//this post is too long for me to edit and keep my sanity, so give me grace with my spelling/grammar errors, and if there are any ‘plot-holes’ or ‘unfinished thoughts’, please comment and I’ll get back to you//
I made this TikTok, using this trending audio and documented it by screen recording. This week, the task was to use new tech to document my learning project. I decided to screen record my progress, but couldn’t find any free screen recording tools which would record when I was not using a google chrome browser, and/or wouldn’t leave a huge watermark. Eventually I stumbled upon f&D’s video explaining that I could use VLC Media Player to record my screen—in any browser, without watermarks, a time limit, or paying any fees. I had previously used this program for observing videos/audios, but not as anything past that so I was a bit skeptical. I gave it a try and it worked splendidly. I would definitely use this method over any other if I had to record my screen again.
I then edited the video I planned on making (which took just over three hours) and was left with a recording of my screen with no audio and no view of myself doing the editing. Luckily I foresaw this issue and had taken a video of a top-down view of my keyboard which recorded the desired audio.
Unfortunately, the video of the keyboard–which I had taken on my phone–would not upload to my computer without error, so I had to edit down the raw footage on my phone. I sent the screen recording of my laptop to my phone successfully and used another new app: InShot. This app is not something I would choose to use over my laptop software, but it seemed the best out of the free apps I tested. I synced up the keyboard and screen recordings and got to speeding up bits of clips to make the video less than two hours long.
upon beginning editing the keyboard/screen recordings together I was able to layer the keyboard video over-top of the screen recording, as i had hoped–InShot even had a special tool for this (Picture-in-picture), however, I had to edit these clips as unrelated to each other, making me have to do the same four steps twice anywhere i wanted to speed clips up. i became quite tired of this quite quickly, as in my regular program, i could link these clips together and not have them shift away from each other when i sped a clip up. Along with the annoyance of needing to do something which took twice as much effort/time, I realized an hour or so into editing that my clips were no longer lining up, but were a few seconds off. I thought maybe I had adjusted something on accident when doing other edits and fixed it, only to notice a few minutes later that they were not synced up again. I realized then that what had happened was the screen recording got compressed (by an unknown factor) when it was exported, so I could not make them line up without cutting it every now and again to re-adjust the sync and cut pieces of the keyboard clip out. I had to basically give up on syncing the keyboard clip after a while because it was so far off I couldn’t tell where it was supposed to be. i resigned to voice over the rest of my explanation just to finish the project within a reasonable time.
When I uploaded the video to YouTube I was expecting to caption it, but the site would not allow me even the option to add my personal captions, so apologies if it is difficult to hear/understand what i am saying.
***
An overview of how to use this tool is covered thoroughly by video, which you can find by clicking this link.
//keep in mind that I edited this next part of the blog on my laptop, so it may be formatted strangely on mobile//
Overview of how to use InShot:
Open the app.
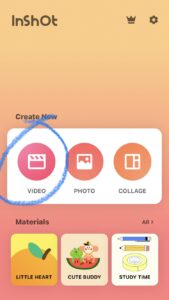
Clicking the circled button will lead you to this pop-up:

Click the circled button so you can import your videos into the app to begin editing.
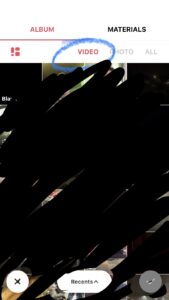
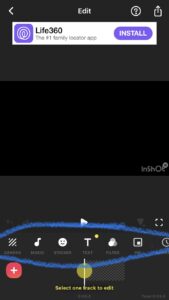
Making sure you are on the ‘VIDEO’ tab, you will see the videos you have saved in your camera roll.
Select the ones you wish to edit, then click the check-mark at the bottom right (it will have lit up green once you have selected something)
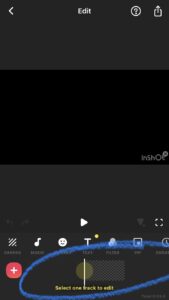
the circled area is where your clips will appear. Make sure they are in the correct order by holding down on a clip
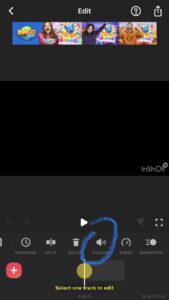
The tools bar is circled on the left. ‘Tools’ are the features in the app which ‘do’ things to change the clips you began with.
I am going to explain the tools I personally used, but you can use more than I did. Play around with it, have fun.
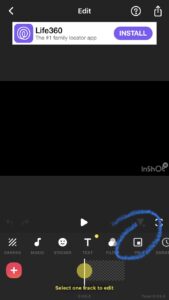
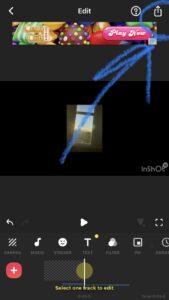
This tool is the Picture-in-Picture tool (PiP), which sends you to the PiP settings/options/editing station
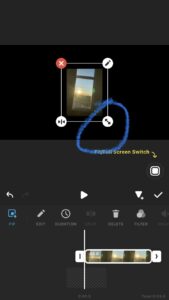
When you click on PiP for the first time, you will have to select a photo or video clip to use as the PiP.
Using the circled piece, adjust the size of the PiP, and then hold the center of the clip to move it to the place you want it.
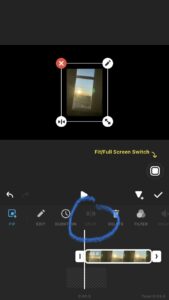
The ‘SPLIT’ tool will cut your PiP clip where the time selector (the white vertical line on the timeline) is, basically stopping the video clip there, but not deleting the rest of the clip if you want to move it (make the rest begin at a different time)
I used this tool to cut out a section I wanted to play faster than normal speed
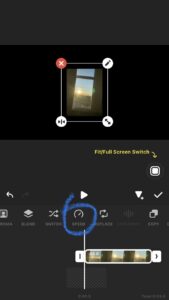
The Speed tool allows you to select a different playback rate for a selected PiP clip.
//if you wanna make a clip faster or slower//
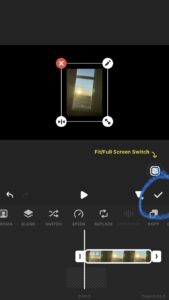
Clicking this check-mark will take you back to the bigger clip’s settings/options/editing mode.
Worry not: you can come back to PiP editor by clicking the PiP tool in the main editing mode
I used the ‘MUSIC’ tool exclusively for the voice over-ing that I did
I assume you can import audio files there, and edit those.

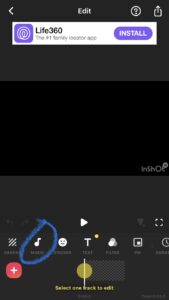
When you click the ‘MUSIC’ tool, it will bring you to this page
Clicking the ‘RECORD’ tool will immediately give you a countdown and then record until you press the ‘STOP’ graphic (a solid square) or reach the end of your video clip(s)
There is then a ‘VOLUME’ tool which can be used on the voice over
Clicking the check-mark (to the right of the tools) will return you to the main editing mode, there: clicking the ‘MUSIC’ tool will return you to this page/mode

In the main editing mode there is a ‘SPLIT’ tool which works the same as the PiP ‘SPLIT’ tool functionally, but will be used on the main clips, not the PiP clips.
//this design flaw is what irked me using this software. I had to do everything twice: once for the main clips and once for the PiP clips. in the software on my computer, ‘link’ing the clips together would edit them as one clip//
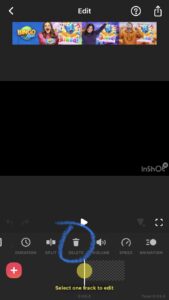
The ‘DELETE’ tool will remove the selected clip (or clip portion) from the timeline
The ‘VOLUME’ tool allows you to change how loud/quiet a selected clip is
//to be honest, I should have cranked up the volume on the keyboard lips, but I didn’t think about that until I was exporting//

In the main editing mode there is a ‘SPEED’ tool which works the same as the PiP ‘SPEED’ tool functionally, but will be used on the main clips, not the PiP clips.
When you have finished editing your video, click the ‘EXPORT’ ‘tool’ to save your edited video to your camera roll
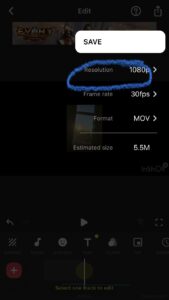
//I had next to no space in my camera roll–thanks to two, 2-hour long videos i needed to edit down–so I had to lower the resolution for the edited version to fit on my phone. that is to say: you may be able to skip this step//
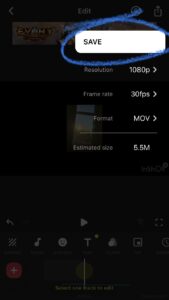
In the export settings, clicking ‘SAVE’ will export the edited video
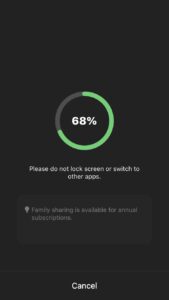
Clicking ‘SAVE’ will result in a loading page like this, this is the video rendering and embedding the edits into the video’s code/’DNA’
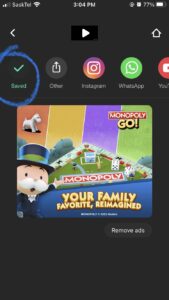
This check-mark means that your video has been saved to your camera roll. the other icons on this ‘shelf’ are options for sharing/posting the video.
//i would recommend watching the video first before posting/sharing, ’cause sometimes videos’ edits don’t render properly and they turn out weird//
You’ll get an ad here (and in other steps of the editing process), that’s what allows the app to be free.
***
VLC Media Player screen recording can be used in the classroom alongside a smart-board to compile all the classwork/notes into a shareable video file that students/educators can refer back to. It could also be used to record student/educator presentations.
InShot could be used in classrooms but I don’t see it replacing Adobe as a video-editing software.
***
//I could use help with deciding what to learn how to edit, if y’all have any suggestions! <3//
3 Comments
Ashley, I appreciate your honesty regarding how difficult this task was. Great job managing all those crazy setbacks and sharing your process so some of us can avoid the same headache.
Thank you, it genuinely took so long to do that project from start to finish. DX
Amazing job bouncing back from all the setbacks and craziness that you had to deal with. Also, the layout you have is amazing for following the process. Thank you so much