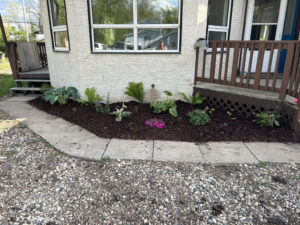
My flowerbed is complete!!!!
I was so excited to finish this project. It was terrific to accomplish a project I had been putting off for the last three years. Using different online sources gave me more ideas for creating the perfect flowerbed, and I was more successful because I used multiple online sources.
Learning Project Week One – Waving My Wand and Turning Red Rock Into Something Beautiful!
I started my project by researching the hardiness zone in which Kenosee Lake was located. I discovered that plants with a 3b or lower hardiness would grow here. Al and I also started to remove all the red rock in the future flowerbed.
Resources
Learning Project Week Two – When Life Gives You Ferns…..
This week, I wanted to learn what type of Ferns were growing in the red rock. Using the Picture This App,![]() I discovered that we had ostrich ferns growing. I also learned that the fiddleheads (produced when the fern first sprouts in the spring) are edible. Next year, I want to sauté the fiddleheads to see if they are delicious.
I discovered that we had ostrich ferns growing. I also learned that the fiddleheads (produced when the fern first sprouts in the spring) are edible. Next year, I want to sauté the fiddleheads to see if they are delicious.
Resources
- Picture This App,
- Flip
- Food Safe tips for fiddleheads
- Sautéed Fiddleheads
- Fiddlehead Ferns Taste
- Fiddlehead Facebook Post
Learning Project Week Three – It’s Shopping Time!!!!
I went shopping! After watching TikTok and Instagram Reels, I figured out what Zone 3 plants I wanted to put in my flowerbed. I went shopping at Costco and our local greenhouse to purchase perennials for a low-maintenance flowerbed.
Resources
- Natural Resources Canada
- @brandonkoruna TikTok video
- @hamptonhousedesigns Instagram Reel
Learning Project Week Four – You Used What??💩💩💩
This week, I learned that some animal manure doesn’t have as many weed seeds as others. If I hadn’t received my soil from the farm for free, I would have added chicken manure to my garden bed. The least amount of weed seeds can live through the chicken’s digestion.
Resources
Learning Project Week Five – To Fabric or Not to Fabric, That is the Question
Who knew that laying fabric in a flowerbed was so controversial? After learning about the different types of barriers to weeds, I decided to use landscaping fabric.
Resources
Learning Project Week Six –🔥 Burn Baby Burn🔥
Once the fabric was laid, I needed to make holes to plant my perennials. After trial and error, I discovered I had a different torch than the YouTube video. This was a problem because our torch kept blowing out. I then decided to cut Xs in the fabric to create a hole for my perennials.
Resources
- YouTube video using Clipchamp
- Burning Holes in Landscape Fabric YouTube video
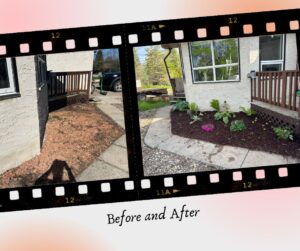
Where my flowerbed started and where it ended.
Conclusion
I really enjoyed this learning project. It was great to accomplish a project I wanted to do while also learning for my EDTC300 class. I am so proud of how the flowerbed turned out and that I could research all the information independently.
Unfortunately, Mother Nature had other plans for my flowerbed. Last weekend, Kenosee was hit with hail, and my flowerbed now looks a little different. I hope that I planted my plants in the ground soon enough to form a root system and that they will come back in the following years.
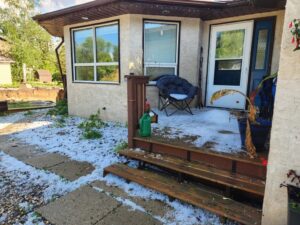
Twenty minutes after the hail storm.
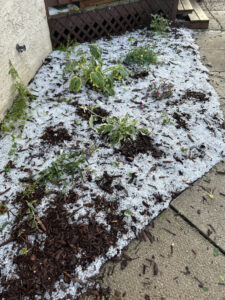
Three hours after the hail storm.
Sharing online can help others out drastically, just like I was able to learn for our project. The skills I learned from different applications, blogs, and websites have helped develop my skills in our technology-driven world.
Hi Dayna,
Your flower bed looks gorgeous now! I have been trying to find time to work in my yard this summer, I can’t wait to check out some of the resources you found! Side note- fiddleheads are so delicious! I always fry mine with garlic and onions 🙂
Yum! I can’t wait to try them next year!!