Shotcut: A Free, Open-Source Video Editing Tool
Introduction
Shotcut is a free, open-source, cross-platform video editor that offers powerful features without the complexity of professional-grade software. As a student producing a class project, Shotcut provides an intuitive way to edit videos with a range of effects and transitions.
In this blog post, I’ll explore Shotcut’s features, provide basic instructions to help you get started, and discuss how it can be used in my learning project—including its alignment with the SAMR model of technology integration.
Overview of Shotcut
Key Features:
✅ Free and Open-Source – No subscriptions or hidden fees.
✅ Cross-Platform – Available for Windows, Mac, and Linux.
✅ Wide Format Support – Works with most video and audio formats without needing extra plugins.
✅ Multi-Track Editing – Arrange and edit multiple video/audio tracks seamlessly.
✅ Filters & Effects – Includes color correction, transitions, keyframing, and more.
✅ No Watermarks – Unlike many free editors, Shotcut does not impose watermarks on your videos.
Basic Instructions to Get Started
Step 1: Download and Install Shotcut
- Visit the official Shotcut website.
- Download the appropriate version for your operating system.
- Install the software following the on-screen instructions.
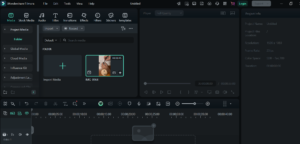
Step 2: Creating a New Project
- Open Shotcut and click Start a New Project.
- Choose a project folder where your files will be saved.
- Select your preferred video resolution and frame rate.
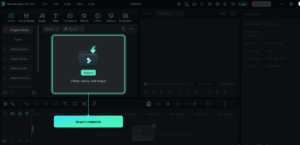
Step 3: Importing Media
- Click Open File and select your video, audio, or image files.
- Drag and drop files onto the timeline to start editing.
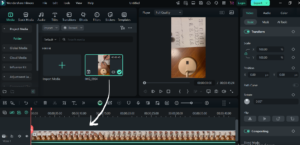
Step 4: Basic Editing
- Cutting and Trimming: Use the split tool (scissors icon) to cut clips.
- Adding Text & Titles: Click on the Filters panel → Choose Text: Simple.
- Adding Transitions: Overlap two clips in the timeline to create an automatic crossfade transition.
- Applying Effects: Explore filters like color correction, blur, and speed adjustment.

Step 5: Exporting Your Video
- Click Export in the top menu.
- Choose an export preset (e.g., MP4 for YouTube or class presentations).
- Click Export File, name it, and wait for rendering to complete.
💡 Pro Tip: Shotcut has an “autosave” feature, but it’s always best to manually save your project frequently!
Using Shotcut in a Learning Project Classroom
Shotcut can be an excellent tool for student engagement, creativity, and digital literacy. Among all those ways educators and students can use Shotcut in learning projects, I found the following feature useful in my project:
📌 Multimedia Storytelling – I can create short films, digital storytelling projects, or animations using images and voiceovers to show how I gradually progress in my project.
Aligning Shotcut with the SAMR Model
Let’s see how Shotcut aligns with each level of SAMR model (Substitution, Augmentation, Modification, Redefinition):
🔹 Substitution – Using Shotcut to replace traditional in-class presentations with simple video recordings (e.g., students recording themselves explaining a math concept instead of writing on a whiteboard).
🔹 Augmentation – Enhancing traditional learning with video editing features like captions, transitions, and annotations (e.g., adding subtitles for accessibility).
🔹 Modification – Students can restructure their learning approach by creating visually engaging narratives instead of just writing essays (e.g., producing a historical documentary instead of a written report).
🔹 Redefinition – Shotcut allows students to create complex, collaborative multimedia projects that wouldn’t be possible without digital tools (e.g., an international virtual exchange project where students edit and share cross-cultural interviews).
I would say Shotcut aligns with the redefinition level as students can develop digital storytelling skills, creativity, and technical literacy, preparing them for future learning and careers.
Final Thoughts: Why Shotcut?
Shotcut is a versatile and powerful tool for classroom projects, offering both simplicity for beginners and advanced features for more complex editing. Unlike many free editors, it has no watermarks or feature limitations, making it an excellent choice for students and educators. By incorporating Shotcut into the classroom, teachers can enhance learning experiences, encourage creativity, and develop students’ technical skills in a way that aligns with modern digital education trends.
🎬 Have you used Shotcut in your classroom? Share your experiences and project ideas in the comments below! 🚀
Thank you for this insightful post on Shotcut! I appreciate the detailed breakdown of its features and how it aligns with the SAMR model.
I love the fact that Shotcut is free, open-source, and doesn’t impose watermarks—making it an accessible tool for educators and students alike. The step-by-step guide is especially helpful for beginners who want to get started with video editing without feeling overwhelmed.
The integration of Shotcut at the Redefinition level is particularly inspiring. Encouraging students to create digital stories or documentaries not only enhances their creativity but also equips them with valuable technical skills for the future.
Looking forward to more of your posts!
Hey Mort! Shotcut looks like it could be very useful for student use in projects. I really liked your ideas in the SAMR model, specifically the Redefinition part. I thought that having a virtual exchange project while conducting cross-cultural interviews could be very useful, especially in university with online classes as some people could be from all over Canada!