Final Learning Summary: My Crochet Project

This learning summary showcases the journey I undertook during this course to explore and develop a new skill: crocheting. Starting with only a basic understanding of single crochet, I used a variety of online resources—like video tutorials, blogs, books and apps—along with guidance from my teacher and feedback from classmates to deepen my learning. Throughout the process, I documented my progress, reflected on challenges, and celebrated milestones. What follows is a collection of key moments, reflections, and takeaways from this hands-on, creative learning experience.

Week 1  A Glimpse at my learning Adventure. Crochet Garden; Growing with Yarn !   

This week, I reflected on my motivation and set goals for my learning project. I decided to learn how to crochet, inspired by past experiences with crafts and fond memories of my grandmother crocheting. I’m combining this with my love for plants by planning to make a crochet snake plant.

I also began learning how to blog for the first time. I see blogging as a chance to share my journey, get feedback, and connect with others.

Key Takeaways:

  • Chose crochet as my new skill
  • Set the goal of making a crochet snake plant
  • Planned to use YouTube tutorials(The Woobles ), crochet blogs and blogs for guidance
  • Started exploring blogging to document learning and reflect week

Week 2  Exploring the Basics of Crochet, My journey with Yarn and Stitches

This week, I began learning the fundamentals of crochet, an art form that uses a hooked tool and yarn to create fabric. I started by gathering basic tools: a crochet hook and yarn. I learned  several Techniques like : Holding the yarn and hook
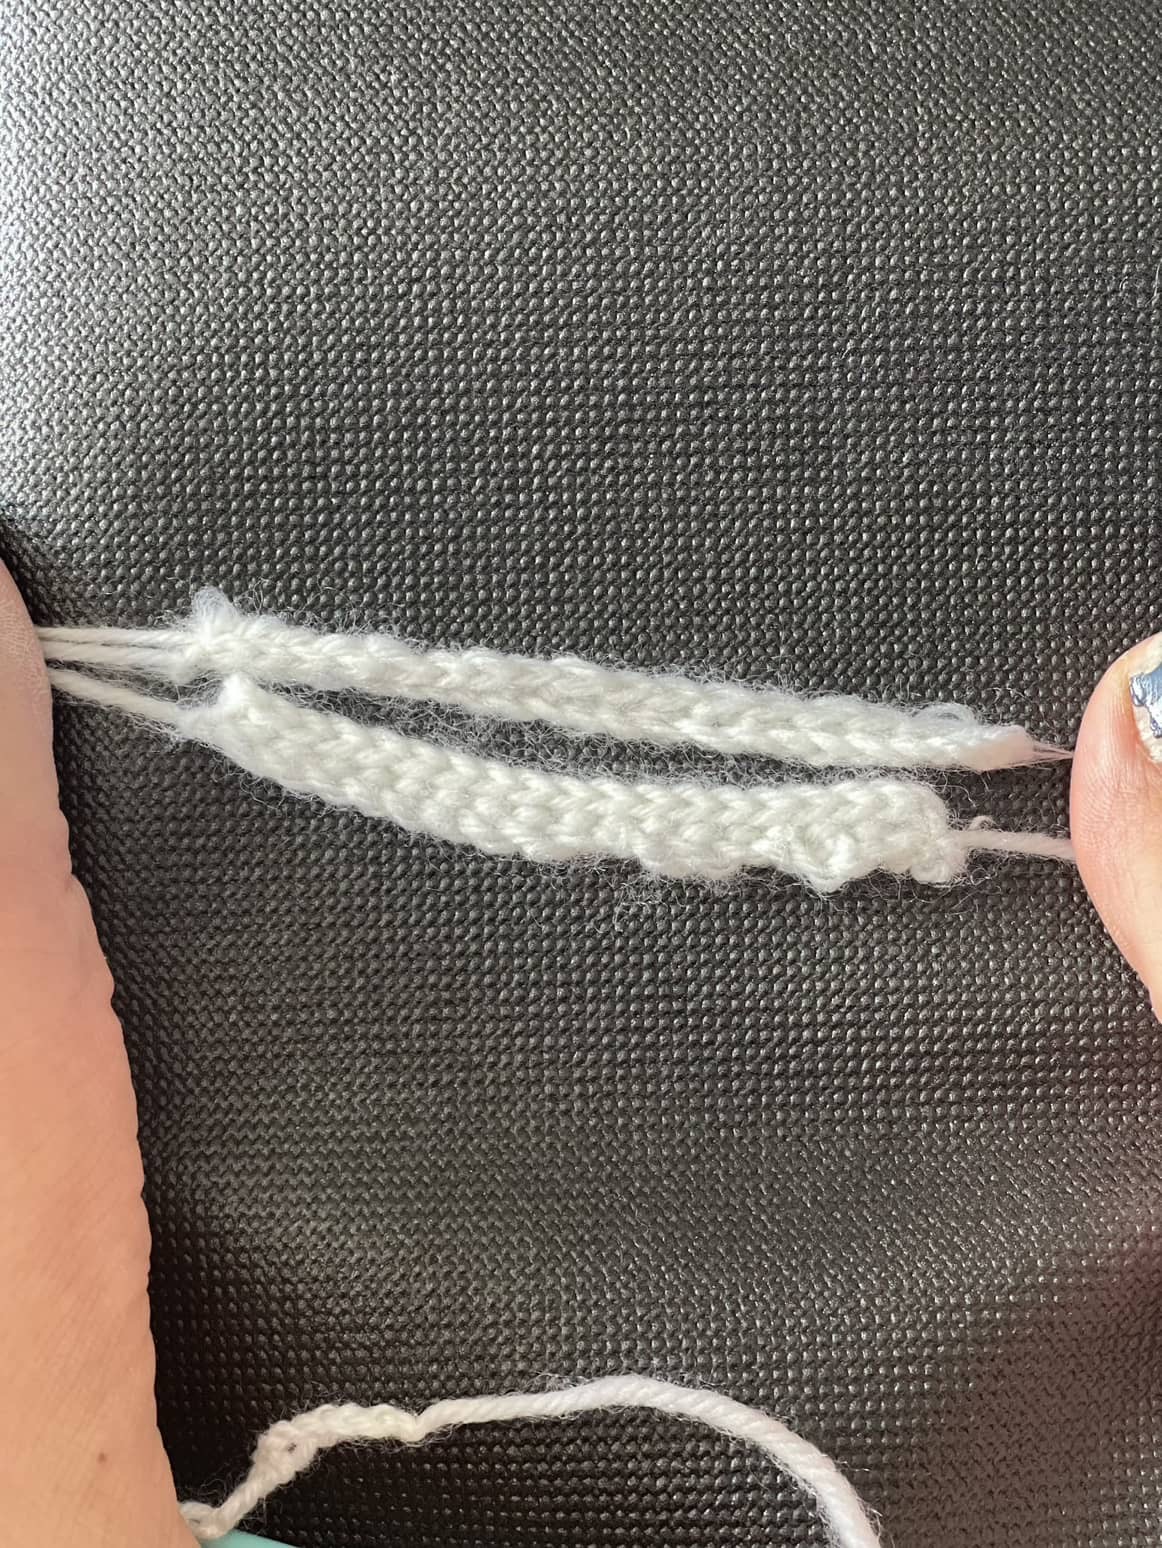
 (Knife Grip)

  • Slip Knot
  • Yarn Over (YO)
  • Starting Chain
  • Working into the Chain
  • Single Crochet (SC)
  • Turning the Work
  • Working in Row 2
  • Fastening Off
  • Slip Stitch

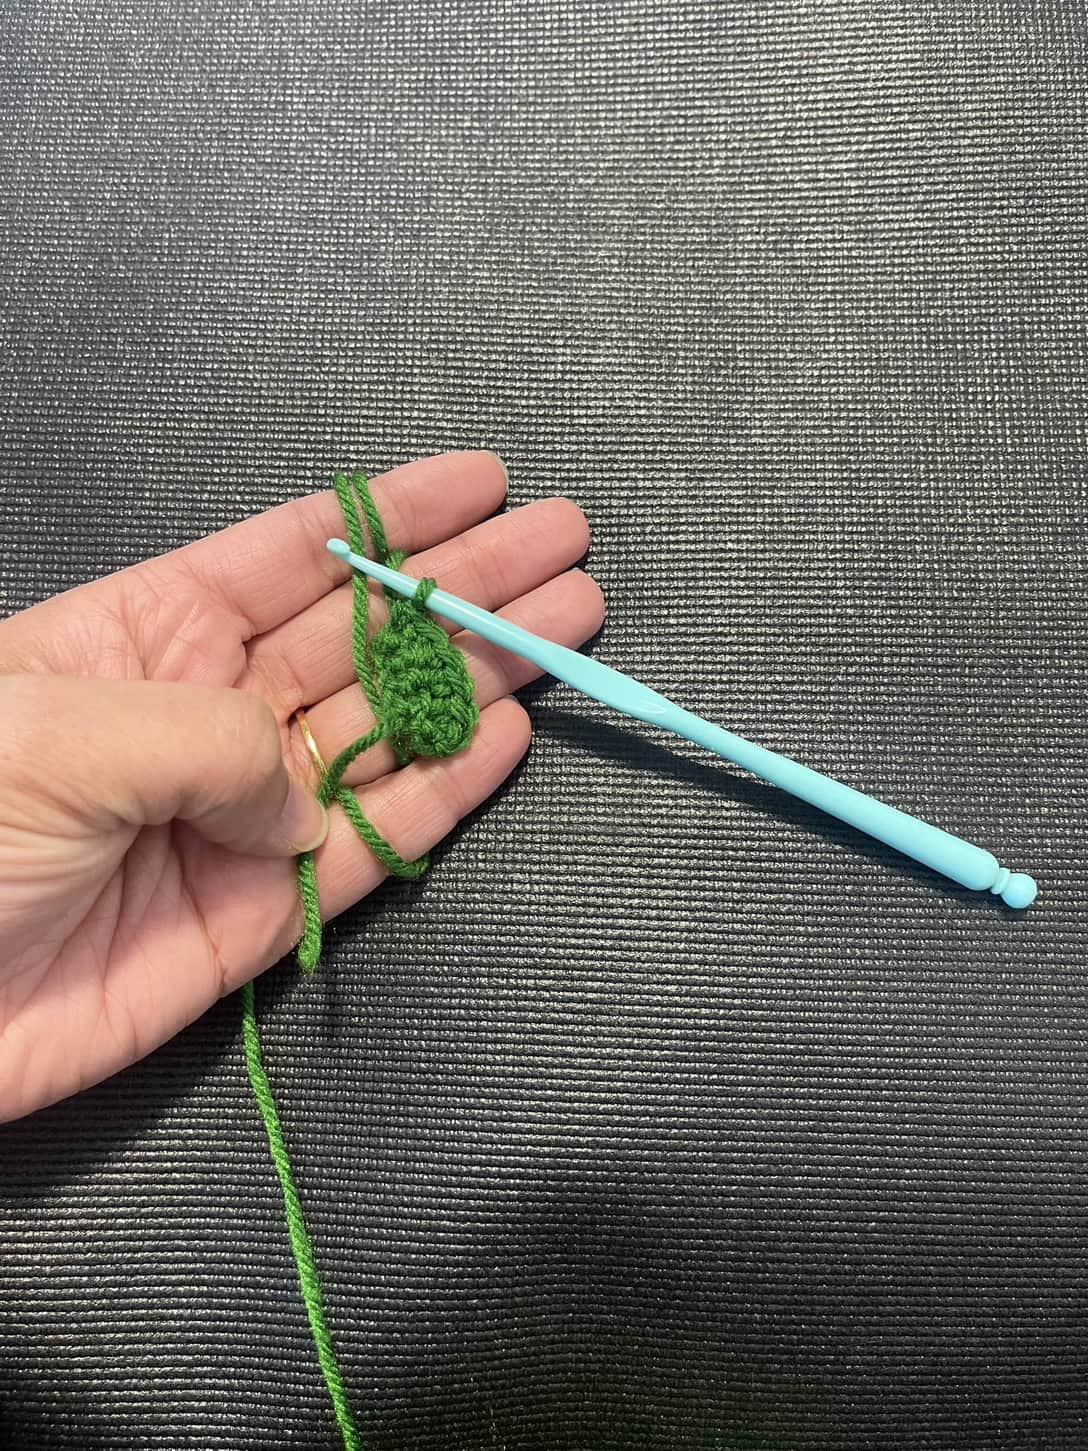
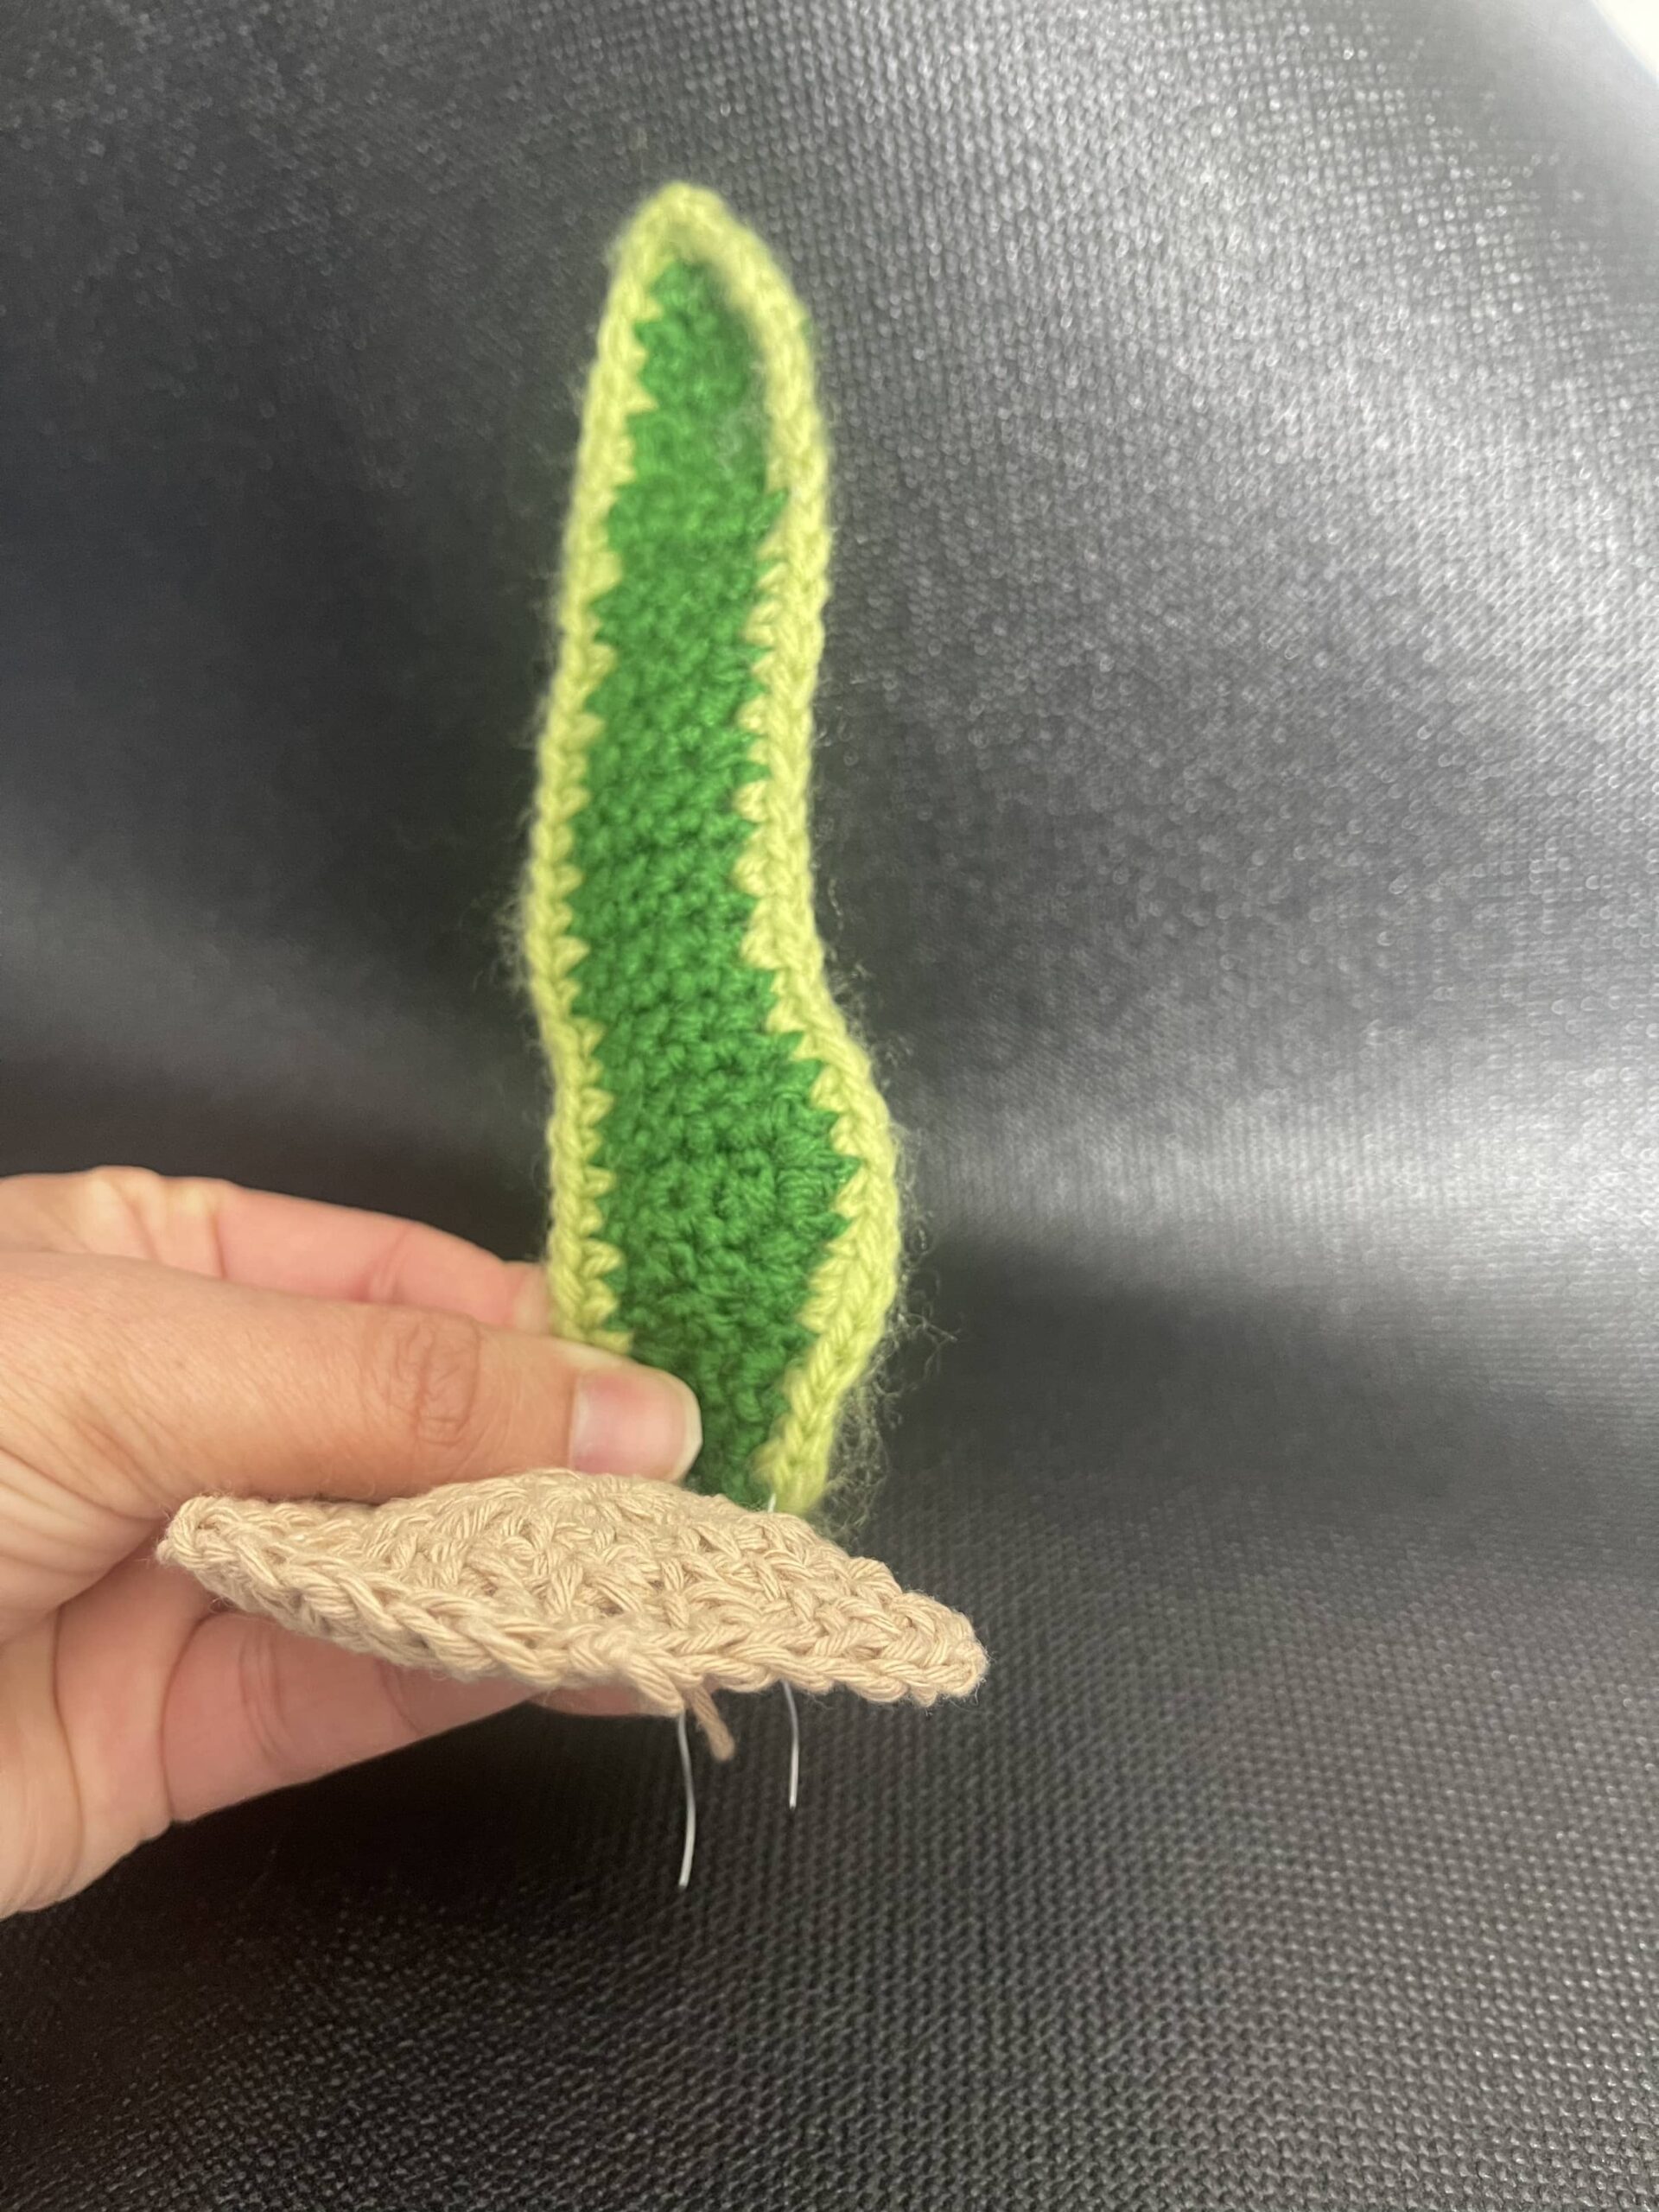
Week 3 Snake Plant Crochet: Leaf Creation & Learning Reflections                            This week, I focused on making the leaves for my crochet snake plant.                              I made small, 
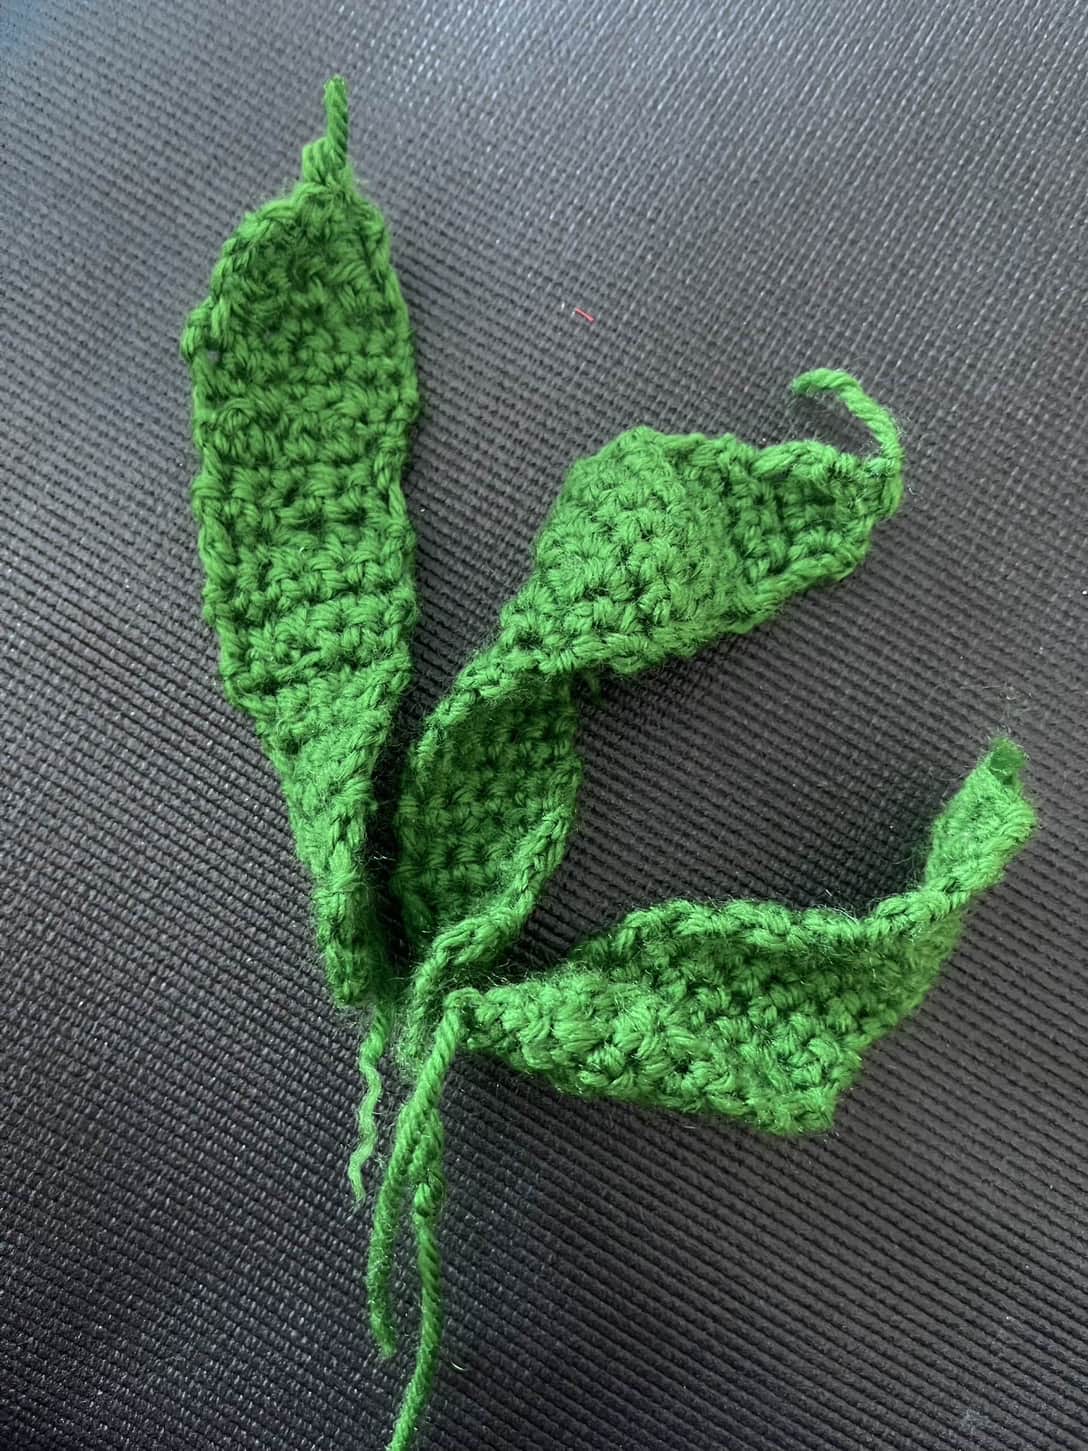
medium, and large leaves for my crochet snake plant, challenging myself by creating all the different types for added character.                                     Here are the techniques I learned this week:

  • Practicing Stitch Tension
  • Size and Shape Matching
  • Following a Crochet Pattern
  • Stitch Counting
  • Crocheting Small, Medium, and Large Leaves


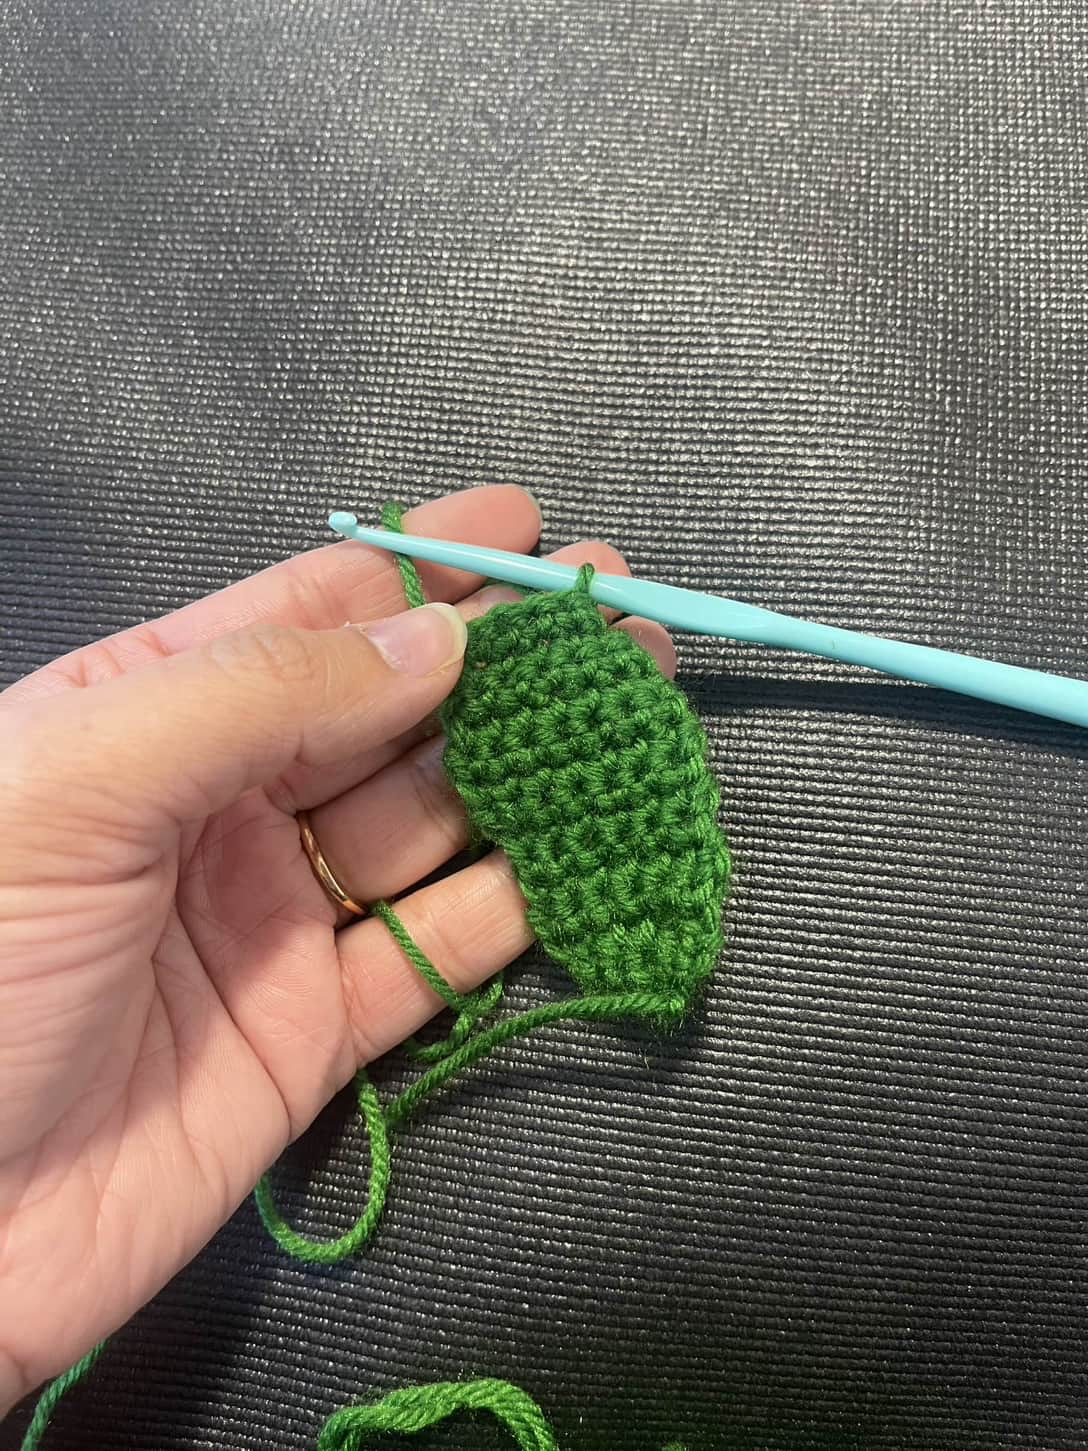
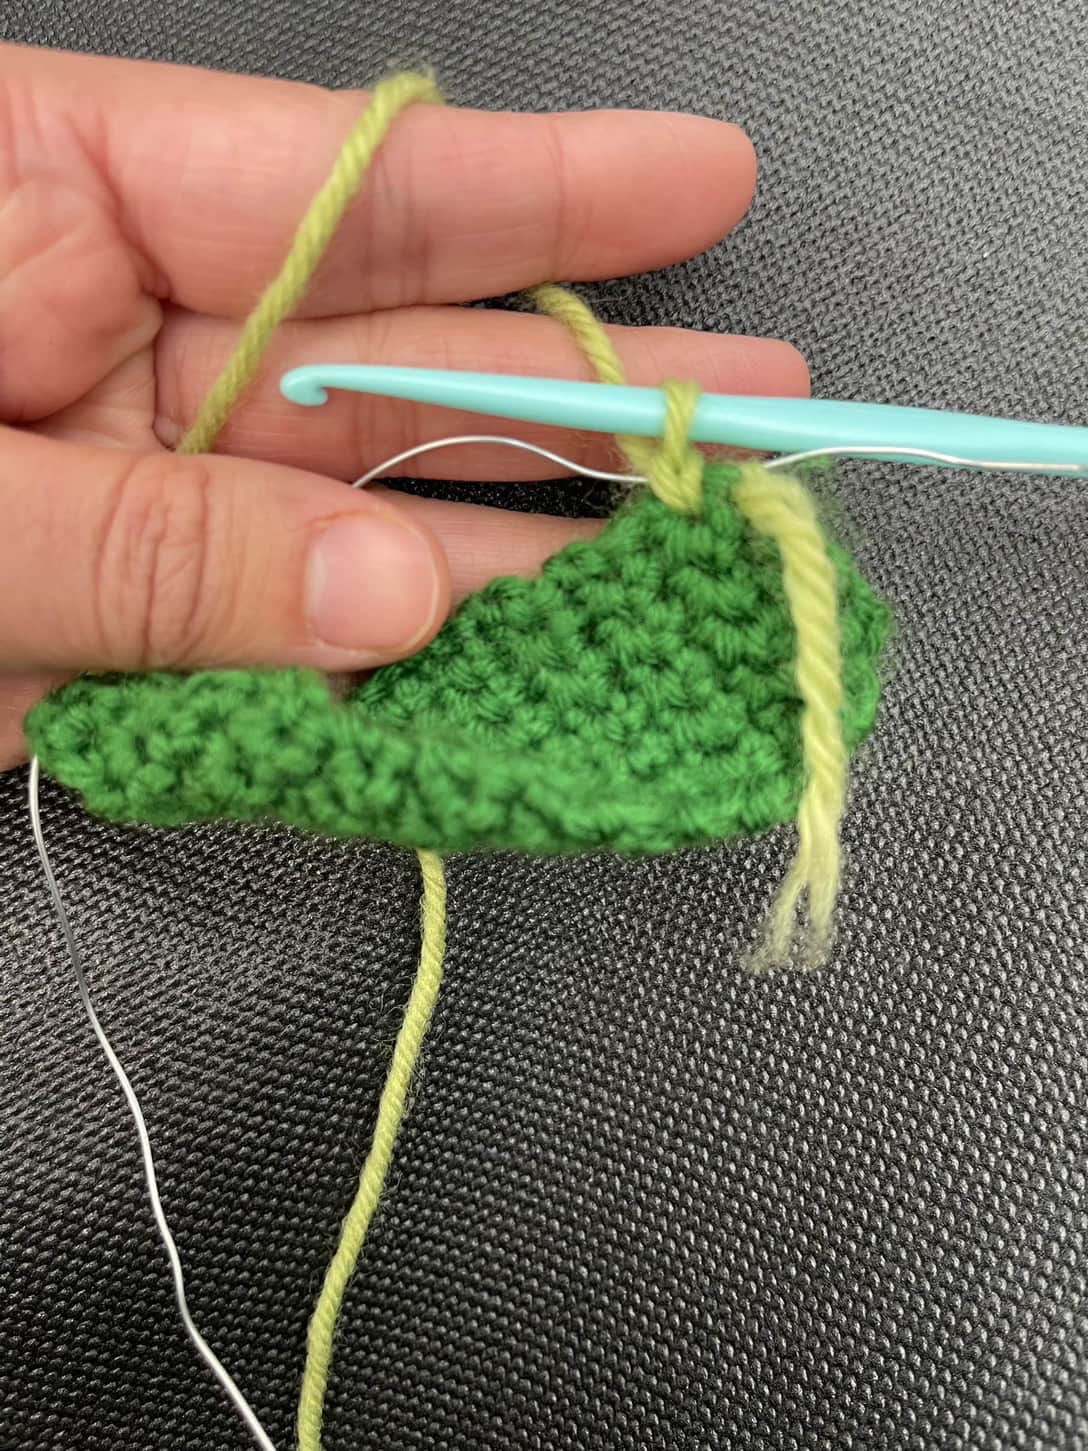
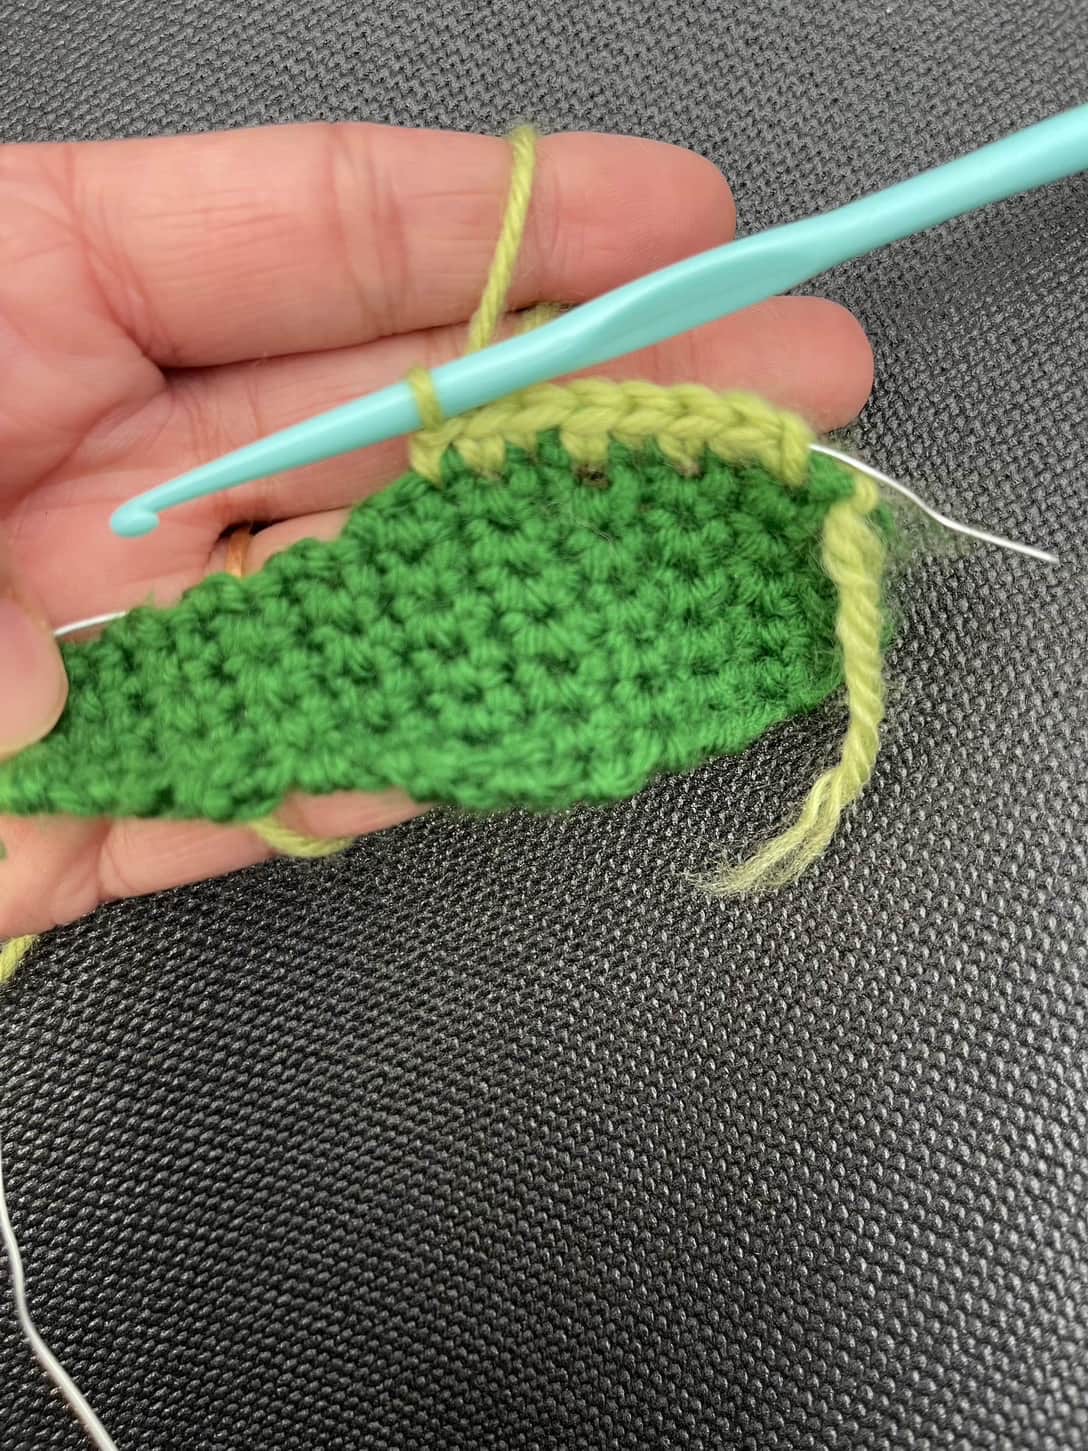
Week 4 Completing the Shape and Detailing of Snake Plant Leaves                                     
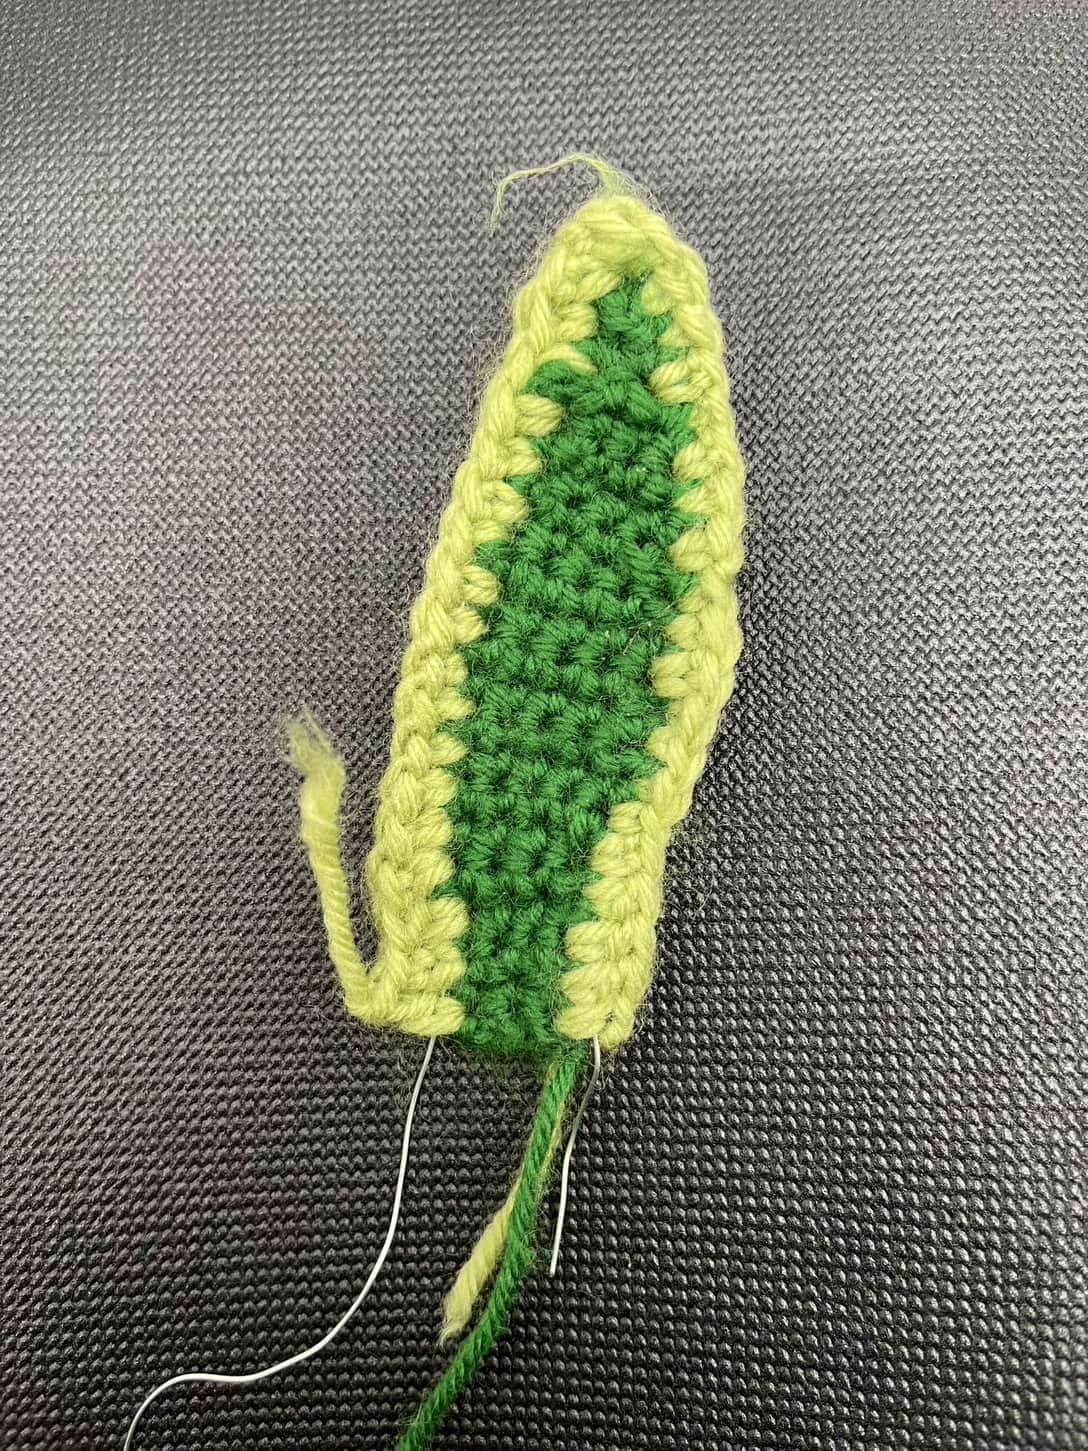
This week, I worked on wiring my crochet snake plant leaves by cutting wires for different sizes and adding neat borders using corner stitches to ensure clean edges. I initially struggled with managing the wire and yarn, but after finding a more detailed tutorial, my edges turned out cleaner.


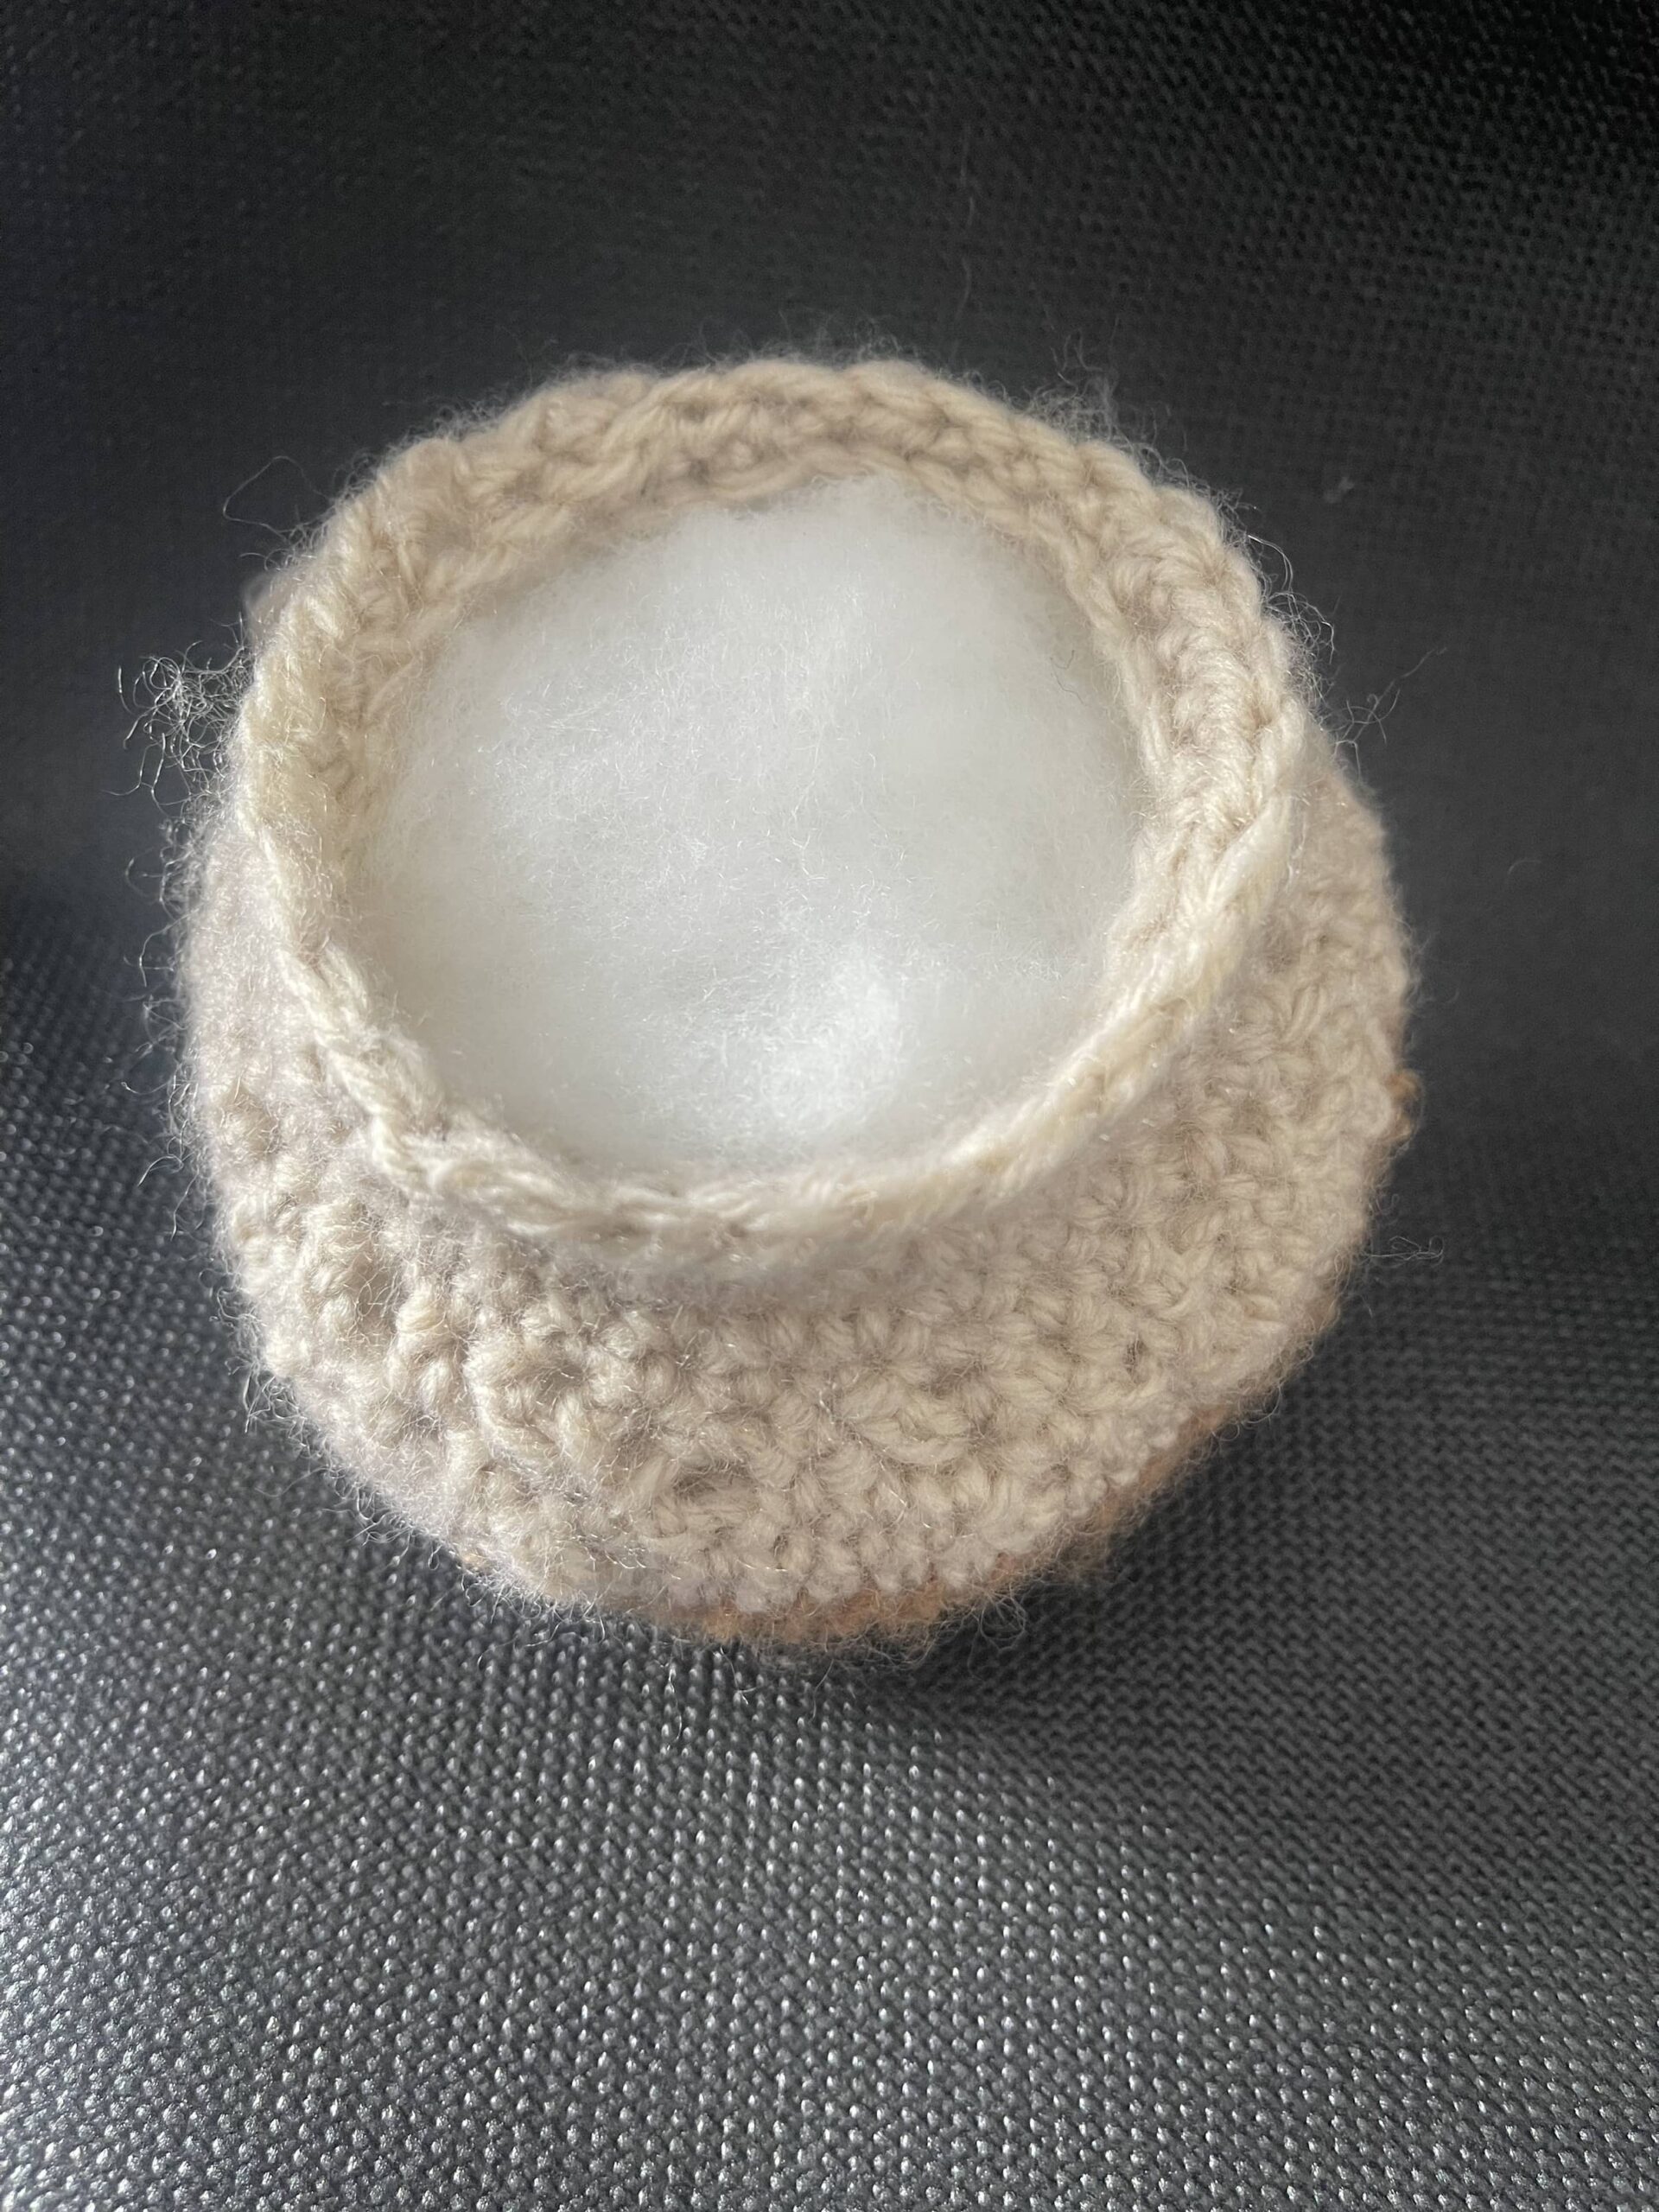
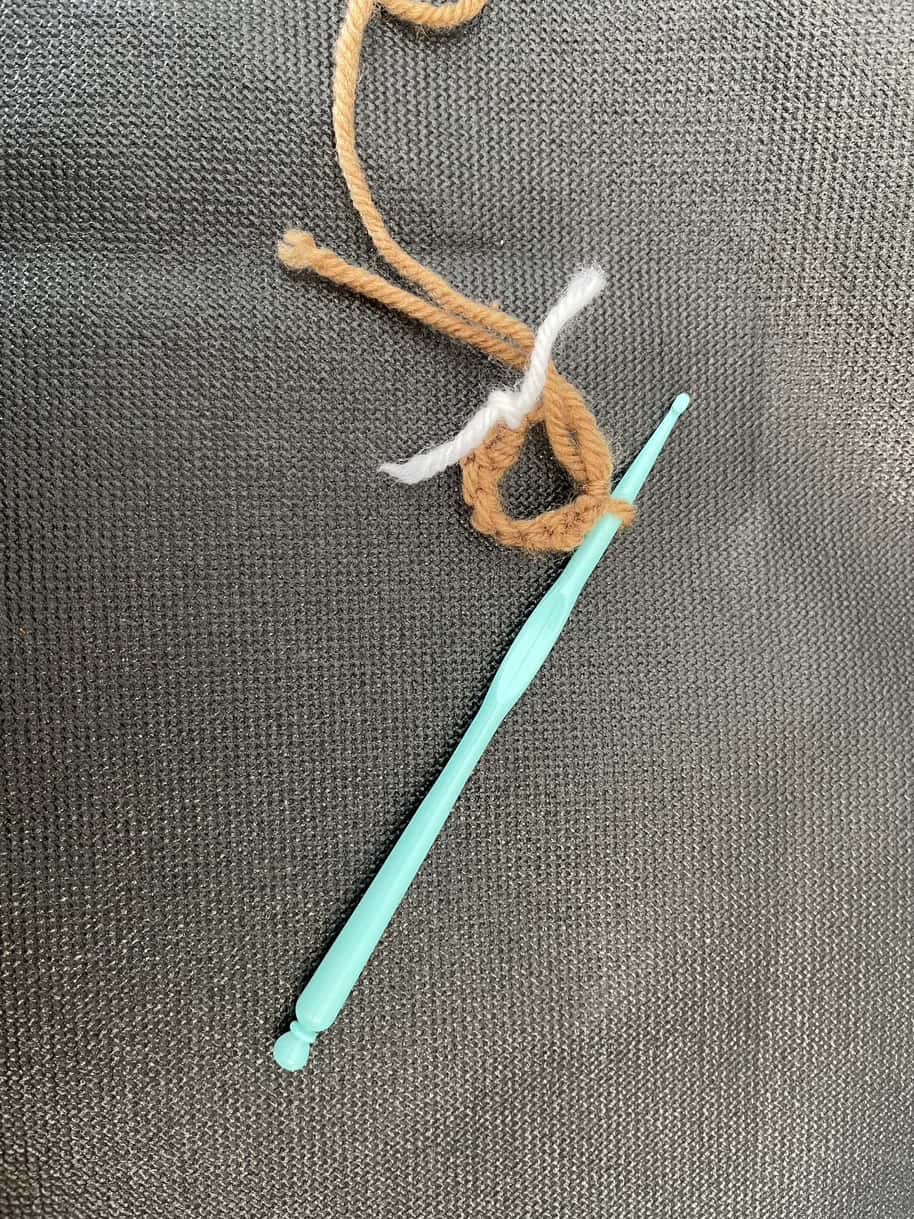
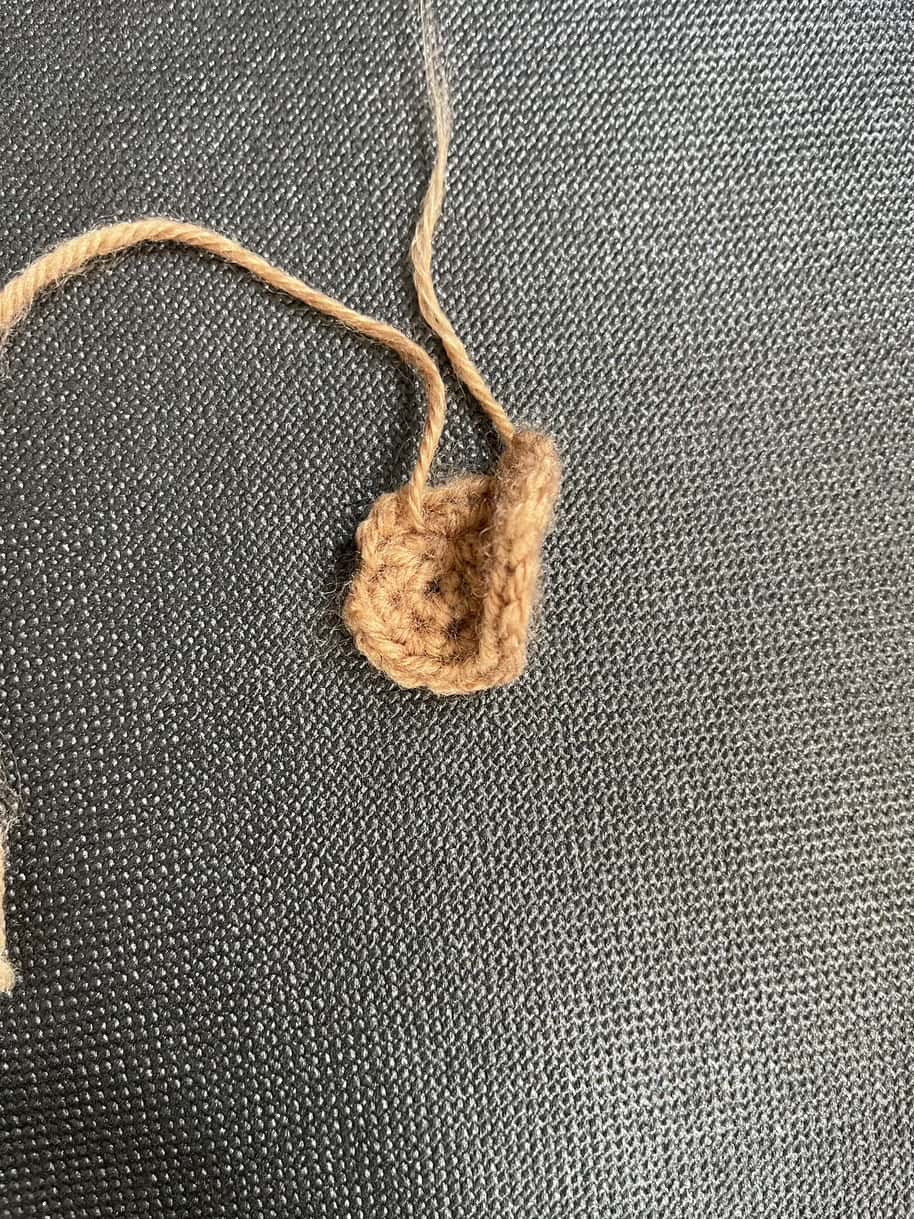
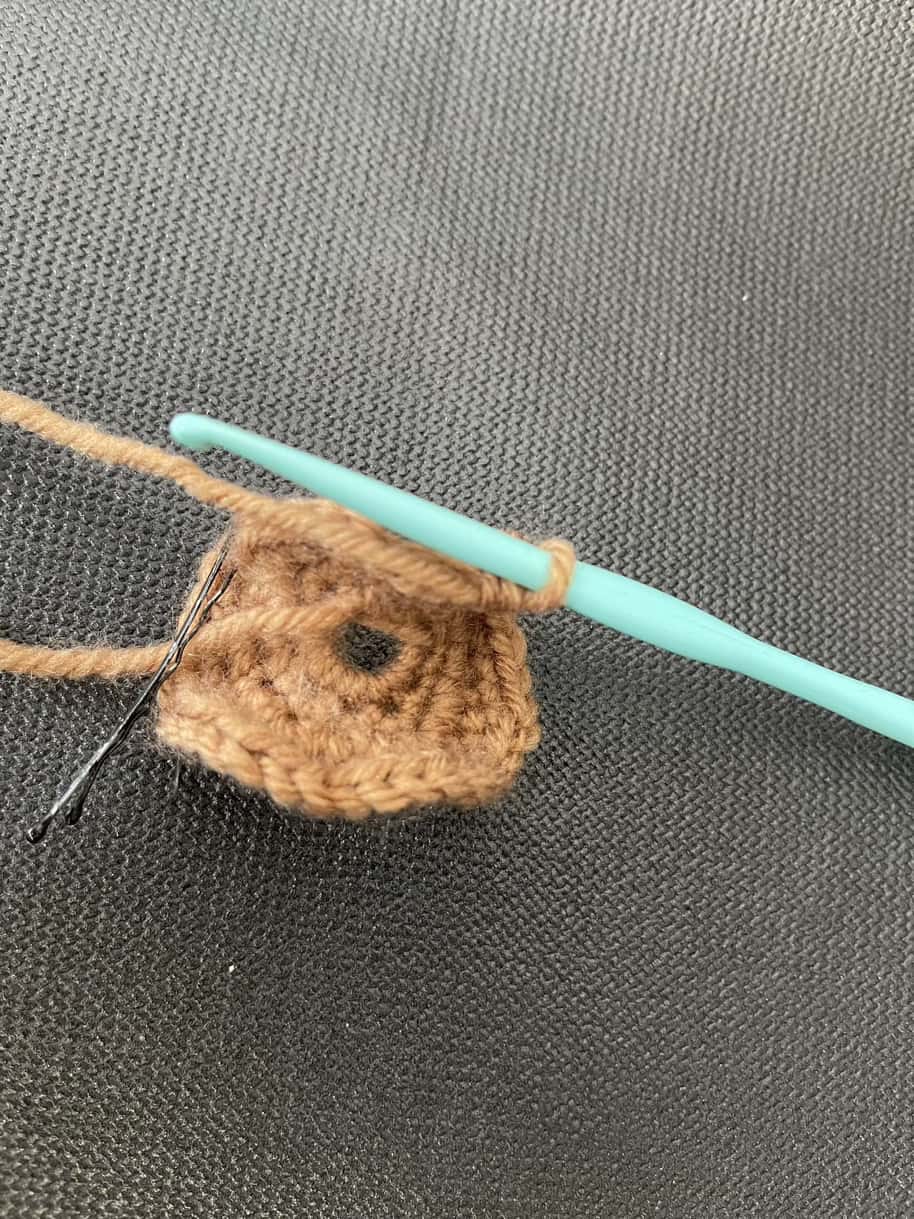
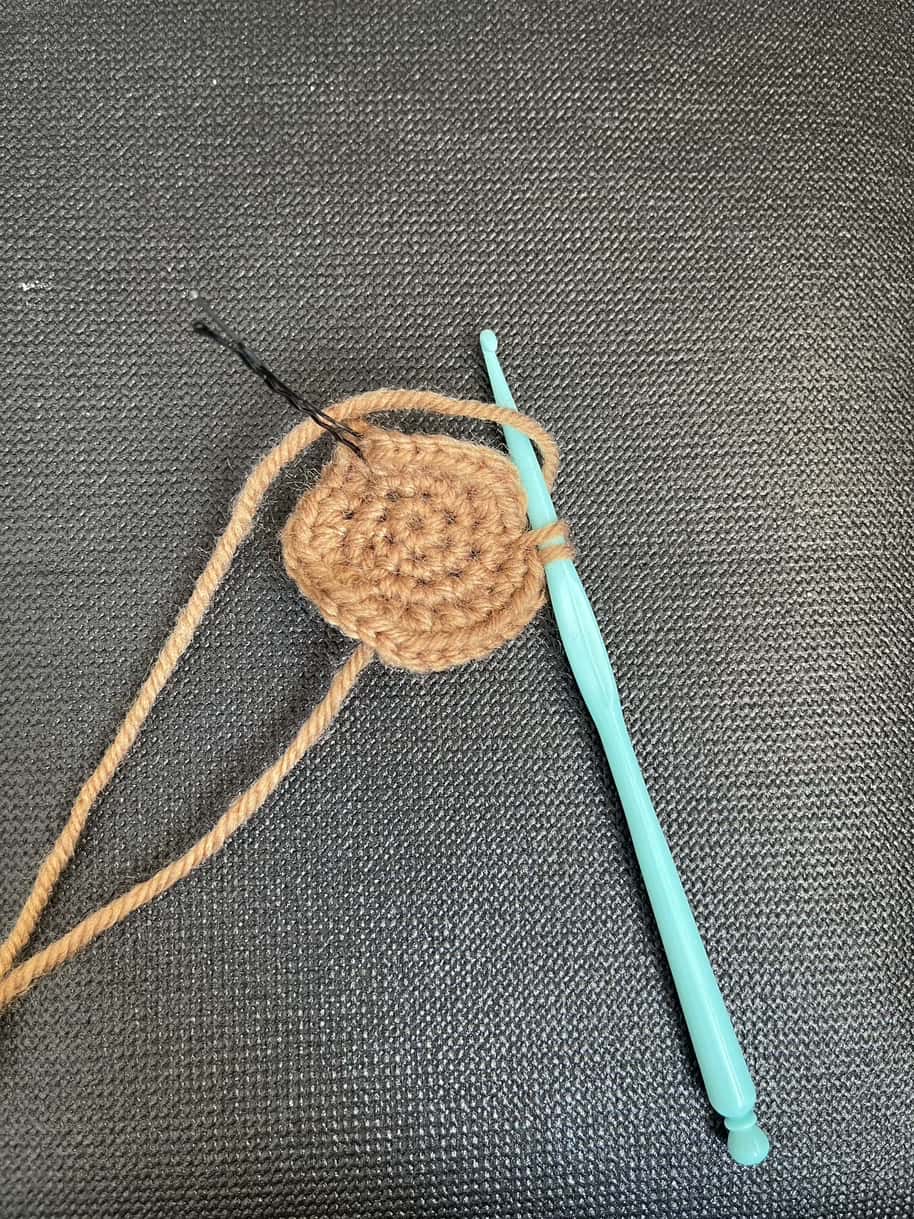
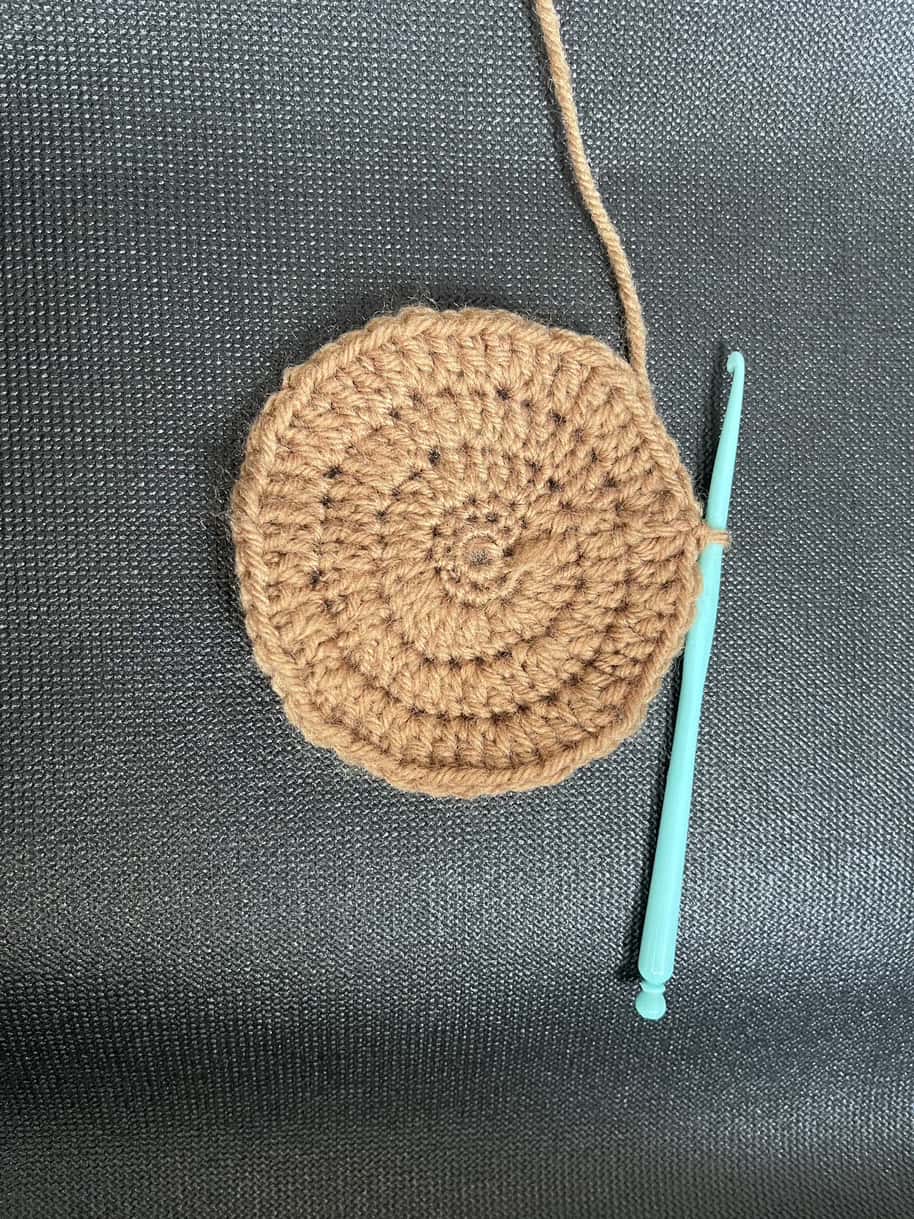
Week 5 Crocheting the Base of the Pot: Overcoming Challenges                                         This week, I worked on the base of my crochet pot, starting with the magic ring 
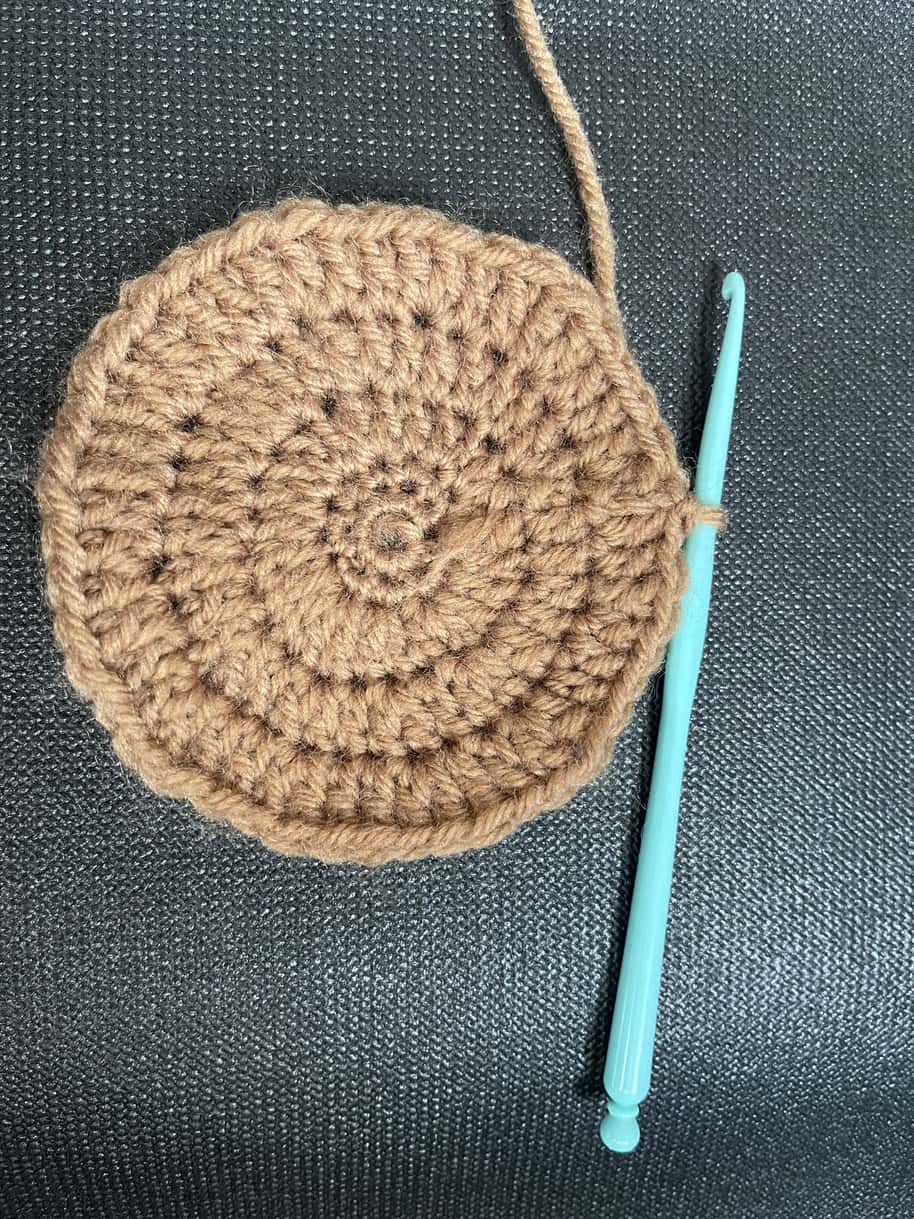
technique. Initially, I used a piece of white yarn as a stitch marker, but it was tedious, so I switched to a bobby pin. The base kept curling, so I explored different tutorials, adjusting my stitch count and switching from single crochet (SC) to double crochet (DC). These changes finally helped me create a flat base. Through trial and error, I learned the importance of patience, problem-solving, and adjusting techniques. I found the best tutorial that provided clear, detailed instructions, helping me resolve my issues.

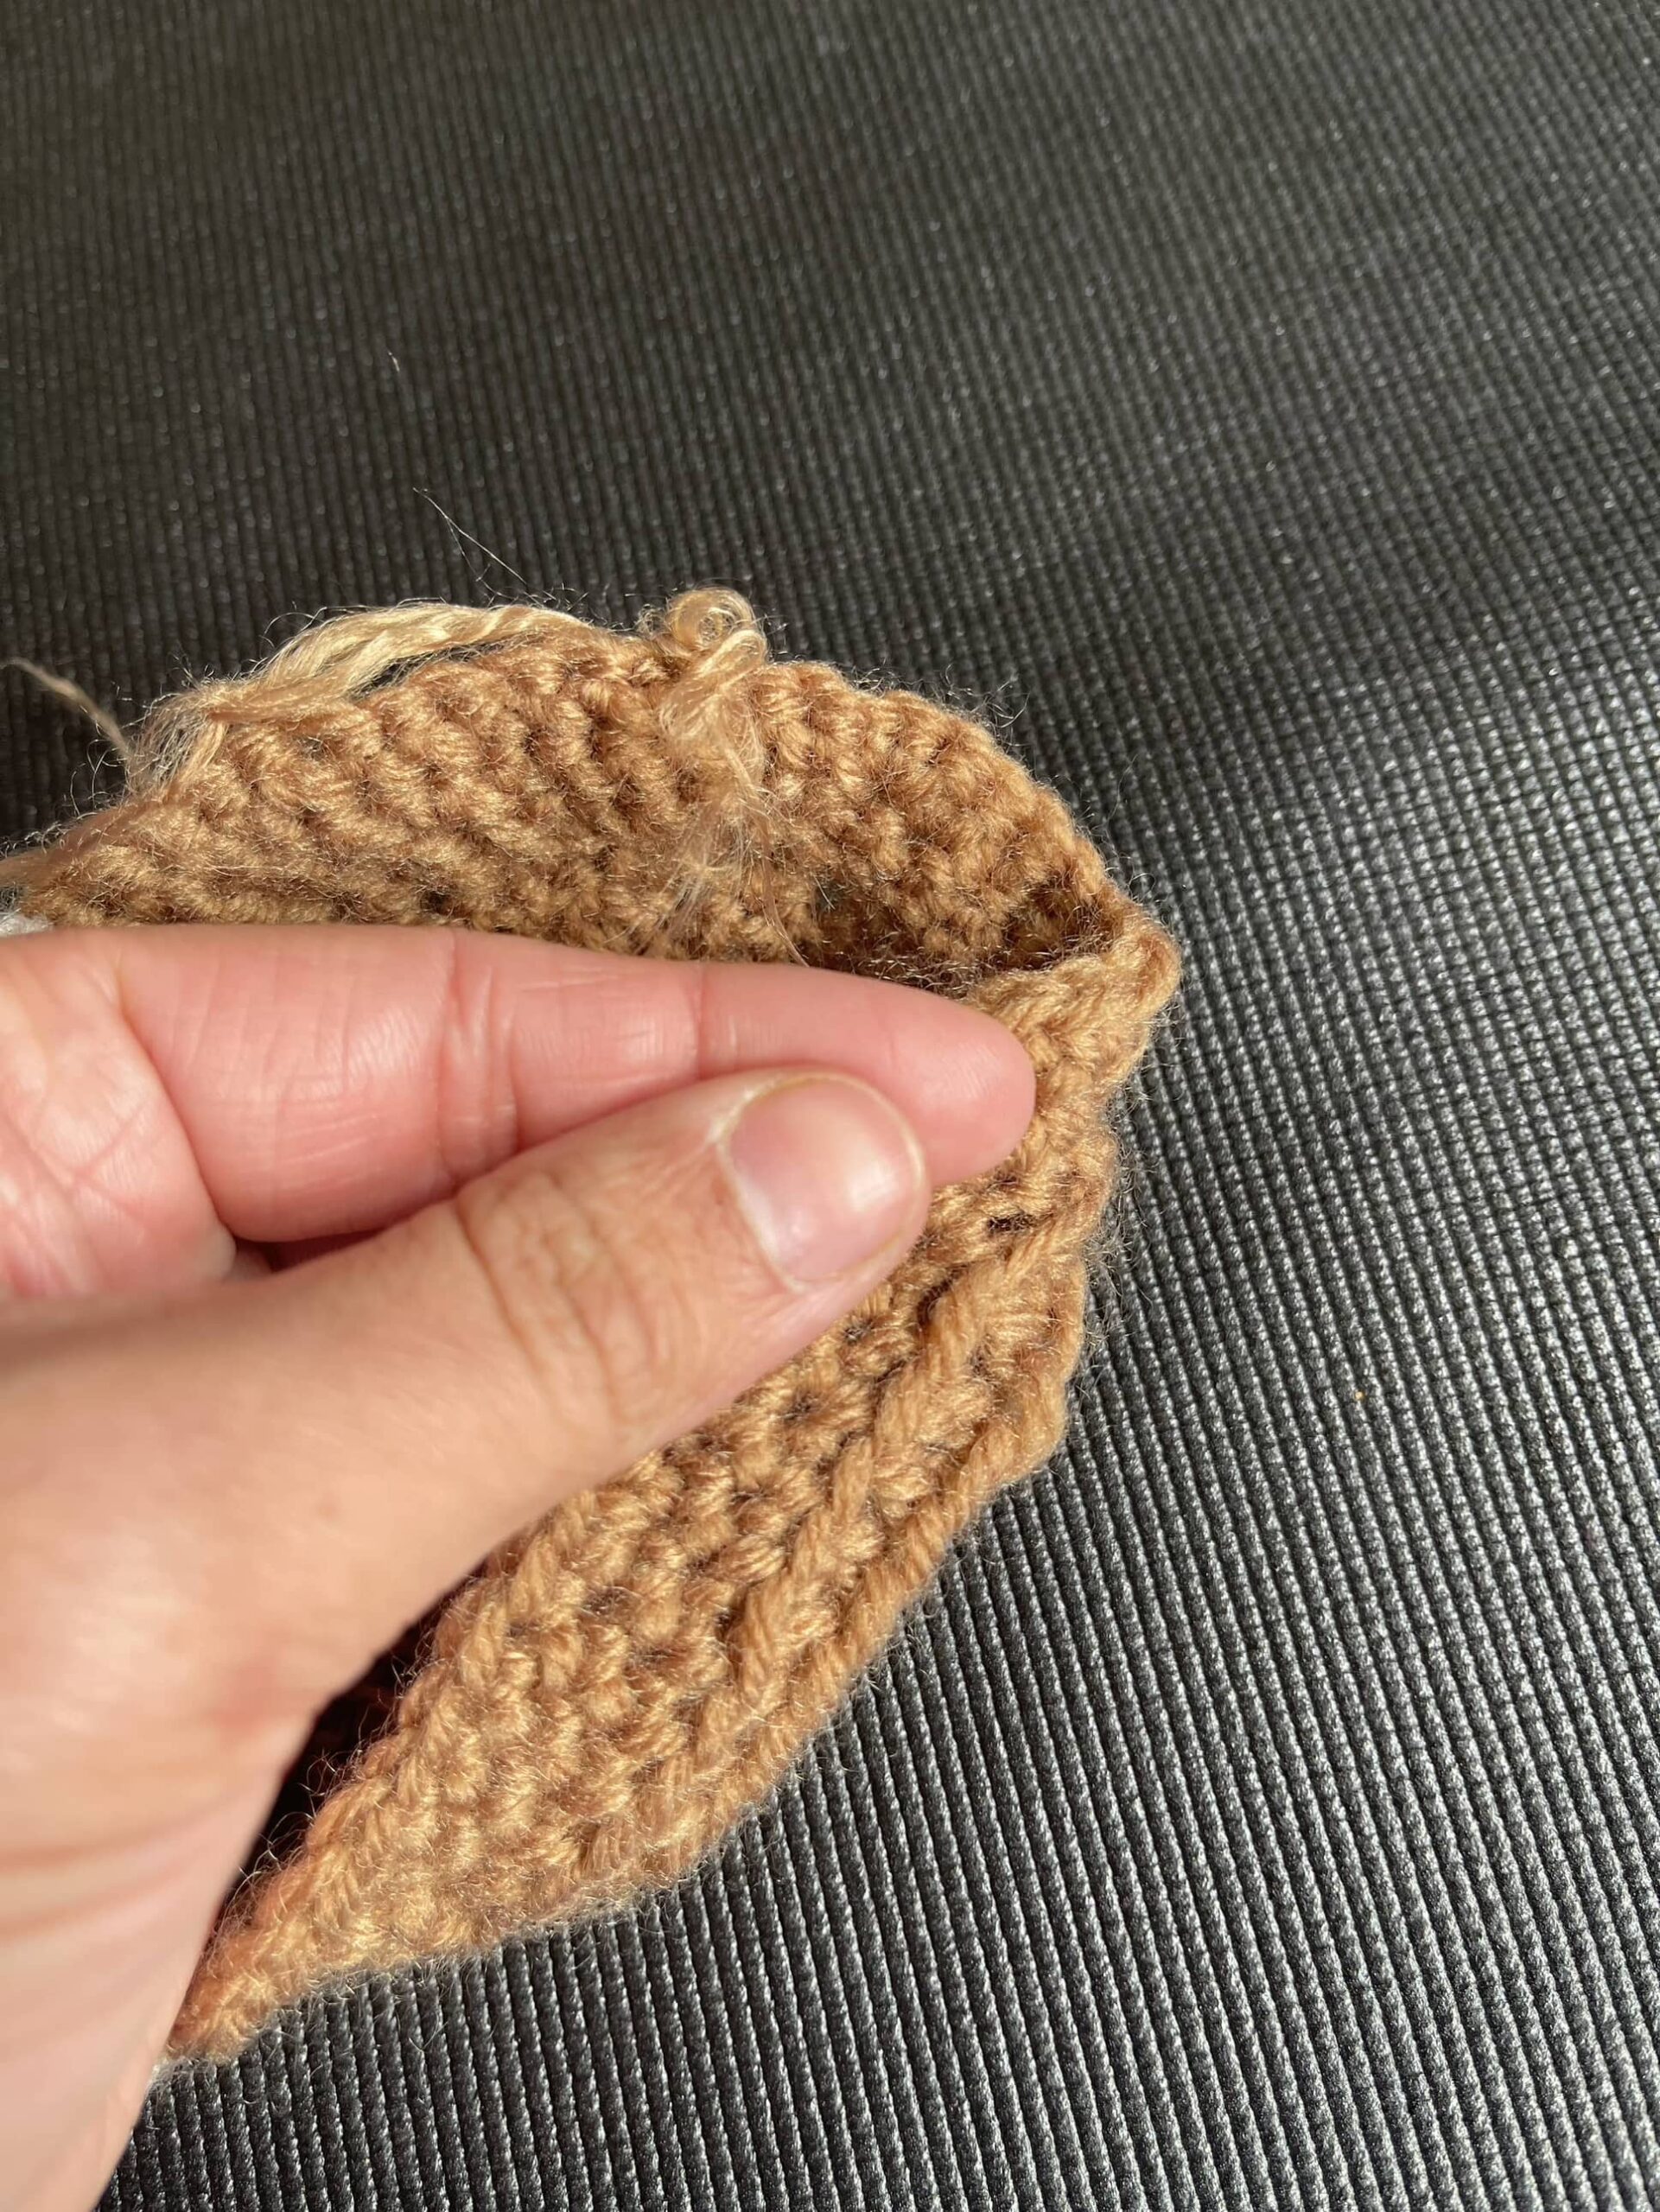
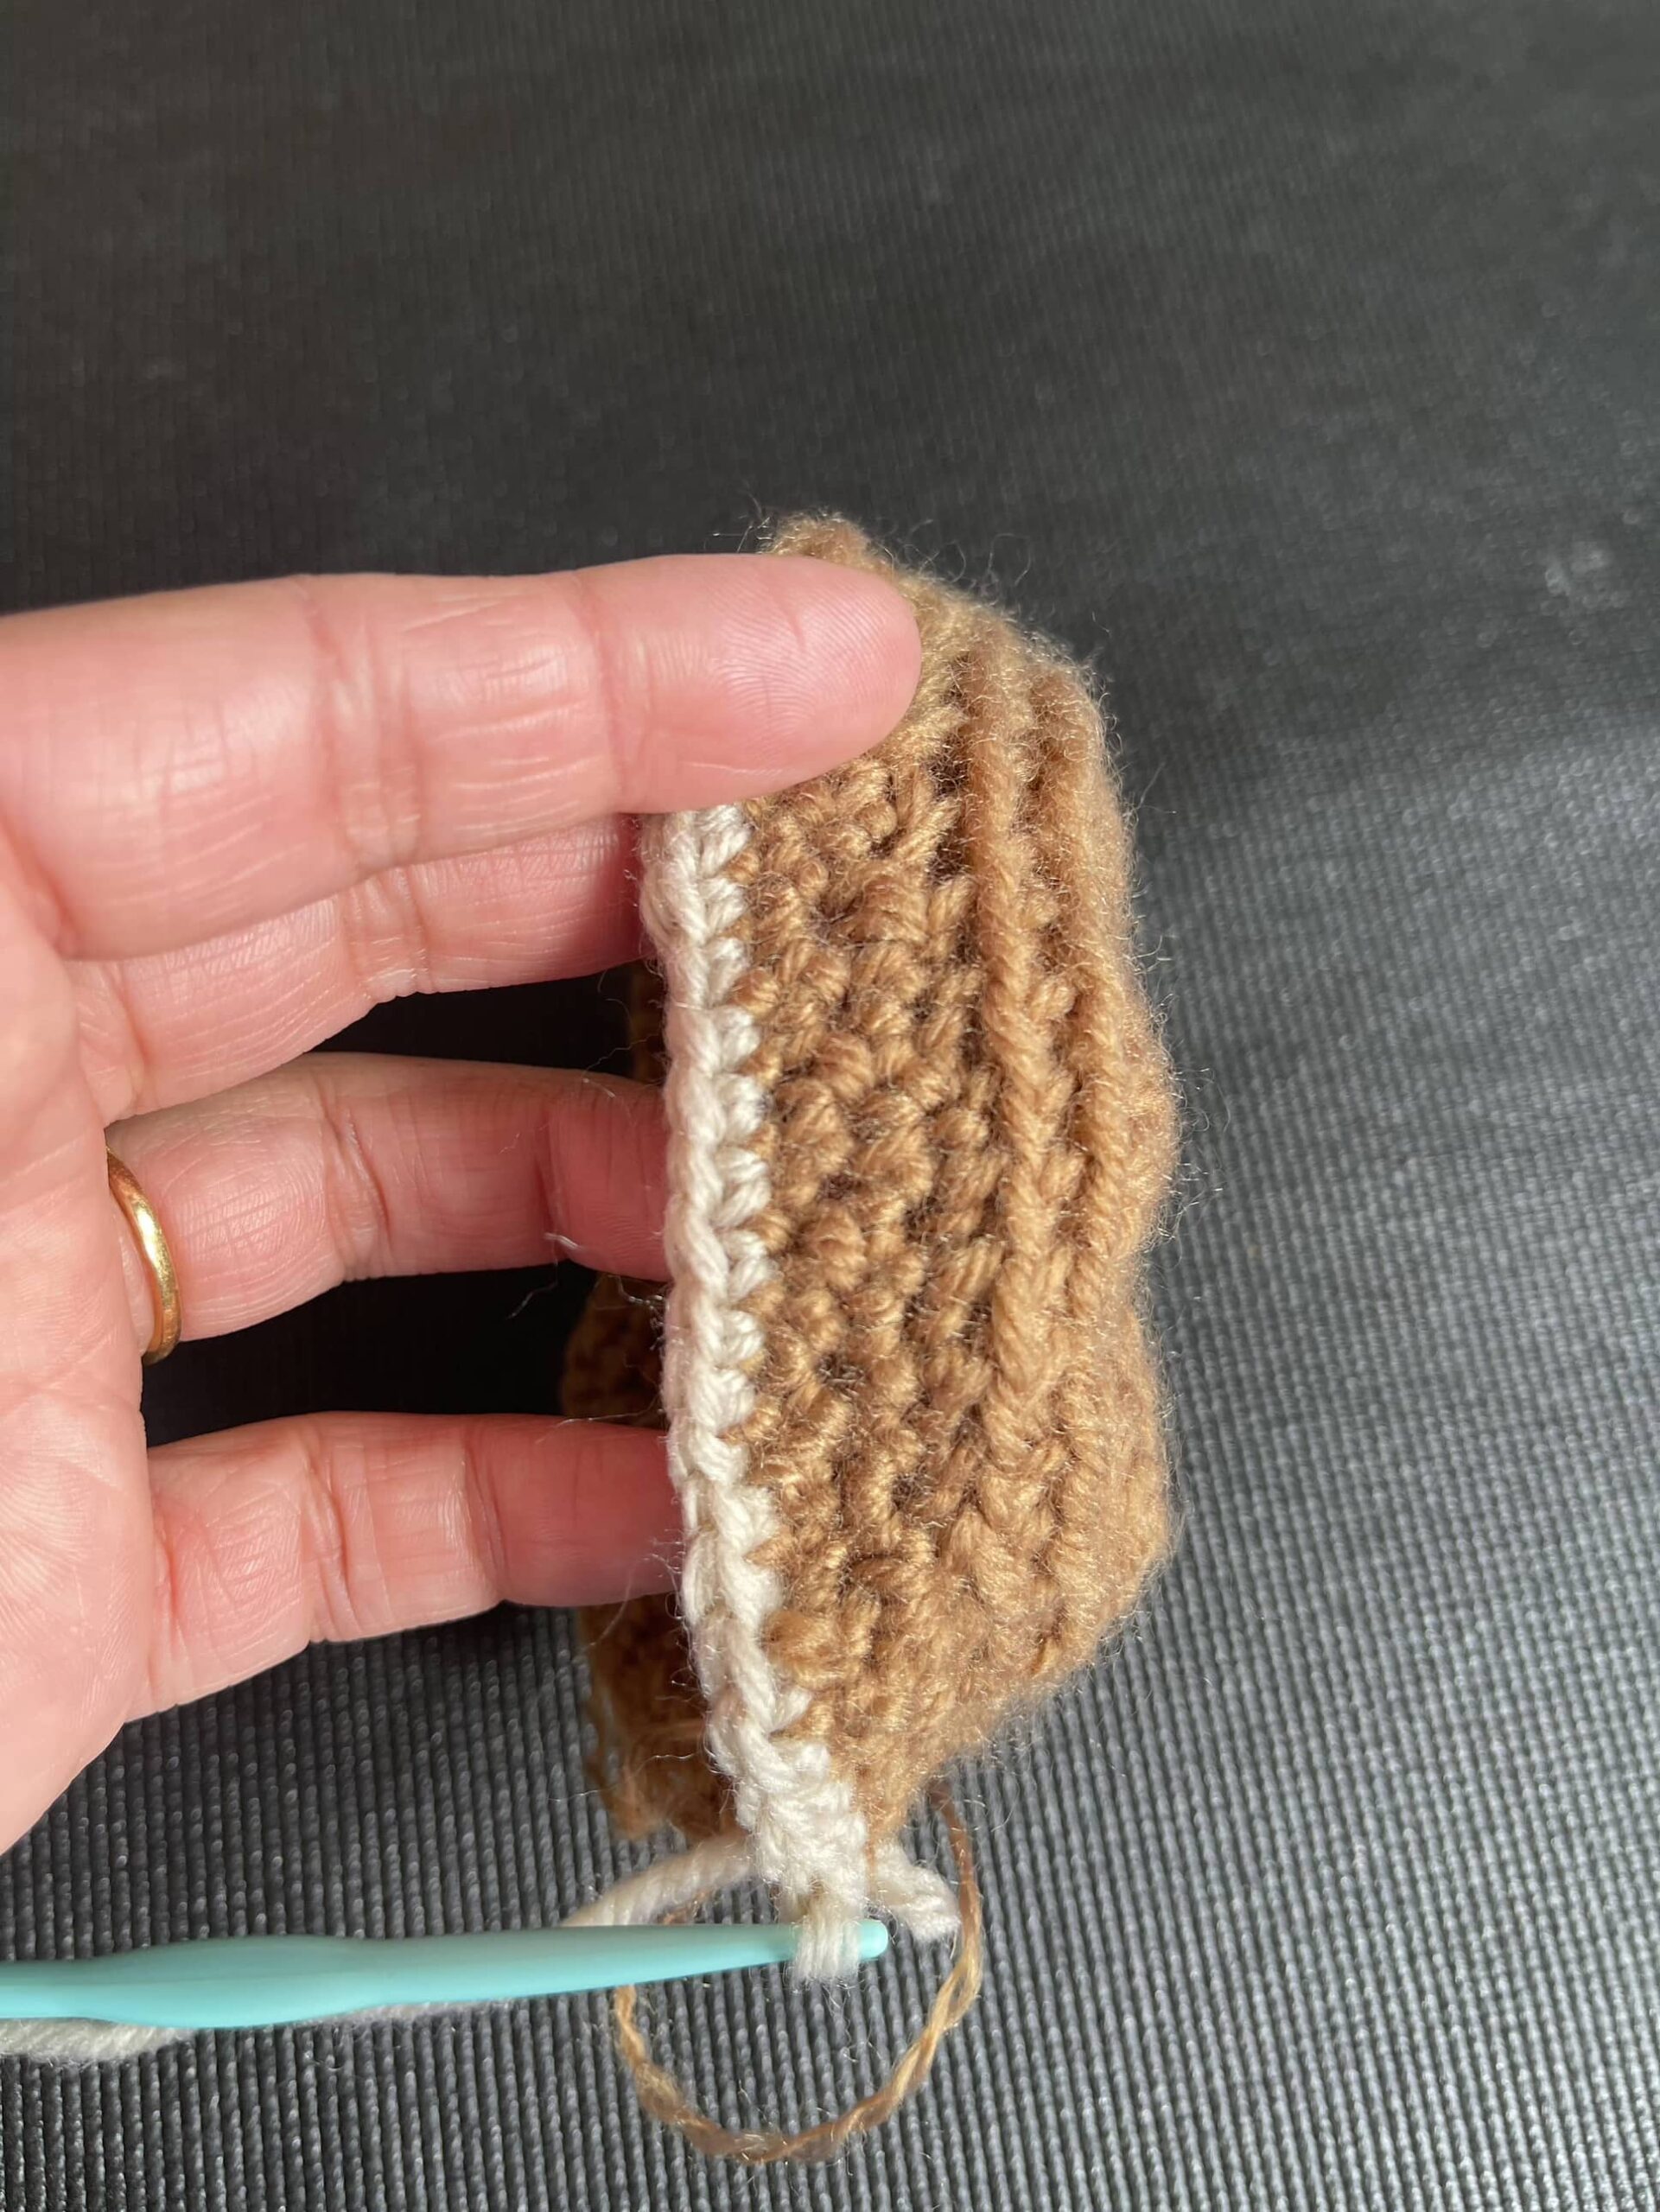
Week 6 Pot for my Snake Plant                                                                                     This week, I focused on completing the crochet pot for my snake plant. After exploring 
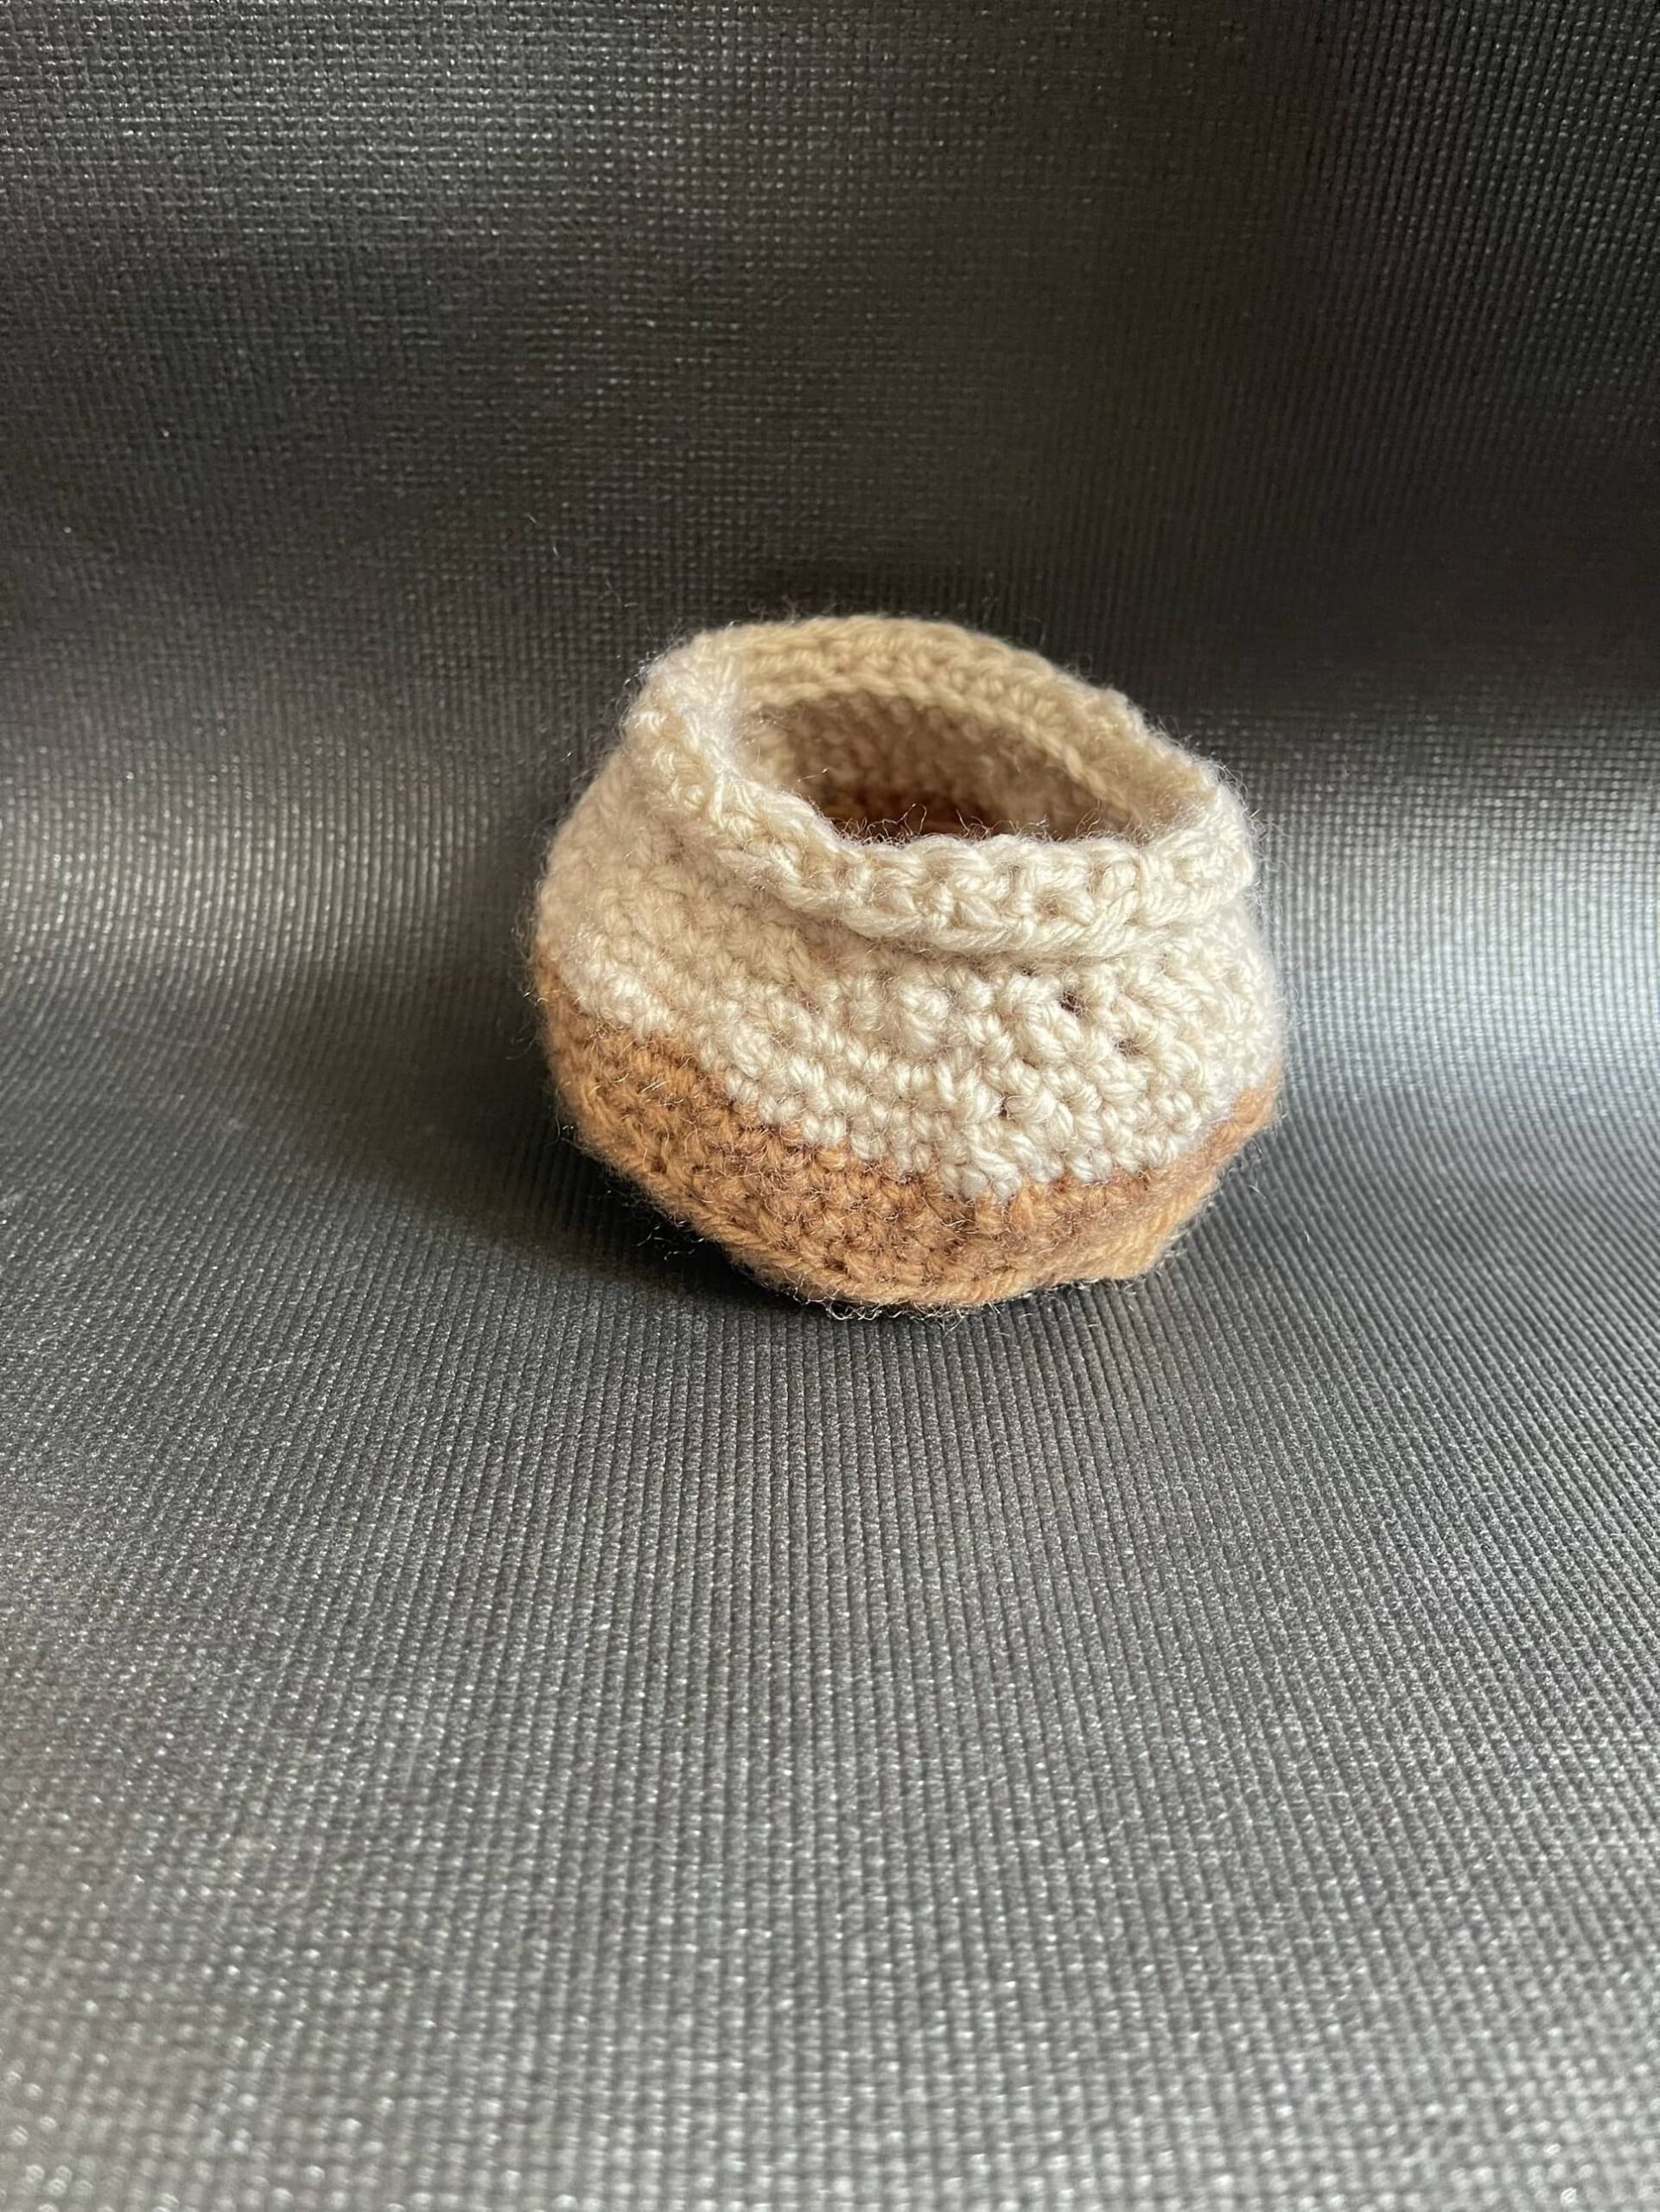
various resources, I found a pattern that worked and used a mix of YouTube tutorials, blogs, and the Whimsical Stitches e-book to guide me.

The main challenge was shaping the pot and maintaining consistent tension. Through trial and error, I adjusted stitch counts and techniques to fix sizing issues. To personalize the pot, I added a second yarn color for a two-toned look, adding contrast and texture.

                                                                                             Week 7 Assembling the Snake plant

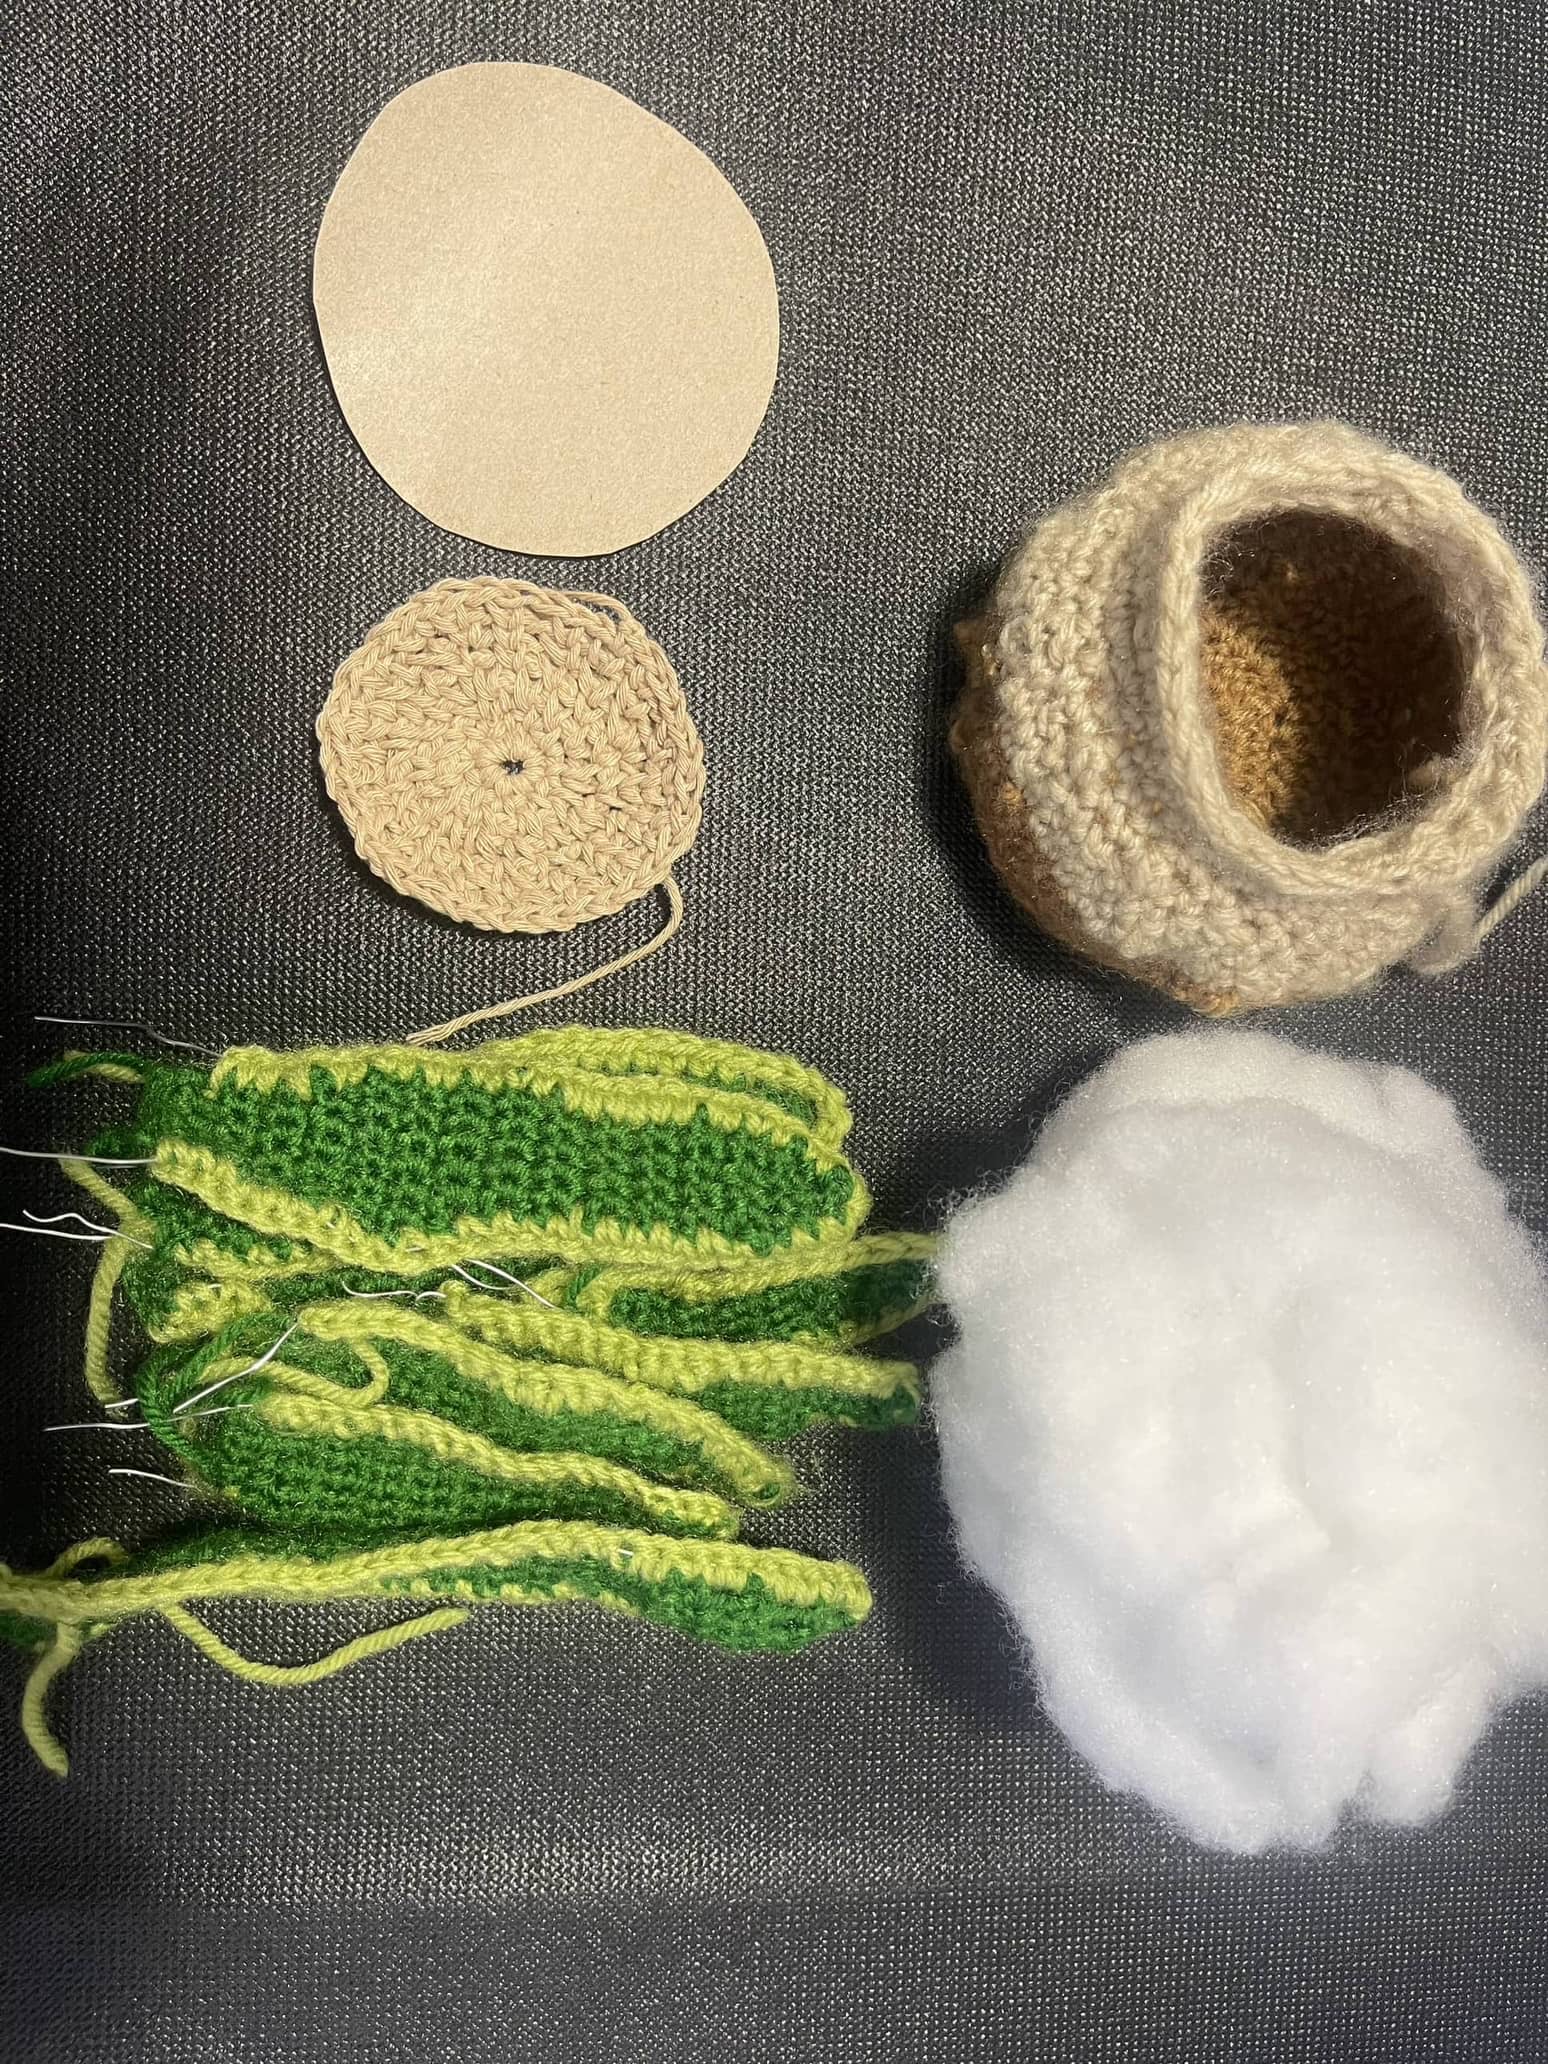
This week, I completed my crochet snake plant by making the dirt, stuffing the pot, and assembling the leaves.

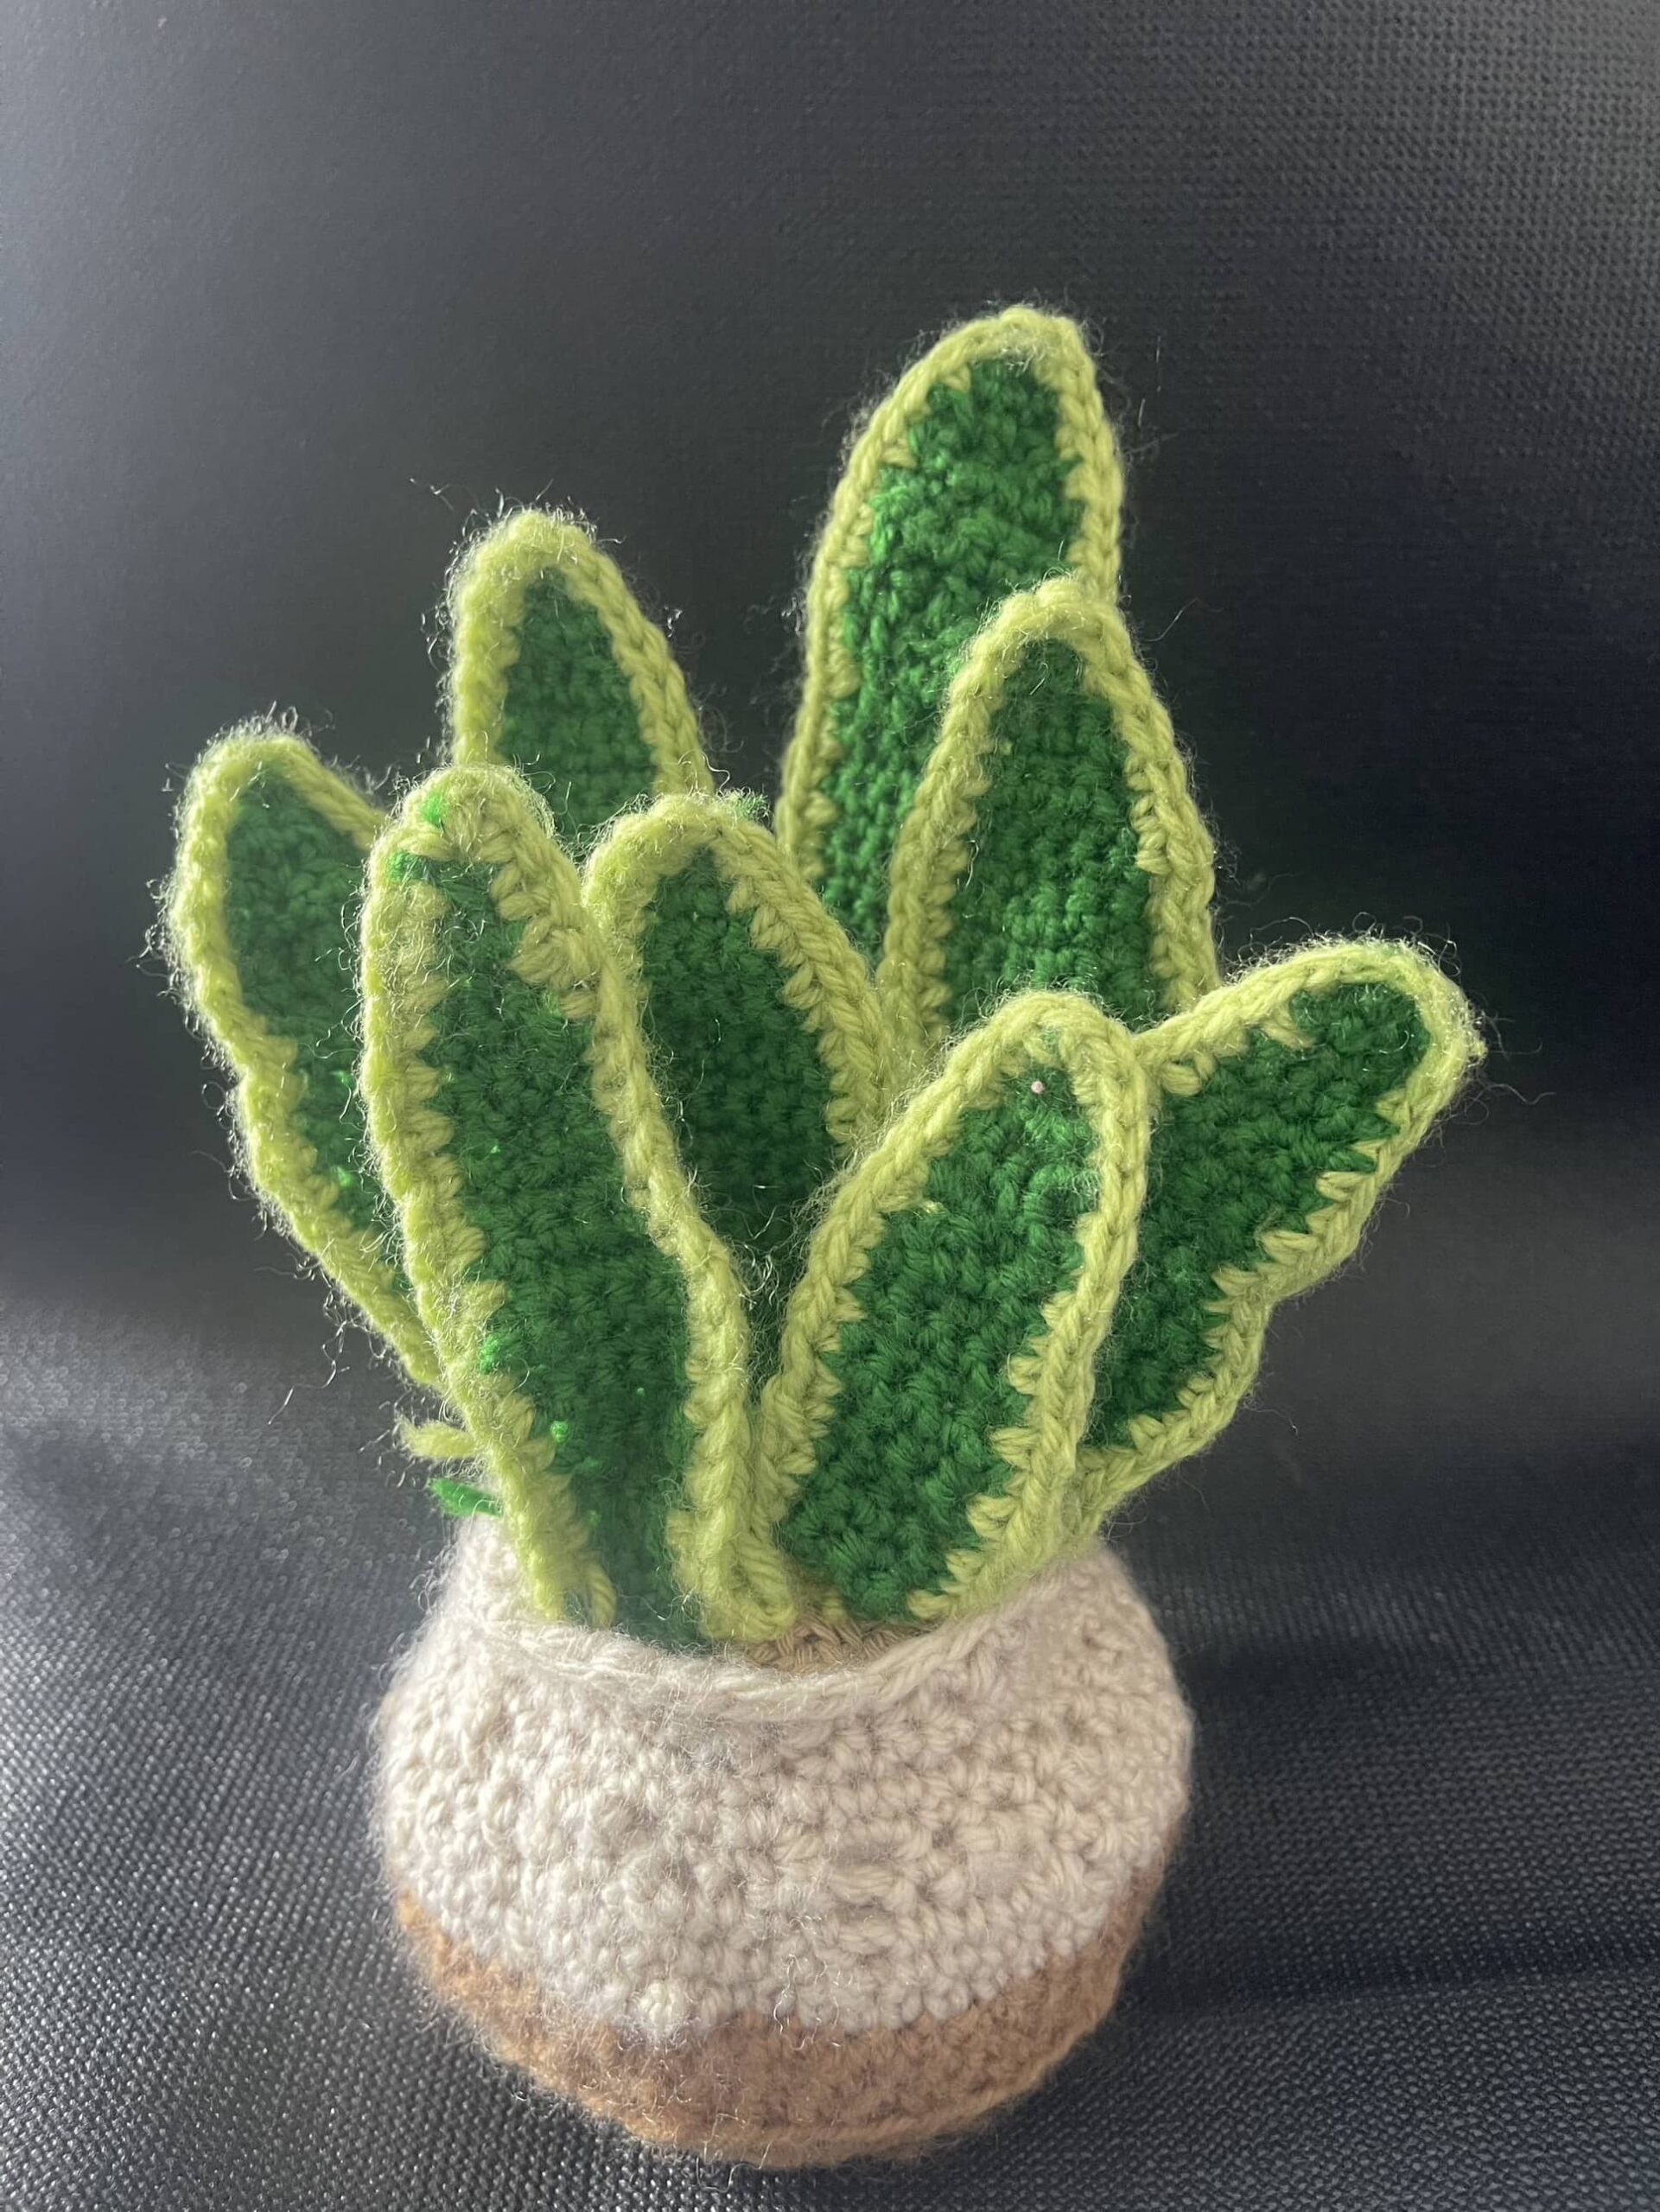
For the dirt, I crocheted a circular base, adjusting stitch counts until it fit well. I added a cardboard base and fiberfill to keep the pot sturdy. Then, I attached the leaves—some reinforced with wire for support—arranging them for a natural look.
I learned how important structure is in crochet, and how small changes, like more stuffing or stitch tweaks, can improve the result. A blogger’s diagrams and photos made the assembly process much easier to follow.

Week 8  Crocheting a Floral Coaster: A New and Exciting Project

This week, I crocheted a floral coaster after getting inspired during breakfast. I followed a YouTube tutorial and used violet and green yarn to make the flower. The pattern was tricky at first, especially with stitch increases, but I figured it out after rewatching the video.


It was my first time making crochet flowers, and I loved shaping the petals. I even made a quick video using CapCut—my baby’s background noise included!

The project boosted my confidence and made me excited to try more floral designs.

Week 9 Crocheting a Rose: Bringing Floral Beauty to Life

This week, I was inspired by a beautiful crocheted rose I saw on Instagram and decided to make one myself. I used deep red yarn for the petals, starting with a magic ring and increasing stitches to create layered, realistic petals. For the leaves, I tried triple crochet for the first time and added floral wire for shape and flexibility.

The project pushed me to explore new techniques and textures, and I loved how the rose began to take shape. I followed a clear video tutorial for the petals and a detailed blog for the leaves, which helped guide me through the process.

This has been one of my most rewarding crochet experiences yet!

Week 10 Overcoming Challenges in Crocheting Sepals and Assembling My Rose

Crocheting flowers can be beautiful but challenging—especially the sepals and assembly. This week, I struggled with the sepals at first, trying multiple tutorials until I found one with clear steps that finally worked. I was proud of myself for not giving up.

Assembling the rose tested my patience. I created the stem by wrapping yarn around wire and attaching the leaves. I initially glued the first petal, but the residue looked messy, so I switched to stitching the rest. In my focus, I forgot to add the sepals! Since the first petal was glued, I couldn’t remove it, but I managed to unwrap the stem, add the sepals, and reattach the petals.

This experience taught me the value of patience, planning, and choosing stitching over glue for a cleaner finish. Mistakes happened—but I adapted and ended up with a result I’m proud of.

What Contributed to My Learning

Several factors played an important role in my crochet learning journey. This course gave me the motivation and space to explore a new skill, and the flexibility to use different online resources like YouTube and crochet blogs made it easier to find guidance that worked for me. When I faced challenges, switching between tutorials and trying again helped me understand better. Supportive comments from classmates and helpful guidance from the teacher really encouraged me to keep going. Their feedback motivated me to push through difficult parts and celebrate small wins. Reflecting on my work, making videos, and seeing my progress also made the learning process fun and meaningful.

Personal Growth Reflection

This crochet journey has been about much more than just learning a craft—it’s been a real process of personal growth. Before this class, the only stitch I knew was the single crochet. I didn’t know how to hold the yarn properly or how to follow a pattern. But through this course and with the help of different online sources, I’ve learned so much more. I’ve now explored a wide variety of stitches like half-double crochet, double crochet, and even triple crochet. I’ve learned how to hold the yarn in a way that gives me better control and flow. Beyond the technical skills, I’ve grown in patience, problem-solving, and persistence. I used to get discouraged when things didn’t turn out perfectly, but now I see those moments as opportunities to learn and improve. Each project gave me the chance to challenge myself, and with every flower, leaf, and petal, I became more confident in my ability to create something beautiful with my own hands.


Overcoming Challenges in Crocheting Sepals and Assembling My Rose

Crocheting flowers can be a beautiful but tricky process, especially when it comes to the sepals and assembly. This week, I found myself facing a bit of a challenge with the sepals after finishing the petals and leaves—it was harder than I had anticipated.

The Challenge of Crocheting the Sepals

I found crocheting the sepals to be the most difficult part of this project. I initially followed a video tutorial, but I struggled with the pattern. I tried several times, only to be left frustrated with the results. But then, I found a video that worked better for me. The steps were clearer, and the process finally clicked. I was so relieved and proud of myself for sticking with it!

Assembling the Rose: A Lesson in Patience

Once the sepals were done, I thought I was ready to assemble the flower. Here’s how I started:

  1. Making the Stem – I wrapped yarn around a piece of wire to create a sturdy stem and attached the leaves at the base.

  2. Attaching the First Petal – For the first petal, I decided to use hot glue to attach it. However, I noticed a white residue from the glue that didn’t look good, almost like a crust around the petal. I quickly realized that the glue wasn’t the best option, so I switched to stitching it with needle and yarn instead, which gave me much better control and a cleaner look.

  3. Attaching the Other Petals – After attaching the first petal, I moved on to the rest of the petals. However, I soon realized I had forgotten to add the sepals! I was so focused on the petals that I missed this important step.

This is where I encountered the most frustration. Since I had already glued the first petal in place, I couldn’t simply remove it and add the sepals. Fortunately, I hadn’t glued the other petals, so I was able to deattach them and fix my mistake.

  1. Fixing the Mistake – Since the first petal was glued, it couldn’t be removed easily, so I had to carefully unwrap the yarn and leaves from the stem. I added the sepals to the base of the petals, then rewrapped the yarn to form the stem once again. After that, I stitched the petals back into place.

Reflection on the Resources

This project taught me a valuable lesson in patience and adaptability. If I hadn’t been able to deattach the petals, I would have had a lot of difficulty adding the sepals. It also made me realize the importance of planning ahead—especially when it comes to assembling the flower! I’m glad I made the decision to stitch rather than glue, and while it took a bit longer, the results were worth it.

Crocheting a Rose: Bringing Floral Beauty to Life

This week, as I was scrolling through Instagram, I came across a stunning crocheted rose. Its intricate details and delicate shape immediately caught my eye, and I was struck with inspiration—why not try making one myself? 🌹 I’ve always admired the beauty of real roses, and the thought of recreating one with yarn excited me. This project would not only test my crochet skills but also give me the chance to experiment with new techniques and textures.

Starting with the Petals

The first step was to create the petals, which form the heart of the rose. I chose a deep red yarn to mimic the elegance of real roses. I started with a magic ring and worked 6 single crochets (sc) into it. In the second round, I increased each stitch, doubling the count to 12 stitches. I continued this pattern in the third round, reaching 18 stitches by evenly spacing out my increases.

To add variation and depth, I made three smaller petals using this pattern. For the next set of petals, I followed the same base pattern but added fourth additional round, increasing to 24 stitches. This created larger outer petals, giving the rose a natural, layered effect.

Crocheting the Leaves

No rose is complete without its lush green leaves. This part of the project introduced me to triple crochet stitches, which I had never tried before! Using a combination of single crochet, half-double crochet, double crochet, and triple crochet, I was able to shape the leaves with a natural curve.

To enhance their look and durability, I inserted thin floral wire inside the leaves. This not only made them more flexible but also allowed me to shape them in a way that looked more realistic. I loved how this small addition gave the leaves a professional touch!

Reflection on the Process

This project was incredibly rewarding! It pushed me to try new techniques, especially triple crochet for the leaves.  I can’t wait to see the complete rose.

Reflection on Resources

One of the most important lessons I learned was the value of finding the right resources:

  • For shaping the petals, I followed a tutorial that was simple and visually clear. The video and step by step guidance helped me understand how to position each petal correctly.

  • For the leaves, I used a crochet blog that provided a detailed pattern, including stitch counts and diagrams. The combination of written instructions and images made it easy to follow.

Crocheting a Floral Coaster: A New and Exciting Project

While having breakfast and sitting at the dining table, I was thinking about my next crochet project. Suddenly, I looked at the coaster in front of me and got an idea—why not crochet a coaster myself? I immediately searched YouTube for tutorials and found a beautiful floral coaster design that I liked. Excited by the idea, I decided to make the same one.

I started with a magic ring. I had made a magic ring before for my crochet snake plant, but this one was different. Instead of the method I previously used, this pattern required ten double crochets (DC) in the ring. Each round had a different number of increases in single crochet (SC), which I initially found confusing. However, after watching the video multiple times and carefully following the pattern, I was finally able to get it right.

For the flower, I used violet-colored yarn to make the sepals and petals, while for the stem, I chose green yarn. This was my first time crocheting flowers, and I learned how to shape them using double crochet stitches.

This time, instead of posting pictures, I made a short video using the CapCut app, which is pretty easy to use, It offers features like trimming, adding text, filters, transitions, music, and effects .I created this video using this app within seconds. You can even hear the background noise of my baby since he was right there while I was making video.

Reflection on My Learning Experience

At first, I felt a bit nervous, wondering whether I would be able to complete the coaster successfully. However, as the project started taking shape, my confidence grew. To my surprise, the final result turned out exactly like the one shown in the tutorial. It was a really fun experience to make a flower for the first time—especially because I love flowers! I was super excited about crocheting the petal details. Although I found the petals a bit difficult to make at first, after retrying them a few times, I got the pattern right. Completing this coaster boosted my confidence in crochet, and I feel more comfortable trying out new patterns.

Reflection on the YouTube Tutorial

I really liked how the tutorial explained everything from start to finish. Each time the instructor completed a round, she showed the stitches and counted them to ensure they were correct. This made it much easier to follow the pattern accurately. Additionally, she demonstrated the detailed pattern for the petals, sepals, and stem, which was very helpful.

One thing that confused me was the subtitles. The pattern for each round was shown in the text, but instead of writing the number of single crochets (SC) required, the tutorial used “DC” (double crochet) in the instructions. This was misleading at first, but after carefully observing the video, I realized the correct pattern. Despite this small confusion, the tutorial was incredibly helpful in guiding me through the process.

Final Thoughts

This project was a great learning experience. Not only did I gain confidence in my crochet skills, but I also discovered how much I enjoy making floral designs. I’m looking forward to trying more crochet projects, and maybe even experimenting with different flower patterns in the future!

💬 What do you think I should try making for my next crochet project? Let me know in the comments!

Balancing Digital Freedom and Accountability: Exploring the Right to Be Forgotten

Every action we do on the internet leaves a digital trail, which in certain situations may follow us for the rest of our lives. A frustrated post or a mistake from years ago may reappear and impact relationships, employment prospects, and college admissions. This raises the question: Should people be able to remove specific elements of their digital history?

Answering this question involves a delicate balance between personal responsibility and the right to control one’s own digital narrative. While it is important to recognize the potential harm caused by the permanence of digital footprints, there also needs to be an understanding that erasing certain aspects of digital history could undermine transparency and accountability.

Nathan Jurgenson (2012) argues that our digital lives are an extension of our real lives, challenging the idea that the internet is a distinct universe. He criticizes the propensity to view online behavior as “less real,” even when it has long-term repercussions. The “right to be forgotten” is a legal notion that permits anyone to request that outdated or harmful online information be removed. This is in keeping with the debate around this idea. Protecting people’s freedom to create their digital identities ought to be a fundamental right if we agree with Jurgenson’s contention that digital environments are inextricably linked to real life.

Jason Ohler urges students to be proactive and accountable in their online contacts, emphasizing that ethical decision-making should be at the heart of digital citizenship. His argument emphasizes the need for students to exercise critical thinking before participating in online accountability initiatives or disclosing personal information, which is particularly pertinent when thinking about issues like cyber-vigilantism and digital footprints. Ohler’s viewpoint supports the notion that digital behavior has long-term effects, highlighting the significance of incorporating conversations about digital ethics into regular education rather than teaching them as stand-alone subjects. By integrating this mindset, educators can help students develop a responsible and reflective approach to their digital presence, ensuring they understand both their rights, such as the ability to control aspects of their digital history, and their responsibilities as online participants.

To deepen our understanding of digital footprints and the ethical implications of managing our online presence, the video by Kaspersky: What is Digital Footprint and How to Protect It. It explains the concept of a digital footprint, how it’s created, and offers practical tips for protecting personal information online. It ties in well with the discussions on digital ethics, the importance of protecting one’s online identity, and the broader conversation on the right.

Final Thoughts

In conclusion, as we continue to navigate the digital world, it is vital to recognize that online actions have far-reaching implications. While individuals should have the right to manage and remove harmful aspects of their digital footprints, this right must be balanced with the need for accountability and transparency. Digital ethics should be incorporated into everyday education to help individuals understand their rights, responsibilities, and the potential consequences of their online actions. Ultimately, fostering a balanced approach to digital citizenship can ensure that individuals can navigate the complexities of the digital world with integrity and responsibility.

Assembling the Snake plant

This week, I focused on bringing my crochet snake plant closer to completion by working on three key elements: making the dirt, stuffing the pot, and assembling the leaves.

Creating the Dirt                                                                                                               

To give my plant a realistic base, I crocheted a circular piece to resemble to the soil. Finding the right size was a bit tricky—I had to make sure it fit snugly into the pot     while also leaving enough space for the leaves. After experimenting with different stitch counts, I finally achieved the right shape and texture. Assembling the plant                                                                                                        In this step I will attach the leaves to the dirt. I arranged in dirt carefully to create  a natural, full look. Some leaves needed reinforcement with wire to help them stand upright. I put them securely into the dirt base, making sure they were evenly spaced and well-balanced.

 Stuffing the Pot                                                                                                                  To ensure the pot maintains its structure, I cut a cardboard of same of the base of pot and then filled it with fiberfill. I initially used a small amount, but I realized it wasn’t providing enough support. After adding more stuffing and pressing it evenly, the pot took on a sturdy, well-shaped form. This step was important because it prevents the pot from collapsing and helps the plant stand upright.

After assembling the leaves and stuffing the pot, my crochet snake plant is finally taking shape. Here’s a look at how it all came together before the final touches.”Reflection on the Process                                                                                      Adjusting the stuffing amount and experimenting with different attachment methods for the leaves helped me understand the importance of structure in crochet projects. I also learned that small tweaks, such as adding more stitches for stability, can make a big difference in the final look.

I really appreciated how the blogger explained this part of the process. She used a diagram to show exactly where to place the leaves for a more elegant and balanced arrangement. The pictures she included—showing each leaf being added one by one from different angles—made it so much easier to understand the concept of assembly. These visual aids helped me gain a clearer perspective on how to arrange the leaves for the most realistic and polished look.

This is how I completed my first crochet project .I’d love to hear your thoughts in comments and any tips you might have for future crochet projects.

Pot for my Snake Plant

This week, my focus was on completing the crochet pot for my snake plant. After searching for different resources, I finally found a pattern that worked well for the pot, and I was determined to finish the project. I used a combination of YouTube tutorials, blogs, and even a crochet e-book which guided me through the process.

Working Through the Challenges

The main challenge of this week was shaping the pot and ensuring that the stitches were consistent. I had to keep my tension even to avoid any unnecessary stretching, especially when crocheting in the round. At first, I faced some issues with the size as it was not perfectly round. However, through patience and troubleshooting, I successfully adapted the pattern, using a combination of stitch counts and different techniques to achieve the right shape.

Adding different colored yarn

To make my pot stand out, I decided to make an addition to the pattern by using two different yarns. This gave the pot a unique, two-toned look, adding more character and texture. The combination of yarn colors provided a nice contrast that made the pot more visually interesting, and it was a fun way to personalize the project.

Finding an E-book for crocheting

I relied on a variety of resources to help me with the pot construction:

  • YouTube Tutorials: The tutorials I used earlier were helpful, gave me a solid foundation to start from.

  • Blogs: I researched for a blog , it helped me to understand more about stitch consistency and how to adjust tension.
  • E-Book: I also found a helpful e-book titled Whimsical Stitches, which included patterns for planters that were similar to what I needed. The e-book provided clear, detailed instructions that helped me to revolve the issue of shape of pot as there is clear description for number and type of stiches in each row, material required, abbreviations, pattern notes which assisted me to complete my pot.

My Reflection on the Learning Process

Looking back on this process, I feel a great sense of accomplishment. While there were moments of frustration, especially when things didn’t turn out as planned, I pushed through with perseverance and curiosity. I learned that crochet is a journey of trial and error, and the key is to not give up.

Next week, I will create the dirt for the plant, stuff the pot with fiberfill to give it proper shape, and assemble the leaves.

Crocheting the Base of the Pot: Overcoming Challenges

This week, I began working on the base of my crochet pot by following a video tutorial, excited to see how it would take shape.

The tutorial first introduced the magic ring technique before moving on to the base. In This tutorial she used a stitch marker to keep track of rounds. Since I didn’t have an actual stitch marker, I initially used a piece of white-colored yarn to mark my stitches.

After completing two rounds, I noticed that my base was curling at the edges, but I continued to round three, hoping it would flatten out. However, the curling persisted, making me realize that something was wrong.

To troubleshoot, I searched for additional resources and remade the magic ring, continuing with the same tutorial. Unfortunately, after three rounds, the base still turned wavy and curled at the edges. I found another video on making a crochet pot, but it didn’t help me resolve my issue.  Feeling frustrated, I revisited the blog I had used for making the leaves, but it did not have any information on creating a flat circular base. I also realized that I had to replace the white yarn marker frequently, which was quite tedious. After experimenting with alternatives, I found that using a bobby pin was a much easier and more effective solution. It stayed in place securely and was easy to move as I progressed through each round, making my crocheting process much smoother.

Determined to find a solution, I explored multiple videos, trying different approaches. Eventually, I found a tutorial that explained the technique in greater detail.

I realized that adjusting the stitch count could help keep the base flat. Instead of using six single crochets (SC) in the magic ring, I increased the count to eight stitches and switched from single crochet (SC) to double crochet (DC) for the rounds.

These modifications finally helped me create a flat and stable base after struggling through several attempts!

Reflection on My Learning Process

This experience taught me the importance of patience and problem-solving while learning a new skill. At first, I felt discouraged when my base kept curling despite following the tutorial. However, by exploring multiple resources, comparing techniques, and making adjustments, I was able to identify the problem and find a solution. Through trial and error, I learned that adjusting stitch count and stitch type can make a big difference in shaping a crochet piece. This process made me appreciate the flexibility of crochet—there’s often more than one way to achieve the same outcome!

Reflection on YouTube Tutorials
While working on the base of my crochet pot, I relied on multiple YouTube tutorials, each offering a different experience.

The first tutorial was helpful in demonstrating the steps visually, but it lacked a clear explanation of how to properly increase stitch count in the third row.

The second tutorial was too fast-paced, as the instructor quickly demonstrated a single stitch and then skipped ahead to show the final result. This made it hard to follow along, and I struggled to understand the exact technique she used.

Finally, the last tutorial provided the clearest instructions. The instructor explained each step in detail, demonstrated the process slowly, and even included written instructions within the video. This combination of visual and written guidance made it much easier to understand the pattern and correct my mistakes.

Completing the Shape and Detailing of Snake Plant Leaves

This week, I worked on wiring and edging to give my crochet snake plant a structured and polished look                                                                                                              1. Preparing the Wire for Each Leaf:

    1. I cut three wire lengths—10 inches for small leaves, 12 inches for medium,  and 14 inches for large leaves.
    2. Bending the wire slightly (without pinching it) gave the   leaves a natural curve.

2.  Adding the Edging for a Clean Finish:

I started by watching the video, which introduced the concept of edging, but it  didn’t provide much detail on the actual process. To learn how to properly create a neat border, I followed the  tutorial, which explained the importance of adding three stitches at the corners to keep the edges looking clean and even.


I also looked at the blog from last week, which helped                                         reinforce my understanding of the different stitch techniques used in leaf formation.

I applied these techniques to my snake plant leaves to ensure the border looked uniform and professional.

Reflections on This Week’s Learning:

At first, I found it really difficult to hold the wire and yarn together while crocheting. During my first attempt, the wire that I left at the end accidentally got inserted into the leaf, making it look messy and uneven.

After struggling with this, I turned to different resources to troubleshoot my issue. The first video I watched provided a visual guide for adding edging but didn’t go into enough detail about how to hold and manage the wire properly. This led me to search for additional tutorials, and that’s when I found the second video, which focused specifically on creating neat and professional-looking borders.

This second resource was incredibly helpful because it explained why adding extra stitches at the corners is necessary to prevent tight or uneven edges. After watching it, I tried again, and this time, my edges looked much neater, and the wire stayed in place properly. This experience reinforced how valuable it is to explore multiple resources when learning a new skill.

Now that the leaves are wired and edged, I’m excited to make planter/ pot for my snake plant next week.

Snake Plant Crochet: Leaf Creation & Learning Reflections

This week, I focused on making the leaves for my crochet snake plant. Since the plant has three sizes of leaves (small, medium, and large) and two striping variations, I wanted to challenge myself by making all the different types for added character.

Steps I Followed

1.Practicing Consistency:                                                      Stitch Tension: I focused on keeping my tension even so that all the leaves looked smooth and well-formed. Uneven tension could make some leaves stiffer or looser than others.


                                                                                                                                                                                                                                              Size & Shape Matching: To ensure all my leaves were proportionate, I frequently compared them side by side, adjusting my stitches as needed to maintain uniformity.


2. Following the Leaf Pattern:
I started by crocheting the small, medium, and large leaves for my snake plant. The original pattern included striping variations, but I kept it simple by using one solid color for all my leaves. This made it easier to focus on the structure and technique rather than managing multiple color changes. I carefully followed the stitch count for each row, making sure to shape the leaves correctly.


Reflection on This Week’s Learning

I really enjoyed following the blog I used as a reference for crocheting my snake plant. The blogger did an amazing job explaining each step clearly by including pictures, which made it easier to understand. I also appreciated that there was a PDF version available for the correct pattern, making it more convenient to follow along.

One of the things I found particularly helpful was how the blogger broke down the pattern based on the size of the leaves. She explained the number of rows, types of stitches, and the stitch count for each row, which gave me a clearer understanding of how to shape the leaves properly.

However, I decided to skip the color variation part because I want my snake plant to be in one solid color. Even though the original pattern includes different striping effects, I liked keeping it simple for my project.

This week, I feel more comfortable with crochet patterns, and I’m excited to move on to the next steps of wiring and edging the leaves next week!