The Rise of AI and AI Tools, Are You Really Keeping Up?
You’ve heard of ChatGPT but have you heard of Animated Drawings by Sketch Meta Demo Labs? The world of AI is among us and there are so many AI tools that are becoming available on the daily. The question is, are they all useful? Today we will be diving into this topic and exploring a program called Sketch Meta Demo Labs.
Sketch Meta Demo Labs is an online tool that allows you to animate your drawings. After you have created your own drawing by hand you can upload a picture of your creation to the online program where it will then take your drawing and make it come alive! AI tools are becoming ever so popular. I used to look at them as a way of cheating and in a negative connotation, but I now view them in a different light. I view AI as tools that can accompany learning and I see no problem with integrating them into the classroom in intentional ways. So far I really am very impressed with this tool and can definitely see myself using it in my future classroom.
How To Use Animated Drawings By: Sketch Meta Demo Lab
Using this online tool is simple and straightforward. I was very impressed with how little effort it took for me to create and make my drawing animated. The first step I had to do was create my drawing. I will let you in on a little secret, it may not be so little but more so just flat out evident. I am not a good artist!! Yes I repeat, drawing is most definitely not one of my strengths but luckily with Sketch Meta Labs you do not have to be a great drawer to create your masterpiece. For my drawing I drew my go to person drawing. I call it an elevated stick man. It took me about two minutes and then all I had to do was take a picture of it. 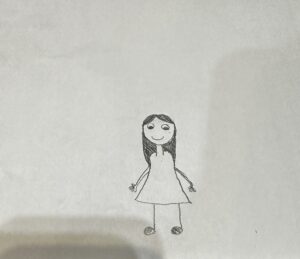
The next step is to upload it to the tool. You will click Upload Photo and choose your image from your photo library. 
The second step is to size the box to your image. This step is so that it is just your main image being animated. 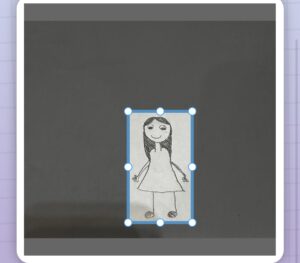
The third step is to separate your background from your character. What you will want to look for is that all the parts of your character are highlighted. If you notice that a part or a few parts are not highlighted, all you need to do is use the pen and color them in. If you make a mistake or color outside of the lines no worries, there is an eraser option that you can use. 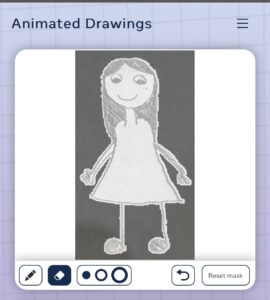
The fourth and final step before your character is fully animated is that you need to mark the character’s joints. The tool puts the joints where it believes that they are but sometimes it can be a little off. You can click each of the dots to move it to the correct part of your character. 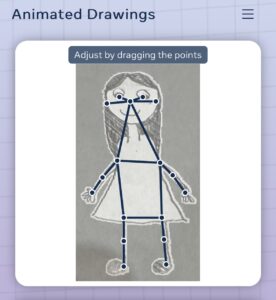
Now your character is complete and animated! My favorite past of this tool is that at the end there are a bunch of different movement options that you can make your character do to make it fully customizable. Interested in seeing how it turned out? Here is my complete character!
In the Curriculum
I can see myself using this tool in a wide range of grade levels. From grade 1 all the way up 10-12. Some outcomes that I found for my target grade level of grade 1 are:
– CP1.8
Create art works that express own ideas and explore different forms (e.g., painting, drawing, printmaking) and media (paint, found objects).
– CR1.1
Demonstrate understanding that the arts are a way of expressing ideas.
– CR1.3
Listen to and comprehend a variety of texts (including a book read aloud, a person speaking, and directions) to retell the sequence and key points (who, what, when, where, why, and how).
How I Would Use This In a Classroom
When I first started exploring this tool I instantly thought about how useful it would be for read aloud or stories read in the classroom. In my opinion I see this tool as a way of integrating different learning styles into the classroom. As a future teacher that is my main goal. I want to make sure that every student has the same opportunities for success, while always keeping in my mind that every student learns in different ways. As a way of demonstrating students’ understanding in a way that is different from just the traditional way of learning of explaining or writing, I would have students create a detailed drawing demonstrating their understanding of the text, including the key characteristics and ideas from the reading. Once they are done I would have them animate it to personalize their drawing even more. This is encouraging comprehension as well as creativity. I believe that you could use this tool for an additional aspect to really any ELA outcome such as having to create their own script or story and finish the activity with, then creating their own characters to accompany their story. In older grades having the students create a character analysis or having them create an additional character that alters the outcome of the real story. There really are so many ways of using this tool and I am very excited to try it out in my internship this fall.