The task I set for myself this week was to take some pictures using my camera, and see if any of the knowledge gained through my study of the manual was helpful in my photography. In addition, I wanted to analyze the usefulness of the manual in gaining knowledge that would help me in my ultimate goal, to become a better photographer.
I used my manual that I referenced in last weeks post to help me play with a few settings this week. Ultimately, I realized I have a lot to learn about photography and have much to improve on.
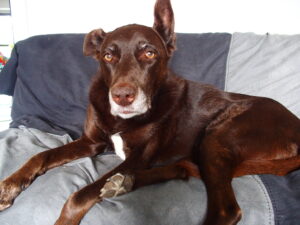
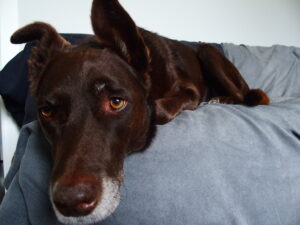
My model and “guinea pig” Tavia.
I used my dog in a reference photo, where I used the “P” setting to take the first of many pictures. This picture was taken in a well-lit room, where she sits on her personal futon to observe the front yard and door in order to protect the residents of the house. The “P” setting is intended to be slightly more professional than AUTO and makes appropriate lighting adjustments. However, as I look at this photo, it seems a little blurred to me, even with the use of auto-focus. Further investigation is definitely required.
I learned last week about aperture, light exposure compensation, and shutter speeds being referenced on the screen and to be adjusted using settings and dials.
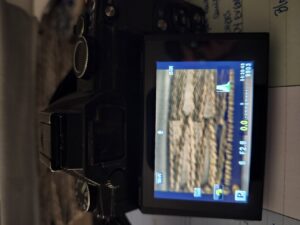
I played with these numbers, the F ratio, the exposure compensation to see what it would do to my basic starter image.
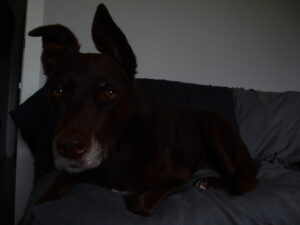
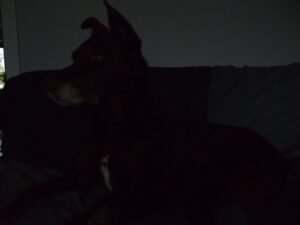
The two images above are what happened when I decreased the exposure and the aperture. Essentially, useless images where you can barely tell that my dog is being good and tolerating my photography. Unless one wants to just highlight her ears.
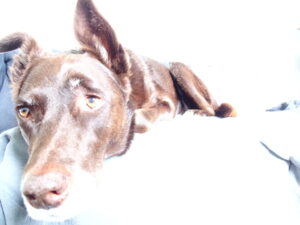
Then I have the results of adjusting the exposure compensation and the aperture. Increased exposure provides the ultra light or blurred background and a slightly higher aperture provides the somewhat average picture. I would say that picture still needs some light adjustments.
I thought that the increased exposure and lightening the background was a neat effect, that results in something simple and clean. I could see the benefits of this in trying to focus on a close up object or person of particular study: say for a portrait.
I found the manual was quite dense and all of the terminology it provided did not necessarily help me improve my skills. It certainly takes time to internalize the terminology and make it work to your advantage. And with that being said, just because I know some new terminology, that doesn’t mean I know and understand how to use it in the right context. As is the situation here. I learned some words, but really was just guessing at what to do. I didn’t know how to get the appropriate or desired effect. Thus the manual wasn’t the be-all, end-all that I had hoped it would be. It showed me how to push a lot of buttons that I didn’t previously use, but it didn’t actually help me be better at photography. I guess I will have to continue on.
Next steps for me, would be to look for alternative sources. Since my technology devices are listening, I have been offered several master classes in photography that I could take. But, I am going to try and see what I can find for free sources, likely YouTube will be my next source of information. If you have any trustworthy source suggestions for photography, please feel free to share as I continue to expand my horizons in sources and in telling a story in pictures.
It’s really funny to me how common it is for manuals and instructions to include a bunch of technical mumbo jumbo, almost ignoring the fact that someone using their tool or device might be a beginner. Too often they over assume how much will be known from the get go leading to situations like you mentioned here of learning new words and elements of your camera, but still guessing on how to use them.
I personally find YouTube to be one of the best places to learn. There’s always someone out there who can present information in ways that are easier for me to understand. While I don’t have any specific resources to pass along I’m certain you’ll be able to find several useful videos next week that’ll help take your skills to the next level.
Also, I just have to say that Tavia is absolutely precious! I’m a sucker for the upright ears, so even the images with decreased exposure/aperture brought a smile to my face!
That’s amazing, photography is so hard to learn! Good on you for taking on something like this. I have girls who do some acting and modeling, and even though I have a pretty good camera, I can never get anywhere close to the quality our photographer captures of them. I’ve tried to learn how to use my camera properly, but there are just so many settings and techniques, it’s a lot more complicated than it looks. I’ve developed such a huge appreciation for photographers. There’s so much more to it than just snapping a picture, as you showed with the difference in exposure on your dog. It honestly looks like two completely different photos, even two different dogs. If you find any great tutorial videos, please share them, I’d love to learn alongside you. (Edited with Chat GPT)
Hi Shayna,
I found this post very interesting and I am not familiar with a lot of the more technical terms in photography. I like how you used your adorable pup as your subject. It was really smart to see just how different the photos can come out when making a few adjustments to your camera. I am also quite impressed with how still your dog stayed throughout the photoshoot. Some Youtube series you may enjoy are Masters of Photography, Pro Photography Masterclass, and Learn Photography [Full Course] by Chris Bray (Australian Geographic).