Goodbye Dining Room

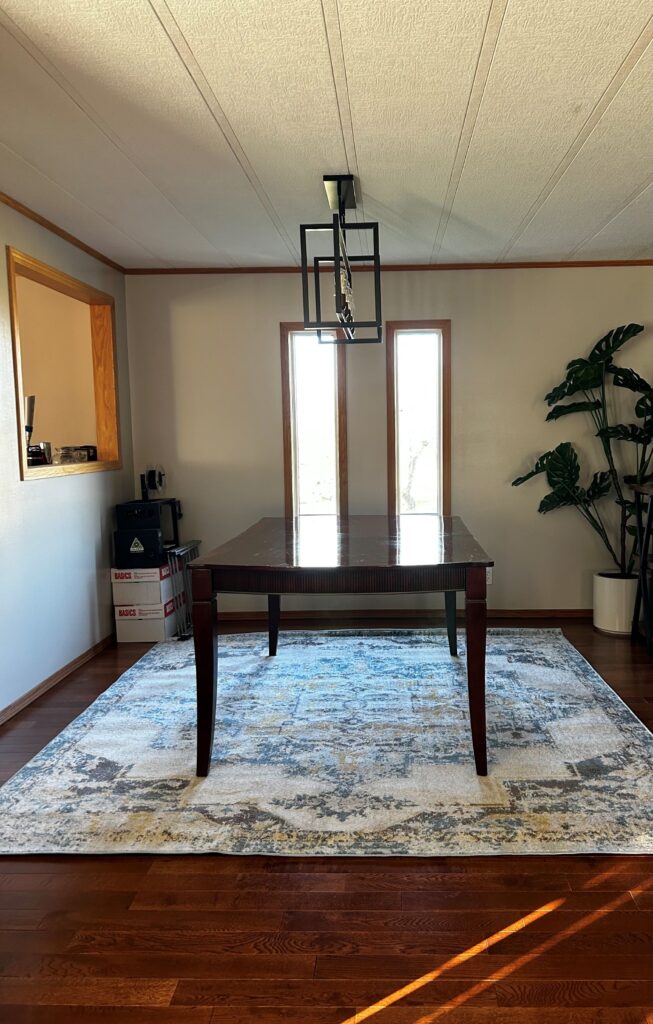
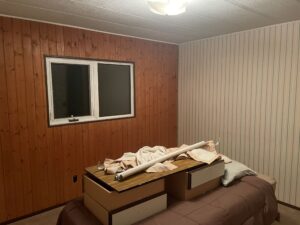
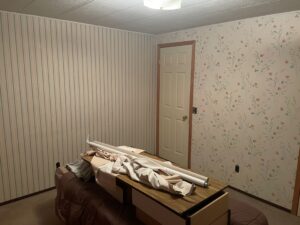
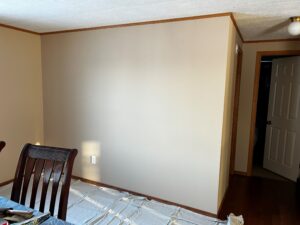
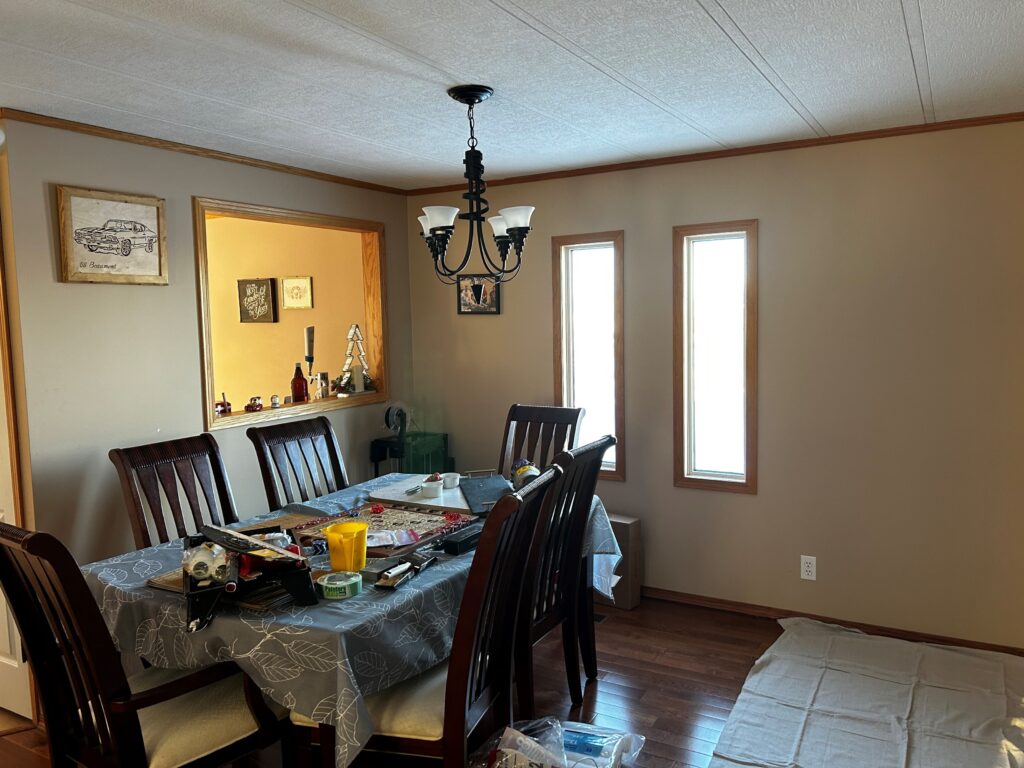
If you’ve followed along from the beginning, you’ll know I tackled redesigning my ugly brown dining room for my learning project. Here’s how it started:

Post 1: He Can’t Say No, Right?

I started by showing you a couple of the projects I had already started in my home and shared my Pinterest Board for home decorating ideas.

Post 2: Anything But Brown

This week I was trying to decide paint colours and used the following resources:

  • A blog about choosing paint colours that go with honey oak
  • I accessed the Benjamin Moore and Sherwin Williams websites and perused paint colours
  • I listened to a podcast on how to choose the right paint colours for your home
  • And I also figured out how to create a poll on my blog

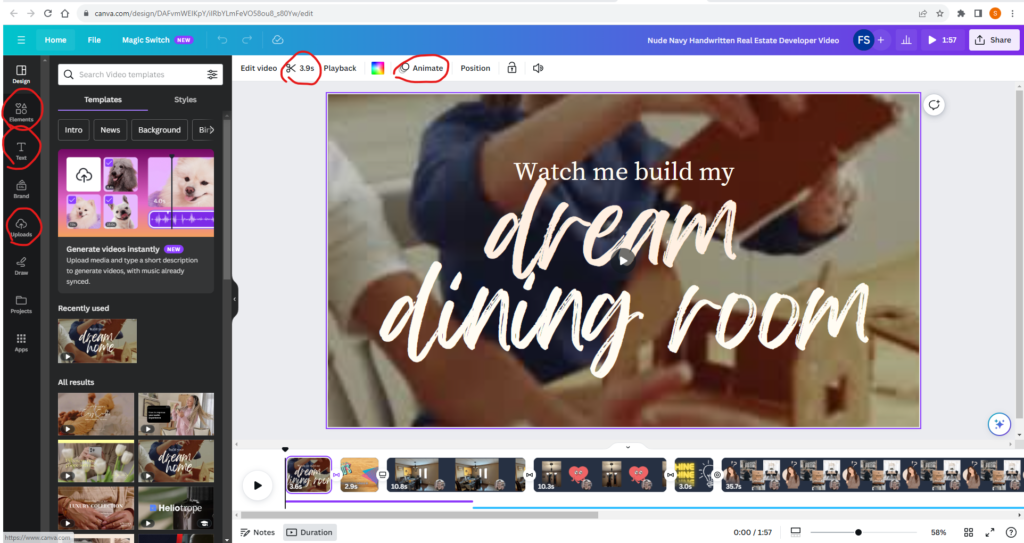
Post 3: Let There Be Light

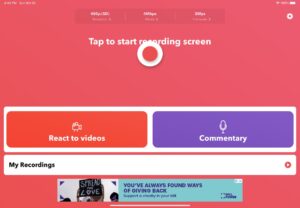
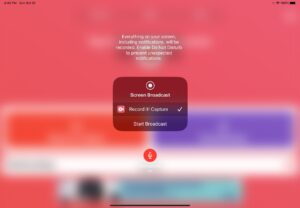
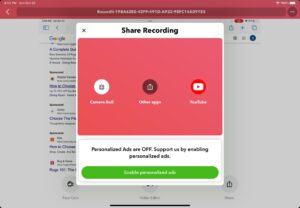
This week I set up a free educators account on Canva in order to create a video. I learned how to save my video from Canva and then upload it to Youtube in order to share on my blog. I needed to watch this video to figure out how to limit my embarrassment so that only people in this class could watch my video.

I then discussed how Canva could be used following the SAMR model.

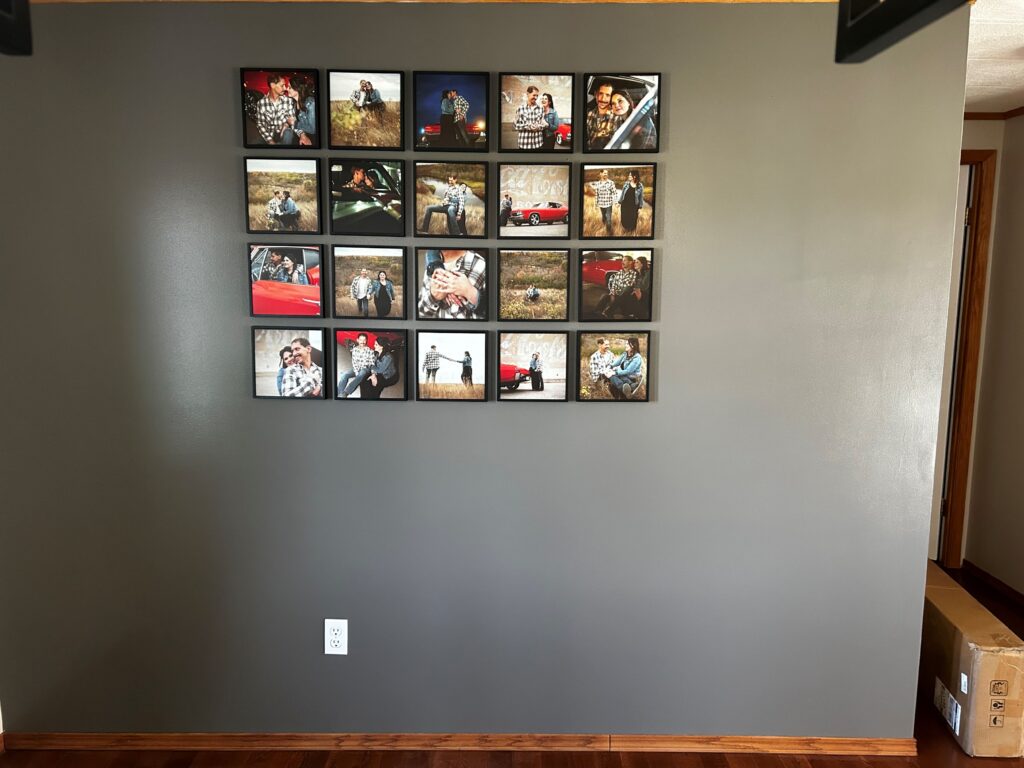
Post 4: I Did The Dang Thing, Now What?

This week I learned how to add giphs to my blog 🙂

I accessed the following resources:

Post 5: Ordering From Wayfair: Hit Or Miss?

This week I was figuring out all the details on area rugs.

Post 6: Reality TV Counts As Learning

This week I learned a lot from a TV platform called Tubi where I accessed one of my favourite home design shows called The Block.

I compared this series to some others that I found on Netflix, including Dream Home Makeover and Interior Design Masters.

Post 7: To Buffet, or Not to Buffet?

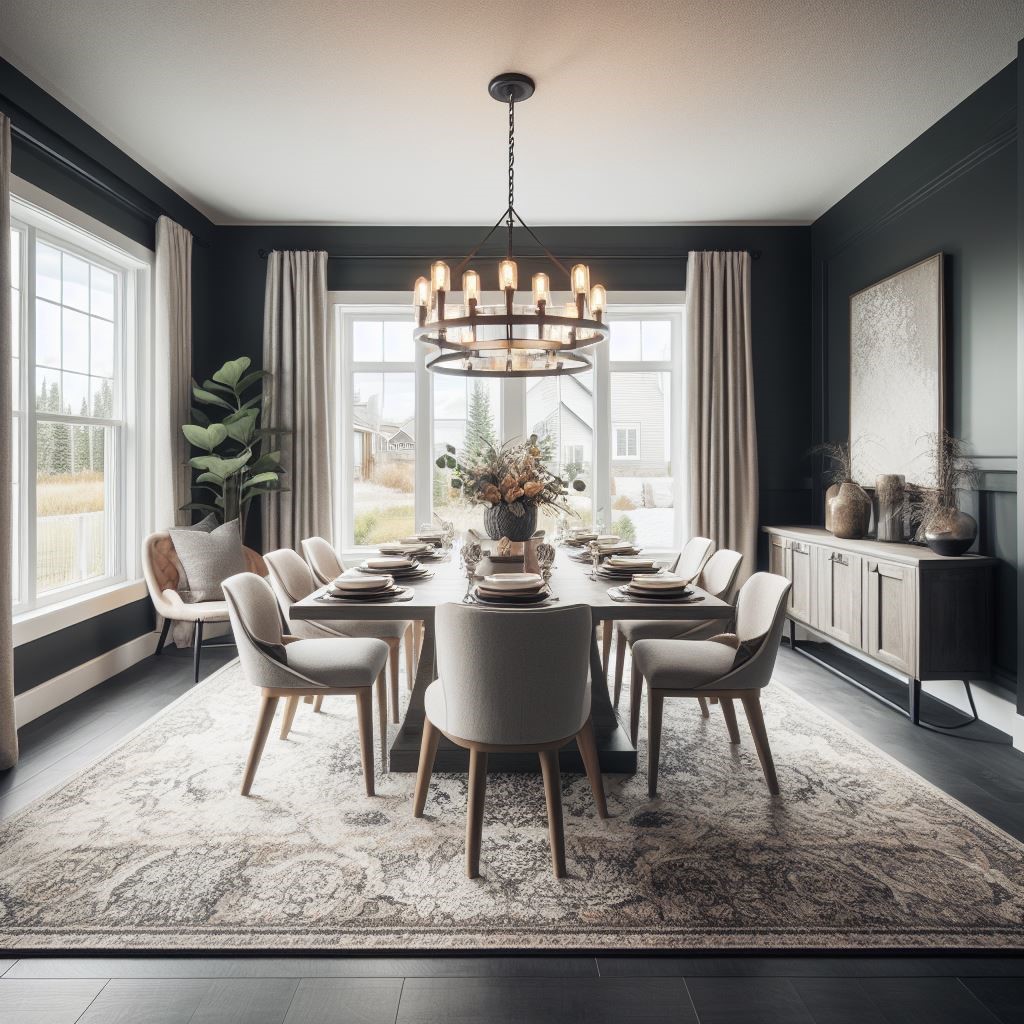
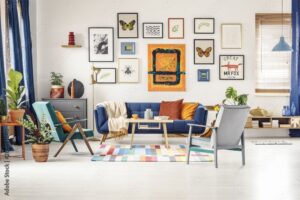
This week I epically failed at using SketchUp to create a design for my dining room. I resorted back to my failsafes of Pinterest and Wayfair to find inspiration. I also learned how to insert stock images into my blog this week.

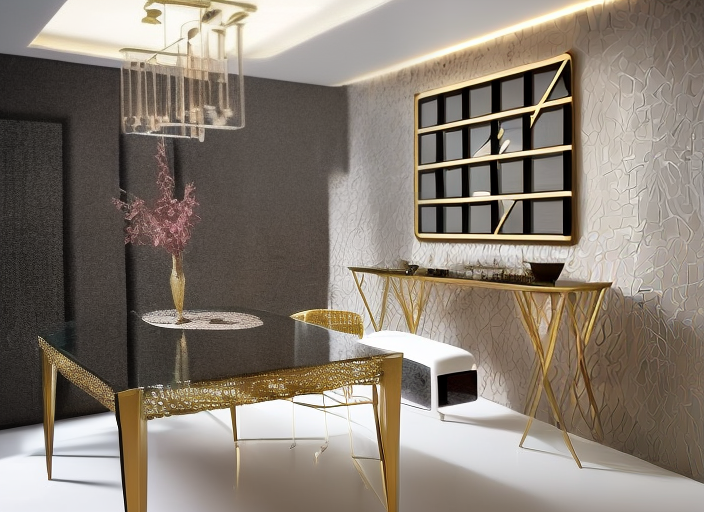
Post 8: Using AI to Design My Dining Room

Had some more funny failures this week using AI.

The first thing I did was use Google to search for “AI generator for interior design.” The first website I clicked on was Apartment Therapy, which recommended these programs:

None of these gave me the results I was looking for, and I now get lots of extra junk mail…

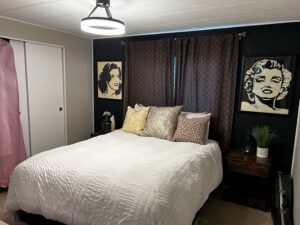
Post 9: Add Light, Then Take It Away

I played around a bit more with the formatting on my blog and figured out how to have a picture and text side by side. I had some fun with giphs in this post which I think added a lot of interest. I used some references from Pinterest and showed the purchases I made from Amazon.

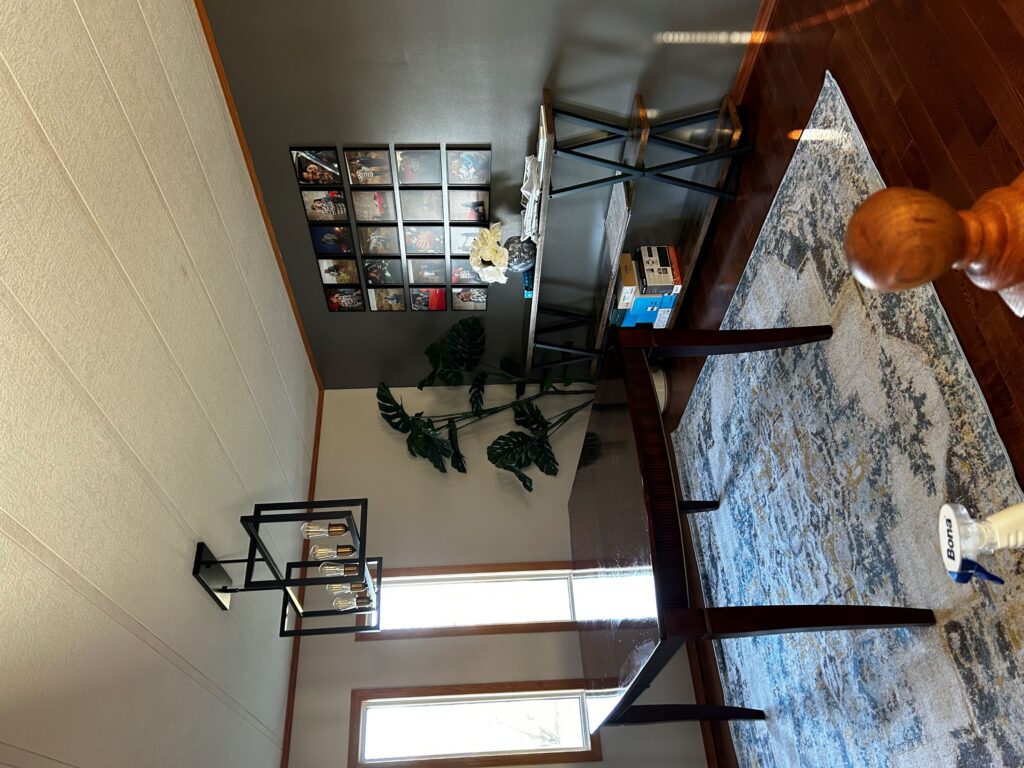
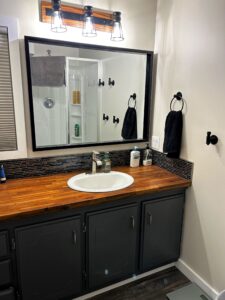
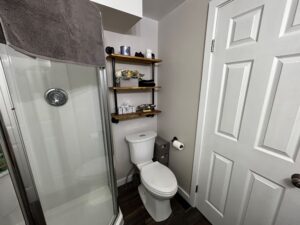
And this brings us to the end…

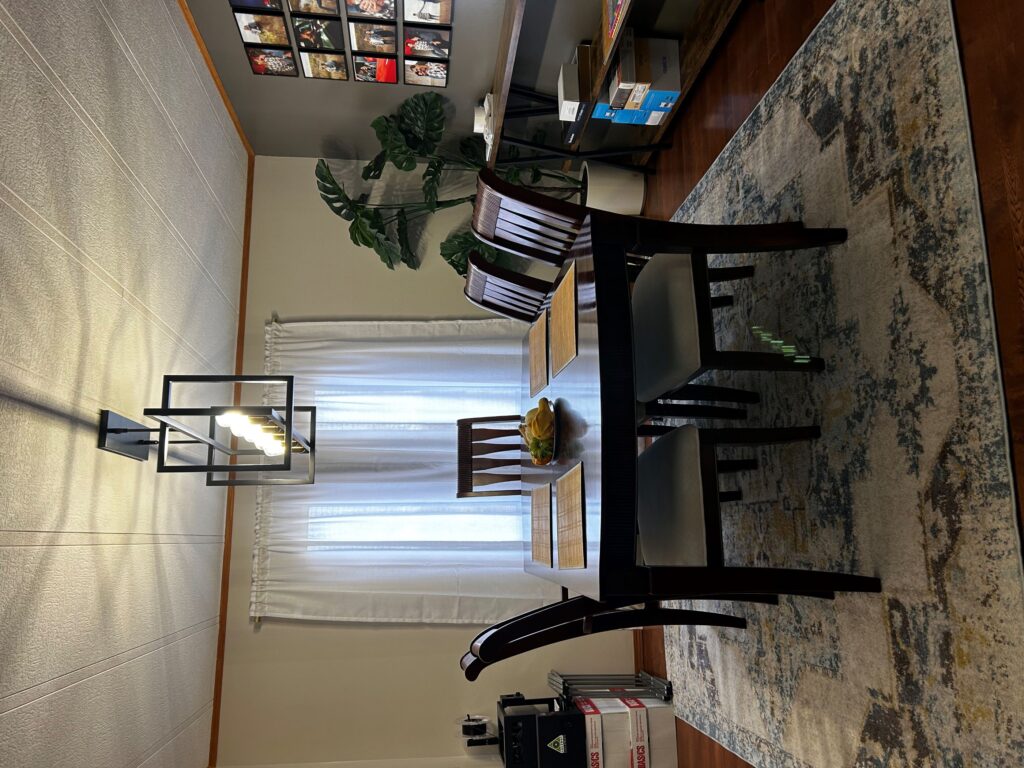
All I really have left to do with this space is tidy up and add Christmas decorations!

I learned about interior design through this project and gained more insight into how I like to learn digitally. For this particular project, I enjoyed more visual resources, like videos, compared to podcasts. Although, I realized that not all videos are created equally. I enjoyed blogging about my progress and finding ways within my blog to add interest and engagement, like using pictures, polls, gifs, videos, links, etc.

I wasn’t exactly sold with the idea of blogging as a way to show my learning, but after finishing this class I think this is actually something I would use with my students.

Thanks, EDTC 300; it’s been a slice!


Add Light, Then Take It Away

My dining room has two weird windows, and while they provide beautiful natural light, they aren’t all that aesthetically pleasing. While the dining room is coming together well, there are a few missing pieces, including curtains!


Truthfully, I grew up in an old farmhouse, and most of the curtains in my house looked like these. If you’ve seen The Sound Of Music, you’ll know that these looked much better as matching outfits on the kids than they ever did as curtains.


The other option in our house was blinds…and not cute ones. I knew I wanted to filter some of the sunlight in our home, but I was pretty nervous about making the room look dated.


I wanted to add as much height as possible because our dining room isn’t huge, and the ceilings aren’t very tall. I wanted to play around with colour and pattern, maybe… but the idea of having a Sound of Music moment where my curtains would be better off as costumes makes me cringe.

I started by looking on Pinterest, which continues to be a fantastic go-to for all things related to design in my home. This is a helpful resource I came across.

“Curtain Tips by dominomag.com.” Pinterest.com, 26 Nov, 2023.https://pin.it/4uRDdw9

Based on the above graphic, I knew I wanted a ‘lived-in’ style and for my ceilings to soar. While custom curtains would have been amazing, they aren’t in the budget. Has anyone done custom curtains/blinds? We did custom light filtering shades in our bathroom and office, and wowza–they are an investment! I wasn’t looking at having any investment pieces in our dining room because we’re hoping to have a family, and I know any curtains I choose will likely be covered in food at some point.

I took some measurements and knew that I should be shopping for 84″ curtains in a set with two panels. Our dining room is also across from our living room, which oddly does not have its own light source (a bizarre design choice in a lot of houses from the 80s). Therefore, I felt I needed to choose a sheer curtain to keep as much natural light in the house as possible. Also, after discussing the possibility of a patterned or coloured curtain with my husband I decided to go with a solid colour; the poor guy is still getting used to the colour on the rug…and the walls.

So, here’s what I bought from Amazon:

I think it’s fair that I chose the most neutral option. The only colour that I really played with is that the curtain rod is gold to play off the gold paint on the light fixture and the curtains themselves have a bit of a sheen to them–but, my husband is happy. I do that they add a lot of height to the room and help to balance the space better. I still need to steam them, but then I think aside from decorating my shelf this space is pretty much done!

If I had gone with a different sheer colour, which one would you have chosen?

Using AI to Design My Dining Room

After struggling a couple of weeks ago to use Sketchup and wanting to use technology to ‘see’ what my dining room could look like, I decided that this week I wanted to see what was out there for free AI programs.

The first thing I did was use Google to search for “AI generator for interior design.” The first website I clicked on was Apartment Therapy, which recommended these programs:

I tried out RoomsGPT first and created a free account. I chose a picture of my dining room, chose ‘modern’ for style, and this is how it turned out:

loading slideshow...

  • Photo used for RoomsGPT generator

  • A 'modern' style version of my dining room.


Not exactly a success. I tried to create other styles with the same photo, but I continually got an error code saying it could not generate anything. I’m unsure if this was a glitch in the website or something to do with my internet. Regardless, this wasn’t exactly what I had in mind–although it’s a neat thing to play with if it works.

Next up, I tried Microsoft Bing Image Creator. This was definitely a letdown. The program runs on ‘credits,’ so you can’t go crazy with what you try. It also relies on your description of a room to generate a photo, and I believe it failed miserably. I provided the program with the following description, “dining room with 8×8 carpet and a dark grey accent wall in a modern farmhouse style,” and here is what it created:

Again, I wouldn’t say that this image was a success. It is also hard to replicate specific features of my dining room. I’m sure I could hone this image some more if I had unlimited credits, but it was more work than I had anticipated.

This is where I stopped. Creating free accounts that then bombard my email with junk isn’t all that appealing. Out of the two programs that I tried, I would say RoomsGPT was more successful, but still not something I would try again.

Have you tried any of the other programs I mentioned? Or one that wasn’t listed here?


To Buffet, or Not to Buffet?

This week has been hard trying to get back into the creative swing of things. For anyone in the classroom, you know it’s a busy time of the year trying to get ready for report cards, and in general, it just seems like teachers are feeling more burnt out than usual–I’d definitely say this is true for myself.

So, while this post isn’t super creative in how I will show you my learning, hopefully, you can take something away from it.

Recently, I’ve been seeing a lot of ads for Sketchup on my social media, and it looked like an exciting design tool, so I thought I’d check it out. Holy cow, it is probably the most frustrating program I have ever tried to use. I would have made a video of me trying to use it, but after an hour, I had literally done nothing. Sketchup is a 3D design software program, and there is a version that is free for educators to use. I was using the online version, where this video seems to show that there is maybe a downloadable version. Regardless, after an hour, I was left with nothing even remotely close to this. Perhaps you will have better luck. If you can get this program to work for you, there are lots of tutorials on the website itself, linked here.

I was trying to use this program to see how big I wanted a buffet or shelf to be underneath my galley wall. Since it didn’t work, I just started looking at dining rooms on Pinterest and scrolling through Wayfair. I really love the look of a traditional buffet, but I was unsure if it would make our small dining room look too full.

an art deco designer sideboard made out of fine wood - generative ai

Absolutely love the look of this, but there is already so much wood in our house that I was afraid it would be too much.

Instead, I opted for an open shelf where we can display some of the trinkets and art that we’ve purchased on our travels. I bought it from Wayfair, and I really like it. I think the struggle now will be to tastefully decorate it and not let it fill up with junk.

I’m mostly pumped that it’s so close to the Christmas season, and I can soon start to fill this bad boy up with many, many new decorations.

Are there any other Christmas fanatics out there?

Reality TV Counts As Learning

This has been a tough week for me. A lot was happening, both professionally and personally, and unfortunately, it was not all good. Tackling a really cool new way to show my learning just wasn’t a priority. However, I could sit down in the evenings and watch some shows on interior design–my favourite. I think these types of shows are great ways to become inspired and to help identify your own style, often by learning what you don’t like.

My all-time favourite show is The Block; I watch the one based in Australia. I watched this in university, and then when I was in Bali–because it’s so close to Australia, I would see advertisements for it. When I got home, I made it my mission to find and start watching it again. I found it on Tubi; however, there were only two older seasons.

Here is the trailer for season 16, which I haven’t seen but would love to! What I like about this show is that most couples who compete aren’t professionals, and so you get to see them struggle through renovations and designing–much like I do. They are also always tasked with unique design challenges, which I love because I see more styles. The show is also cheesy and has some drama–can it get any better!?

In comparison, I have watched Dream Home Makeover on Netflix, and while it’s still entertaining, I find it a bit boring because it’s always the same style over and over. Plus, there are never any complete fails/flops because they are professionals. Check out the trailer below.

Another fun show that I love–and am now realizing I really love seeing everyday people tackle design is Interior Design Masters with Alan Carr, who is hilarious. Again, because this is an interior design competition, you get to see lots of different styles being tried out, some successful and others not so much. This one can also be found on Netflix.

While I didn’t make any progress on my actual dining room this week, I am feeling a little more refreshed and inspired to continue working on it.

Do you have a favourite interior design show?

Ordering From Wayfair: Hit Or Miss?

Next up in designing my dining room was choosing a rug for the space. As part of my learning this week, I made a video using screen recordings (my first time doing that) and then turned it into a video using iMovie (my first time using this program as well), followed by turning that into a YouTube video.

I’ll post the video I made and then discuss my experience with the tech as well as my thoughts on the rug I chose.

So, I wanted to show you this week how I went about choosing an area rug. Everything I checked out was on my iPad, so I downloaded the app called Record It. I found it very easy to use.

Once you download the app, you press the start button to begin recording.

A little pop-up appears and you choose the “Start Broadcast” and turn your mic on or off to begin the recording. It does a count down for you.


Once you are done your recording you can edit it in app, I chose not to. You can then share your project to your camera roll, other apps, or YouTube.

I downloaded the video to my camera roll and then moved it over to iMovie to begin editing. I found this to be a very easy program to use. I trimmed out the bits that weren’t needed and then added my voice to it–nothing fancy. It’s not a great video; certainly not something that I would watch myself if I were looking for a resource to find an area rug. However, I was successful in learning how to use a few new programs.

So, in case you didn’t watch the whole video. Here are the places I went to in order to research and buy my area rug:

I ordered a smaller area rug from Wayfair about 7 years ago, along with a cat stand and both have held up really well, so I figured I would try ordering from there again. Shipping was fast–although it needed to be sent to a physical address; thanks again to my mother-in-law for accepting all my packages at her office! The rug was delivered quickly and was wrapped well. I unrolled it and then placed it in my dining room. The corners and one end didn’t really want to lay flat so I bought some ‘carpet tape‘ from Amazon to help it stick down. The product was easy to use, and the corners are now lying flat.

Here’s a visual of the rug before I put the tape down.

I love how this rug works in the space. My husband initially thought it was a little ‘busy’ but once the chairs were tucked in they took away from the design a bit and he felt better about it–or just wasn’t brave enough to say otherwise.

What do you think? Have you ever ordered from Wayfair before? What was your experience?

I Did The Dang Thing, Now What?

Alright, for those of you who played along…please know that while I appreciate your input, I dismissed it and went with the one other person who also voted for a grey wall. Indeed, it was unfair of me to even ask because, if you remember, my husband only likes brown–and red, so blue and green didn’t stand a chance.

Once I had the wall painted, I absolutely had to put something on it. And thus began my journey of creating a gallery wall.

Simple posters gallery hanging on the wall in bright living room

First, I watched the video below and really disliked it because the gallery wall he was showing was nowhere near my aesthetic, and I couldn’t get past the visual to listen to the message.

I ditched the videos and checked out what Crate&Barrel had to tell me about creating a gallery wall. I found this website to be a lot more helpful because the artwork in the pictures matched closer to my style, and it used clear layout ideas that I could refer back to quickly and easily.

Videos are excellent if you are trying to see how to hang the pictures themselves, but as far as learning about the design style, I much preferred reading about what I might do.

I also checked out Donna Lott’s Photo Gallery Wall Pinterest board. I have no idea who Donna is, but thanks for putting in the hard work of culminating a plethora of ideas! I really enjoy Pinterest as a way to see and save ideas that have piqued my interest quickly. I can tuck them away and delve deeper if I want–I think this is similar to the Save to Pocket Chrome extension, and I attempted to use this extension this week; however, I use my work computer and can’t seem to get it to work. I’m wondering if my school division maybe blocks it.

Anyway, here is the grand reveal! In the picture, there looks to be a green undertone, but this is not the case. I used paint from Sherwin Williams and got my pictures from Mixtiles. Mixtiles was fantastic because it had many examples of gallery wall layouts, and I just peeled off a sticker on the back and slapped them on my wall! I chose this option in the Bold style. Once I get my wedding and honeymoon pictures organized, I’ll pop some of these off the wall and add new ones, easy peasy!

I used Mixtiles because it was easy, but what have you used for displaying pictures?

Let There Be Light

Alright, so this week, we were tasked with using a new piece of technology to document our learning journey. I’m not going to lie; this was a struggle. I felt like I was just getting the hang of blogging itself, and then there was a new challenge!

I used a couple of different things to create my video, mainly Canva. If you weren’t aware, Educators can get a free account on Canva with some awesome premium features.

Alright, back to my dining room. This week, I decided to tackle the light fixture since I was going to be in the city and could do some shopping!

Check out my video below to see the process! 

So, how was I able to create such a masterful video, you ask?

  1. I signed up for an Educator account on Canva and logged in.
  2. Under the title, “What Will You Design Today?” I chose Videos
  3. I chose a template that looked interesting
  4. I edited the text on the first slide
    1. I appreciated that this had slides because it was sort of familiar to a PowerPoint.
  5. I played around with the “Elements” tab. In here you can add:
    1. Shapes, graphics, photos, frames, videos, and music. As you can see, I pretty much used everything.
  6. Using the “Uploads” tab you can:
    1. Insert your own pictures, and add recordings of yourself.
  7. I also fiddled around with the timing of my slides, the transitions, and animating graphics I used.

Once I had created my video, I clicked the “Share” button in the top right corner. I chose “download” and saved it as an MP4.

Then, I went onto my YouTube page and created a new video by uploading my MP4 file. Here’s a link to a video showing you how to create an unlisted video if you’re unsure!

My students love using Canva, but this was my first attempt. Overall, I found it relatively easy to use, although I’ve seen the videos my students have created, and I know that I’m missing a lot of the features that they have. If you or your students want to create videos, I would definitely recommend trying this program!

Most importantly, how can Canva be used with the SAMR model?

  • Substitution- this program can be used to create digital formats of posters, worksheets, or even your entire lesson.
  • Augmentation-you can add multimedia elements to your creations such as images, videos, interactive links, transitions, etc.
  • Modification- students can create their own interactive projects on Canva, even collaborating on these projects with peers (use the free education profile and you can assign students). I might use this for interactive timelines, digital storytelling, creating and filming plays, etc.
  • Redefinition-Canva allows you to format projects for all sorts of purposes. You can create posts or videos for Instagram, TikTok, Facebook, YouTube, Pinterest, etc. This allows students to design projects for a variety of purposes that are easily shared both in class, as well as worldwide. The video I made could even be converted by Canva (using its new Magic ‘AI” feature) into a blog post!

Are there any other cool programs out there that we have free access to as educators?

Anything but Brown

Alright, the walls are washed, and now I really need to decide what colour I want on the walls. Here’s the catch…did you notice all that awful yellow oak (apologies to those who love it)? All the baseboards, window trim, and even the ceiling moulding in the dining room are yellow oak.

Flashback–the 80’s want their yellow oak back. Please keep it there.

So, let the research commence.

The first blog I read recommended beige and guys, I just can’t. At least not any true brown-beige. The blog continues to show some colours they would recommend that, while beige, look more grey, which I can get on board with. They also recommend a blue paint, or something with a purple or green undertone. I think my favourite recommendation from the blog was the colour “Salamander” by Benjamin Moore, which is a dark, almost black-green colour. This leads me to think that maybe I want a statement wall? This blog was a great first step in seeing what I liked paired with yellow oak. There were parts that I skipped over when reading, like the discussion on whether yellow oak will come back into style (barf), and other parts that were really interesting, like the colour theory of why certain colours will go better with the oak than others. When I’m seeking the answer to a question like, “What paint colours will go with yellow oak,” I don’t want to read about someone’s whole life story and why green is their favourite colour–which is why I struggle with reading blogs at times. If I were reading a blog solely for enjoyment, I think I would feel differently.

I also tried listening to a podcast called “How to Decorate,” episode 32: How To Choose The Right Paint with Sandie Mazzi. I wasn’t really sure how I would like listening to a podcast about paint colours when I couldn’t actually see what they were talking about, but it was actually great! They talked about things like establishing the mood, how I want to feel in the space and considering the items I already have and need to keep.

Sandi Mazzi, thankfully, also told me what I wanted to hear–go bold in the dining room! I’d really like to do an accent wall, so I was happy to hear this was the space to do it in. Sandie Mazzi also hit the nail on the head when she discussed how having a vision in your head and then actually being able to find that colour and have it look that way on your wall is an epic battle.

I was pleasantly surprised at how much I enjoyed listening to this podcast. I don’t know that I necessarily learned anything new from it, but I was given some assurances on the direction I wanted to take in my dining room.

This week, I also played around on the Sherwin Williams website:

!!Opinion Time!!

Loading poll ...
Coming Soon
Accent Wall: What Colour Should I Paint It?


Also, if you’re wondering how I casually slipped this poll into my blog, here are the steps!

  1. First, I watched “How to Add a Poll in WordPress
  2. I learned that I needed to check out the Plugins tab. Click it.
  3. Scroll down, and you will see an option for “Poll” and “activate.” Do this.
  4. TS Poll should show up on your side tab. Click Add New.
  5. From there, you can pick your theme, and change the question and answers.
  6. To get your poll into your blog, click the tab that says “Shortcode” on TS Poll. Copy the link for WordPress.
  7. Paste the link into your blog. This will just look like weird code, but don’t worry, the poll will show up like normal!

Hope this helps!


He Can’t Say No, Right!?

I have always loved interior design and dreamed of having a home I could make my own. My husband practically lives in his shop building cars in his free time, which means the house he bought before my time is basically a bachelor pad…free for my taking! Unfortunately, for a man who has been satisfied to have everything in our house be a shade of brown, he has some strong opinions about the changes I want to make.

Lucky for me, one of our toilets started leaking last winter, and we had to gut our bathroom and start over. This marked the beginning of my take-over. Cue villanous laugh!

loading slideshow...

  • I used an acacia wood butcher block and cut out a spot for the sink (with the help of my husband).

  • Then I chose a stain and later did a clear coat to protect it.

  • The finished counter--I swear it looks better in natural light!

After the bathroom, I tackled the spare bedroom where we, no joke, almost had a fistfight over whether or not I could paint the ’70s wood panelling. I won this battle with the caveat that I never, ever touch the fireplace brick (little does he know; I had my fingers crossed). I also started on our laundry area, but alas, life took over, and the job is half finished.

loading slideshow...

  • Welcome to the 70's

  • So much wallpaper

  • So much better!

  • Disaster area

This brings us to now. Our dining room seems to make the most sense to tackle next (and maybe even finish the laundry area–but this is less exciting). However, I feel like a teenage girl who keeps trying out new outfits to see what I like and where I fit in. While the other rooms I have worked on were more private, the dining room is the beginning of the more public spaces in our home–so I desperately need to figure out my style. You need only look at my Pinterest board to see that I’m obviously in the middle of an identity crisis.

Here’s what my dining room looks like now:

loading slideshow...

  • Brown, on brown

  • on brown, on brown


So, my plan. I’ve washed the walls and brought up some of my painting supplies from the basement. Now I just need to figure out colours. Some goals for this room are to paint, get new lighting, curtains, rug, artwork, and something for the large wall…maybe a buffet or shelf?

Wish me luck, and let’s hope my husband doesn’t say no!