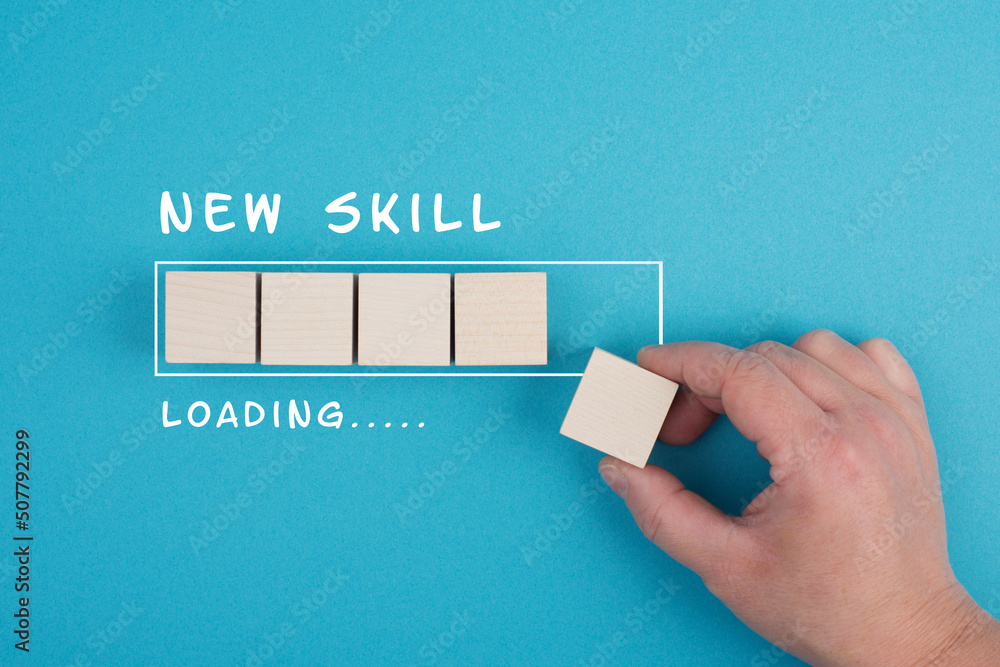
Setting Goals: I’ve been feeling overwhelmed about getting started. So I’ve decided to set specific learning goals:
Collage separate digital images into one image
Draw and save a digital drawing that is high enough resolution to be used for projection.
Learn how to use basic ‘tweening’ to animate from a few drawings (if I get time).
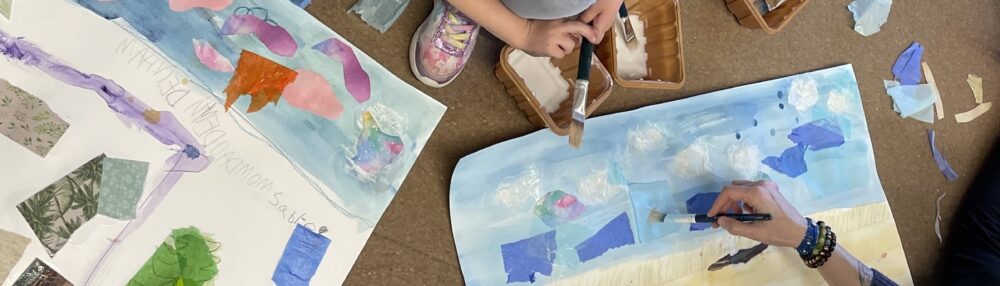
Digital ‘Collage’ I’m working on a project with kids from Riffel HighSchool’s integrated theatre program, That’s Possible.
They have drawn separate images and I want to merge them into one image that will be used as the backdrop projection for the production.
A quick google suggests that if I want to resize my scanned images to collage together without getting pixelation or quality distortion – I need to convert my images to Vectors.
What is a Vector??? This quick video shed light on the different image files.
What I learned: JPG, PNG, GIF = Raster Files (pixelate when you resize them).
PDF, EPS, AI = Vector Files (maintain their sharpness when enlarged)
This leads me to ask : Can I just use PDF files to create my digital collage? After quite a bit of googling, I’m not fully confident in the answer I’ve come to…but I think I should stick with a TIFF if I can.
<<< One issue I’m having is that I don’t have the tech language and terminology to research what it is I want to do. I’m spending a lot of time trying to find an application that can teach me what I need…..in part because I’m so graphic design illiterate.>>>>
The search for a cost free application continues… Because Adobe suites are $$, I spent time looking for a free alternative. Adobe Express came up as a free option, but I spent nearly an hour looking at videos trying to figure out if I could create the 16×9 1080 resolution format I need for this projection project….. I never found the answer I was looking for.
I’ve decided to call in some NON-digital tech support so I can get things moving! My partner has GIMP on our laptop and I usually defer to him if I need small graphic created for social media or projection. The inter-web is just getting me tangled up, so I’ve decided to use GIMP for this project. This way, I’ve got some real human assistance as I get myself oriented.
What have I learned? When you are really just getting started with learning a new skill, it can be just as hard to find the online training and information you need as it is to learn the skill.
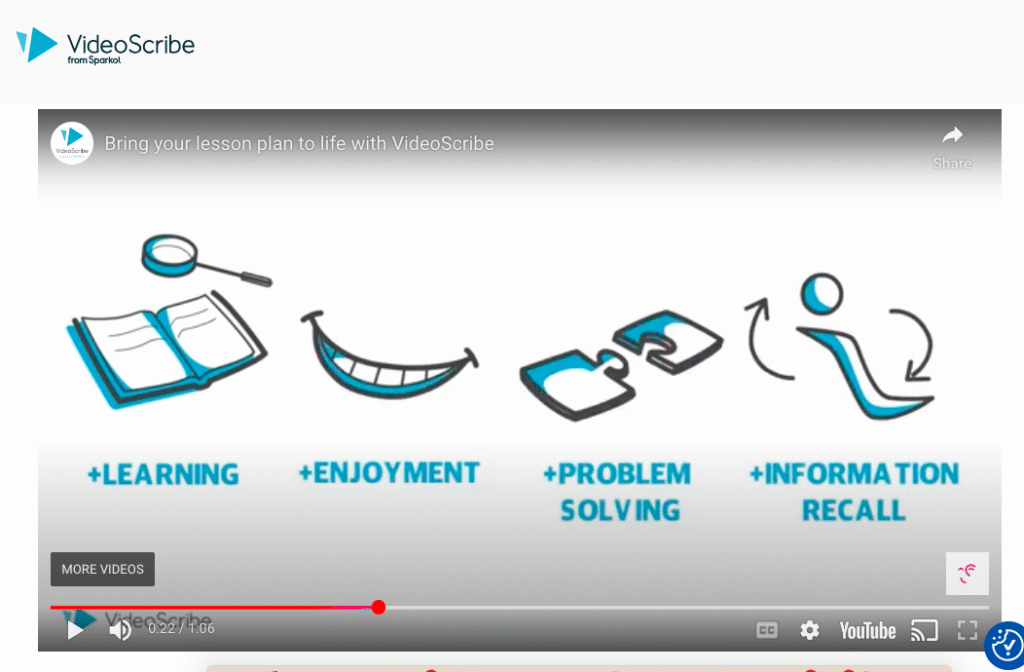
I’m interested in how technology can build engagement and support creative learning within the classroom. So this week, I tried my hand at VideoScribe, an animation app that creates whiteboard style animations.
The website says it’s quick, user-friendly, and for all skill levels; specifically promoting it as a tool to support student engagement within the classroom. Could this app be fun visual learning tool that both my middle years students AND this Gen X educator be able to use???
But first, I wanted to know whether I would be inclined to pay for this app if I really liked it. So before giving it a trial, I looked up the subscription fee.
$16.25/month for the basic plan.
It’s more than I’m inclined to pay for an app but my curiosity lured me in.
I gave VideoScribe a shot using their 7-Day free trial. To get the 7 day free trial you DO NOT need to put in a credit card or a lot of personal information. All you need is an email address and a password.
However, with the free trial all videos are watermarked (until you pay for a subscription).
HOT TIP:There are also ‘premium’ images within the application (identified by a little crown). If you use these, you won’t be able to download your animation. You CAN get a link to your animation, however – it is only good as long as the 7-Day free trial. After that ..bye bye.
As soon as you set up an account you are given the option to EXPLORE TEMPLATES or CREATE A BLANK PROJECT. For this review I chose to create from scratch.
Because apps aren’t generally intuitive for me (or maybe my brain just likes instructions), I liked that when I chose to Create A New Project, it immediately gave me the option of ‘getting tips as you go’ OR ‘watching a video to start’.
This video walks you through features – so you have a sense of what is available and where to find things. However, it doesn’t go into a lot of detail, nor does it demonstrate visually what some of the features actually look like – which isn’t very useful. I had to learn what features looked like through trial and error.
TIP: I recommend watching the VideoScribe Intro video in its entirety BEFORE starting a project. You can also access all the VideoScribe tutorial videos here.
I’d recommend watching an audio tutorial and an animations tutorial before starting as well. (I DID NOT – and probably took longer than necessary fussing to figure these things out)
I also used this tutorial from YouTube to supplement my learning. It helped give me an overview of features with a bit more detail that the VideoScribe Intro Tutorial.
From this tutorial I learned that there is a cloud-based version and desktop version of VideoScribe, and there are benefits and drawbacks to each.
The desktop version offers a royalty free music library.
The cloud-based version can sometimes be glitchy (YES – I did experience this too! Overall, I really liked this tutorial. It went into lots of detail and walked you through creating a project from scratch at a very accessible pace.
CREATING AN ANIMATION:
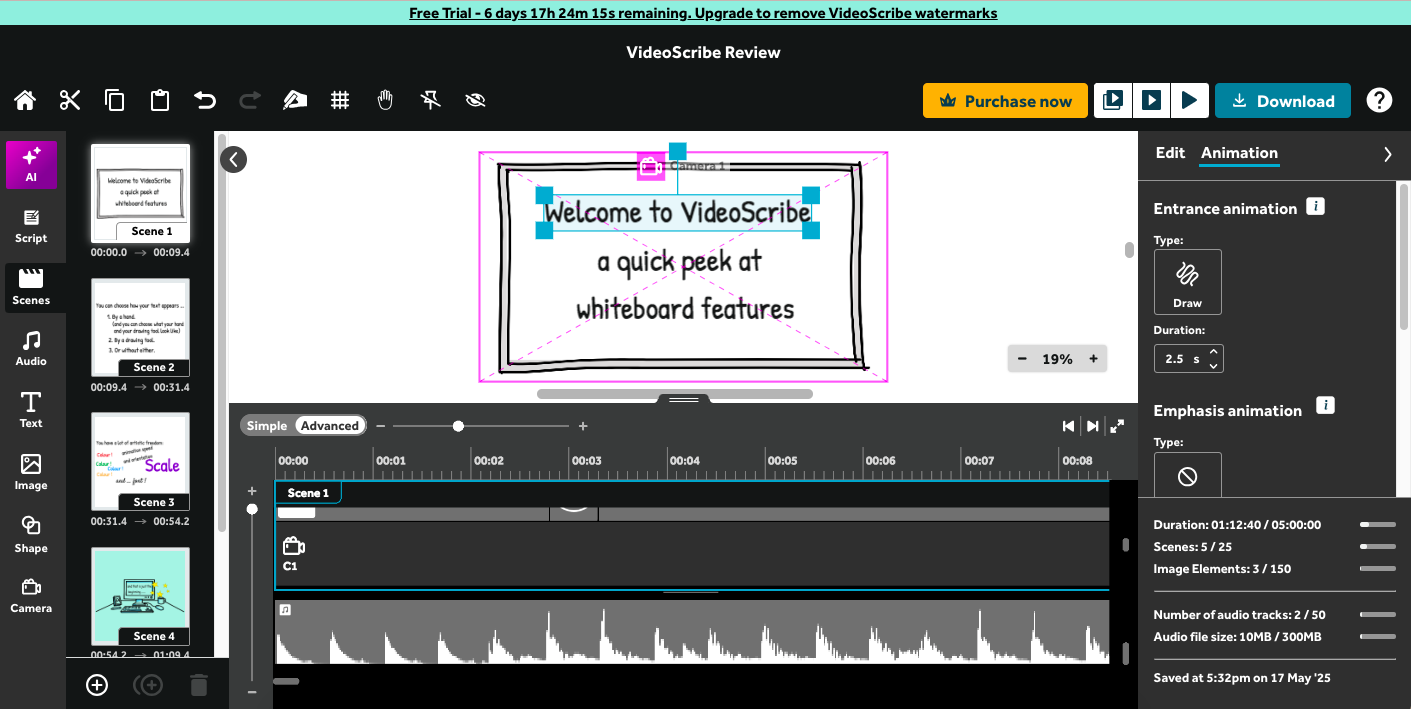
Here are a few key features to be aware of when you start.
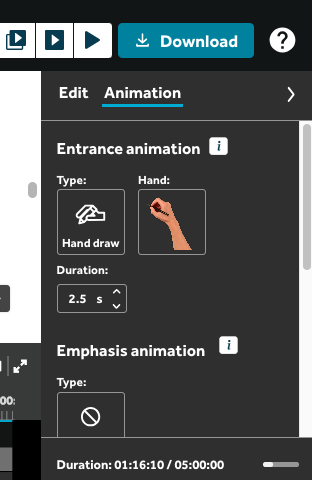
1. The left toolbar offers options for images, text, objects, and audio features.
2. When an image/ text/ object is selected, the right toolbar offers you two modes to work in: Edit and Animation. Edit allows you to adjust the feature (colour, font, flip, crop, opacity, etc). Animation allows you to adjust how the feature is animated (ex: drawn by hand, slide on from the side, bounce), along with speed of the animation and length of pause caps the animation.
3. At the bottom of the screen, you have your Timeline.TIP: there is a – + bar on both the left side and top of the timeline. These allow you to scale your view of both the stacked frame layers AND the project. I found this really fussy. Started out ok – but the more content I got in the project the trickier it got.
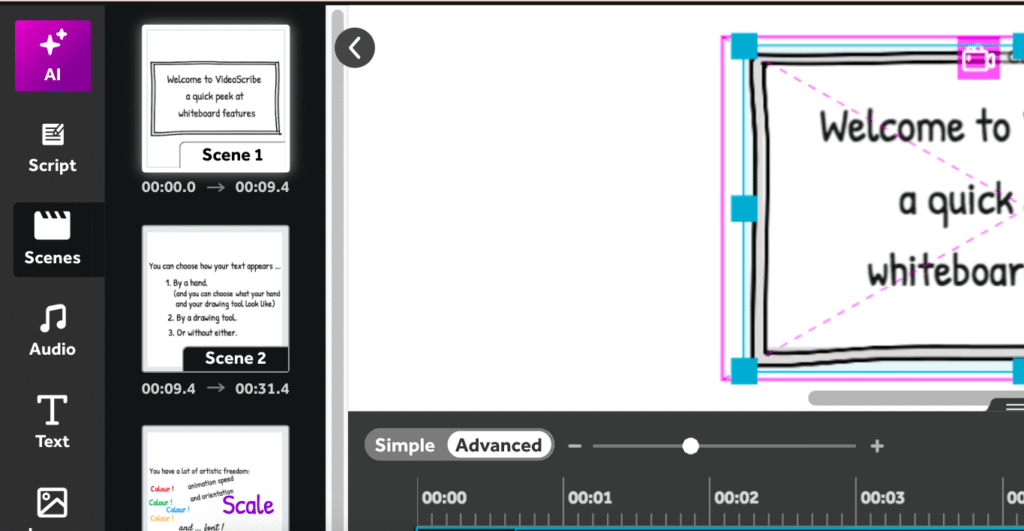
4. Scenes: the left toolbar has a scenes icon. Once you click this – you’ll have the option to + more scenes.
TIP: When a scene is selected, you’ll find the option in the right toolbar to add a transition between it and the PREVIOUS scene. This includes eraser, bounce, slide, fade, etc.
QUICK, EASY, BEGINNER-FRIENDLY?
I found that using the text and simple images was pretty straightforward and I enjoyed the process. But once I wanted to add more images and transitions…it started to get finicky. But remember …. I’m really a beginner in using a tool like this.
The audio feature was cool, in that there was music you can add as background AND you can do a voice recording directly over your video as well.
TIP:don’t try to do any kind of voice over until the very end. If you end up editing your work after adding your voice over, you’ll likely end up with the voice audio out of synch and will have to adjust it to line up with your video again.
Here is the video I made to learn the processes ! It actually took me a couple hours…but I was learning along the way as I went.
Will I use this again? Ya, I think I will. I like the possibility and I’ve always liked white board animations. It would take a solid investment of time to watch the tutorials and get familiar with the app before I could build videos with ease.
Is this useful for the classroom? If I had a lesson I was really keen to use with classes over the years, then YES – I think it could offer an engaging way to share lessons. But for a one-off lesson, this is far too time consuming.
Would I offer it to students? I’m interested in giving it to my own kids (10 & 12) to try out. I’m aware that kids can be pretty savvy (and less precious) in using a tool like this. They may have more ease with it than I did.
Could this tool take learning to the next level? Yes, I think it has a lot of potential. Using the SAMR model, lets look at how this app might enhance opportunities for learning and teaching:
Substitution – VideoScribe offers teachers a way to pre-build a lesson they might have planned to share on a classroom whiteboard. So in the simplest application of this tool – it could be seen as a way teachers might carefully craft their lesson in advance and then share it as a video. But even this conversion actually acts to impact the students’ learning experience….
For example: by playing a video of a lesson being written out on a whiteboard rather than writing it in real time, two things change. Speed of the writing is impacted, so students might stay engaged longer. But more importantly, the teacher themselves is removed from the equation (visually)! And this is a big one. In a 2004 study, primary school students with dyslexia stated that it was helpful to their learning experience when they were able to see the board and the teacher wasn’t obstructing it!
Augmentation – The ability to adjust font, colour of both the font or background, speed of which text appears, images, and audio tracks means that this tool enhances both the student and teacher experience. Teachers can prebuild a lesson and present it at a quicker pace, enhancing it with music, voice over, images and charts. Colour and font choice provides students with more readable text, can be used to visually identify ideas, and can be again used in support to support reading fluency by using coloured background.
Modification – VideoScribe, being an animation program, allows for something similar to a powerpoint presentation but where the features are animated. Images and text can be animated and coordinated to provide a next-level storytelling experience (not matter the subject). It changes the way information is shared and potentially more efficiently.
Redefinition – Putting the tool into the hands of students, there is the potential to change the way students share their learning. By offering an image bank, audio voice over and a music, a variety of text options, and capacity for animation through scene-to-scene storytelling, VideoScribe offers students the ability to create multimodal texts. Overall, it can offer a more comprehensive, inclusive demonstration of student learning.
Final thoughts: While I’m not keen on the price tag, this app did get me excited to build whiteboard animations. My next step will be to try out the templates and look into whether I can pay monthly for shorter term project use.
I generally spend 6-8 hours each day working on my laptop. Most of this time is spent shifting between my professional work as a project coordinator and attending to my BEAD course work.
My habits for both are pretty similar. I predominantly use a Google Workspace for organizing and managing my projects and coursework and sharing content with collaborators. As someone who has spent most of my life living with ‘organized piles’ as a system, I’ve now become reliant on keeping carefully crafted folders and files for all my work in a google space. Scheduling is a necessity in my life! I’m generally working on 3 or more projects (usually with multiple community partners or collaborators). I’m now adding my BEAD course schedule and assignment deadlines to that. Add in two kids with nightly extracurriculars and daily school events, and a partner who also takes on contract work in the evenings/weekends…and it’s a lot to keep track of. My google calendar is a carefully crafted and colour-coded blueprint that holds all the details that my brain cannot. I appreciate that when I read an email about a new event from a teacher or book a meeting, that I can quickly just add it to my google calendar without hunting down a hard copy day planner. HOWEVER – I recently went back to carrying a day planner as well. Why? Because I like being able to see the whole month at a glance with all the event details visible at the same time. Google calendar is good for a week preview, but mostly I need to see what’s coming down the pipeline.
In school work and professional life I constantly am navigating between google docs, internet searches, and shared content sites like UR courses. I always have far too many tabs open and I never spend long in one place before I’m searching up a work or reviewing something I’ve forgotten. I look up almost everything I think of and am constantly bouncing between resources whether I’m writing a paper or working on a new art program or project.
For ongoing communication on work projects, I generally rely on email or text. I use Edsby on my phone for all communication with my kids school and teachers, and WhatsApp for recreational class threads.
I’ve come to rely on apps that provide me with ‘focus’ music or ‘flow’ audio to keep me from being distracted by the outside world when I plug in to work. But I also use these same apps for short meditations or brain breaks throughout my day and in the evening. Another app that I REALLY rely on is Google Maps. I have no sense of direction. Before cell phones, I used to regularly o stop at payphone booths to use the telephone book map. Finally I started carrying around a city map in my car … so Google Maps changed my life!
I don’t spend a lot of time on many other apps, and when I do it’s on my phone. I hit the CBC news app a couple times a day, for short 10-20 minutes updates. I sometimes listen to the radio via CBC Music app.
The only social media I get sucked into is Instagram.
I generally go to Instagram looking for local updates from friends, artists, or about events … but, often find I’ve lost half an hour getting sucked into mindless reels. This is the one place where I consciously watch my engagement and actively chose not to open it up during ‘work hours’. Sometimes I can get sucked into Pinterest in a similar way – which I occasionally open when doing creative research.
Other than that – I intentionally avoid TikTok. (I’ve opened it a couple times and within minutes have shut it off and deleted it. I just found it obnoxious and overstimulating off the bat – so I never gave it a chance). I’ll go to Youtube for specific research related things, but I’ve seen how addictive it can be with kids. I don’t let my kids have free access to it…and I’m aware that I need to model healthy online behaviour if I want them to respect my opinion on this topic. Productivity and intentional, responsible engagement in the world is something I want my kids to be learning as they grow up. My limited experience suggests that social media often leads kids (and adults) in the opposite direction.
My children learning to smudge and scrape buffalo hide with my friend, and Indigenous Knowledge Keeper, Joely BigEagle-Kequahtooway (2019)
I want to be comfortable with a program that will allow me to digitally manipulate images, draw, and possibly animate.
I’m pretty illiterate when it comes to using digital design programs. So to begin this learning process I need to begin with some really foundational research.
I started by asking:
What beginner-friendly programs exist.
What do they offer?
Will it align with the technology I currently have access to?
What is the cost involved?
Because I’m kinda keen to learn some basic animation, I began my research with beginner-friendly Animation Apps.
After some googling and skimming a few YouTube videos, this video on Brad Colbow’s youtube channel helped direct me.
It offered a really clear breakdown of what FREE apps work best to replace Adobe Animate, based on these criteria: ability to draw directly in the program, ability to import sound to do voice overs and sound effects, symbol library, and a timeline that allows tweening. I liked these criteria and like now straightforward this video review was.
However, what I took away from this video was that Adobe Animate is a tried and true application that does all of these things AND is a familiar program that is often used by organizations and businesses. As part of the Adobe family – this felt like a safe bet….If I’m going to learn a program, it makes sense to choose one that I might come across within future workplace & education sites.
Next task….
I need to learn a bit about Adobe (because while I’ve heard of it and my pdfs open up in Adobe Acrobat Reader….thats about ALL I know!
Searching Adobe, I quickly realized that I have in fact used photoshop before. Back in 2004, I was given a few key tips on how to scan a transparency/ photo slide (old school – pre digital photography styles). From what I remember, I was scanning, cropping, and adjusting the resolution. This was around the time that arts councils and granting bodies were beginning to accept digital images instead of submitting ACTUAL sheets of transparencies with an application.
Anyways – the point is, my exposure to Adobe suites is pretty archaic and was limited to digital image sizing. So, I went back to Brad to get his breakdown on the difference between Illustrator and Photoshop to help me understand which of these might offer the program capacity that I’m searching for.
I really like Brad’s videos because he clearly breaks things down right from the start of the video. You don’t need to listen to him talk for 5 minutes to find out where things are going. The videos are fast paced, animated (and engaging), and quickly identify what he’ll be reviewing and how. Also, he mentioned in an earlier video that he Does Not have an education in design and animation. Being self taught, he brings an awareness of the questions and frustrations he had as a learner and incorporates that experience into his approach to teaching.
My next step is take what I’ve learned, get myself set up with the software I’m going to start out with…and start learning!
Returning to postsecondary education after 20 years, I am highly aware of how the education landscape has been changed by technology and digital applications. To put it in perspective, it wasn’t until I’d completed graduate school that I first used Google.
As I settled into being a student again, I definitely feel the impact of being hardwired in an analog world. I feel I’m moving at a slower pace as I learn to communicate through technology that is less familiar to me.
However, I am also experiencing how the assistance of technology is supporting my ability to learn in areas that I once found challenging. Being able to take notes by typing on a laptop, quickly formatting content to make it more readable and digestible for my brain, and using text to speech applications has made my experience as a learner with ADHD far less challenging. Having access to slides, notes, and resource links for courses through UR Courses has been a game changer!
Seeing this impact on my own learning has me eager to gain fluency in educational technologies so that I can best support students in my future classroom.
This blog is my first experience in creating a personal site through which to connect with an online community. I’ve been reluctant to build a website due to a lack of knowledge. The task, and learning curve has simply felt too huge to begin. AND – I’m not someone who is comfortable with putting myself into a public sphere in this way. I generally like to be ‘behind the scenes’ and both a blog and a personal website feel like a public showcase that I’m not completely comfortable with. That said – this is exactly why I’m taking EDTC 300, diving into critically thinking about the applications, benefits, and opportunities of learning and community within a digital community.
Facilitation of Le Temps d’une Soupe, relational art project by Montreal’s ATSA (2019)
In art and learning, two things guide my practice: cross-disciplinary and collaborative approaches. I was first inspired by E.O. Wilson’s book, Consilience: The Unity of Knowledge when I was an undergraduate studying biology (I ended up switching to visual arts where I could pursue interdisciplinary meaning making).
I have a BFA (University of Regina, 2001) and MFA (Concordia University, 2005) in Studio Arts. I studied and participated in an archeological dig in Jordon in 2001. And my arts practice and career in arts management has traversed the territories of installation – theatre – dance – and socially engaged art.
Using art as a tool for social change is embedded in my work in building youth programs that support access and inclusion.
I believe the arts play an important role in the practices of teaching and learning. I had the opportunity to see this embedded in the pedagogy of the Reggio Emilia Approach during a recent study tour in Italy with the Vancouver Reggio Association.
I’ve just begun my two year journey to completing a Bachelor of Education After Degree at the University of Regina. After years of working with schools and communities to share creative practices that support curriculum and foster social engagement, I’m excited to be learning the foundations and practices of the teaching profession. Thanks for joining me on this journey!
Bulyea Elementary School, Sk Arts Artist in School Project (2024)


 As someone who has spent most of my life living with ‘organized piles’ as a system, I’ve now become reliant on keeping carefully crafted folders and files for all my work in a google space.
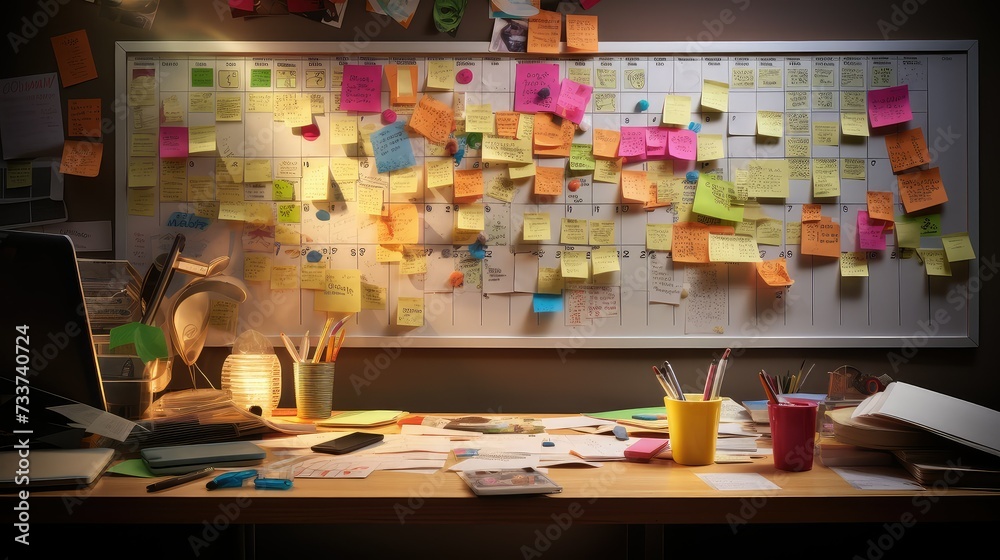
 Another app that I REALLY rely on is Google Maps. I have no sense of direction. Before cell phones, I used to regularly o stop at payphone booths to use the telephone book map. Finally I started carrying around a city map in my car … so Google Maps changed my life!
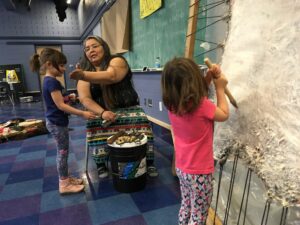

