Canva Conclusions

This week I was visually introduced to the powers of Canva by a classmate. Although this tool had stood out to me in our lecture, I forgot to take the time to explore it further afterwards. My classmate’s use for their learning project was a powerful reminder to check it out. Immediately, I fell in love with the aesthetic options the program included. I began expressing my newfound love to a couple of my friends and they resonated the sentiment.

Initially, I spent some time browsing through the free templates and tools. Let me tell you, there are sooo many options. Even without paying for the pro version, one can create beautiful and informative digital learning opportunities. Personally, I chose to pay for the monthly subscription as I found more of the pro templates and tools to be more of my aesthetic style.

The process of creating a Canva is fairly simple. However, it is important to not that it can be rather time consuming depending on the amount of attention one pays to details. You can learn more about what Canva has to offer below.

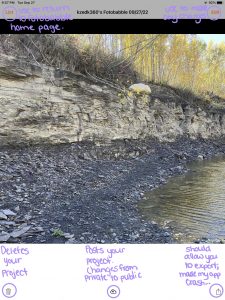
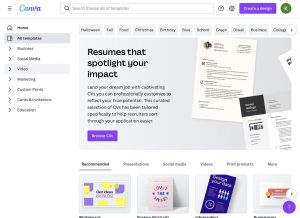
Home Page

When you open the app, this is the home screen you are greeted with. From here you can navigate through the different tools and resources that Canva offers.

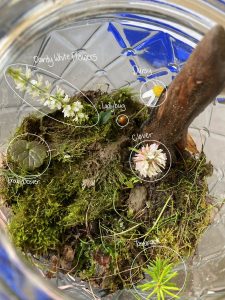
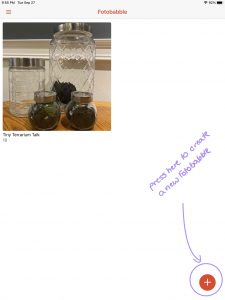
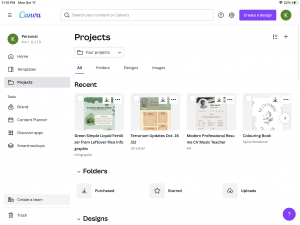
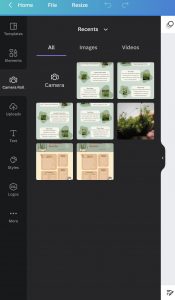
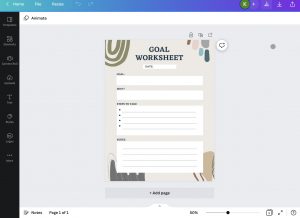
Projects

Under this tab, one is able to access the projects they are currently working on. In the screenshot you can see both of the terrarium Canvas I shared this week, as well as a resume template and a colouring book I am working on.

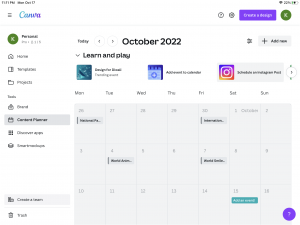
Content Calendar

The content calendar is a tool Canva provides to its users. One can schedule events or social media posts. Although I haven’t spent much time using this feature, Canva has a great YouTube video explaining why and how to use the content calendar.

Templates

There are thousands of different templates one can browse through. Templates are categorized into themes such as business, social media, video, marketing, custom prints, cards & invitations, and education. Individual themes are then broken down further into sub themes. This is a great feature as it allows you to find the perfect template for your project.

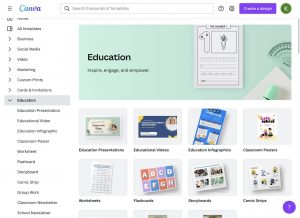
Education Templates

There are numerous templates that are related to the theme of education. Sub themes include education presentation, educational video, education infographic, classroom poster, worksheet, flashcard, storyboard, comic strip, group work, classroom newsletter, and school newsletter templates. I find the education template category to be of the most use and value to teachers; however, it is important to note that other template styles can be adapted for classroom use.

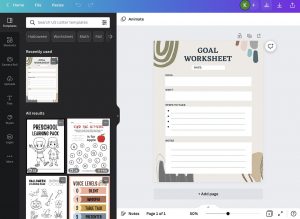
Working on a Template

Once you have chose which template you would like to use, you will be taken into the project editor. From here you can access several tools to customize and create your project. Continue reading to explore each of these features in further depth.

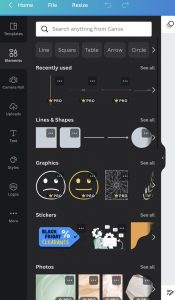
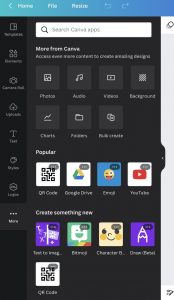
Elements

Elements is by far my favourite editing feature Canva has to offer. Here one is able to shift their focus to the aesthetics of their presentation. There is a search feature that can be used with keywords to find specific elements. Additionally, one can click on a specific element and then related elements of a similar style or aesthetic will be suggested.

Camera Roll

This allows users to upload an image directly taken from their camera. Furthermore, one is able to access images and videos taken previously. To use this feature, one must allow Canva to access your Camera and Photo Album.

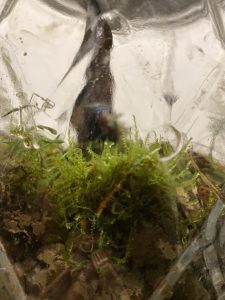
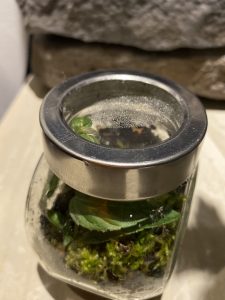
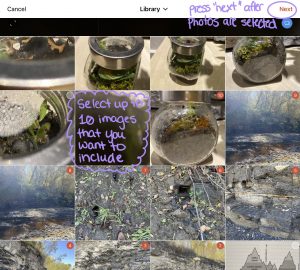
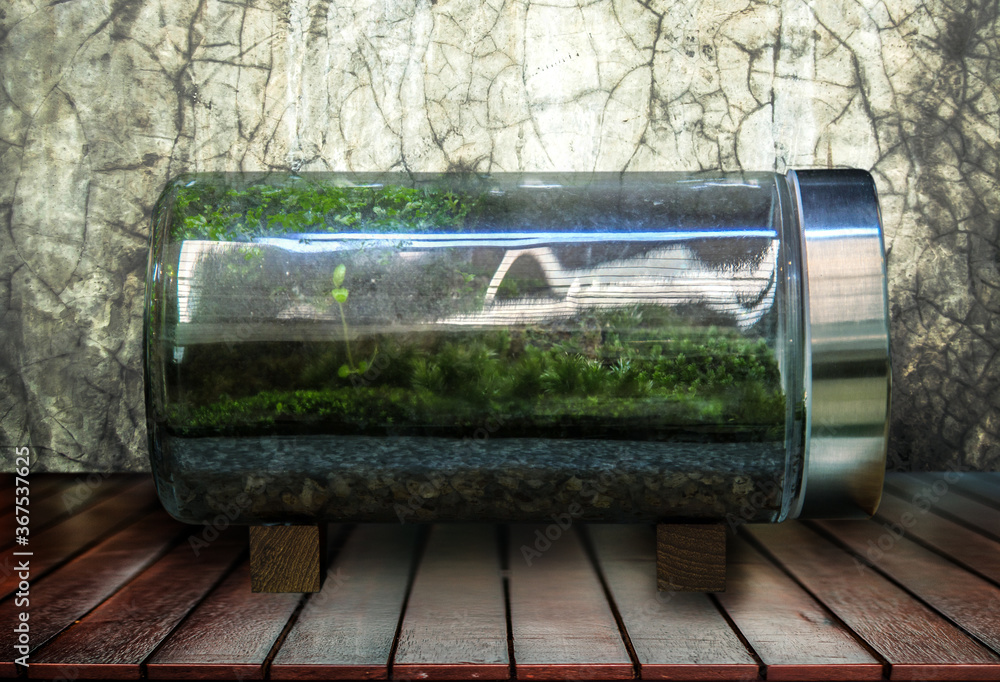
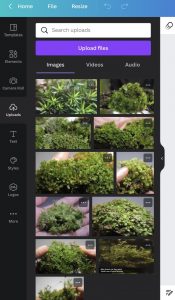
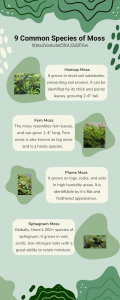
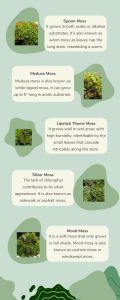
Uploads

The uploads section allows one to do just that - upload their own images, videos, and/or audios to Canva. In the picture below, you can see all of the moss screenshots that I uploaded for my second Canva project.

Text

The text tool allows one to not only add various text features to their Canva, it also allows them to customize the way the text is visually presented. This is definitely a fun tool to play around with if one has the time to.

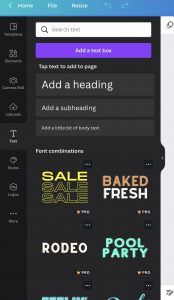
Styles

The styles feature allows users to customize the colour palette, font sets, combinations, and other related aesthetic aspects within their presentation.

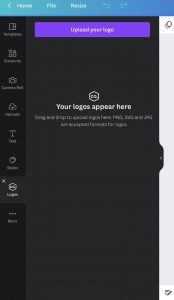
Logos

If there is a particular logo you would like to include in your presentation, this feature allows you to upload it. This may be useful when wanting to include the school logo in a presentation or project.

More Feautre

Other Features

One can further customize their presentation with the various tools outside of the features described above. On the side of the screen where the template in progress appears one can identify various tools. Here one is able to lock and unlock elements on the template, adjust their transparency, size, colour and font. Furthermore, one is also able to add presenter notes and export their project from this screen. These features definitely take a bit of time to get to know while one learns what editing tools are associated with the specific features explored earlier.

In conclusion, Canva has become a key technological tool for me moving forward both personally and professionally. I love that it combines various presentation formats on a single program while providing numerous tools to customize and make the presentation completely your own. In a way, this tool can be used to replace programs such as PowerPoint and Word as it includes creative options to use similar features within the Canva app.

Pondering Plants & Processes

Time for Research

This week I took some time exploring some online sources to learn more about the plant species within the various self-sustaining ecosystems I have created. I also took some time to refresh myself on the various processes taking place within the closed ecosystems.

Plants

Wild Mint

I took some time to find a video that showcases how to identify wild peppermint as I was pretty certain this was the plant growing in my tiny terrarium. Based on the identification characteristics provided by David’s Passage, I am now certain I harvested a peppermint plant from the shale river bed.

Identifying Characteristics:

  • Plant has a strong minty smell, particularly when crushed. The mint taste will vary depending on the location in which the plant is growing.
  • Peppermint grows along watery places and requires a reliable source of sunlight.
  •  The plant grows straight upwards and has a purple stem.
  • Plant leaves are sharped toothed or serrated around the outside edge. Leaves grow in opposite-side pairs that alternate between north-south and east-west orientation (vice versa) up the stem. Top appears to be a cluster; however upon further examination one while still see the leaf pattern described above.

Moss

Common Terrestrial Moss Species (5:37)

The Urban Nemophilist produced a video exploring different kinds of land moss. I created an infographic using Canva to showcase my learning from this video.


Moss Evolution – A Lecture by Ralf Reski (8:36)

BioTechGermany uploaded Reski’s evolution of moss lecture to YouTube. Reski explains that there are around 120,000 different species of moss. They are miniature forests for even smaller species that live within. Moss has existed on Earth for millions of years and throughout this time the species have made little evolutionary progress. This is due to their innate adaptability qualities which enable them to survive drought and continue converting energy. Each species of moss requires varying needs in regards to  temperature, pH, and nutrients.

The Hidden Superpowers of Moss (4:43)

The SciShow briefly explains the different superpowers of moss such as being used medicinally to absorb, sterilize, and heal wounds as well as being a primary source for carbon storage.

Medicinal Moss

Moss was found to be particularly useful during the wars. It served as a bandaid as it has high absorption levels. Additionally, the acidity level of the moss works to sterilize and kill off majority of bacteria.

Moss for Carbon Storage

“Moss bogs are huge reservoirs of stored carbon that play a major role in keeping our climate stable” (SciShow, 3:44). Carbon is stored in moss via the process of photosynthesis. Carbon releases can occur in large quantities if the peat layer is exposed to dry out, resulting in the bog catching fire.

Biogeochemical Cycles

Water Cycle

The terrariums provide a really simple visual for the water cycle. It shows how the water is filtered through the soil before evaporating when the jar is warmed by the sun. This is then followed by a  condensation period where it collects on the glass of the jar. When there is enough condensation,  precipitation occurs in the form of a water droplet descending the side of the terrarium wall.

Screenshot of the water cycle from the Water Cycle Song on YouTube.

Carbon Cycle

Plants play an important role in the carbon cycle as they absorb carbon dioxide to use in the process of photosynthesis. Two critical processes of the carbon cycle seen within the terrariums are cellular respiration and photosynthesis.

Photosynthesis

Plants acquire their energy via photosynthesis. This is a chemical process involving water, carbon dioxide and sunlight to be used to create energy for plants in the form of glucose for plants. The stomata on plants surfaces allow carbon dioxide to enter the plant to get to the chloroplast where photosynthesis occurs. The plant then undergoes a chemical reaction in which it takes carbon dioxide, water, and sunlight are used to create glucose and oxygen. The oxygen is released into the atmosphere while the glucose is used to provide energy for the plant.

photosynthesis
Photo by casaltamoiola on Adobe Stock

Soil Sequestration

“Soil contains the largest biologically available pool of carbon on the planet” (Soil Carbon Sequestration, 1:44). Carbon soil sequestration is the process in which carbon is stored within the soil.  Carbon provides soil it’s rich, dark colour, known as humus. Humus is essential for enriching the soil which promotes greater crop production, water retention, as well as nutrient cycling and decomposition.

If you are interested in learning more about the carbon cycle, I recommend checking out the following videos:

1. The Carbon Cycle Process (2:57)
2. Relationship between Photosynthesis and Cellular Respiration (3:28)
3. Soil Carbon Sequestration (3:09)
4. How Trees Capture and Store Carbon (2:29)

Camera, Time-lapse, iMovie?

For my sixth learning project post, I decided it was time to create a YouTube video. I did so with the help of the app iMovie. iMovie allowed me to upload and edit the speed of the time-lapses I had taken while creating my first water-based self-sustaining ecosystem. I was able to string the separate clips and a picture into a singular video. Then, I went back and audio recorded over the videos to explain the process I used when creating this jar. After some deliberation, I decided to include some background music into the video. I did so by choosing a song from Apple Music and then reducing it’s volume so that it wouldn’t overpower my voice. Being able to change the volume of an audio recording is one of the features I most enjoy about iMovie. Once my video was complete, I saved it to my iPad before uploading it to Youtube via the app.

Considerations for Next Time:
1. Have a larger percentage of the jar containing water.

2. Create a thinner soil layer as it does not need to be as thick as the one is inside this jar.

3.  Try to find a location that grows under-water aquatic plants rather than above-water aquatic plants. Examine the difference above verse under water plants make.

4. Try creating an aquatic jar that contains a piece of charcoal. How does the charcoal affect the ecosystem of the new jar compared to the jar without charcoal?

8 Years of Twitter

Early Twitter Use

I first started using Twitter when I was 12. My initial use was rather childish (as to be expected) and contained several band posts, minion memes, and random retweets from trending hashtags at the time.

When I was 14 I decided that I needed to clean up my digital footprint a bit. This was mostly due to the fact that the school was going to be starting a Twitter account to showcase our participation in sports, activities, and learning experiences. I wanted my Twitter to appear more mature than what it was at the point. This led to me unliking and deleting any tweet I had interacted with, as well as unfollowing a ridiculous amount of random accounts. This was a crucial purge that has allowed to use the same Twitter account that I started with back in 2016. Majority of the posts from my early Twitter days were either posted by my school, a response to an assignment, or interacting with a tweet via the retweet and like option.

Between 2016 and 2020 I would sporadically download, log-in and check my Twitter account, but would rarely, if ever, post any of my own thoughts or understandings. After graduating from high school, I deleted the Twitter app and once again my account was inactive for close to two years.

Present Twitter Experience

This September was the first time I had gone on Twitter since leaving high school. Starting this process I was hesitant. I didn’t understand how it could be used as a learning tool, but I was willing to give it a chance and I’m glad I did. I have come to see that it has a very large learning community full of support and resources. I have enjoyed learning about a variety of new strategies and technologies, that teachers can use within a classroom. Several of these have come from peers, as well as educators, administrators, principals and many others across the world.

I love opening the Twitter app and scrolling through everyone’s #learningproject and watching as individuals develop their skill in a specific area. Furthermore, Twitter has provided a great opportunity to interact with the peers in the class daily which I feel is not always easily achievable in an online format. I enjoy seeing the overall community of support that has been created in our EDTC300 class.

I’ve also really appreciated the opportunity to participate and read the discussions for #SaskEdChat, although it can get a little intense at times while everyone is interacting with each other.  It’s a fantastic opportunity to discuss vulnerabilities, successes, and areas for improvement all while fostering relationships between individuals related via the field of education. Overall, I really enjoyed this experience and can see myself participating in one again. If you’re interested in the #SaskEdChat on Twitter, join in by going to the ‘latest’ feed after searching the hashtag on Thursday nights at 8:00 pm. Even better is the fact that if you miss the initial start time, you can always join into the conversation later on.

One thing that I am not a huge fan about Twitter is the daily digital footprint I am leaving. Although I have numerous forms of social media such as Facebook, Snapchat, Instagram, TikTok, etc., I rarely post on any of them and if I do it is no more than ten times for the whole year. Being that we are expected to post twice daily, I have significantly surpassed my typical posting quota. I have found that I struggle to consistently post twice a day and that this past week particularly I have been experiencing what I like to refer to as Twitter Burnout. In the future, I personally would not post as much as I am posting now. Furthermore, my posts would focus more on what we were doing within the classroom rather than tools teachers and others can use.

Feel free to check out my Twitter account. My handle is @kzedk360.


Jar Size Matters

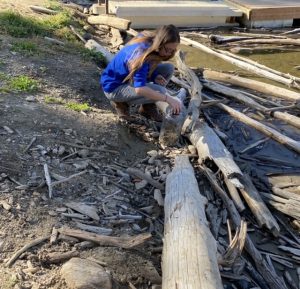
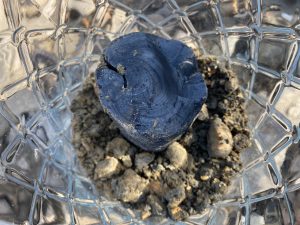
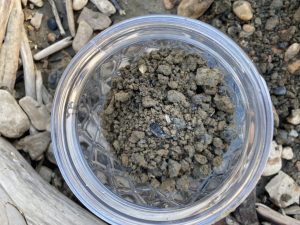
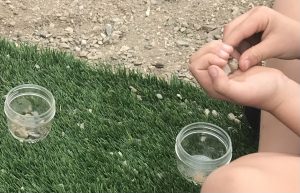
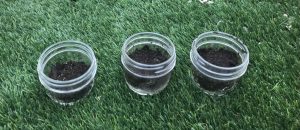
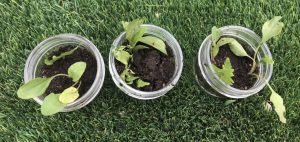
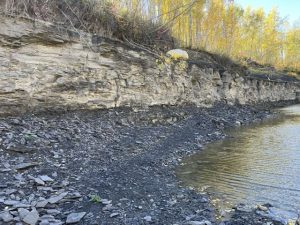
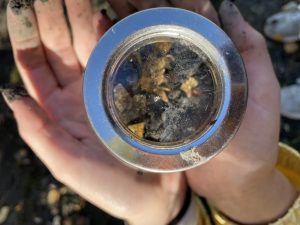
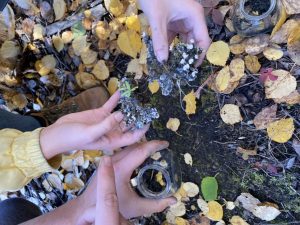
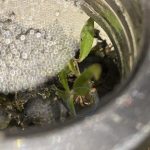
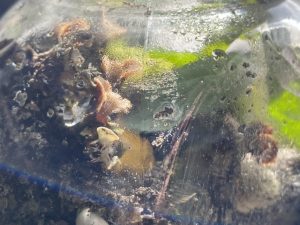
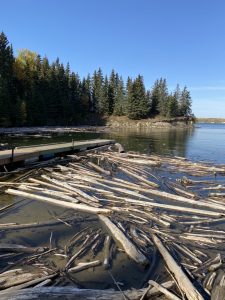
This weekend I decided to head down to the Lake to create my big terrarium. While I was there, I took the time to acknowledge that the lake is on the unceded lands of treaty territory six. While I was there I took the time to appreciate my relationship to and with the land. Being that I was taking from the land, I made the effort to give back to it and laid down some tobacco to honour the reciprocal relationship we share. I prioritized doing this as I had failed to acknowledge the land I was on creating my tiny terrariums. As a treaty relative and having taken ECCU400, this did not sit well with me. Land acknowledgements are something I need to continuously work on.

I started the large jar in the typical fashion, layering in differing sizes of rock into the bottom. I then started to add some soil. This soil was more a combination of sand, sediment, and clay. After adding close to an inch of soil, I took my charcoal log and stuck it standing upright into the jar. I then finished off my soil layer by filling in around and above the log.

I am slightly concerned about the effect the charcoal is going to have. Majority of the videos I watched where charcoal was used, it was in a powdered form known as activated charcoal. When I looked around town for the broken down form of charcoal, I was unable to find any. However, Home Hardware has charcoal briquettes and ended up having actual charcoal logs as well which is what I decided to go with. Being that I through an entire mini log into the jar, I am interested to see if there is such a thing as too much carbon within a sealed system. Will the plants not be able to filter out the carbon that comes from the charcoal? Will the log reduce the oxygen level or benefit it as there is more carbon that the plants can convert? How will the access carbon affect the other organisms within the terrarium?

After my base was completed, I set out looking for a small piece of driftwood to include. My mom ended up finding the perfect piece in the water, floating not far from the dock. In hindsight, I probably should have left the jar on dry land while I went to retrieve the stick; however, the anxiety one can induce from having their jarrium almost break on a swaying dock is quite a thrilling experience… Ok, maybe not… and luckily, my jar did not break. After safely getting the jar and stick back to land, I decoratively placed the stick into the soil layer as if it were a tree growing out of it.

Then, I set out to add some plants. I started with some moss that was growing on a sandier patch of soil. While walking along the lake’s edge, I found a different kind of moss that appeared to grow on water soil.

I then came across a cluster of wild daisies, clovers, small green-leaved ground coverage, dainty white flowers, and a tamarack sapling. I gently picked off a the head of a clover flower, the dainty white showers, and daisy. I then gently pulled out the ground coverage plant and tamarack sapling, ensuring that the roots came with them. While collecting and transplanting, a ladybug found it’s way into the jar.

I then sealed the jar before coming back home. On the way home I noticed I had a plethora of different insects which I was excited to see. Once home, I added around a 1/4 cup of water to the jar. I chose to go with this amount as it is a much larger jar than the tiny ones I had used initially. Furthermore, being that there is a sapling in the jar, any additional water will be absorbed by its roots.


I am really interested in seeing how this terrarium does due to the different plants I’ve included. I think the plant that I am most curious about surviving is the tamarack being that it is a pine tree. Assuming that it does grow, I am interested to see how the sealed jar affects it’s process. Additionally, I am excited to see how the different bugs interact within this ecosystem compared to my boyfriend’s.


In conclusion, as hinted at by the title, the jar size one is using for their terrarium matters. Jar size is important in the sense of what and how much of it you want to put inside it. Starting with the tiny terrariums was nice as it gave me a chance to learn the process with a small impact before trying something that may have a larger impact on an ecosystem. However, I have determined that I prefer larger terrariums as they are easier to design, decorate, and include elements such as the charcoal log that would not have fit in the smaller jars. Furthermore, with the larger jars, there is more room for plants to grow which in turn may affect the overall health of other plants within the containment.


Teaching Tiny Terrariums

Last Friday, I invited the school age children (grades 1-3) that I work with to create their own tiny terrarium. The project came about spontaneously. It started with me taking each of the kids into our art room so that they could choose materials for a craft they wanted to make and/or teach to their friends that day. During our search for popsicle sticks, we came across three sealable glass jars. This was perfect being that I had three kids to plan for that day. During the excitement of finding these jars, the other two school age children came back into the art room to hear me excitedly exclaim that I had an idea for the craft I wanted to do. Immediately, all of them were curious and I briefly explained to them that I wanted to go outside with the jars to create mini ecosystems from the plants in our yard. I told them that they would be trying a project that I’m doing for my university class, making them even more excited to be doing “big kid school.”

Throughout the rest of the day it was hard for them to contain their excitement as we waited to go outside as just the four of us to create our project. Our opportunity came during afternoon snack: we decided to stay outside to create our terrariums while the other kids went inside to eat. We then embarked on the following journey:

1. First we layered some smaller rocks into the bottom of our jar. I explained that the rocks were important to create a base to help filter the water throughout the jar while providing other areas for bugs to live within the jar.

2. Next we layered in some soil. I invited the kids to add a handful of soil to their jar. I then asked them why it was important for us to have soil, to which they responded “for the plants to grow in!” We furthered our knowledge by learning that the soil has special nutrients (plant food) that help the plants grow big  and strong while providing a home for the roots.

3. After we finished our dirt discussion, it was time to add our plants. We collected some plants from our overgrown flower beds. These were small pieces of plants that either did or did not have roots attached. I explained that the root is important to help the plant grow and without one the plant often doesn’t survive. However, within a closed ecosystem (such as ours) one can use clippings off of their plants. These clippings can then be planted and should continue to grow the plant as per usual. It is important to note that individuals are more likely to be successful with their gardening when the root is still attached to the plant.

4. Once we were done transplanting, we gathered on the grass to add a capful of water to our small jars. Due to the size of the jars we chose and the thickness of the base layers, I explained that the lid could be left on or removed once the kids got home. If they were to leave their lid on, they wouldn’t have to water their plants as it would be self-sustaining; however, if they chose to remove the lid, they would then have to water their plants regularly.

Although this was not an in-depth and planned lesson, it created an opportunity for the kids to learn more about science and the environment in general. For using this project in the future, I would like to spend more time going over the plant cycle, water cycle, and cellular respiration systems. This will foster a deeper learning as well as a hands-on experience that students can then tie there knowledge to.

Tiny Terrarium Talks

Before we begin, I would like to present you with the option of engaging with my learning project this week via Fotobabble and/or this blog post. If you are interested in following along using the Fotobabble, check out Tiny Terrarium Talks here.


Shale Location
Shale and river bed location we visited to make our tiny terrariums.

This week on my terrarium travels led me and my boyfriend to a shale bed. We had decided that we wanted to go on a terrarium date and being that I hadn’t taken him to the shale bed yet we devised our plan. We decided to start with tiny terrariums as to get a sense of what the process was and see how things worked.


Glimpse at the base layer for our ecosystems.

We started our terrariums by layering some loose rocks and shale into the bottom. Then we added a layer of dirt, followed by a layer of shredded leaves, topped with more dirt. We finished our base by adding a some more shale and rock as decorative features.


Mushroom moss.

As we were headed back to the river bed, we came across moss growing on the ground. It wasn’t typical moss as it had mushrooms and fungus growing on it. We decided to both incorporate a piece into our terrariums. My boyfriend’s had a small plant growing out of the moss and mushrooms while mine was mostly mushrooms.


After climbing down the shale ledge and crossing the small river stream, we found some tiny shells to add to our ecosystems. As we explored the river bed I came across a plant that looked familiar. Although I do not advise touching unfamiliar plants, I decided that this plant was the final element that I wanted to include in my ecosystem. While harvesting a sprig of the plant, it started to release the familiar smell of mint, which leads me to believe that I now have wild mint growing in my terrarium.

Bottom of the river bed.

Before climbing out of the river bed and back up the shale layer, my boyfriend and I added a small handful of river water to our glass jars. Then we tightly sealed the lids, put them away for safe keeping and crossed our fingers that they wouldnt break on our way up.


Mr. Beetle

On our drive home from the shale bed, I was examining both of our terrariums. I noticed a beetle had somehow managed to find a new home in my boyfriend’s terrarium as well as a centipede. Although I have thoroughly examined mine, there is no sign of life aside from plant life and creatures to small to see with the naked eye.


Flourishing mushrooms

The next day when I went back to check on our terrariums I was happily surprised. The mushrooms in mine were happily flourishing and not affecting the other plants inside the jar at all. Furthermore, both my green moss and mint plant had taken over night and were still looking healthy. In my boyfriend’s jar, Mr. Beetle and Mr. Centipede had been hard at work rearranging their new home and making tunnels through the base. Both bugs as well as the small plant growing out of the moss-fungus appeared to be happy and healthy.


Wild mint touch jar lid.

Day two of the sealed terrariums has led to some interesting insights. Surprisingly, my green plants still remain unaffected by the mushroom and mold spores present from the leafs and fungus. Furthermore, my mint plant has grown and is now touching the top of my jar lid. I am unsure whether or not I want to break the seal and trim it, or leave it to see how it responds to its sealed environment. In the second jar, Mr. Beetle is still doing well, however, I have not seen Mr. Centipede. As mentioned in the Fotobabble, I’ll be keeping an eye out for him.


Next week, my goal is to make a large terrarium that has a charcoal feature in it. I am curious to see how the terrarium with charcoal grows and sustains itself verse the terrariums without. Additionally, I am super excited to be making a larger terrarium. I would like to include a piece of drift wood within this jar. I think it would be a cute additional feature where plants can grow or insects can crawl (if any happen to find there way in during the process).

Babbling about Fotobabble

Fotobabble app.

This week I took the time getting to know the online tool and downloadable app called Fotobabble. Fotobabble allows you to upload photos and then audio record overtop of them. It is perfect for storytelling, experience sharing, and may be even useful for recording lessons.

As a teacher, I could see myself introducing the tool to students and then inviting them to create a story or share an experience using the app. If used in this way, Fotobabble would become a modification tool in reference to the SAMR model. The task of creating, writing, and illustrating a story remains the same but the way in which students approach the task via an app rather than pen and paper modifies the way students will present their stories to others.

Overall, I enjoyed how quick and easy it was to use as well as the fact it lets me describe what’s happening in the picture. Another cool feature about it is that you can edit your photos within the app or browser. I played around with the blur and focus feature which can be seen in the pictures featuring the beetle.

For an example of what Fotobabble does, you can check-out how my learning project, Tiny Terrarium Talks, went this week as I the app as my primary method of documentation.

If you are interested in using Fotobabble, check out the steps outlined below.

1. Decide if you want to use the online version or app version.
Inside Tip: If you are using a mobile device such as an iPad or tablet,  I recommend having the browser version open as well as having the app downloaded. The app will easily allow you to upload photos and audio record over your project. However, the browser is better for uploading and sharing your completed project. 
2. Sign up for a free account.
3. Once logged in, click the red button with a white plus symbol. This will allow you to create your first Fotobabble.

4. You should then be prompted to insert photos from either your gallery, files or camera. Choose the option that best suits you.
5. Select up to 10 images you would like to include in your project.
6. After uploading your images, choose the image you would like to record over. To start recording, press the microphone icon. You will need to create a separate recording for each image. To preview your entire post press play in the top right corner. To review the audio on a singular photo click the image instead.


Inside Tip: I only had thirty seconds available to record audio for my project. Try to have what you want to say planned ahead in a concise manner.
7. When your project is complete, you can keep it listed as private, or share it. To share it, click the share button. This will then post it too your Fotobabble account. You can then click on it again and go to share it from your browser. It will provide you with a link which others can use to access your project.


TikTok Terrarium Teachings

This past week I have taken to TikTok to get a better sense of what I’m getting myself into as I embark on this learning project.

After scrolling through countless videos, I have been introduced to the different types of sealable containers one can use, the different styles of ecosystems (forest-based vs aqautic-based), as well as the materials one needs to start their self-sustaining terrarium. One can also choose to make a larger terrarium such as in a chest, or a much smaller terrarium which is often referred to as a tiny terrariumFurthermore, some individuals took the time to explain the science behind including certain materials or items within the ecosystem such as the respiratory process of plants or the benefits of charcoal. This ranged from insects to charcoal that both aid in keeping the aquarium clean.

green moss glasshouse hobby collectiono on forest
Photo by Yanukit on Adobe Stock

Being that there are various ways to approach this project, I am interested in creating a couple kinds of terrariums with different materials as well as in different container sizes. I am planning on making at least four terrariums: the first will be moss only, the second will include a mixture of plants, the third will be the same as the second but will include some critters to help out, and the fourth will be water-based. Additionally, I would like to try creating some terrariums of various sizes to see how the space of an environment effects the interaction between items inside it.

If you are interested in checking out TikTok terrariums further, I recommend starting with the following hashtags:

Although TikTok was a great introduction to self-sustaining ecosystems, providing a plethora of information, I am interested in checking out some other resources to gain a better understanding of the terms and processes being used. I feel this will aid me in my project as I work towards developing a more rounded understanding of the topic and it’s related components as a whole.

Ed Tech Experience

Photo by Kaelynn LePoudre

For those of you who don’t already know me, my name is Kaelynn LePoudre. I am in my third year of studies in the Bachelor’s of Early Elementary Education program. My passions include hiking, photography, and nature. I also enjoy bullet journaling as a form of self-reflection and a way to unwind after a long day. However, I do not particularly enjoy posting my personal thoughts online and thus am not the most eager blogger. However, I am willing to step outside of my comfort zone, even if it requires me pretending I am writing in a journal rather than online.

My educational technology experience primarily comes from the time I’ve spent as a student. There are some key experiences that stand out to me.

1. Computers

The earliest memory I have of technology being used in a classroom was a computer. This wasn’t just any computer, but the teacher’s computer, specifically which students were not to touch (at first). As more computers were made available throughout the school, the more students were allowed to access them.  This lead to us playing online on websites such as  Poptropica or Cool Math Games. As I advanced through the grades, I learned how to use websites such as Google Docs and Google Slides to work on and submit assignments either individually or with a group. We were taught how to use search engines, as well as the importance of using key search words and citing our sources.

2. Microphones

After computers became a commonplace, I remember being introduced to sound systems and headset microphones. One lesson I will always carry with me when using a microphone in general is to make sure that it is turned off every single time I finish using it. Although I am sure my teachers were taught how to use the device, I can recall a three times private discussions were accidentally broadcasted through the classroom  for all to hear.

3. Smart Boards

Around the same time the microphone headsets were introduced, so were Smart Boards. These quickly became a key feature in every classroom. We would sit down to watch a video, take notes, study course content through games such as jeopardy and much more.

Since becoming a university student, I have become extremely grateful for educational technologies. Throughout the duration of my program, the only classes I have taken have been online.  This has exposed me to new forms of technology such as Zoom and Discord. Due to this, I have learned to appreciate educational technology far more than I had throughout my K-12 learning experience.