This week I began searching for a tool to use for my learning project that I have not used before. I came across Visme. The thing that grabbed my attention was the use of the word “visual”. My whole learning project is based on visuals. I document and show my progress through a series of pictures and videos. I wanted to see how I could do something a little different this week while using this new tool.
How to get started with Visme:
- Start by typing Visme into your browser and click on “Visme – Create Presentations”.
- Click on the square in the top right-hand corner that says “Sign Up Free” and to create your FREE account.
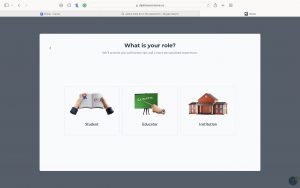
3. When creating your account, click on the middle option (educator).
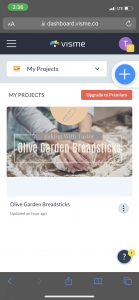
4. To create a project, click on “projects” on the left-hand side, then “Create New”.
5. Begin exploring Visme!
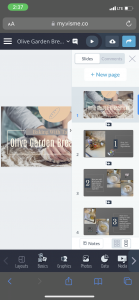
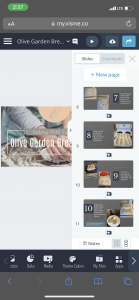
You can create anything from presentations and posters, all the way to videos and storyboards. Once you begin creating a Visme, you can add headers/text boxes, photos/videos, graphs/diagrams, graphics, and even change the theme and colours. It is a great tool to personalize your projects in order to create your vision.
I do have one critique. This is possibly a user error and I may be the only one who was not able to figure it out, but when I was done creating my project, I could not share or download it without having to pay. I ended up screenshotting each slide and creating an iMovie video. This may be an issue when using this tool in the classroom. A way around it is to have each student present on their own computer without downloading their presentation.
I think this would be such a beneficial tool in the classroom because students can tailor their presentations to fit their own individual visions. They can add animated graphics and pictures to create “wow factors”! This tool may fit in the Augmentation part of the SAMR Model. Technology is being substituted for a traditional method and increases student potential by providing so many options. Students can implement videos and graphs that they create into their presentations.
Click Here to see how I used Visme to show step-by-step instructions on how I made Olive Garden Breadsticks. This will show how others can benefit from the presentation I created!
This is so cool! I’ll have to check Visme out for future use. Thanks for sharing!
Hi Taylor,
I have never heard of Visme until now… It seems like a great tool! It is disappointing that you weren’t able to download or share. Unfortunately I think lots of resources do this as a way to get people to pay. Good on you for thinking on your feet and taking screenshots. The Breadsticks look amazing!
Danica
This was such an informative post on a resource I had never heard of before. Unfortunately, it seems like many online resources require payment in order to be able to fully utilize the app/website. The finished Visme video came out great! I appreciated how aesthetic and professional all of the visuals were and I thought it was a great way to display the process of creating a recipe. Those breadsticks look delicious!
What a super cool resource! As I was reading through your post, I went and made myself an account. Your explanation throughout the blog post definitely helped me set it up properly. It definitely sucks when sites make you pay for “full use” of their service, but there are definitely always ways to *get around* those paywalls. Thanks for the tips and the great review!
Hi Taylor,
This is awesome! I have never heard of Visme before. It seems super simple and great for pictures! This would be a great presentation tool for kids and a substitution for Google Slides! I love your video! It’s like a visual interactive step-by-step recipe book! Your blog does a great job of showing me how to use this and the breadsticks look awesome!
Thank you!
Noelle