I guess that is a wrap!! What a journey it’s been!
Here is my final video! Thanks everyone for a great semester!

I guess that is a wrap!! What a journey it’s been!
Here is my final video! Thanks everyone for a great semester!
It’s the final week of of our EDTC 300 class! What a journey it has been! I wanted to thank all my classmates who took the time to follow along my posts and shares! At the start of the year we were asked to keep track of how we contributed to others in the class! Here’s my thoughts on how I contributed to my peers!
DISCORD
I have to be honest here, I signed up for discord and without notifications turned on I wasn’t able to support much of my other classmates. Now I did check it a few times but usually if there were questions, someone had already responded!
BLOGS
Here are some screenshots of how I contributed to others by responding to what they shared on their blogs!
OTHER WAYS TO CONTRIBUTE
Although I lacked in discord, I thought there were some other subtle important ways I contributed to others. One thing I tried to do was have a strong online presence during class time. This meant having my camera on for most of class, engage in questions and conversations, and doing this in a thoughtful and respectful manner!
FINAL THOUGHTS
I am very thankful for the support that I got from my fellow classmates! As someone who wasn’t familiar with blogging and sharing, the positive and encouraging feedback I got made me feel comfortable when sharing my journey and thoughts! Although my presence in discord wasn’t much, I truly feel there were other ways I contributed to the learning of others!

Closing time I guess! Time to wrap up this putting journey with one final post! This has been such a fun and unique learning project that brought some different challenges and overall a positive experience! For this project I decided to improve my putting skills in golf, this post is a summary of what I learned, how I grew, and how technology supported my learning!

Photo by Michael-Li on Pixabay
I had no idea where I was going to go with this learning project, or really how to blog about something in general! I knew my struggle in golfing was my putting game, things like form, pace, and reading greens have always been a question for me.
Takeaways after week 1-There is a gameplan but not sure how it’s going to go!
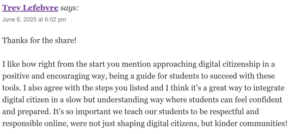
Week 2- Back to the Basics of Putting
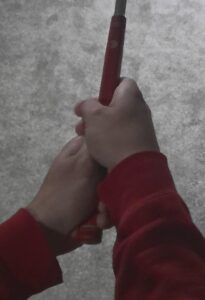
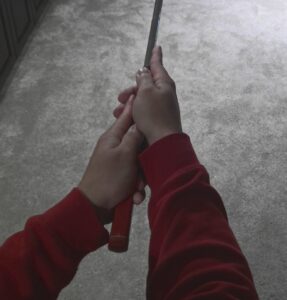
Takeaways after week 2- There was a lot to unpack on this one! Thankfully got to get comfortable with trying different grips and swing styles!
Takeaways after week 3-Connecting music with golf was a fun way to learn and practice! I found during this week it was important to stay consistent with practicing!
Week 4-Reading The Green, The Algorithm Is Here
Week 4 had my phone listening to me! I went to search music on Sportify and it auto-populated a golf podcast! This weeks learning was from Golf Tips for Beginners on Spotify as well as a great video called How to Read Putting Greens Better with Brad Faxon
Takeaways after week 4- Listen and learn! A big part of putting is based of intuition and feeling. There are many factors when putting the key is to take what you know and have a good feel with what you can do with your putter!
Week 5 was a week where weather kept me off the course but yet I still found a way to practice some putting! At this point I had gone through understanding the fundamentals, now it was to practice and do some drills to get better! I’m including this video because I found it really helped with control and tempo!! Best part was that it can be done from home!
Takeaways after week 5- No place like home? I was able to find some great drills that can be done right at home! these drill were inspired from Rory Mcilroy. Some great simple drills that can easily improve feeling with your putter!
Week 6-Putting Drill With Phill
Takeaways after week 6- BEST FOR LAST!! Hands down the best drill I found that can improve your putting game! I think if I were to stay consistent with this drill or even incorporate it into my warm up, I will have better success in putting! I would encourage everyone to check this drill if they want to improve their putting!
TAKEAWAYS FROM LEARNING PROJECT
THE ROLE OF TECHNOLOGY AND ONLINE RESOURCES
It was through technology and online resources that were crucial in helping me improve my putting game in golf! YouTube was a great tool for finding different videos that not only helped but were easy to follow and understand! I encourage all to utilize online resources and technology when learning something new!
FINAL THOUGHTS
This learning project taught me that if I want to become better at putting in golf, I need to focus, adapt to new learning techniques and be will to try new things! After reflecting on my journey, I do feel more confident on the greens and my overall putting skills! One thing I enjoyed about this project was also seeing the progress in my blogging skills! So not only was I making progress with putting but also in my blog posts! I hope to stay consistent and keep improving different parts of my golf game. I definitely noticed by practicing more and getting more comfortable with my putter, I feel better with my putting skills and knowledge! My biggest advice for anyone trying something new, is to break it down and find different ways you can learn and practice. It might be from a golf pro at the course or finding something online, no matter what your trying to accomplish, KEEP GOING!!
Thanks to everyone that followed along my journey and even shared a comment! Big thanks to Katia for providing this opportunity! I had so much fun practicing and improving my putting skills!

LOOKING INTO SUNO: MUSIC AI
A big part of the reason why I took this class, was to get a better understanding of technology in the classroom and finding ways to engage students. I was excited to see SUNO music in the list of options to look at for AI. I have not heard of or used SUNO before so I was excited to see what it was all about!
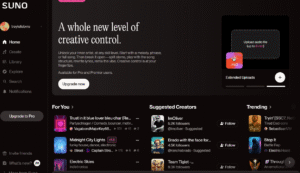
WHAT IS SUNO?
SUNO is a AI music generator that allows users to create songs by filling in some prompts like lyrics, genre, and instruments. At first I wanted just to make a random song but then I thought about considering making something that I could use in my future classroom!
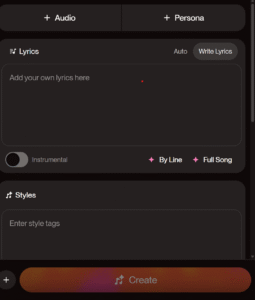
MY TURN TO CREATE
I wanted to see how well SUNO would work. So I put it to the test! I created a short song for early year students to practice their ABC’s in a fun song! The nice thing about SUNO is it always gives you a couple different versions to work with! I noticed I tried about 3 or 4 different ones before I found one I liked! Here is a short sample of what I made!
TOOL TO ENHANCE LEARNING
Here is how I think SUNO can be used to enhance learning for students and teachers!
SUPPORTING LEARNING STYLES
CHALLENGES
AI IS HERE IN EDUCATION
I believe AI, when used carefully, can help both teachers and students in education. Tools like SUNO bring joy and creativity to the classroom! This can allow from simple concepts to difficult concepts easier to understand. Although AI is alive and well, one thing it can’t replace is empathy and heart! I see AI being a big part of what is ahead in education as long as it is used in the right ways! As someone who was against the use of technology, I have grown to see the upside it brings into our education!
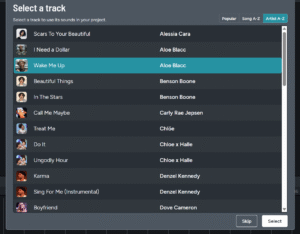
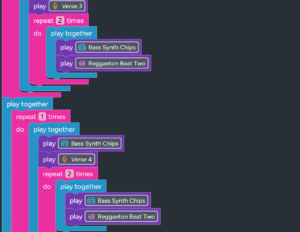
I’ve always had a passion for music, so when I was checking both options for coding I saw hour of code and it had an option called Music Lab: Jam Session. Right away I wanted to make and create a song! It had a list of song you could use so I went with one of my favourite songs “Wake Me Up” by Aloe Blac
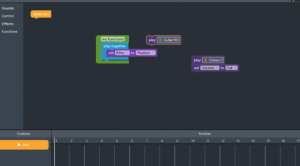
Easy Right?
Nope! It took me probably 30 minutes of clicking and moving things around as I didn’t have any step by step instruction! It popped up a new project and left me to figure it out on my own! After taking some time and once things started to progress, I started to reflect on how and why I think coding is important and hands down should be used in school if students take interest in things like coding! Here’s my 3 reasons based on my experience:
1.) Problem Solving- I had to figure out based on trial and error how to navigate what I was doing and what was working.
2.) Creativity- I was able to make something very unique and my creative skills were out to work.
3.) Developing Skills- I made progress throughout my time spent coding and after an hour and a half, I had something that I thought was good!
Before & After
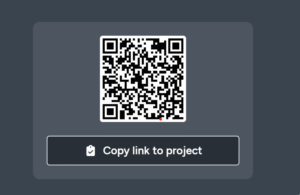
You can check out the song I made through the QR Code below!
I didn’t know what to expect when I saw the video posted by Willow Glen Basketball but one thing I know is that I had to make the title catchy for this one! One of golfs greats Phil Mickelson shares THE BEST (funny because of the title of the video) putting drills he learned from Jackie Burke, who was a 1956 Masters and PGA champion. Phil claims the 3 foot circle drill has been the foundation to his short game. Here is the video below!
Here’s what I took from the video:
My Results:
Right now I’m working on uploading a video of me doing the drill but I am having some technical difficulties.. BUT!! Let me tell you, I missed many of the short putts in the 3 feet range! I found myself on hot and cold streaks of making and missing. I think if you do this drill more and more, you’ll see improvements! I’m considering about using this drill in my warmup routine when I go golfing, as I think it would be a great way to warmup your putting before heading out on your round!

Based on some of my field experience, I find students especially in the earlier grades are growing at a rapid rate of how well they can use and navigate things like phones, iPads, computers, and gaming consoles. Which can be looked at in good and bad ways. So I’m left with the question, how do I plan how teaching my students about digital literacy? Here’s what I think and what I learned from some research.
My thoughts:
Learning from the readings:
Connecting to the curriculum and NCTE Framework:
Connecting to Reflect:
Even in the early years it is our responsibility to help guide and navigate our students with digital literacy. It might not be about fact checking but understanding safe behaviour, to ask questions, and to think critically with everything they are learning so that they can build their skills, navigate the real and digital world with confidence and care.
Now that I’ve gone through some of the fundamentals putting, I want to change my focus to doing putting drills! I was supposed to golf a couple times last week but cancelled due to weather. I always have thought there is no way I can putt from home, it’s just not the same. Then I thought to myself, I’m here to get out of my comfort zone and try some new things!
So what I did was search on YouTube “Putting from home for beginners” and I found the video by Feel Good Golf called “I tried Rory Mcilroy’s Home Putting Drills….(in 2 minutes)“. After I watched the video, It quickly changed my mind on practicing putting from home. Here’s why:
Check the video for yourself!
What I learned in the process:
Before, I would have only practiced putting on a actual green but after watching this video I learned how helpful simple little drills from home can benefit your putting game! I would encourage all to check out this video as it helped me! I am hoping to get some practice on the green and I am excited to share some content of my progress!

Photo by Michael-Li on Pixabay
In class we have talked about some very powerful and unsettling topics around things like Cyber-shaming and digital footprints. After watching some class videos and discussions with peers, it has opened my thoughts on the importance of teaching how to navigate through the online world and the dangers that can be out there.
For many years, the internet has been this amazing tool with endless information. What we forget about, is the danger behind the internet and those who use it for the wrong reasons. I think it is important to educate yourself and others about the harm that can be out there. This is also why I try to distance myself from the internet, I feel we are disconnected from the real world because everything you need to know can be right at your finger tips. Don’t get me wrong!! I get it, find answers to those questions you have been wondering about, or the best stuffed chicken recipe, how about the workout routine that what’s his name shared on how to get buff quick. Where would we be, if we were left in wonder? What if you didn’t need to know the answer to that question? or maybe making that chicken how you see fit. Or what about just working out to stay healthy? I have seen many different trends, I wonder if there will be a trend to “disconnect”?
HERE’S THE THING!! As future educators, we need to adapt all the time, and as much as I want to have my class not depend on technology, I understand we live in a digital world and it is my responsibility to teach and guide my students how to navigate the online world. Which starts with me, I need to have an open mind, educate myself, and challenge myself to grow with the digital world! I can only hope the dark side of the internet changes over time, but for now, I plan to teach how to navigate through the good and bad of the digital world.
Hey all!
For this post, I wanted to share some tips on reading the green with putting! This time I used two different resources, One being a YouTube video and the other a short podcast from Spotify! Wondering why I titled “The Algorithm is Here”, find out below!
Let’s back things up first! Reading the green is used to help a golfer understand / predict where your ball is going to go on the green based on slopes, angles, and even which going with or against the grain of the grass! This is something most people from beginners to pros think is the most crucial part of golf. But is reading the green really something you need to be really good at? well… good news! the answer is NO! You do NOT have to be really good at reading the greens to be a good golfer. What a relief! I will say, being able to have an idea of where your ball is going to go is usually helpful in the game of golf! Here’s what I learned on this weeks on reading the greens!
As it was a late evening, I was on my phone listening to music on Spotify. I went to search for a new song, and as I was typing the search bar auto populated a search recommendation called “golf tips”. I think I panicked and dropped my phone on the floor because never have I ever seen anything in my search on Spotify that was golf related! Now I know I have been searching lots on golf and talking about to friends and family! So why not Spotify! I went ahead and listened to the podcast called “Reading The Green” by GolfTipsForBeginners. Here’s what I learned from the 3 minute clip on Spotify on tips for reading the green!
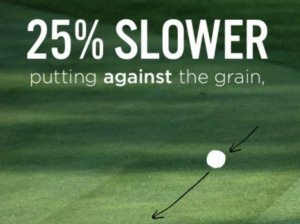
Putting against the grain- If grass is a light shade, you are putting against the grain, the blades of grass are pointing toward you.
Putting with the grain-If grass is dark, you are putting with the grain, the blades of grass are pointing away from you.
Look for the setting sun! Grain often grows towards the setting sun.
One of the more common things that was talked about is looking for slopes on the green, putting uphill will take more swing power, while putting downhill will take less swing power.
Another trick for reading the green is based on feeling with your feet! yes, you read that right! If you feel the ground is soft the green, it is likely to be a slower green that might take more swing power, while if it is a hard ground, it might be a faster green and take less swing power. Another thing to keep in mind is if the ground is wet or dry as this will change ball speed!
Now listening only did so much for me, I needed to see more on reading greens! Which is where I found a great video by Brad Faxon and his take on reading greens! Here’s the LINK if you’d like to watch how Brad reads greens! This is what I took from Brad:
1.) Reading the green can happen 25-30 yards out from the green looking for slopes
2.) Walk around the green looking at grain, not just from behind your ball
3.) Be aware of playing partners
4.) Instinct and visualization, based on feel and seeing your putt through
5.) ROUTINE!!
The most helpful tip is #5! Make your routine and stick with it! building consistency through routine will build your confidence when you have the putter in your hand!
Stay tuned for more!
