 Hello EDTC 300! We are at week 10 of my knitting journey! Wow time has flown! This week I decided to have some fun with learning the ‘Bubble Stitch’. I figured to add an extra layer of learning and to make my Bubble Stitch more interesting that I would also learn how to knit in a second colour of yarn. I really enjoyed learning this stitch and I am happy with the final product. I can see myself using the Bubble Stitch and both variations of the purple yarn I used in the future to create another cup cozy.
For this project I used 6 mm curricular needles, but I didn’t knit in the round, I just used them to knit back and forth, like you do with straight needles. I have found the curricular needles to be easier to maneuver since they aren’t as long as straight needles. I used two different colours of yarn this time, I used a light purple and a dark purple. They are both medium weight acrylic yarn.
The Bubble Stitch
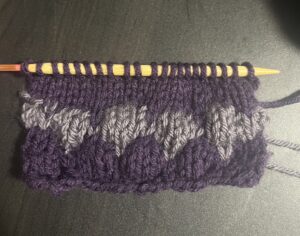 The source I was learning from this week was Kristen with Studio Knit videos on YouTube. I learned the Bubble Stitch is created by using mostly knit and purl stitches, which I am very familiar with by this point but it also included another technique I hadn’t learned yet. The technique is called ‘Knit 4 Below’, this is what creates the bubble look in the stitches. In order to create this, you have to drop 1 stitch from the left needle, then pull apart your needles to allow for the yarn in between to stretch. You have to then drop 4 stitches down to create 4 ‘ladders’ (straight lines of yarn). The next step is to pickup the stitch below these ladders with your right needle, then put your needle in behind the 4 ‘ladders’. Wrap your working yarn around the top of this same needle (right needle) and pull the yarn through all the layers and knit into the stitch below. It sounds confusing and I was nervous the first few times as it seems unnatural to purposely pull the stitches apart, but once you do it a few times, it becomes more straightforward. For this process I found Kristen to be relatively easy to learn from. Below I will list some of the things I appreciate about learning from her video:
- She demonstrated in her video the bubble stitch technique more than once and her pace was good for following along
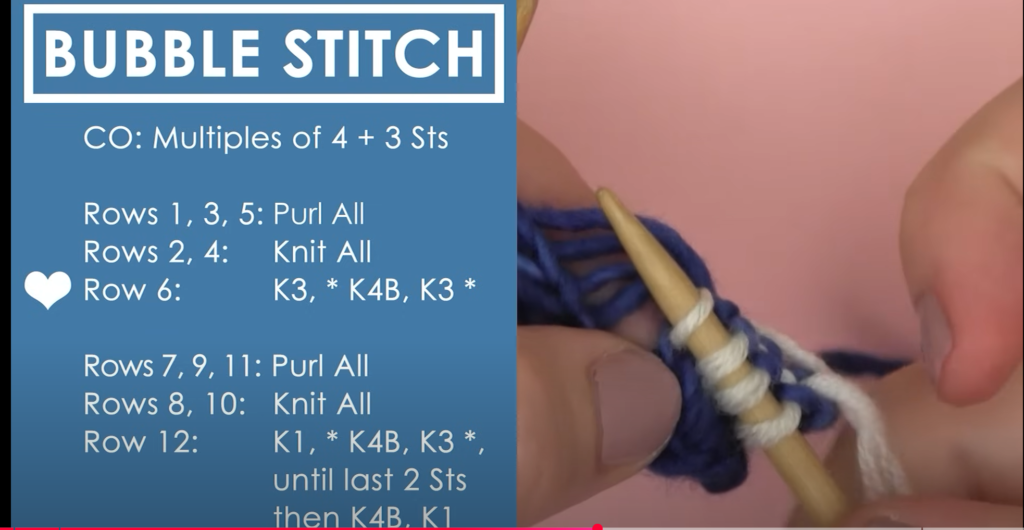
Studio Knit Video displaying pattern and teaching the technique at the same time
- She had half the video screen showing her technique, walking you through the different rows while the other half displayed the written pattern
- In the comments below her video she included a link to her written pattern. This is nice to reflect back on if you are simply just looking for information about the rows/stitches and don’t need to learn the techniques involved
- Her video only included the basics and focused mostly on the technique for how to ‘Knit 4 Below’ but if you needed any additional teachings on other techniques mentioned, she included links to her other videos in the comments section.
- For example: How to Purl Stitch, How to Knit Stitch, and How to Change Yarn Colours.
I ended up viewing her other video that was linked in her comment section for how to change yarn colours in knitting and I found it equally as easy to learn from. I will definitely be adding Studio Knit to my list of sources to learn from again in the future!
Thanks for following along for another week of Amber’s Knitting Chronicles!
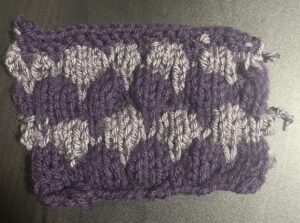
Oh it’s so pretty! Well done! You’ve come such a long way!