While working on my previous project, I stumbled across a YouTube video that inspired the idea for my next learning project! The video posted below showcases a lady making a sign for her bathroom. She explains that she uses HTV vinyl for this project. I happen to have a roll of black vinyl that I have not had the chance to use yet! Additionally, I’ve just installed some shelves in my bathroom and have been contemplating what to display on them. A small sign will look marvelous on the shelf. Off to Dollarama I go, to find a canvas that will fit the shelf.
Upon returning home from Dollarama, I considered checking out other quotes before settling on the one featured in the video. I broadened my search to Pinterest, where you can find ideas and inspiration for everything. As I was scrolling through, I came across several funny quotes, but the one that stood out to me the most was this one shown in the picture below.

Although I am not to fond of the word “hate” I still think the sign is pretty cute and I can see my children having a good laugh over this! I went back into design space to see if I could find the same template to use. However, I had no luck finding this. I did not want to settle for a different sign so I decided to try out a new route outside of design space. During this learning project, I came across a video that was explaining the use of Canva for Cricut projects. Not knowing the exact steps, I turned to ChatGPT and asked, “how do you create a design in canva for a cricut?”
These were the results:
Step 1: Set Up Your Canva Design
- Open Canva: Go to Canva and log in to your account.
- Create a New Design: Click on “Create a design” and select “Custom size”. Enter the dimensions based on the size of your Cricut mat or the size you need for your project. Common dimensions for Cricut designs are 12″x12″ or 8.5″x11″.
Step 2: Design Your Artwork
- Add Elements: Use Canva’s tools to create your design. You can add shapes, text, illustrations, or import your own images.
- Use Vector Elements: For best results with Cricut, use vector elements as they scale without losing quality. Canva has a variety of vector shapes and icons available.
- Simple and Clean Design: Ensure your design is simple and clean with distinct lines, as intricate details may be difficult for the Cricut to cut.
Step 3: Prepare for Export
- Make Elements Solid: Ensure that any shapes or text you want to cut are solid and not transparent. Cricut needs clear paths to follow for cutting.
- Flatten Your Design: If you have multiple layers or elements, consider flattening your design to ensure it exports as a single layer. This can help prevent issues when importing into Cricut Design Space.
Step 4: Export Your Design
- Download as SVG: Cricut Design Space works best with SVG (Scalable Vector Graphics) files for cutting designs. In Canva, click on the “Download” button, select “SVG” as the file type, and download your design.
- Alternative Formats: If you don’t have a Canva Pro account (which is required for SVG export), you can download your design as a PNG with a transparent background and convert it to SVG using an online converter like Online Convert.
Step 5: Import to Cricut Design Space
- Open Cricut Design Space: Log in to your Cricut Design Space account.
- Upload Your Design: Click on “Upload”, then “Upload Image”, and select your downloaded SVG file.
- Prepare for Cutting:
- Clean Up the Image: If you uploaded a PNG, use the “Select & Erase” tool to remove any unwanted backgrounds or areas.
- Save as Cut Image: Make sure to save your image as a “Cut” image.
Step 6: Cut Your Design
- Insert Design onto Canvas: Select your uploaded image and insert it onto the Cricut Design Space canvas.
- Resize if Needed: Adjust the size of your design to fit your project.
- Prepare Mat: Place your material (e.g., vinyl, paper) onto the Cricut cutting mat.
- Send to Cricut: Click “Make It” and follow the prompts to cut your design.
These 6 steps make this process sound easy. I will attempt these steps to create my design. Practicing this in Canva will be a great step for my learning journey. If I can figure out this step, I feel it will open the doors to more personalized creativity in the future. ‘
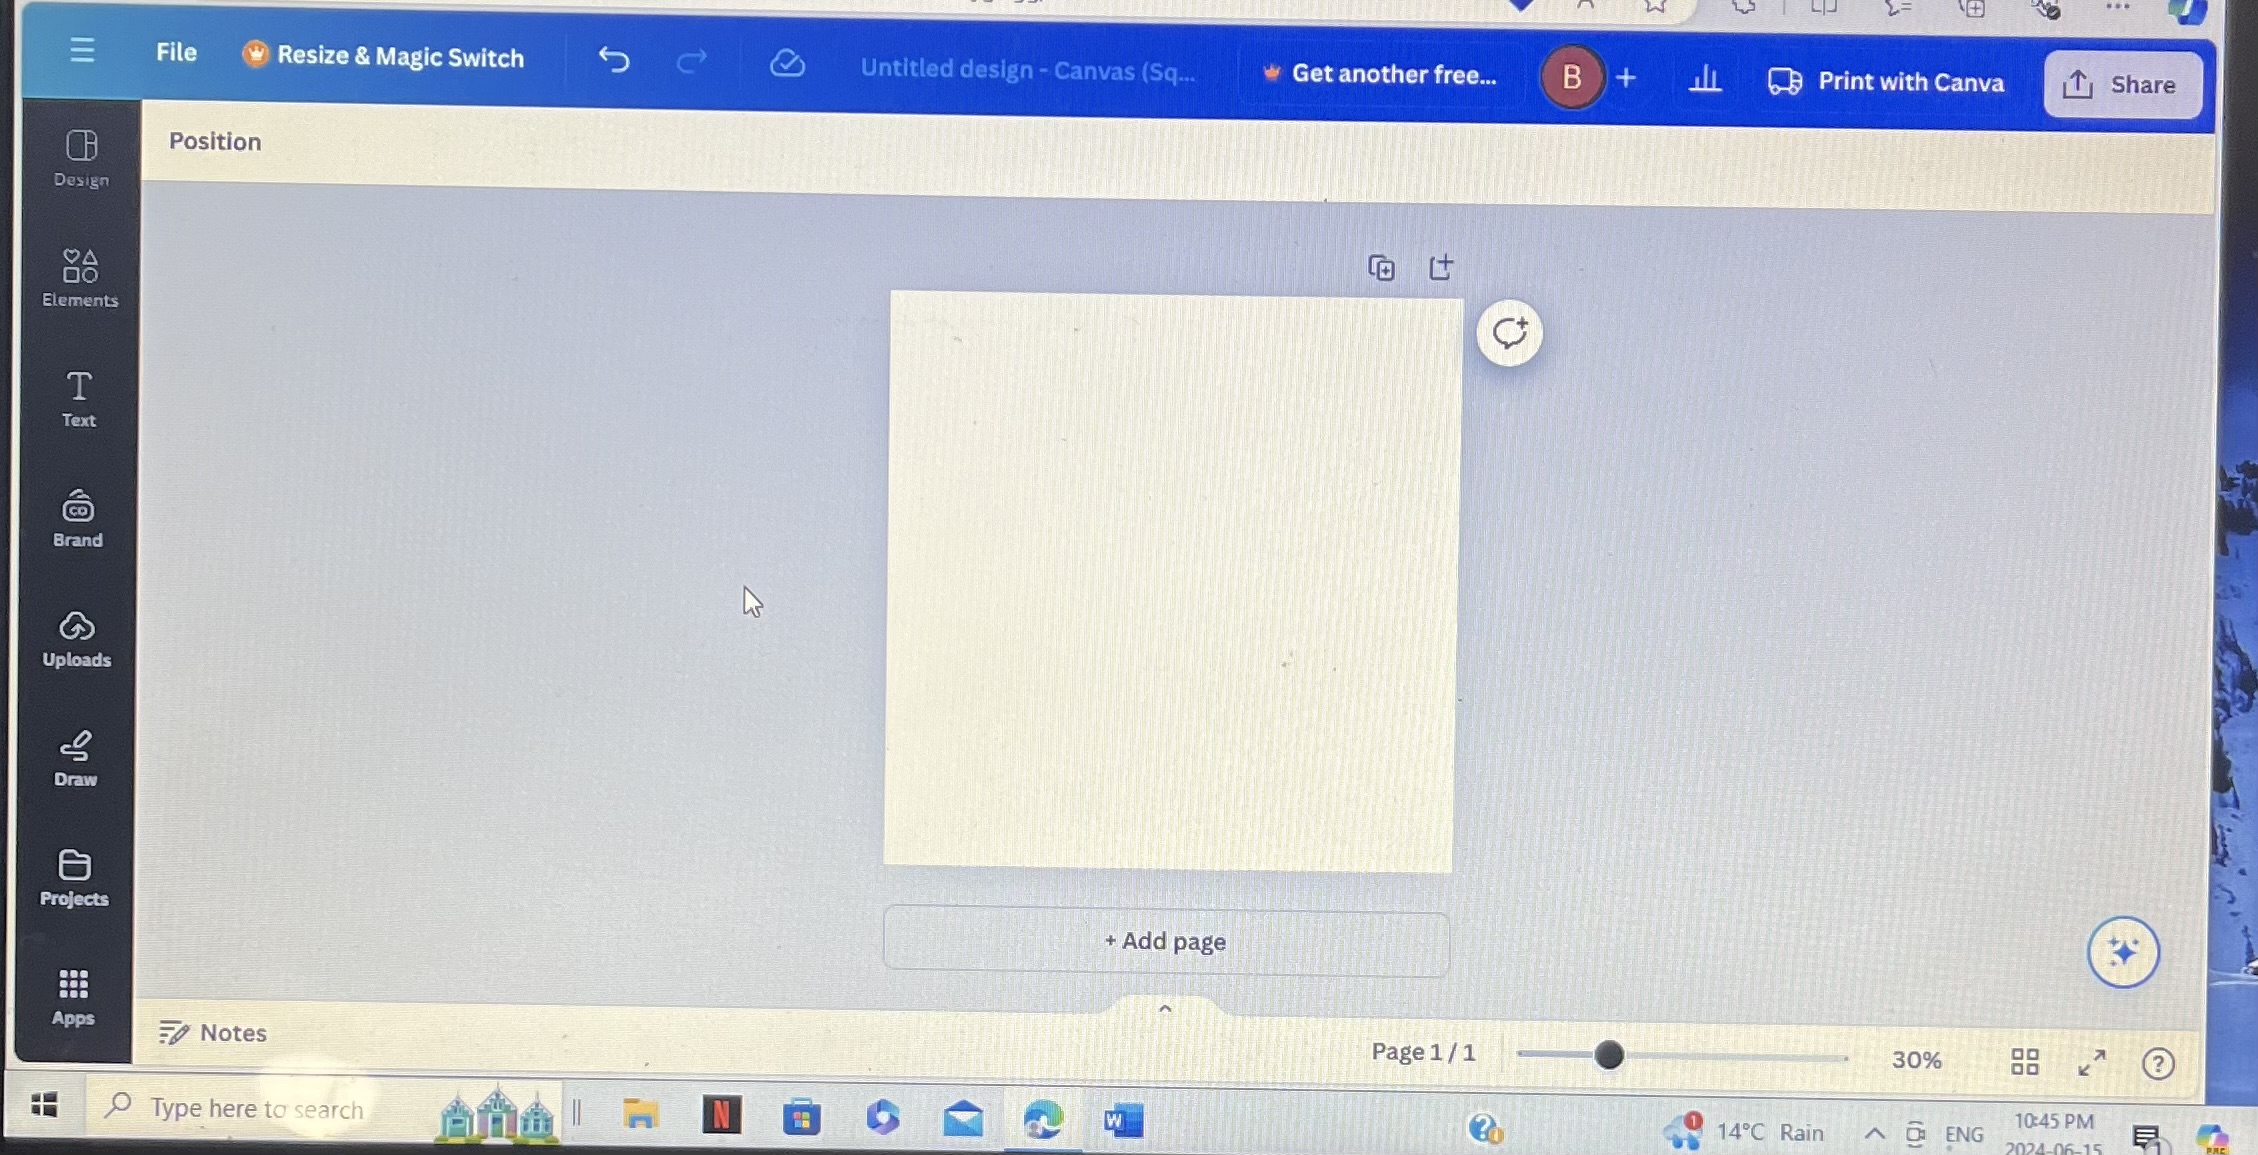
Step 1, is posted in the picture below where I have created a blank canvas design.
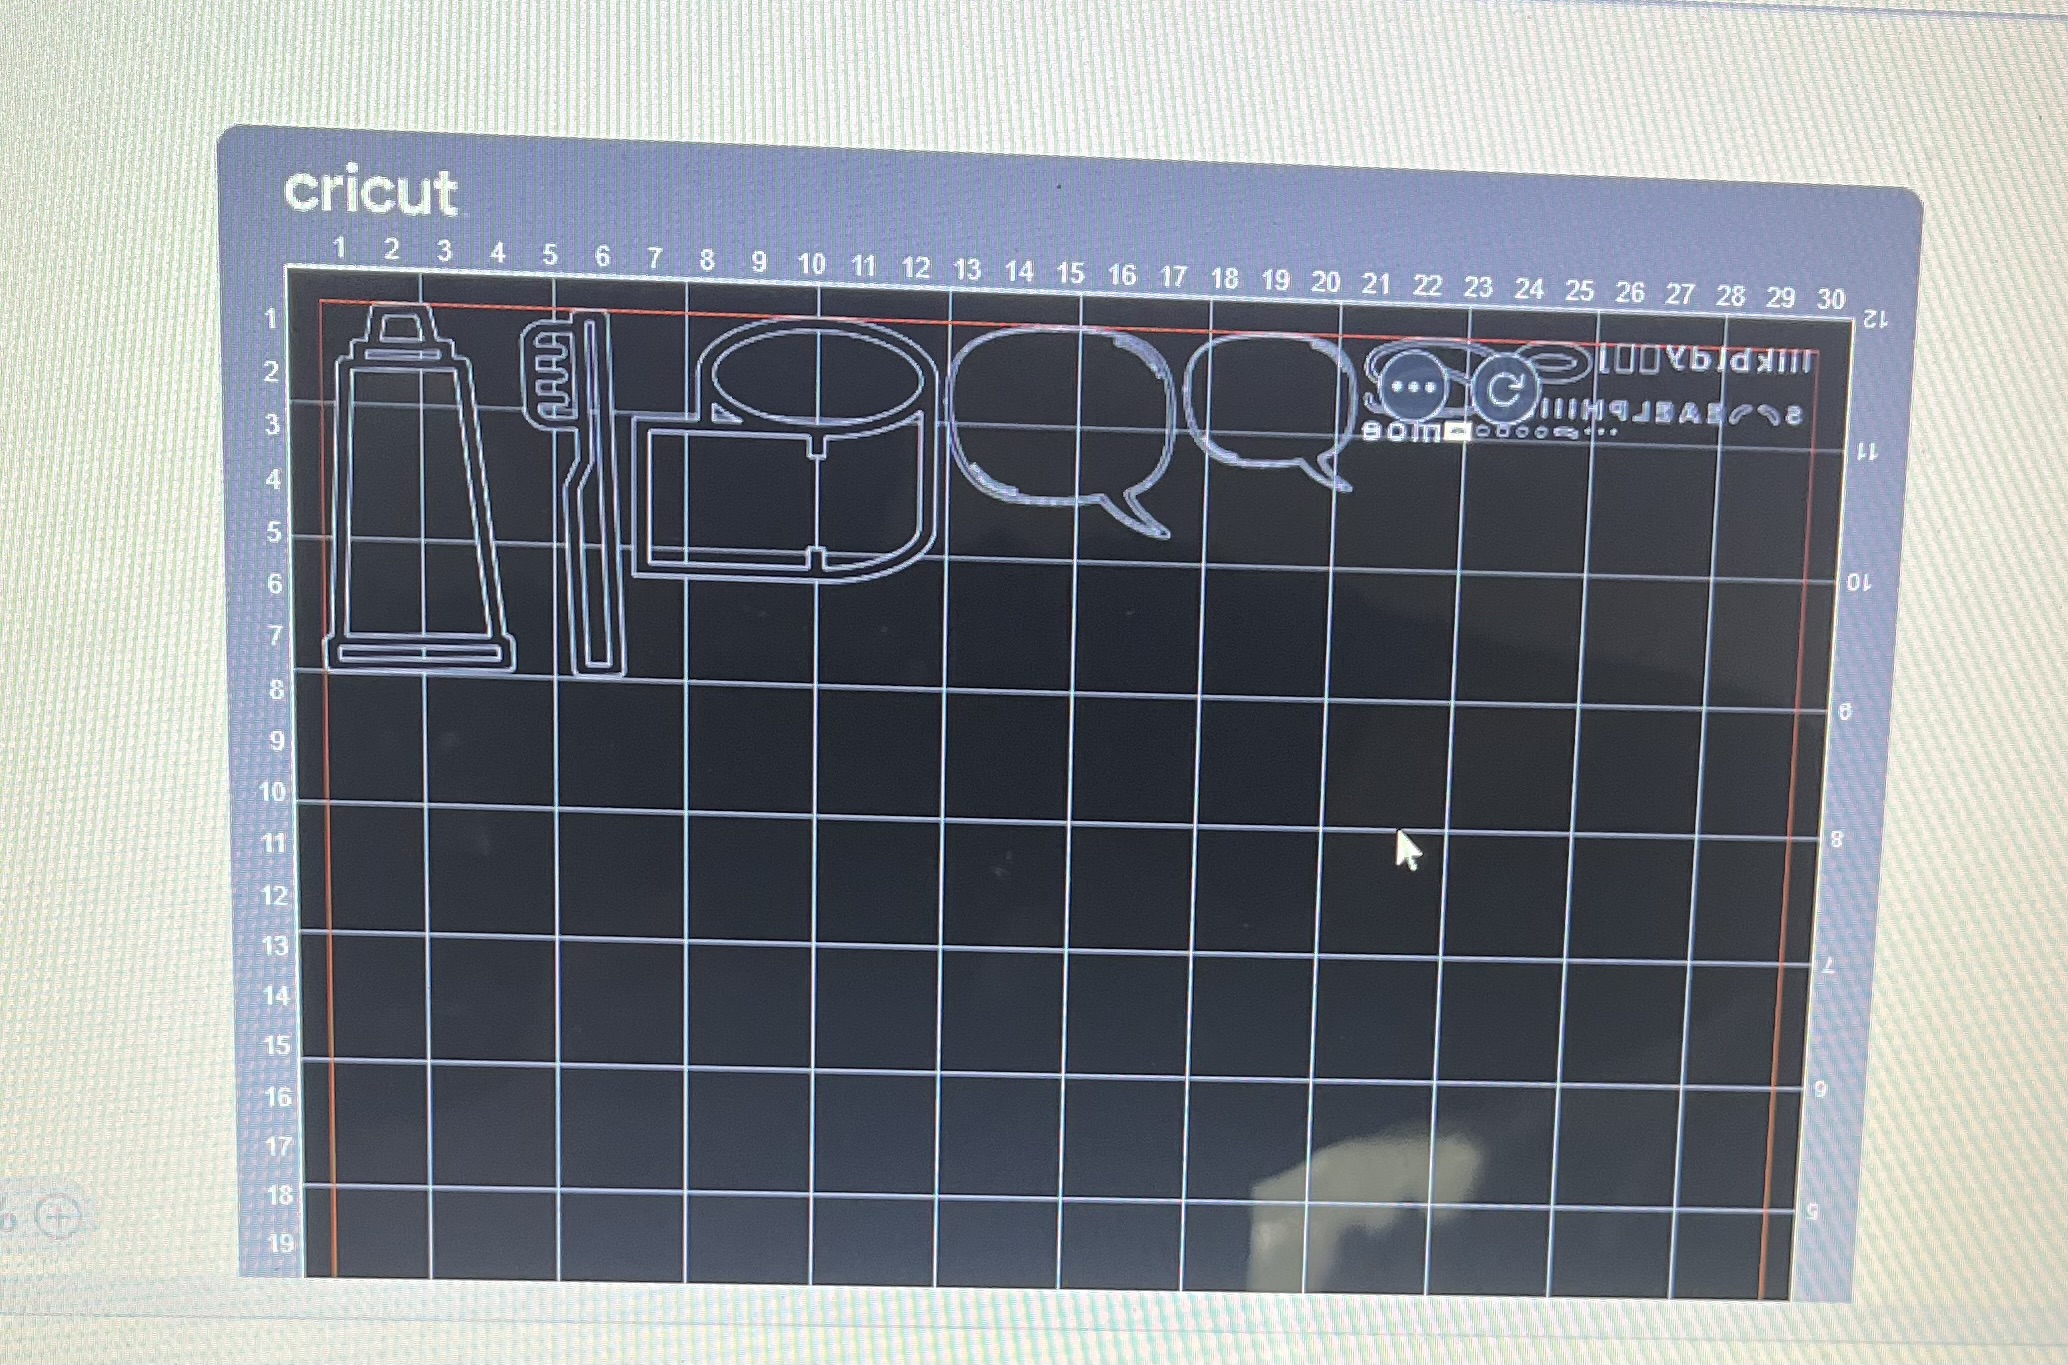
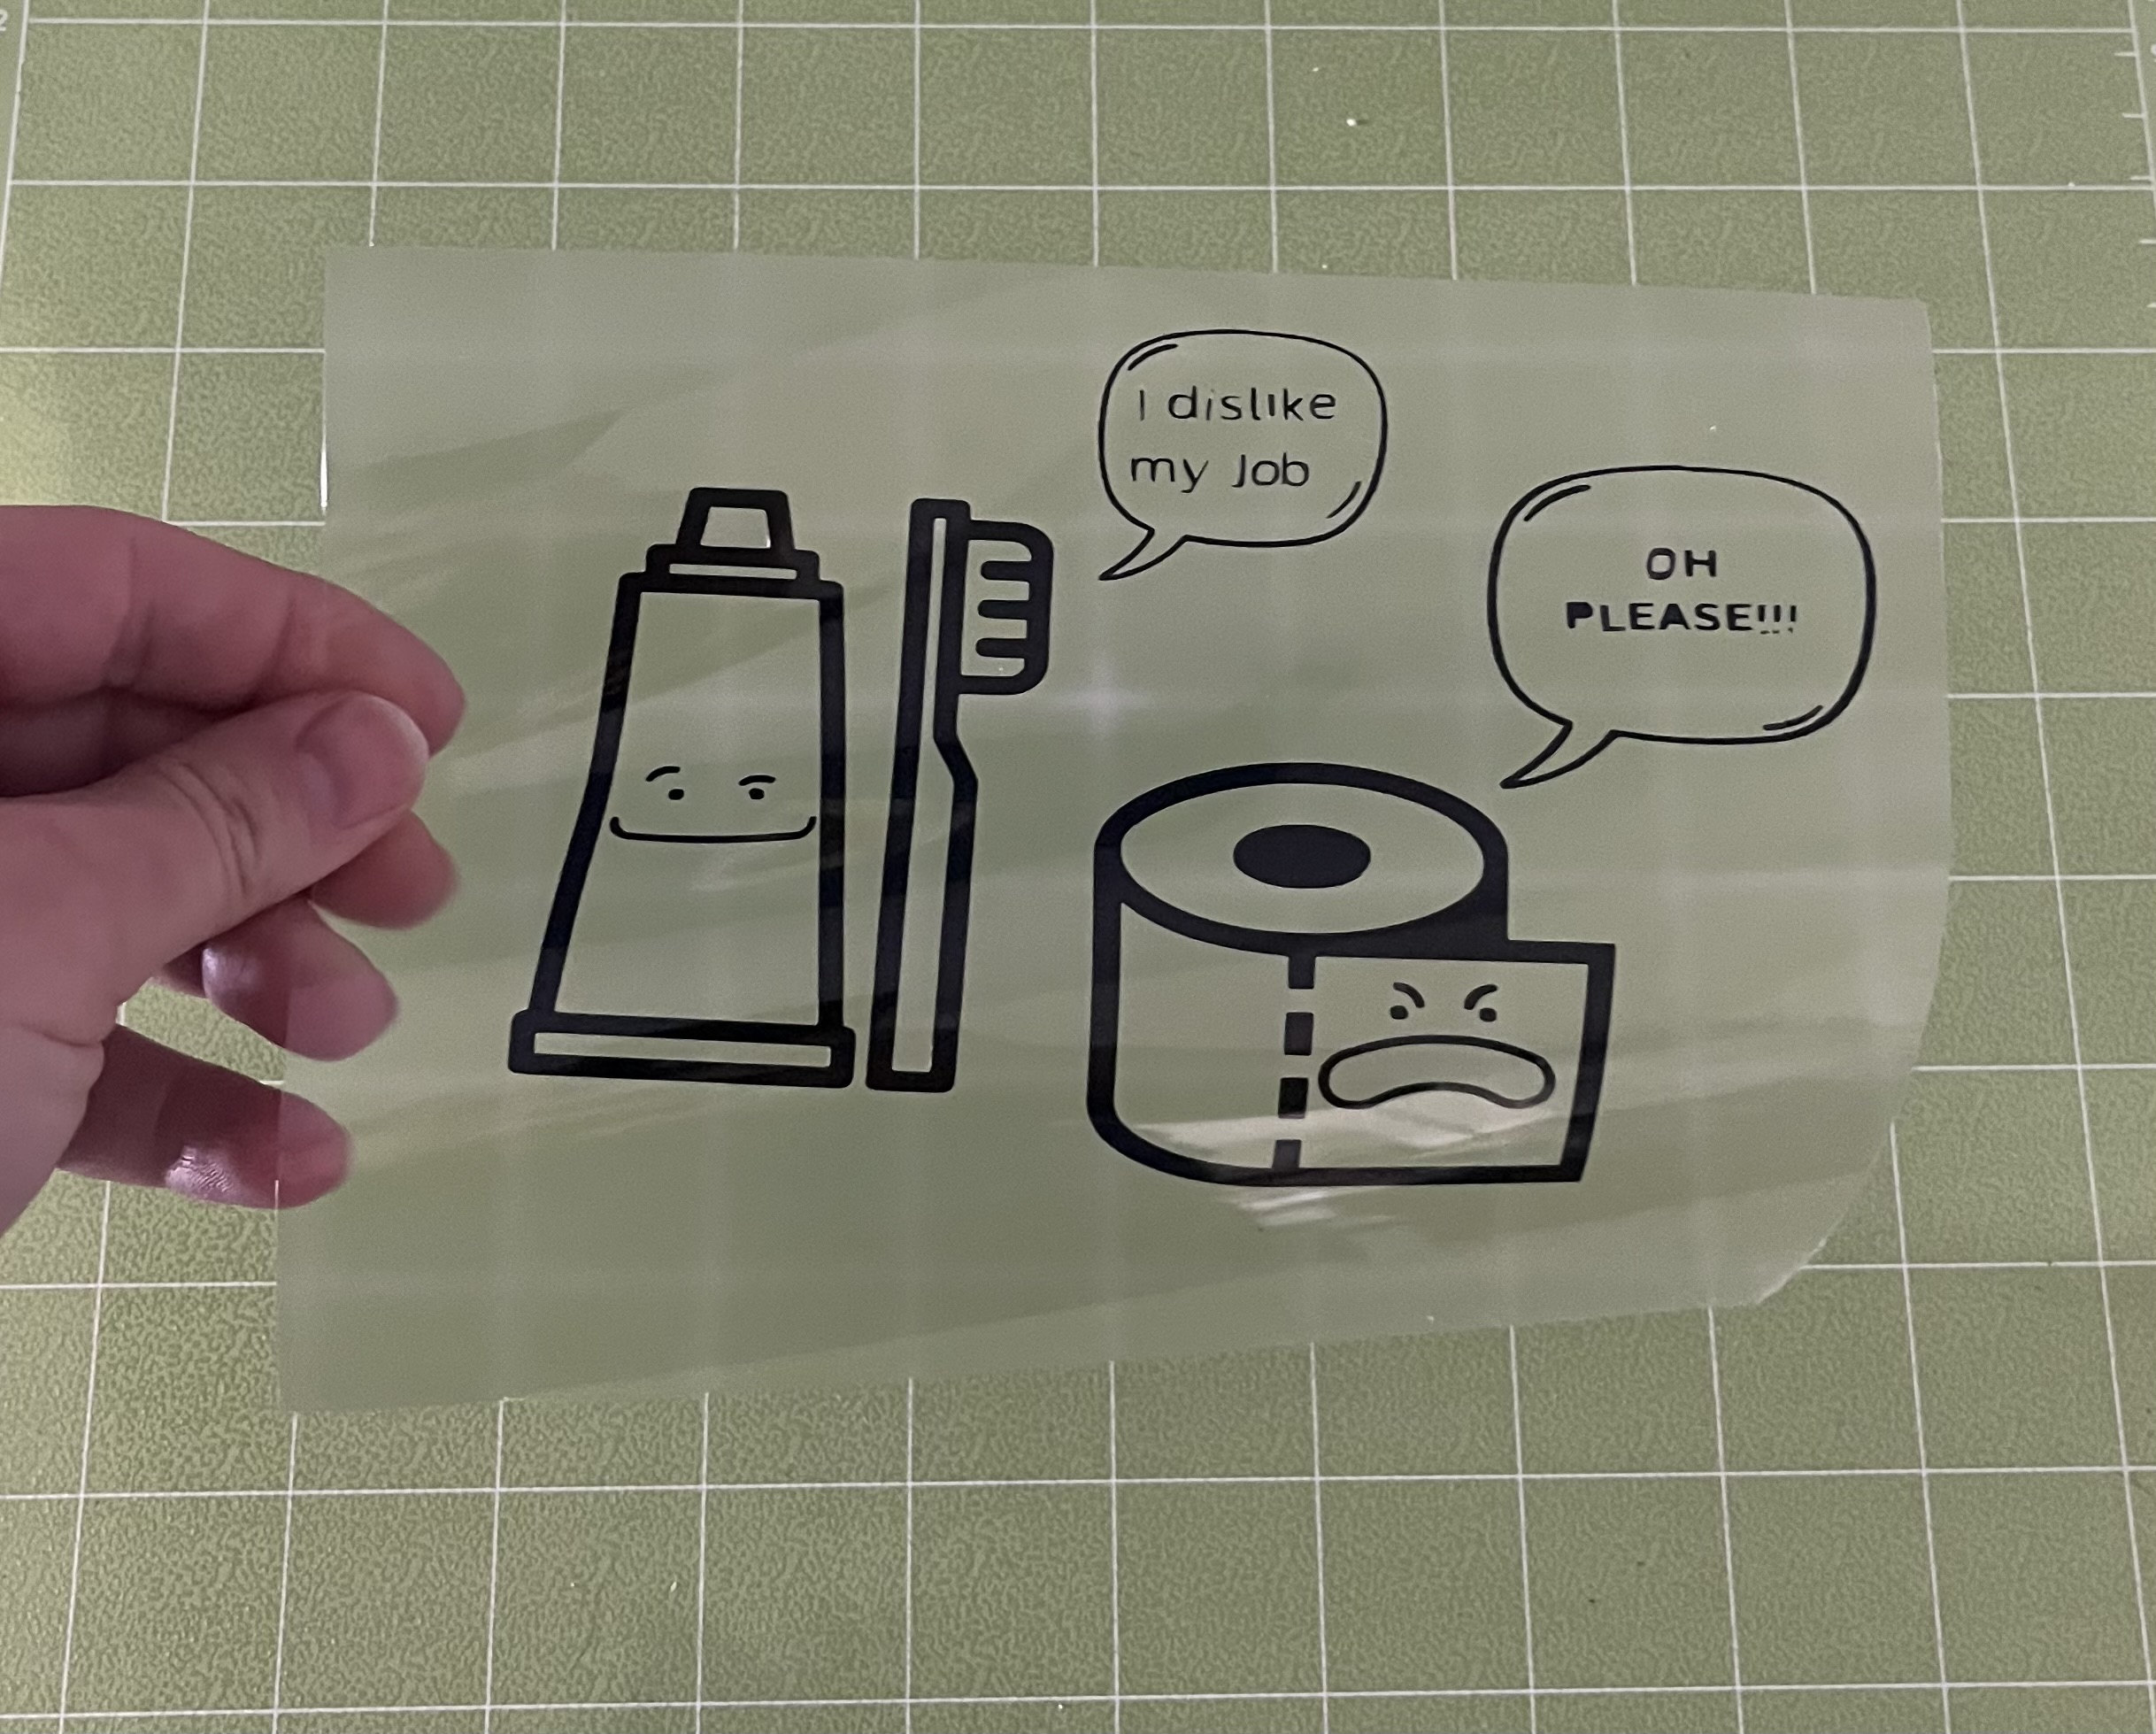
In step 2, I will try to find some images of a toothbrush, toothpaste, toilet paper roll, quote bubbles, and emoji faces. I only have the regular membership in Canva and not the premium one so I will be limited in what photos I can find for free. This step also talks about the use of “vector images” and I have no idea what that means so I will have to do a quick google search on how to find these images within Canva. Shown below is what I have created on Canva.

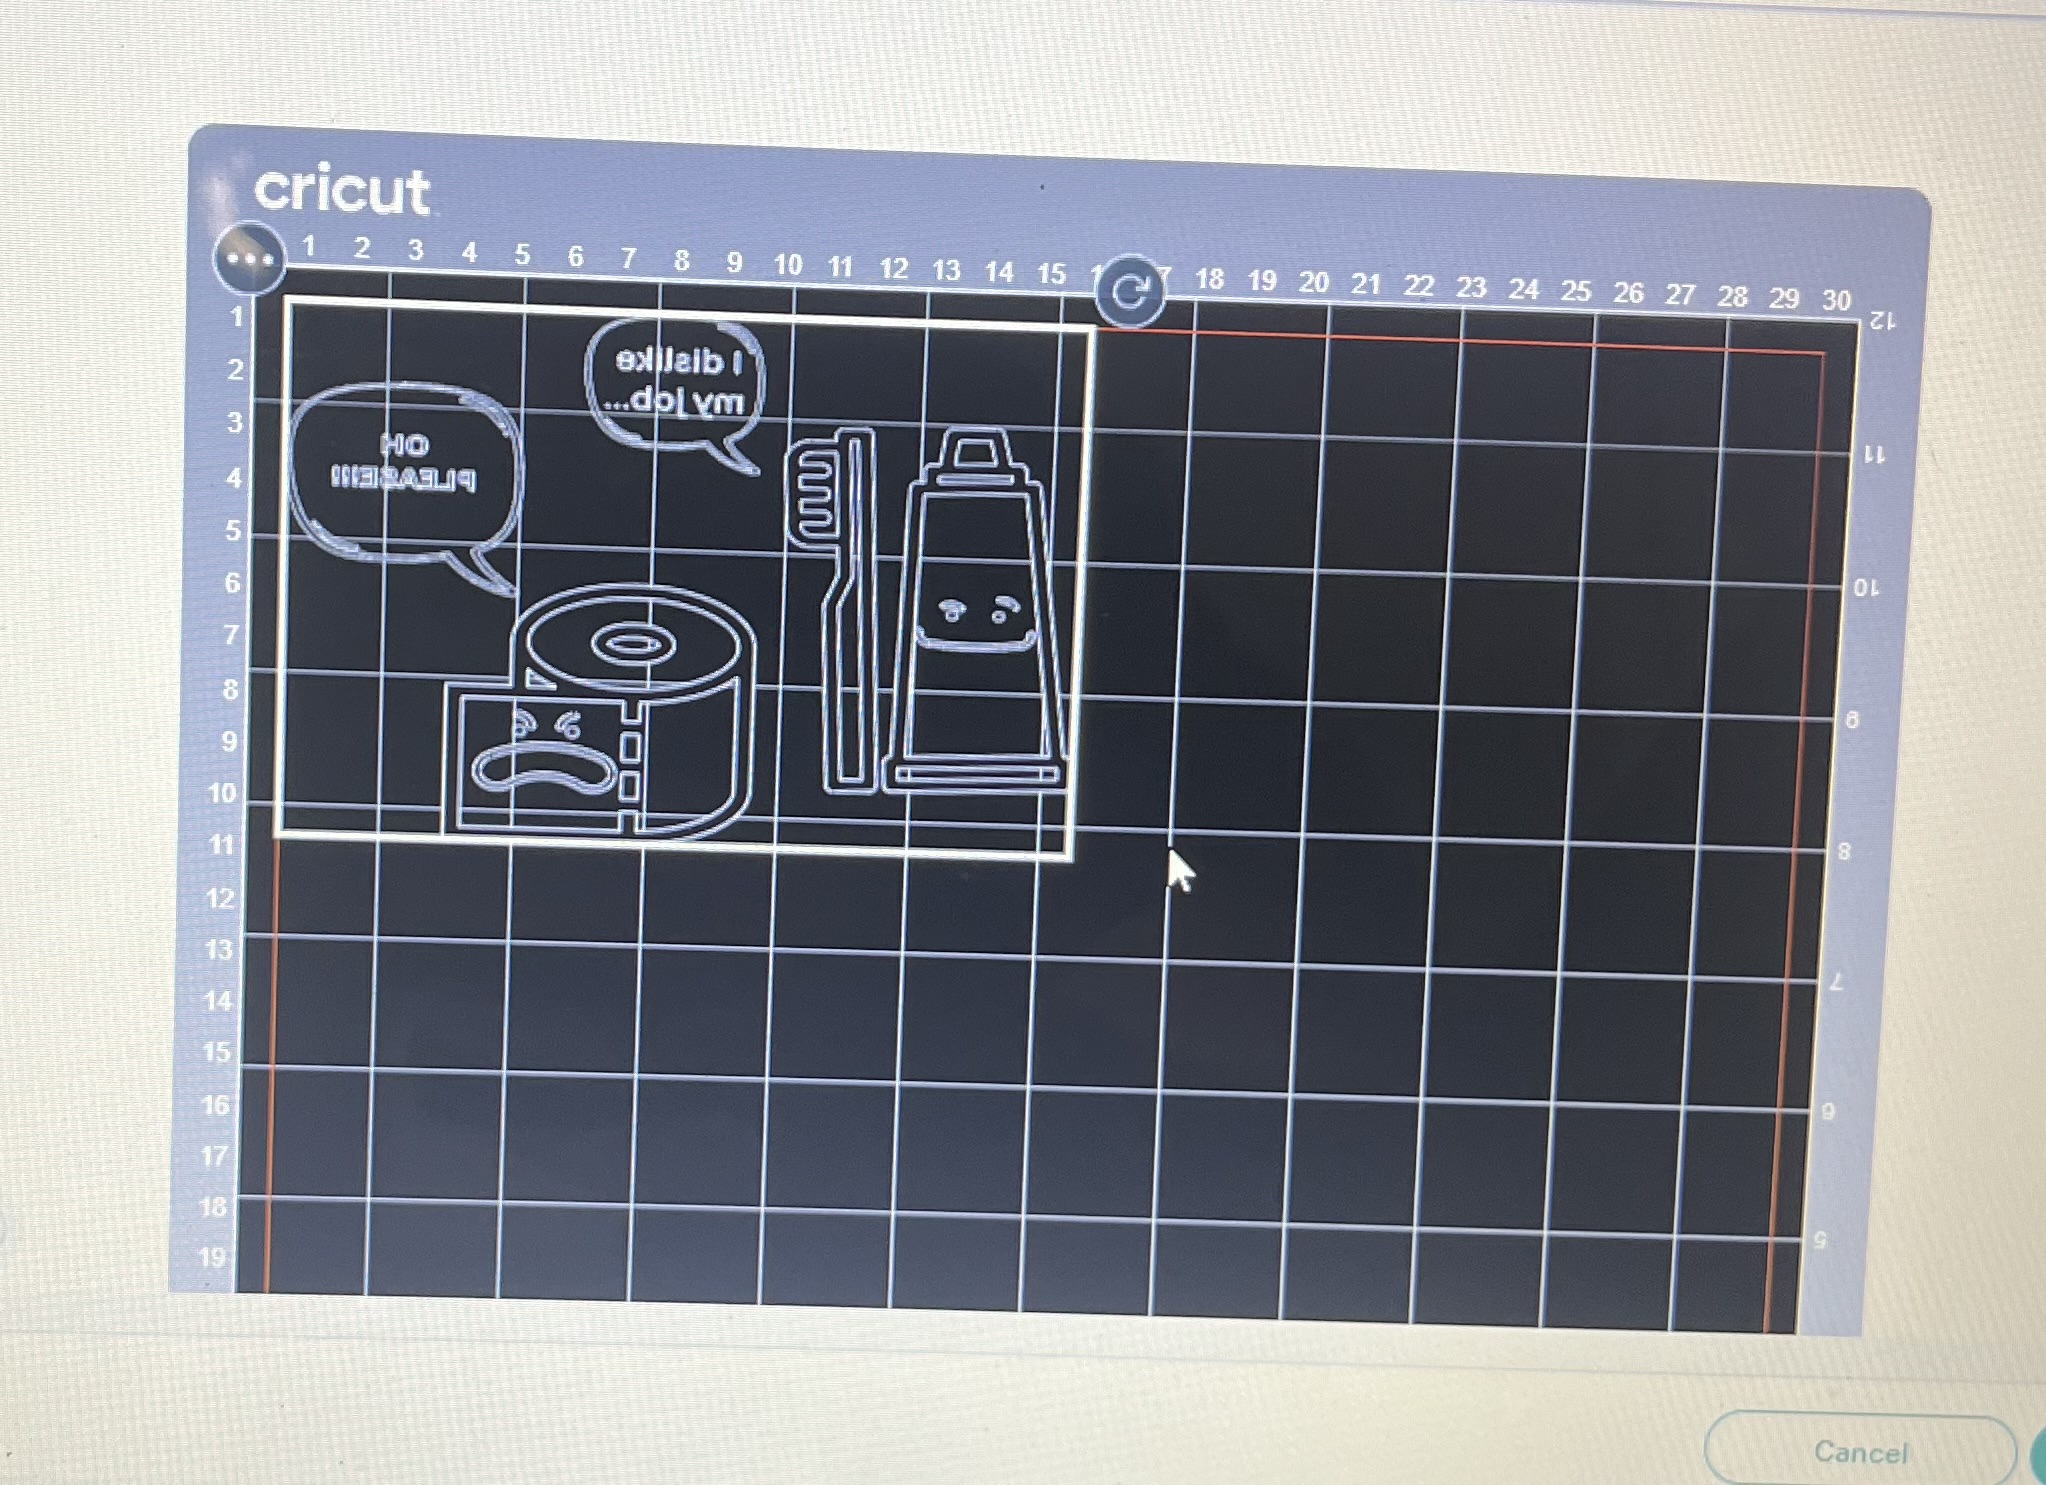
In step 3, it talks about “flattening” your design. My design looks ‘flat’ to me but I didnt really know what this step was asking for, so I turned to google and asked, “How do you flatten a video in Canva?” This video tutorial, gives step by instructions on how to flatten your video. To my surprise, my image was not yet flattened and I needed to combine all the seperate imgages into one. The video goes on to explain how to download the image as well.
Now that my image is grouped together, I’ve proceeded to step 4, where I have encountered another obstacle. This step requires me to download my image from Canva as an SVG, but this requires the Canva Pro membership. Alternativetly, Step 4 suggests downloading as a PNG with a transparent background. However this option is limited to Canva Pro as well. I have two options now, I either scrap the whole project, or I sign up for the free 30 day trial to Canva Pro so I can complete this process. Of course I am not going to quit when I am this far in, 30 day trial it is!
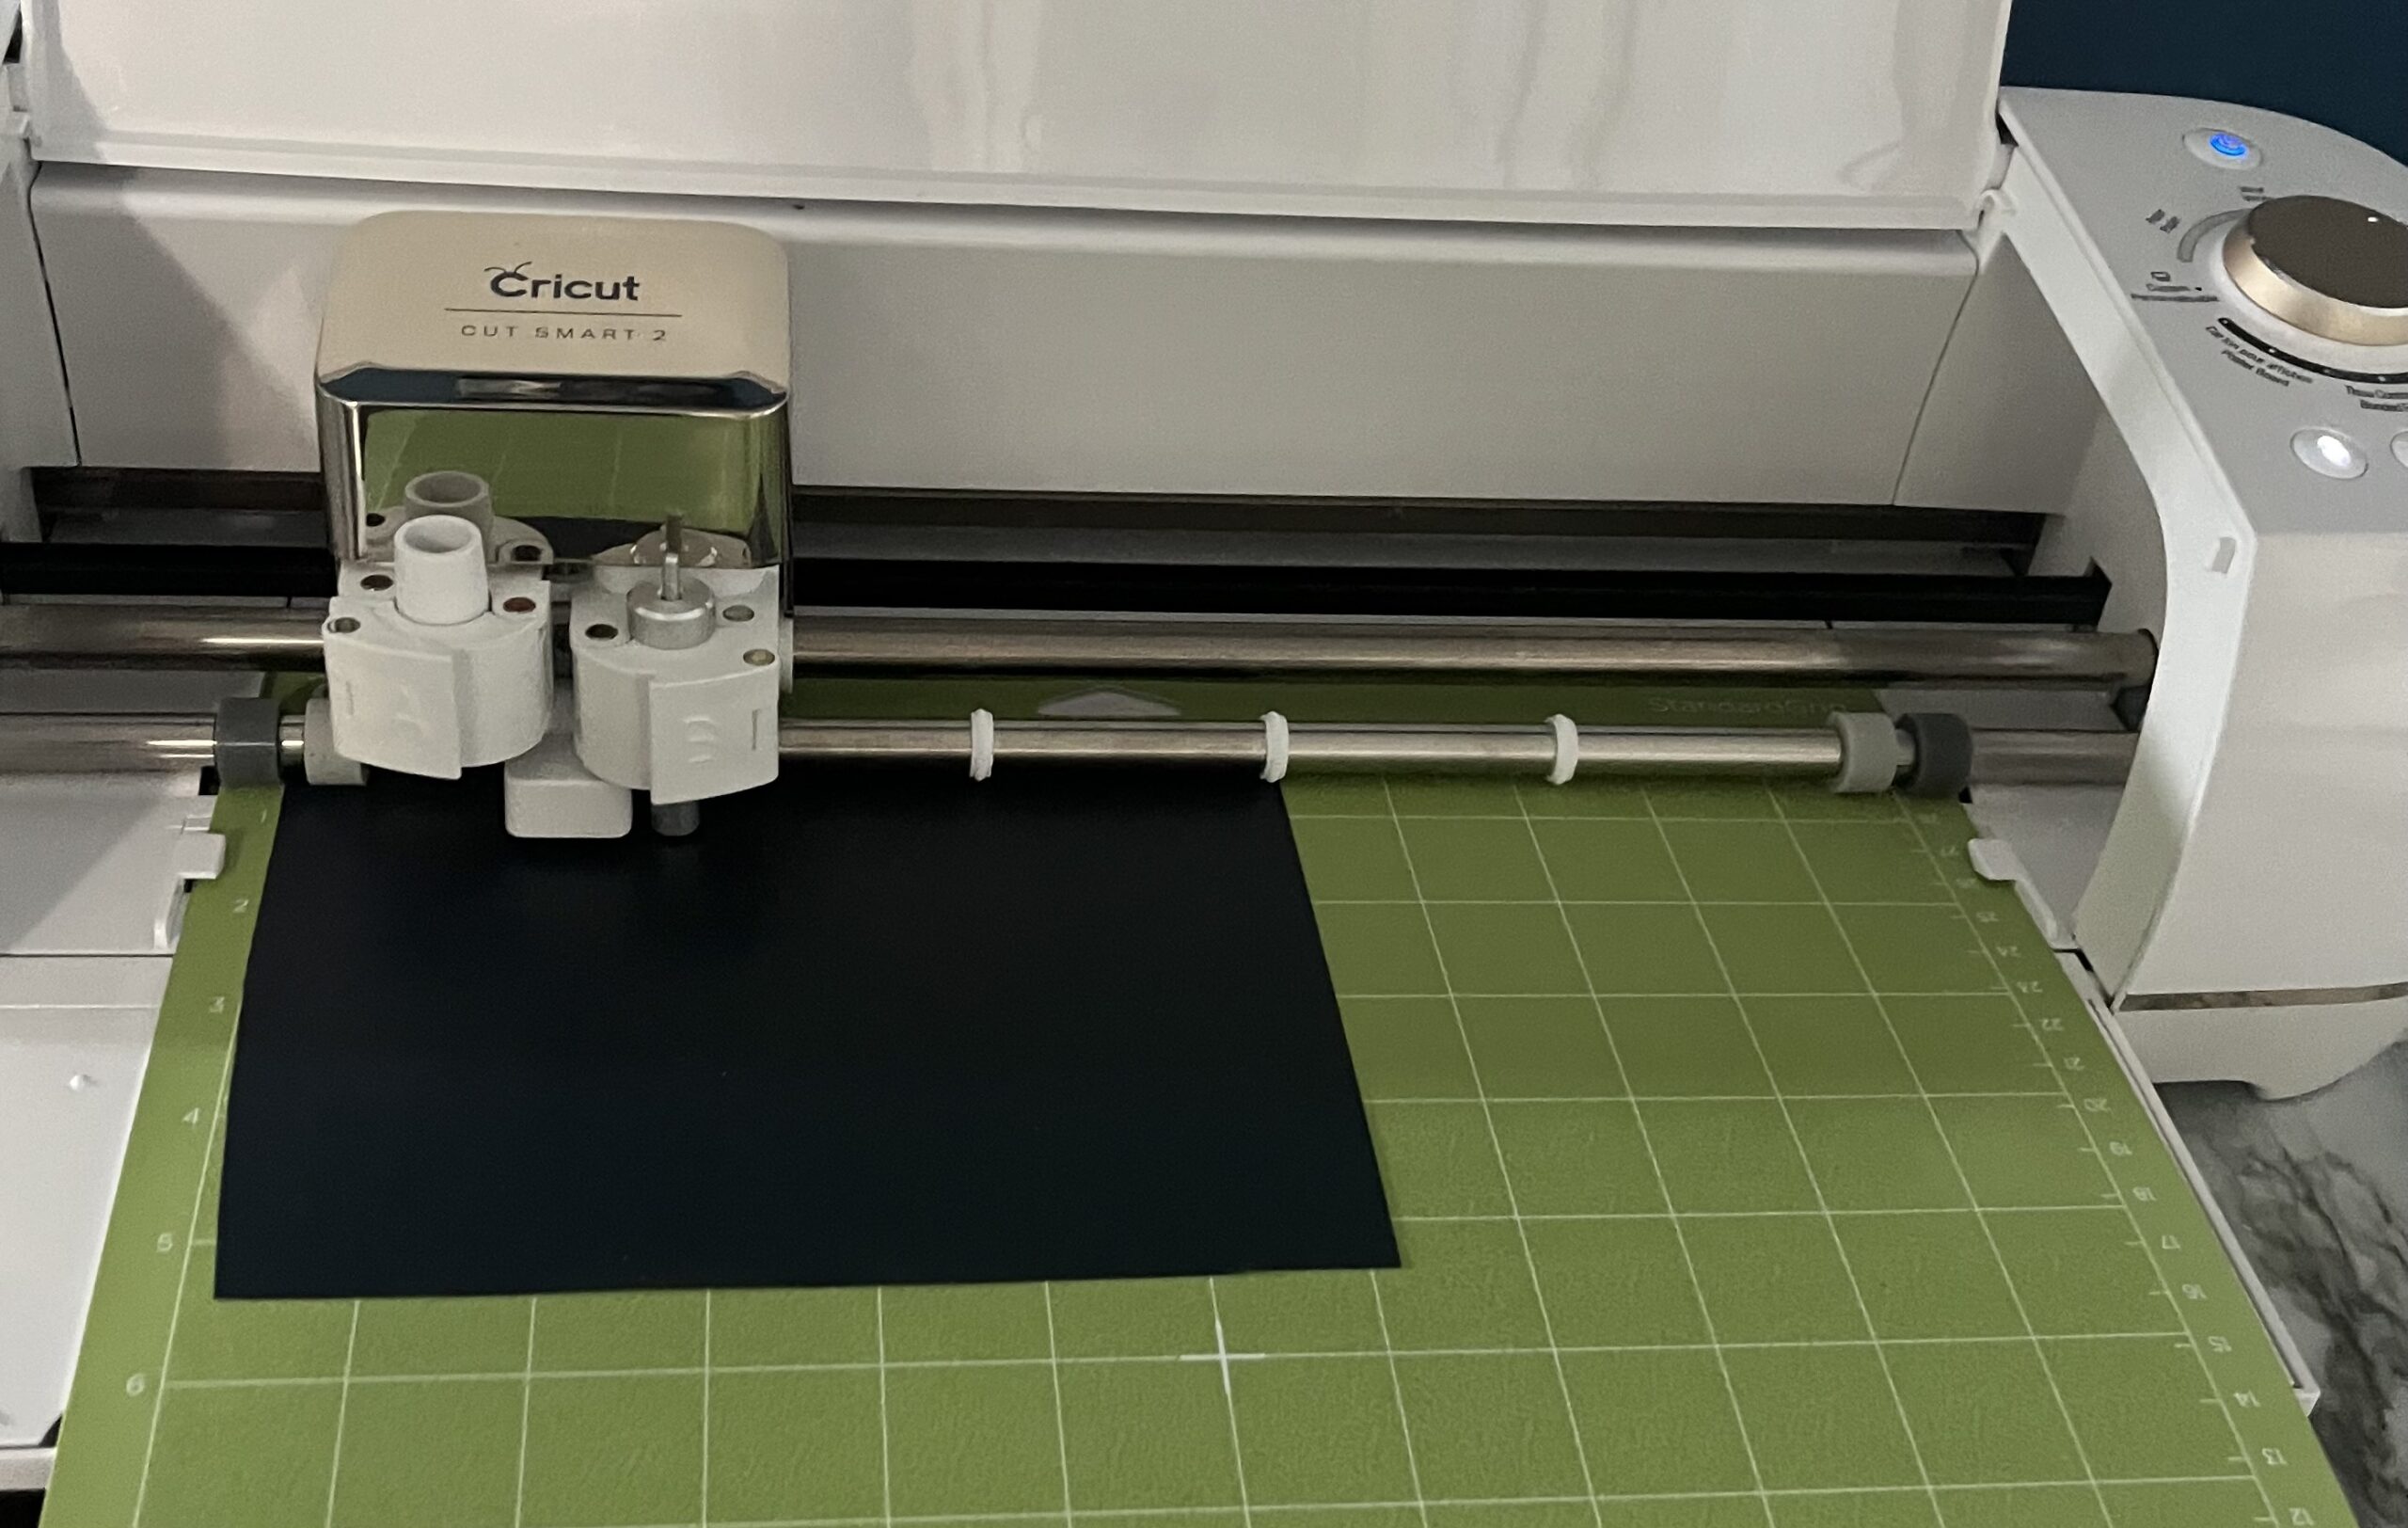
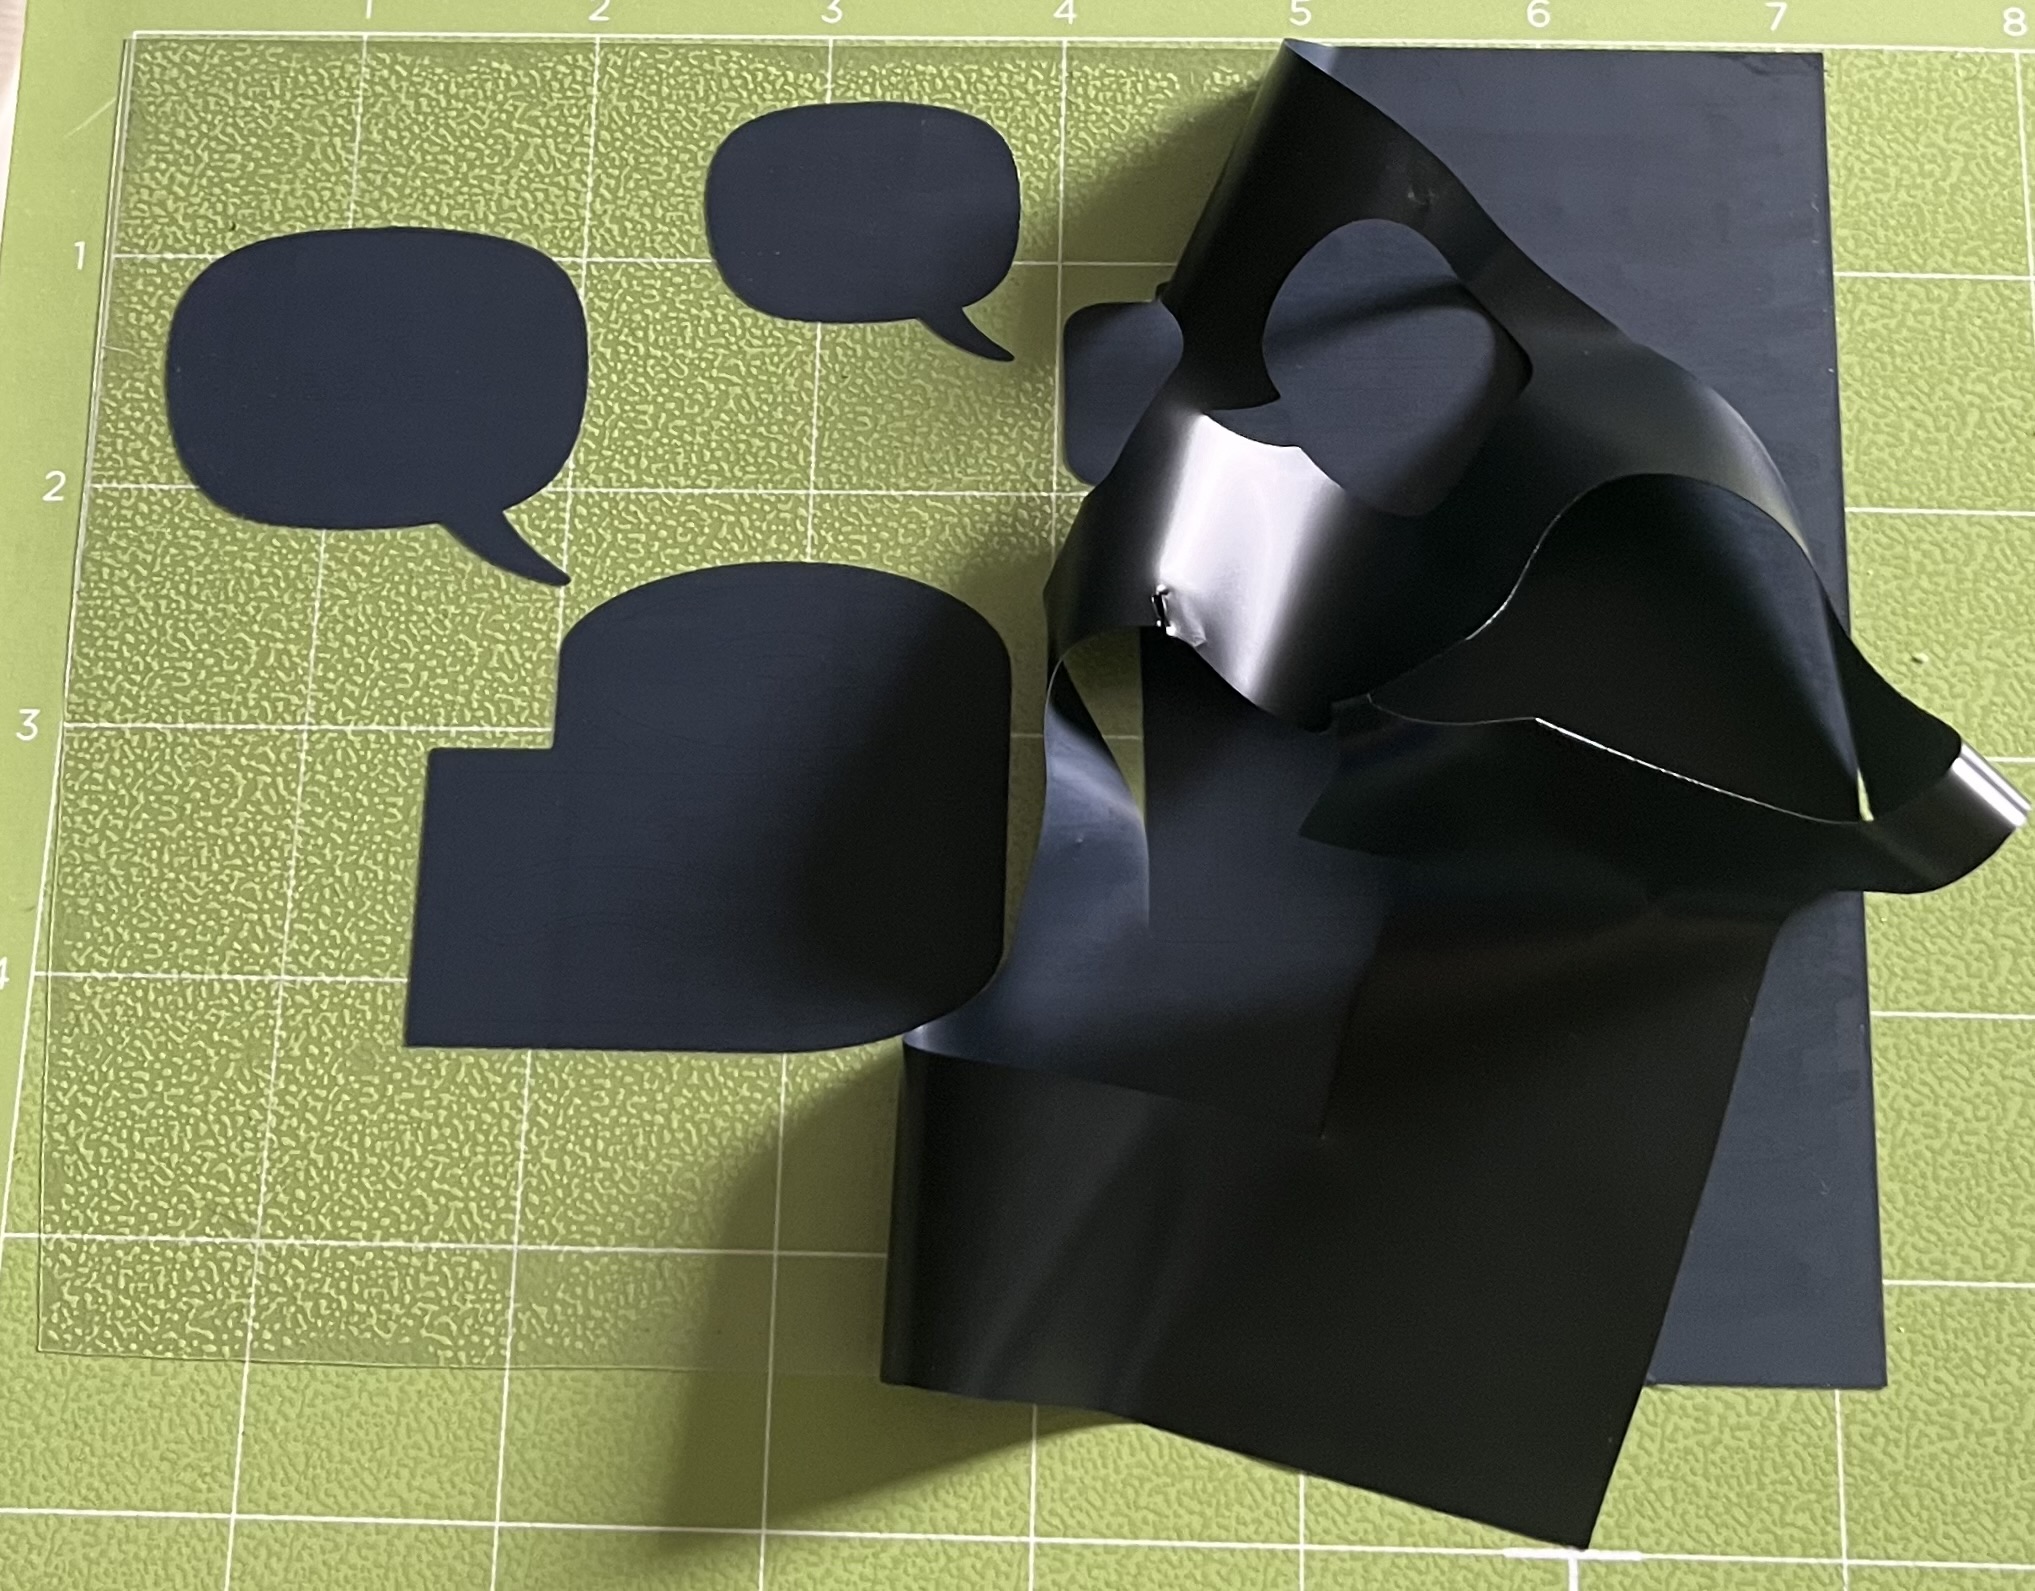
Next, I followed the instructions for step 5 by uploading the image and saving it as a cut file. Now I am ready for step 6, which is to cut and see if I can successfully cut an image from a Canva creation. After mirroring the image, I pressed the ‘Make It’ button, and it separated my image, causing the words to overlap with the emoji faces. The pictures below show what happened.
Back to google I went to figure out if this was normal to seperate all the images or if I could do something about it. Sure enough I found a video explaining that you need to highlight the image in the order you want it and select a button on the bottom of the screen that says “attach” this kept all the images in the same place when it enters the cutting step. Shown below is the aligned parts after I have attached them altogther.
Here is the progress photos after the cut as well as the finsihed product!
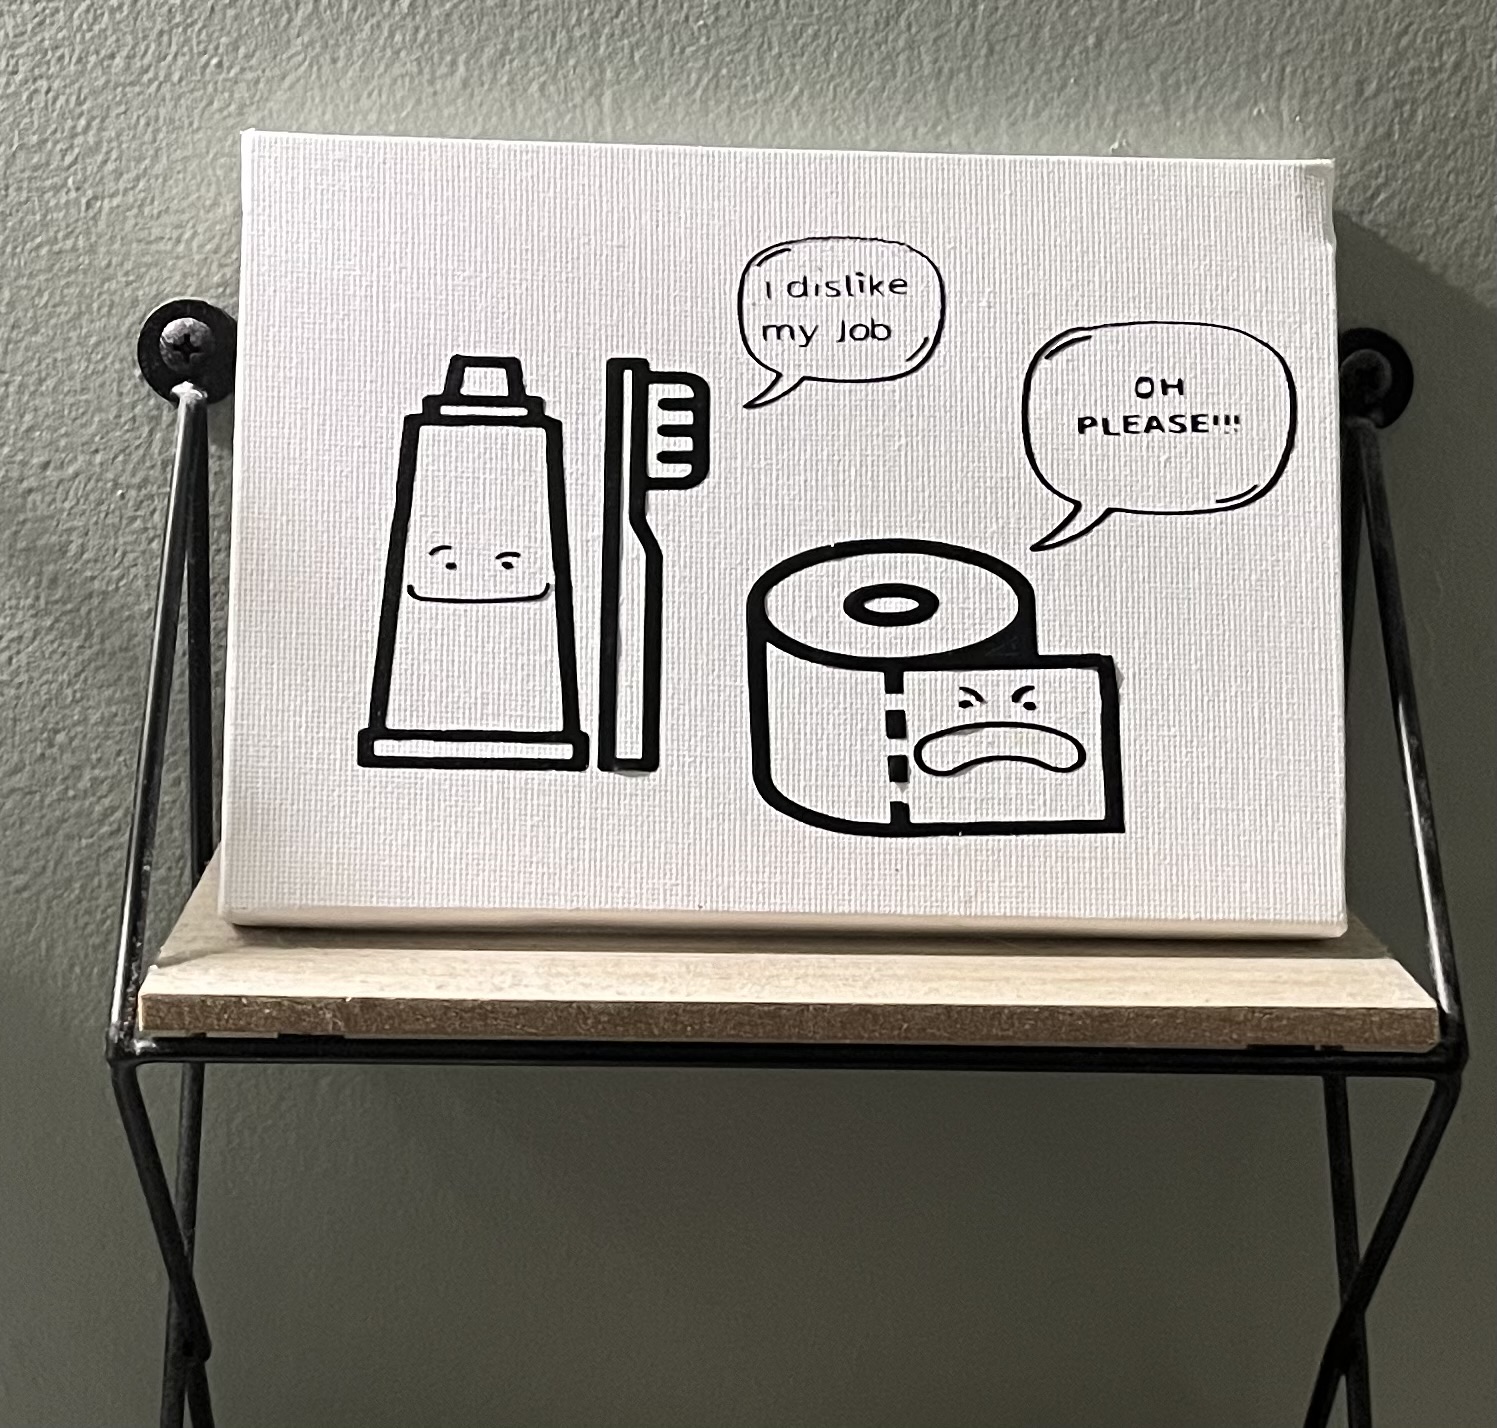
The HTV vinyl did not adhere well to the canvas. Despite multiple attempts to press the vinyl in hopes of a better attachment, some areas still would not stick. Others have used a product called “mod podge,” essentially a glue painted over the top to assist the vinyl in sticking. However, since my project had only a few small areas that weren’t sticking, I decided it wasn’t necessary to use the mod podge and it would hold up just fine. Overall, I think I would do a project like this again. However, I would choose larger letters as working with those tiny letters was slightly challenging. Additionally, learning to use Canva was a valuable part of this experience, and the step-by-step instructions from ChatGPT was beneficial as well.
Hello Brittany!
I loved following your journey with the Cricut. I also own one and have used it a lot, including making signs for bathrooms!!! It is absolutely amazing the things you can do with the Cricut after sitting down for a bit and reading up on it! It is very difficult working with small cutouts such as letters, so it was very smart of you to choose larger letters. One hack I use is ALWAYS using parchment paper when using HTV, just so I can apply a lot of pressure without melting the vinyl.
One thing I have never done is use Canva to create designs for my Cricut projects, and as a Canva lover, I am definitely going to try this!