Here is the AI song I made for the video!
Kade’s Kitchen Week One: Laying out the groundwork for the upcoming term in EDTC 300
- I wanted to become more comfortable trying new recipes in cooking and baking.
- Becoming a better home cook? Yes, I did showcase that learning is being aware of the mistakes that I might make, taking my time in the kitchen (not rushing), trying to be calm, the pros and cons of sources, developing a growth mindset, and willing to continue trying new things online.
- In hindsight, I did not use the NYT Cooking app because I heard it was controversial for kitchen beginners.
- I did see the unique ways a person could cook with technology in 2024 through the sources listed, like Facebook, blogging websites, Nick DiGiovanni, TikToks, celebrity chefs, and the use of AI
- Most of the dishes were healthy, comfortable, and rich in culture
- I did sort of apply it to a Home Ec class
 Kade’s Kitchen Week Two: A Sweet and Sour Adventure on Facebook
- I used Facebook from a creator’s reel.
- Understanding my comfort level in learning and safety is good most of the time
- I tried to follow the reel with the Ingredients I had at my house
- Put three links and picture to boost community involvement
- Connection to flavour and it is okay to try new things with adaptation in recipes over time
- Healthy meal
- New Skills: chopping chicken, dredging, frying it in a pan, and cooking it in the oven with a sauce
- Transferable skill to education in accommodation and inclusion
- Quick, reliable, and realness to cooking that I was scared of through Online Sources
- Acceptance that I need to have time for the Learning Project and ways to improve
- I wanted to continue being curious because then you take more opportunities
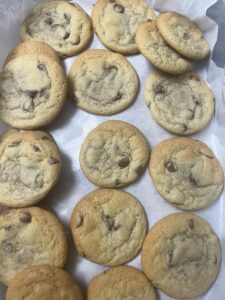 Kade’s Kitchen Week Three: C is for Cooking!!!
- I channelled my inner Cookie Monster for the first time in forever
- Brynn recommended Sally’s Baking Recipes, and Peter also pushed me to be my very best at baking
- I started putting the recipe into the posts to make them more accessible
- Start of a detailed description of what exactly I did during baking
- Experimenting with using Corn Starch because I had never heard of using them for cookies before
- I thought chilling was only for sugar cookies, but I was mistaken because they are the best cookies I have ever had!
- History of Chocolate Chip Cookies and Chocolate
- Figuring and knowing why cooking is an art and baking is a science.
- Changing attitudes to the point that I was starting to enjoy this project as more than just schoolwork
- Challenges are in the knowledge that makes you a better learner in the long run, and you always have to overcome them to succeed in life.
- I am becoming more open to classmates and more genuine in this class.
- I realized that all I have to do is be myself and put in the effort.
 Kade’s Kitchen Week Four: Staking Out Photo Editing
- I had always been confused about how to cook a steak, so I decided to give it a try during Fall Break to thank my family for supporting me during University.
- I used two video recipes (one was a short) by YouTube chef Nick DiGiovanni
- Time efficient, unlike Photoshop, I did not want to do a video like everyone else. So, I perfected the pictures to a form that you would see in cookbooks or on Instagram
- I can deviate from the recipe in all good spirits because it does not end the world with the use of Montreal Steak Spice
- SAMR model opened my eyes to how technology could be adapted for the classroom
- The Photo Editing programs are a little finicky behind a pay wall, but they look perfect like the Steak and Garlic Mashed potatoes taste.
- The end product equalled a new perspective and skills, dedication, hard work, and presentation of my blog/the food on the plate.
- Simplistic, decadent, and wholesome!
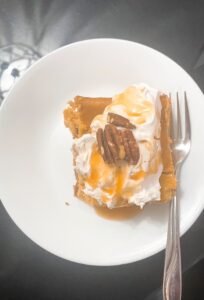 Kade’s Kitchen Week Five: Are you PUMPED for Pumpkin Cheesecake?
- It is my favourite dessert that I made.
- I used Natasha’s Kitchen and started to rate the sites based on what I had learned.
- I am starting to feel closer to being a professional in the kitchen rather than a home cook.
- I figured out issues with Edusites pictures because they have been a pain in my side. They either say they are too big or in the wrong format. So, I email them to my university email and download them to my commuter as thumbnails.
- It’s okay to notice the imperfections with recipes, i.e. the brown sugar
- Similarly, I made a mistake because cheesecake is hard to bake, and it was cracked. I overcame this by doing some research on the issue. Ensuring that the same thing does not occur again and recognizing that it is a part of the learning process.
- You can’t be a perfectionist in cooking or baking
- I will make Pumpkin Cheesecake again because it is to die for!
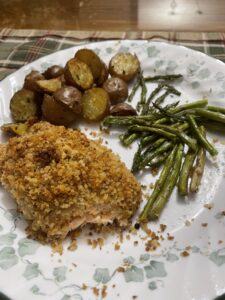 Kade’s Kitchen Week Six: Swimming through the Food Network for Salmon
- Due to the cooking host’s positive attitude, I want to be like Mary Berg as a teacher and in any learning task.
- Hoping on the nostalgia train only motivated me more this week!
- I used the Food Network‘s online source, and it was alright. It was commercialized without the charm of a cooking blog or the audience of a content creator.
- I recommend it for anyone looking for a quick supper (45 minutes) and meal prepping.
- As always, I took pictures of my journey for everyone to see.
- While making this recipe, I learned to be practical and dedicated in the kitchen. I solved problems critically through my passion for understanding a situation by broadening my horizons with Salmon. I was afraid to try anything involving fish due to a lack of responsibility and tired after a long week.
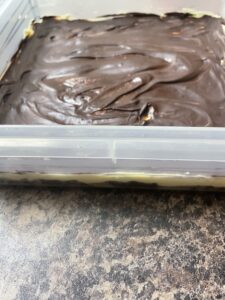 Kade’s Kitchen Week Seven: We Built This City…. On Nanaimo Bars!
- Three-layered dessert was a challenge because I have never used a double broiler before, and the science behind it is fascinating!
- I used TikTok content creator Spirit Alchemists, and Larry produced an easy-to-follow video with a well-crafted, rich taste.
- In the baking section, I tried to make my post fun to convey my overall persona in the kitchen.
- Overall, the bars were joyful and experimental—to think that I would not have been capable of making them a few months ago!
 Kade’s Kitchen Week Eight: The Battle of Lunch Proportions upon Soup & Buns
- The ideal pairing of Soup and Buns complements the approach to finals
- Not a fan of Campbell Soup and grocery store buns
- I used two recipes: The Natural Nurturer and A Pretty Life In The Suburbs. I enjoyed the soup’s health focus and the inclusive focus on recipe modifications. I will make the soup again and search for more on the site. Meanwhile, the buns were interesting because I tried the bread maker for the first time, and they were delightfully fluffy. I’m considering how to do dough for a future week.
- Continuing to be calm and collected in the verses of multitasking discovery!
- There was a little mistake with the hamburger in the soup, but in the end, it tasted perfect for cold winter days.
- I will take away that I have control of the kitchen or whatever else might come my way in life, but creativity has to exist to be whole.
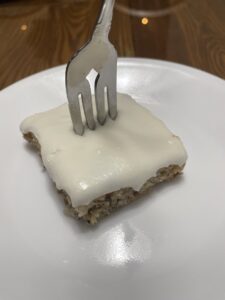 Kade’s Kitchen Week Nine: Going BANANAS for this Cake Recipe!!!
- I used a recipe from A Mind Full Mom and it was homie and personal
- I have always wondered about the science of baking soda. It’s interesting, to say the least…
- The frosting is the chef’s kiss.
- I will make it for my Mom around the holiday season
- Measuring has been an issue for me, and I finally solved it by reading the Cake Baking Rules
- I should have added more photos, but I forgot while making it… oops
- Continued determination in my growth mindset through the inspiration of my classmates and the fact that I value this recipe because of my persistence
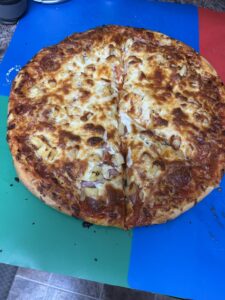 Kade’s Kitchen Week Ten: Like a Big Pizza AI, That’s Magically Amore!
- I used ChefBot AI to see the limitations that this form of technology can do for a recipe. There were some, but it is a personal issue with no pictures and feeling like a robot rather than a human presence. How much of any bot can you trust? The only thing nice you can do in this case is to rely upon it for cooking and baking.
- The pizza was top-notch because of my experience with dough. The sauce was good but a little bland. Everything else was my choice, from the deli meats to the vegetables to the mozzarella cheese.
- Inspiration from online videos and Briana Leibel’s beading with AI post
- Taste and patience are the most critical issues in a kitchen
- Magic School AI is an excellent tool with some flaws, but it is generally fantastic for teachers and students. The highlight was creating a Home Economics lesson plan for Grade 8s!
The evolution from S&S Chicken to Pizza is immense. I got comfortable trying new things on the Internet, seeking new skills, and always focusing on the positives of a growth mindset. I also recognize that learning is ongoing because we seek knowledge. As such, I will continue to seek recipes in both domains because it expanded my love of food. The only exception now is that I can add forms of technologies and media to my list of repeaters, from Facebook to charming cooking blogs to a literal AI. Documenting through pictures and the development of the dish’s history added what made the project fun! I was initially optimistic about blogging, but now I see the finer thing in it and applaud the opportunities blogs provide. This is evident in how photos, links, videos, and my friendly personality expanded over the four months in them. We should approach the digital world in education better than ever since it benefits the field, Teachers, admin, and most importantly, each student currently and future generations. Thanks for being the best support system and audience during my learning journey! Remember to congratulate yourselves that the term is now done, and take time to try one of my hearty meals or sweet treats!
The Accessibility of Online Learning through Zoom:
We used the video communication platform Zoom, accessible to this class through the varied perspectives on educational technology and media. Compared to other courses I have taken, the breakout rooms were meaningful, and you felt part of the community of learners. I would always have my camera on and try to participate wherever I felt comfortable on a topic. I enjoyed the discussions on digital literacy and AI because they were well described due to Katia’s passion for the subjects. Significantly, when the chat would move the conservation further toward discovery and where we all could have a good laugh at the simple things. Using a Metimeter and Booklet provided inquisitively fun in different ways to communicate!
I have used Discord before to talk with friends and other individuals online in groups following my hobbies. This is the first time a Professor has provided access to a community that they endorse and encourage people to comment on as a part of a grade. It was well managed, and I participated as much as possible, from introducing myself to asking questions and answers to figuring out unique situations with my learning project. I wish I had commented more, but I am happy about what I did! The problem was that so many classmates would answer the same person’s questions that you didn’t want to copy someone else’s response. The resource-sharing sections were used a few times, and they provided fantastic support like PDF to Brainrot, countries banning Social Media/TikTok, articles about AI, and more about Digital Footprint. In all, it shows potential in bringing people together with learning and great educational usage that I will keep in mind if I ever teach high school because it is too advanced or unsafe for elementary students!
How I contributed to Discord this term:
September 16th, 2024- 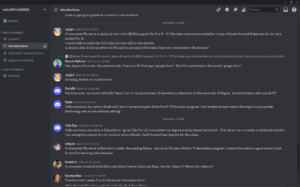
October 3rd, 2024- 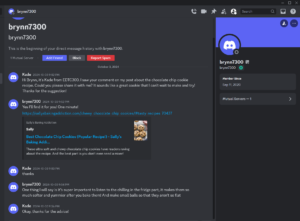
October 29th, 2024- 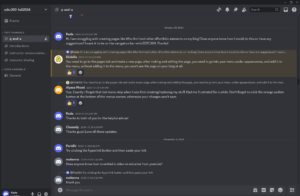
November 5th, 2024- 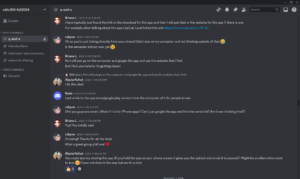
December 3rd, 2024-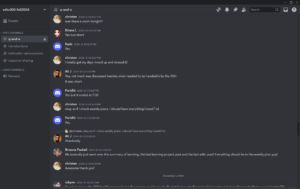
One of the most prominent aspects of this class was replying to classmate’s posts. I enjoyed the variety of projects, including cooking, canning, ASL, French, Whittling, learning songs, and so much more! The different perspectives and kinds of posts opened my eyes to how I wanted my learning to be transformed into blog form. Knowledge on the Global Web can happen through pictures, videos, and other forms of digital storytelling. It was nice to see the progress and moments in posts that you just connect to because we aren’t that different of individuals. I succeeded by commenting 6 to 8 times per week, and I was rewarded with my support for them commenting on my own posts. Classmates enjoyed my evolution of posts with pictures, step-by-step processes, including the recipe ingredients in the post (not just the link), and fun little sections on the history of the food. It was also lovely to thank commenters for seeing my cooking and baking from Kade’s Kitchen. I always asked for new recipes or ideas and sometimes got questions. So, you always have to be present for your fans, and I wouldn’t have done it without them!
Here are my replies to other people’s posts in Alphabetical order from the Contributors list:
Alyssa M
October 22, 2024 at 3:39 PM Hi Alyssa!
- Instagram Reels are awesome and addicting! I enjoyed the ways that you connected them to the classroom with journalism and other classes. Tips and tricks help students and even teachers learn new skills. I will probably have to give these short-form videos a chance!
October 29, 2024 at 4:26 PM
Hi Alyssa!
- A rose is one of my favourite plants; your plushie is no exception! The fact that you made it shows significant developments in learning. I also enjoyed the cat with it on since I have two cats, and they bring joy to my world! Awesome, work this week!
November 17, 2024 at 9:09 PM
- I loved the Duck Song when I was younger. The plushie is so cute; now your cat has a new friend! Keep up the talented work!
November 26, 2024 at 4:53 PM
Hi Alyssa!
- Those are fantastic plushies of Deadpool and Wolverine that any superhero or movie fan would love! Memories and homemade gifts are so special for everyone involved. Keep up the excellent work, and I can’t wait to see what you create next!
Amie
Dec 3rd
- This is a fantastic and informative post! Games are fun and a great way to learn anything about languages. However, they only motivate the person to get the questions right. Sadly, the best things always cost a leg and arm to work effectively.
Nov 19th
Hi Amie!
- Learning moods in French is fun and essential for the learning process. I will have to look at some of Alexa’s videos; thanks for sharing this source. Keep up the great work!
Oct 29th
Hi Amie!
- Since I am currently in FRN 100, I always try to look into your re-learning of the language. I have heard about Emily in Paris, and it would be an excellent way for a person to get used to French. Picking up the ins and outs of culture through video/streaming piqued my interest. Keep up the fantastic work!
Oct 8th
Hi Amie!
- I have enjoyed reading about your journey with French so far. I am in FRN 100 and wondered if I should use the app to learn more as a beginner. I have gotten a few units into Duolingo and wondered about the Super features. However, as you said, $119 does not seem worth it! I wish you continued success on this learning project and with Duo (he can get angry if you don’t do your streak every day)!
Briana L
Nov 26th
- I will have to follow your lead with AI to learn for this project! Challenges are still a part of the learning process and provide an example of ways humans do stuff better than it. Keep up the great work!
Nov 17th
Hi Briana!
- I also think Reddit is a good source, but its toxic users bring down learning purposes for me. The beading tracing method seems efficient and is in the spirit of the holidays involving the BC Lions. I always look forward to reading your posts, and keep up the remarkable artistic works!
Nov 4th
Hi Briana!
- The poppy is elegant and beyond respectful for November 11th (probably the Friday before if you are at school). I enjoyed that you are showing growth with ways to improve future creations. Excellent progress and fantastic beading!
Nov 4th
Hi Briana!
- This is an outstanding post-contribution to learning and respecting Remembrance Day! Showing confidence during each beading petal and perseverance when frustrated. Keep up the great work, and I can’t wait to see the final product!
Sept 30th
Hello Briana!
- Beading seems like such a fun and creative learning project! I have always been interested in this form of art because of its connection to Indigenous culture and Canada. I can’t wait to see more, especially your poppy and other examples!
Cale
Nov 20th
Hi Cale!
- The Sweet Potato Soup looks fantastic and delicious. I will have to give it a try sometime! The video is a great way to showcase your learning. Good luck with the rest of your recipes for this class!
Carlos
Oct 1st
Hello Carlos!
- I enjoyed this week’s learning project post about Tree Straid Braids! Remarkably, the determination and reflection you are doing for your future daughter. You are going to be a super teacher and dad! I can’t wait to see your progress next week!
Oct 8th
Hi Carlos!
- I have always enjoyed reading about your adventure in braiding, and this week did not disappoint! This website and videos seem informative and great tools for learning the five tips mentioned. I also noticed that painting applies to my project, and inquisitiveness increases a person’s learning skills. I can’t wait to see more from you!
Carson B
Nov 27th
Hi Carson!
- I love anything with Fish and enjoy making it or ordering from a restaurant. The different approach to cooking was eye-opening for me because I like to stay relatively close to recipes. Keep up the great work in the kitchen!
Chassidy
Oct 22th
- This is a fantastic post about Smores and the use of SAMR! I have always wondered about its use for education besides as a monthly newsletter. I can’t wait to read more of your blog!
Elyse W
Nov 28th
- Olivia Rodrigo would be so proud of how you learned about her work for this learning project. The final product of Vampire sounds so beautiful and is a testament to your talent! I wish you all the best in future music and teaching endeavours!
Nov 12th
Hi Elyse!
- Your journey on the piano is quite exciting to watch, and it must be exhilarating! The chorus in Vampire sounds terrific, and I can’t wait to hear the singing.
Oct 29th
Hi Elyse!
- I found memories of using iMovie during physics class in high school for the final projects! It seems like you got it under control when learning Vampire. Keep moving forward with the chords, and you will continue doing great things!
Oct 1st
Hello Elyse!
- The mentions of family and learning the joys of music fill my heart with joy for you. These memories on the farm are probably moving you forward in this learning project! Also, excellent song choice, and I wish you continued luck in picking up this old skill of yours again!
Fathima
Oct 29th
Hi Fathima,
- Recipes associated with loved ones are the best and most comforting dishes anyone can eat! For me, it is a basic grilled cheese sandwich and homemade soup. It looks yummy; I will have to try it sometime. Great job!
Jaylyn
Oct 23rd
Hi Jaylyn!
- Canva is something that I used quite a bit on assignments, so I quite enjoy your exploration of it each week! The templates and presentation are something that I will look into when I start my Pre-Internship in my third year. Anyway, keep doing great things with this blog!
Jerome
Nov 4th
Hi Jerome,
- I also enjoy growing things in the garden! What salad with lettuce is your favourite? Fabulous pictures and posts!
~Kade Aseltine
Jules
Nov 27th
- I am fascinated by using a homemade recipe and perfecting it with technology. I love Cupcakes and will have to make them sometime! I can’t wait to see what you make next!
Nov 20th
Hi Jules!
- I had never heard of Shakshouka before this post, and it looks like a yummy breakfast. The recipe’s time efficiency is spectacular and exciting for beginners. I can’t wait to see what you make in your kitchen next week!
Nov 12th
Hi Jules!
- The Grinder Sandwich looks yummy and trendy for TikTok! I also like to eyeball or reduce/add more of certain ingredients in my recipes. Tomatoes are not my favourite sandwich topping, so they would not be on mine either. Keep up the fantastic work and blog posts!
Nov 5th
Hi Jules!
- I will surely try the recipe whenever I crave mac and cheese. This is an excellent step-by-step exploration and learning post on using TikTok in the kitchen. Keep up the incredible and mouth-watering work!
Oct 22nd
Hi Jules!
- I am also doing my project in the kitchen, and you seem motivated to reach your goals. I must admit that Carrot Cake is not usually one of my favourite desserts, but I might try it again! iMovie is an excellent demonstration of SAMR, and it can be fun to use for assignments.
Kacey
Dec 4th
- Wrapping gifts is not my favourite thing, but you do it efficiently. I think it looks glorious, and if the receiver enjoys the present, then it would be an A+ in my books. I enjoy the determination and preservation of your learning project. Keep up the fantastic work!
Nov 27th
- The wrapping looks fantastic and so creative! Your progress from the start of the learning project to now will make Christmas look even better. Keep up the great work!
Oct 8th
Hi Kacey!
- I can relate to the struggle of gift wrapping during the holiday season and even birthday parties! It looks great, in my opinion, because the recipient’s opening would be more effortless. Also, I understand the frustration of watching tutorial videos, and that can be a problem since you want it done quickly. I’ll have to keep checking your blog; this is awesome!
Kamden L
Nov 26th
Hi Kamden!
- Practice is good, and falling back only motivates a person to continue learning. The Rubick Cube is a curious mechanical piece of fun and shows dedication to growth. Keep up the fantastic work!
Kenzie B
Nov 12th
Hi Kenzie!
- Fun and creativity on the piano are fantastic to hear; it must be music to your ears! I enjoyed how you modified the choice of video to show growth in yourself because you know what is best for you. Keep up the inspiring musical progress and blog posts!
Nov 5th
Hi Kenzie,
- Billy Joel is such an amazing musician with fantastic songs! I want to go to Madison Square Garden and listen to him live one day. You persevere with the struggles of learning, and that is nice to see. I hope your work on the end of verse one and the whole of verse two goes well!
Lily
Nov 12th
Hi Lily!
- Blizz’s bunny fashion is so cute, showcasing in-depth learning of jacket patterns. What would you suggest for someone who has never crocheted? I can’t wait to see the variety in future projects. Keep up the great work!
Oct 8th
Hi Lily!
- I love the pun-title; it is so funny! Crocheting is a great learning project. I always see wobbles in stores, and they look fun with all the unique varieties. The two-in-one of YouTube and TikTok is something that I never thought of using for my learning project. You could try to make coasters or a washcloth; these are just some suggestions! I look forward to seeing what you have next!
Makenna H
Dec 4th
- It sounds like a cozy and festive time with tea, watching the Grinch, and making ornaments! They will look great on any Christmas tree as a gift that anyone would remember. Keep up the tremendous homemade work; success has paid off!
Nov 26th
Hi Makenna!
- I understand what you mean about final projects, and it’s okay to have a lacklustre week. The painting of the X’s & O’s looks creative and crafty! Keep up the fantastic work; I can’t wait to see the Ornaments!
Miranda H
Oct 8th
Hi Miranda
- Of course, you know this, but mistakes and failures are part of the learning journey. Growing with my project is a goal of mine, and you demonstrated it with this post. The cards are beautiful, and I am sure that the creativity you put into them translates into your classroom. Greatness is on the horizon for this project, and I can’t wait to see it manifest!
Morgan H
Nov 30th
- I always try to achieve a growth mindset and mindfulness daily! However, I have never considered it from an educational perspective, and students have a lot on their plates. I will watch the video and provide a better worldview of my aspiration to one day have a safe space for all students, not just middle school students. Keep up the fantastic and mind-provoking posts!
Nov 5th
Hi Morgan!
- This is a great post because, as you said, people’s brains often get distracted from the important things around them. I would know that as I am a procrastinator, I try my best to improve daily. Following your advice, I will be mindful of awareness to build positive connections and strengthen my purpose. Thanks for the insightful post!
Olivia H
Nov 12th
Hi Olivia!
- Dips are great food, and TikTok has a lot of recipes for them. The different creators on video platforms have made cooking and baking fun to learn! It looks yummy, and keep up the incredible work!
Peter S
Nov 20th
Hi Peter!
- The evergreen wooden craved tree looks fantastic. Difficulty is an excellent part of growth in the persevering learning process. I can’t wait to see the shaped knives; keep up the incredible work!
Oct 2nd
Hello Peter!
- Excellent work on all of the whittling this week! I also recommend video learning, especially since there is much information in shorter social media forms. You are doing much better than I would be, even with the difficulties. They help you grow into a stronger learner; I can’t wait to see your outcome and the carving videos!
Rob H
Oct 29th
Hi Rob!
- This is a great post and reflection on the timeline of technologies on the internet! A medium that many people have a love-hate relationship with, including myself. Heritage Minutes are one of my favourite things to watch, I will have to watch it!
Robin K
Nov 18th
Hi Robin!
- Excellent post! I enjoyed the good, bad, and ugly points of the recipe you followed. I will have to venture out and try Tomato Jam sometime! I have helped my mother make sugar cookies and other Christmas goodies for friends and family. Keep up the hardworking task of canning; you are doing fantastic!
Yemi
Nov 18th
Hi Yemi!
- I enjoyed the creativity and craftsmanship that you showed this week with the art of cutting fabric. The step-by-step process and video are lovely visual touches to the learning project post. Keep up the fantastic work!
Now, here are my comments to the people who commented on my own posts from a certain point because I forgot to before and regretted it:
October- 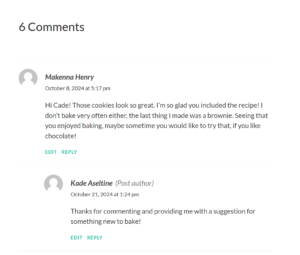
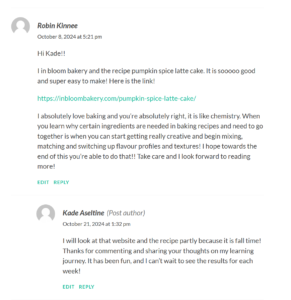
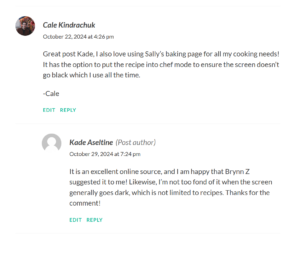
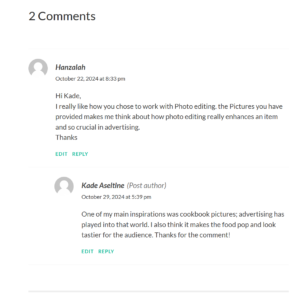
November- 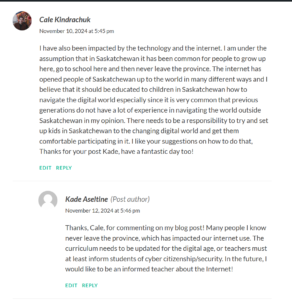

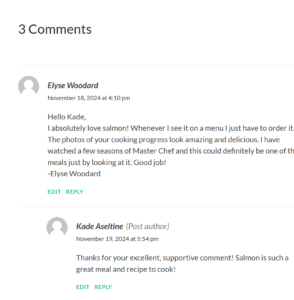
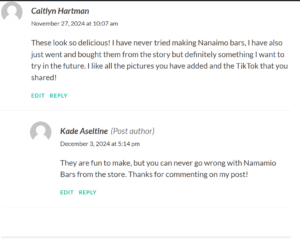
December- 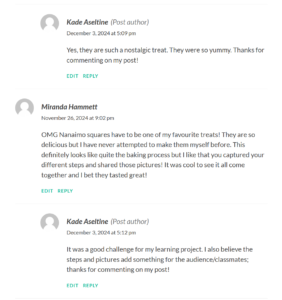
I wish everyone continued support and well-being in the future! Remember always to Seize the Day!
In a world that trusts technology and often ignores the presence of someone online until it’s too late. You must be aware and digitally literate to travel through the wild jungle that is the internet in the 21st century. It can be as simple as building connections between people, ideas, and information for early elementary students because their whole lives have been on the global web, from baby showers to the next trend on TikTok. As such, they have been exposed to the hoax of misinformation that misleads people to gain new views financially and politically. One of the examples I can think of is videos announcing fast-food restaurants from the United States were coming to Canada, and most of them weren’t since there were no sources for them after a simple Google search. Another is the thought that Fake News can only exist in Right-Wing media after Donald Trump’s win presidential win in 2016 and a month ago in November 2024, but this is a lie and an example of implicit bias with the attitudes that impact our thinking manners.
@canesmontreal #raisingcanes #canes #canessauce #fyp #fypシ゚viral #fypage #fyppppppppppppppppppppppp #xyzbca #viral #viralvideo #cane #official #fastfood
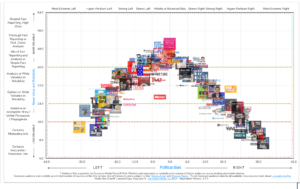 I think anyone should figure out the difference between headlines and journalistic storytelling, how politics changes the likelihood of Media Bias, always question, figure out if the pictures are real since you don’t want BigFoot to be stomping around your digital footprint, and be engaged in different perspectives or worldviews to be culturally informed. In support of these causes, you should listen and change because the Backfire effect is really, and it might get back at you with this too-good-for-school attitude. We react to the physical and emotional learning of intelligence as a predator since our core beliefs don’t want to be challenged due to constituency with the world around us.
I would show this comic without the language obstinacies as a starting point for the NCTE Framework and focal points in How Do We Teach Students to Identify Fake News because these forms of storytelling make learning fun. It would align with ELA 4’s comparison and response to appropriate grade-level texts for social responsibility or even identity to how people learn online. Do learners use a variety of tools effectively and efficiently?: creativity and critical thinking should be applied through video programs and other apps to showcase the capability of supporting an evolving place like the genres of a book. These will surely help them succeed in citing reliable sources (NOT USING WIKIPEDIA!!!) and can done through communication tasks like group presentations. 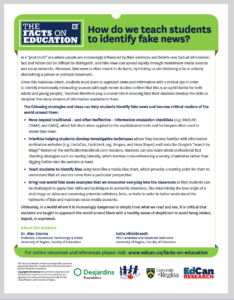
Inclusion is my priority, and they should be aware of how our province consumes, curates, and creates multimedia works. It could be done through Social Studies Power & Authority outcomes rules, laws, and responsibilities related to Mike Ribble’s Nine Elements of Digital Citizenship. Teachers could use a booklet as an engaging and fun activity to inform students about the harms of fake news. Videos are a great tool, with PBS having a whole learning section on specific grade-level resources dedicated to lifelong knowledge, leadership, and unique ways to develop confidence in safe technology usage. I would also like to do a weekly exploration of the news with tools like the New York Times Student News Quizs to keep them informed on current public opinions because it has always been on my mind, even though everyone says the news is negative. 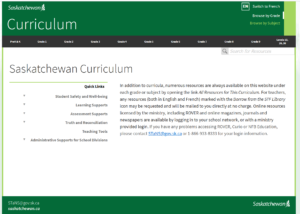
In Health Education 4, a significant focus is on digital safety in various situations and strategies to overcome them with the behaviour that causes harm to be done. For example, it wants students to examine prior knowledge and new information related to safety (including cyber safety). It is also essential to discuss how electronic networks could be used ethically and safely because they can impact the health of future generations of digital learners.
What do you think about these pressing issues in Educational Technology and Media? It prepares us to be aware of the discovery of information in a quickly changing world that might be more disinformed with artificial intelligence. Educationally, we, as future educators, have a role in using the resources mentioned above to bring justice to the curriculum and reassurance that no one falls for misinformation without the proper moral guidance beforehand. Will you walk with us and continue the fight for digital literacy in our unjust society? I hope so… Thanks for reading this EDTC 300 post, and have a wonderful day!

Politicians’ digital pasts are a growing liability for parties from The Economists.
As I write this EDTC 300 post, I am reminded of the class discussion and breakout room talks about our presence or identity online. It isn’t a surprise that this leaves a trace on the digital web forever because of the conversation people get when trying to get accepted into post-secondary programs. So, the reasons why people get discovered are kind of their fault for spreading provocative or bluntly racist stuff online. This reminds me of something my professor from ECS 102 said about past students and their biased views about the Truck Convoy to Ottawa and the similar effect of the old American orange man’s supporters storming Washinton, DC, on January 6th, 2021. We worry about them in the teaching profession because it is a political act, and I think the approach to our presence here should be the same. Standing up for justice in a bipartisan political system that recognizes how we, as citizens of the web, should act. Should we take an oath or allegiance to use this right? I think so because people often go psycho on random people for things they say. For example, a person on X is blocking half the platform for not agreeing with his views, and users must figure out why it is happening. What the heck is wrong with individuals developing a whole new personality, leading them to harass others they won’t see? 
Monica Lewinsky was a person who had an affair with United States President Bill Clinton due to gross advances from a 47-year-old (at the time). Yet, people gave her death threats because he was the leader of their country. However, Bill claimed that he did not have sexual relations with that woman. This did not change the fact that people attack others online without knowing the true colours of a person, which became a global affair on the world stage. Justice and experiences made Monica an activist for future generations of consumers in technology and media. She now calls for us to understand the feelings of others and suffer together by acting against cyberbullying, directly messaging the individuals about the situation, being informed, telling the police, spreading positivity, and showing the strength in you not to be an online hater. Meaning that cancel culture is the current and evolving form of what not to do to a person within reason because strumming a ukulele is not thinking twice about grooming children. IT IS NOT A JOKE, OKAY!!! How could someone make a song about it for views and click online? Our world is truly not okay, and they need to take a class on this topic from Katia or get educated. 
How can I help future generations and students be on the right track for online presence? We should show the rhetoric within our community and that being present on devices like tablets, digital phones, and computers is the first step to digital awareness. Inform the youth about Free Speech, privacy, the Canadian Charter of Rights and Freedoms, and other legislations. Listen to the voices and promote the legal right kind of justice in a quickly evolving time in the Internet’s history. This showcases that we have to know and adhere to our responsibilities, unlike youngsters, because they can return to haunt us. For me, it was getting Twitter in grade four, and the posts don’t add up to something I would post nowadays. If you are wondering, there are many reposts and mindboggling selfies with questionable words like Yo, Boys and Girls. Luckily, when I currently search Kade Aseltine on Google, it pulls up posts from this class, news articles, and my grandma’s obituary (which makes me sad). Anyway, keep on staying alive and out of the vigilantism of the web!
Special Notice: This combines the EDTC 300 post and Learning Project because I applied AI to my cooking and classroom responses.

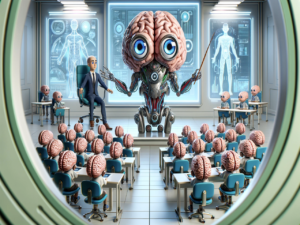
Pizza AI meme lifted from Katie Notopoulous
Pizza is a favourite food of many individuals, from children to young adults to seniors, for its combination of toppings and flavours. What was your first exposure to pizza? For me, it involved the tussle between Saskatchewan Bar Pizza and a local Greek restaurant. I would always have/order either a cheese or pepperoni pizza and eat two slices with my family as a classic, reliable meal on a Friday. Meanwhile, I would watch Teenage Mutant Ninja Turtles salivate in pop culture for their weird pizza toppings like Chocolate Fudge and Extra Garlic Pizza. I will pass and just stick to the originals, hahaha! Then, my love of pizza-like creations would not fade in the summer with a bush pie cooked around a campfire at the lake. If you have not had them, they are two-breaded pizza sandwiches to die for, and I would kill for one right now! In this segment of Kade’s Kitchen, I will explore an Artificial Intelligence take on the famous pizza pie through ChefBot GPT and later educationally with Magic School AI.
The history of Pizza starts with the consumption of flatbread in ancient civilizations. Fast-forward to the city of Naples in modern-day Italy. It was a food of the working class, who needed a quick meal customarily described as a flatbread with toppings like cheese, tomatoes, garlic, anchovies, and oil. Margarita pizza is a story of royal tastebuds and unification, with Queen Margarita loving an Italian flag-inspired topping of mozzarella, basil, and tomatoes in 1889. Immigrants from Naples brought it over to New York, and the broad North American cuisine world loved it from the slice shops or pizzerias. So, during World War Two, American Allies introduced Pizza to the rest of Italy and Europe, unlike yesterday’s flatbread! Becoming commercialized in fast food with Pizza Hut and other competitors. I hope you enjoyed and learned something in the last food fun-fact section of my learning project blog post!
My inspiration for AI cooking comes from online food videos, which show how AI can genuinely beat human-created recipes. Also, this blog post using AI for beading by Briana Leibel was inspirational, as was how I thought during this experience. It challenges the chef or person to compete against technology in a domain that bots can search in a wim. Here are a few examples that you should watch for fun:
ChefBot GPT is a unique source of learning how to cook because it does not have the soul or drive that human recipe blogs create on the Internet. It is all up to the prompt engineering of the user and the ways they ask the question. I asked the bot if they could provide me with the best homemade pizza dough and sauce. I would use it again if I were in a pickle for a recipe or needed specific tips in the kitchen because that adds to the reliance on this technology.
 Here are the Ingredients and tips it gave me for each recipe lifted from the AI Chef. It also came with instructions, but I will write out my steps and reactions during the cooking process:
Homemade Pizza Dough
Ingredients (makes two 12-inch pizzas):
- 3 ¾ cups (450g) all-purpose flour (or bread flour for a chewier crust)
- 1 ½ teaspoons salt
- 1 teaspoon sugar
- 1 packet (2 ¼ teaspoons) active dry yeast
- 1 ¼ cups (300ml) warm water (110°F/45°C)
- 2 tablespoons olive oil
Homemade Pizza Sauce
Ingredients (makes enough for 2 pizzas):
- 1 can (14 oz) crushed tomatoes or whole San Marzano tomatoes, blended
- 2 tablespoons olive oil
- 1 teaspoon sugar (optional, for balance)
- 2 cloves garlic, minced
- 1 teaspoon dried oregano
- ½ teaspoon dried basil (or 2 teaspoons fresh, chopped)
- ¼ teaspoon red pepper flakes (optional, for heat)
- Salt and pepper to taste
Tips for Assembling and Baking
- Preheat Oven: Heat your oven to 475°F (245°C) for at least 30 minutes. Place a pizza stone or an inverted baking sheet inside to heat as well.
- Shape the Dough: Roll or stretch the dough into a 12-inch circle on parchment paper or a floured surface.
- Assemble: Spread a thin layer of sauce, leaving a ½-inch border for the crust. Add your favorite toppings and cheese.
- Bake: Transfer the pizza to the hot stone or baking sheet using the parchment paper. Bake for 10-12 minutes, or until the crust is golden and the cheese is bubbling.
- Finish: Let the pizza cool slightly before slicing.
Enjoy your homemade masterpiece! Let me know if you want topping ideas or additional tips.
I started by focusing on the dough because I tried a method different from the one I used with the buns. I used the traditional hand method of activating the yeast for ten minutes in a small bowl with warm water and sugar. Next, I got a large mixing bowl and added the activated yeast and olive oil to some salt and flour, stirring until it had an uneven-lumpy dough texture. Kneading the dough is a fun process with the white powdery flour surface, and I handled it appropriately by adhering to the nine-minute time frame the bot told me to do! Now, you roll the dough into a ball shape and put it into an olive oil-covered bowl. Remember to toss a damp dish towel over the bowl and put it in a warm place for two hours or until doubled in size. 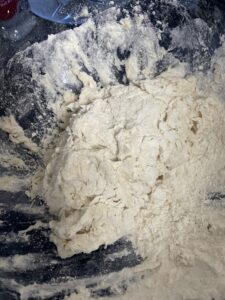
In the meantime, prepare the pizza sauce around thirty minutes before the dough can be divided into two equal portions. Turing on the stove, you love the olive oil and put it into a pan to cook up some minced garlic for 30 seconds. Depending on the tomatoes, blend them into a nice juicy mixture. Add the tomato juice mixture with the oregano, basil, and sugar to the same pan as the garlic. In there, constantly stir well and get it to a delicate low simmer for twenty to thirty minutes. Don’t forget that taste is the number one priority in the kitchen, and you may choose to add the good old Salt and Pepper. Cool the pizza sauce for ten-ish minutes off the burners of the stove! 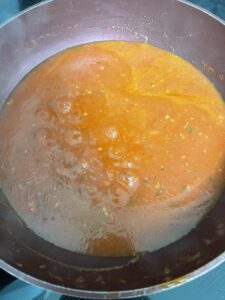
Let’s focus back on the dough by dividing it into two equal balls and providing them with more beauty sleep (covered) for fifteen to twenty minutes. Next, I grated my mozzarella cheese, got the deli meat from my fridge, and heated the oven to 475 degrees Fahrenheit. The toppings on my pizza were pepperoni, honey ham, mushroom, and pineapple. Now, I rolled the dough and followed the tips on how to assemble it. The pizza cooked in my oven for twelve to fifteen minutes and was scrumptious because it was better than the fast food equivalents. I ended my time in Kade’s Kitchen, surrounded by my family, waiting for a pizza feast. Boy, did they enjoy the progress that I’ve made this term for cooking and baking!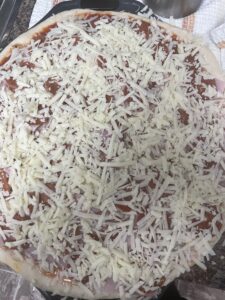
Pivoting over to Magic School AI, I was curious about its approach as a teacher managing assistant because I wanted to see how the technology would make the job easier. It has so many tools, which can lead to doubt from the user since the version used is free. Depending on the individual and how much information is in the lessons, they might disagree with the platform. This adds creativity to education and teaching practices because you should try to make it your own! Sidenote: I will not cheat with AI for future assignments when making these plans; this is only an example of what someone can do. 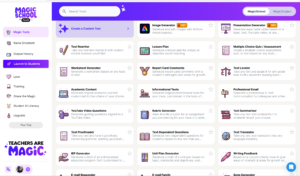
I started by putting the homemade pizza dough and sauce recipes into the lesson plan feature and directing it towards focusing on the Saskatchewan curriculum at a grade-eight level. What it gave me is well described and more directed at teachers with field experience rather than student teachers. The object and assignment are straightforward because they do not leave the teacher asking more about making pizza. Meanwhile, the key points are almost second nature to a food class, delving into techniques, measuring skills, safety, hygiene, and why ingredients are used. I enjoyed the opening with hooks and a short video to get student’s understanding of learning. However, I think it should be taken as a guide because most of it will take more than a class period. So, maybe plan the lesson for two days or use a quick-rising dough without yeast to solve these problems. Also, the guided practice and “independent” practice are funny because they could have occurred earlier in the lesson due to time management practices. Lastly, the reflection practice is a nice touch compared to the typical test or writing assignment, which is why the homework section might be unrealistic. 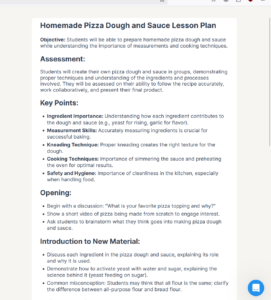
Next, I will briefly discuss some of the other tools. First, I generated an email, which was simple due to other AIs existing with the same rewriters, but there is an episode of Abbott Elementary precisely like this. The only thing to add is that the email tool is efficient and could get you in trouble with parents/guardians or admin. Second, the same can be true involving report card comments due to how long they take to make them. However, it is better than a generic comment with no substance or thoughts for students. Third, the assignment generator seems kind of lazy and can’t choose what kind of assessment is on the document without much understanding of the topic. If I wanted a quiz, I would have asked for one on the Canadian Charter of Rights and Freedoms! 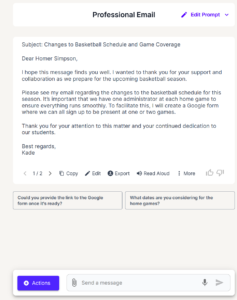
Magic School tries to generate Student IEPs successfully for personalized learning, and you can incorporate inclusive needs and other considerations into the system. It has goals that the student has to achieve in the face of challenges in how they perform in the class. As someone with a disability, I enjoyed mentioning accommodations and modifications that make life easier for the learner! As I am not in or trained in the special education program, this provides uncertain approaches that are not in my current wheelhouse. In terms of different learning styles/critical thinking and creativity, they have a variety of tools, including Multiple Explanations to seek a clear understanding of concepts, making a topic relevant to specific learners (the same approach can be used for the self-explanatory Real World Connections), visual social stories (podcasts or videos), and Assignment Scaffolder provides step by step instructions via support in large pieces of work. 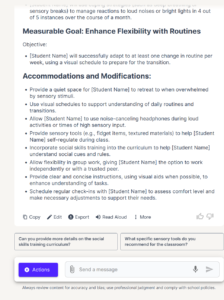
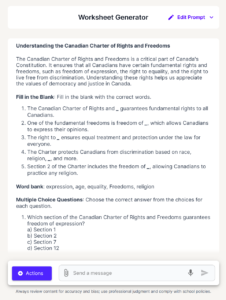
The ethical problem with AI, ChefBot GPT, and Magic School is knowing how to correctly use it for learning without hampering the educational experience. If these tools can make life easier in the long run, teachers and students must use critical thinking or creativity instead of copying or pasting these figurative cheat codes. It comes back to digital identity and the online responsibilities that we have every day because, without it, Artificial Intelligence can produce a generation without guidance or morals in the face of justice. How do we become warriors of the future in education?
I think it is an acceptance that technology is ever evolving like we are because I remember my high school ELA teacher’s reaction to AI. He said it was terrible and changed the world forever, but my acceptance came in building upon it in the kitchen since you can still showcase a growth mindset with it. Benefiting from unique forms of learning that engage students who might otherwise fail in a school environment and pick up the forgotten pieces from the teacher’s past equals revolutionary guidance. We all must view it as a helper and the key to supporting future growth in our educational society!
I hope you enjoyed my pizza-loving post and determination to learn through our future in AI! Thanks for all of the supportive comments during finals. Till next time, smile through the darkness and hunger since your stomach tells you to make it to supper!
This week’s learning project is about nostalgia and the feelings you get from experiencing something again! Another recipe or breakfast dessert that brings me back to the safety of my childhood is a sweet Banana Cake. My grandma taught my mom a similar recipe, and I want to surprise her with this around Christmas time as a little treat of joy. I will provide you with two questions to consider while reading the post: What is your favourite baking involving bananas or fruit? And do you have similar dishes that bring you comfort? Anyway, let’s get back into Kade’s Kitchen!
The baking history with bananas comes with the common cousin to this dessert, banana bread. Trading ships brought the fruit to North America in the 20th century with the invention of the ice box (refrigeration). The main ingredient territory for bananas started in the depressing years of the 1930s when people wanted to save ripened bananas and advances or exposure in baking. Leaveners got similar recipes printed in cookbooks of the time. It evolved as the general public wanted a cake instead of the typical good with bananas. Also interesting is the recipe has a cult following as a steamed version in China, Malaysia, Indonesia, and Vietnam cultures.
A Mind“Full” Mom’s website has a homie and preppy feel, making the audience want more recipes. The recipe index and meal plans are well sorted and presented, which other cooking pages don’t have. Kristen’s About Me section is a standout section of the blog because it has her favourite recipes and gets personal with cystic fibrosis awareness. I enjoyed the family connections and standard step-by-step instructions. Great inclusions were quality pictures, tips, reasons, notes, and nutrition counts like grocery store food items. These easily give the recipe and site a five out of five chef hats. 
Sour Cream Banana Cake with Cream Cheese Frosting Ingredients lifted from the website:
The Cake
- ½ cup unsalted butter softened
- 1½ cups granulated sugar
- 2 room temp large eggs
- 1 cup sour cream
- 1 teaspoon vanilla extract
- 2 cups all-purpose flour
- 1 teaspoon baking soda
- ¼ teaspoon salt
- 1 cup mashed bananas (2-3 large overripe bananas)
Cream Cheese Frosting
- ½ cup unsalted butter softened
- 1 cup cream cheese softened
- 1 teaspoon vanilla extract
- 2½ – 3 cups powdered sugar sifted
- 1-2 tablespoons milk or cream
I started by beating the butter and sugar into a light yellow, fluffy, full-of-air mixture in a large bowl for three to five minutes. Then, I added the eggs, vanilla, and star recipe contributor sour cream until thoroughly combined. Mash the bananas in a small bowl and add to the wet batter. Now, it was sifting and whisking time for the powder dry-ingredient substances of flour, baking soda, and good old salt. Around this time, I preheated my oven to 350 degrees Fahrenheit. Also, I wanted to know what baking soda did for this recipe. So, I googled, and this is the answer that came up! In this recipe, CO2 raises the cake during baking to ensure the final product is light and tasty in our tummies. Okay, fine, I will stop with the fun facts and get back to the baking by returning to my kitchen. Next, I combine the dry ingredients mixture with the wet cake batter. I deviated by using a long cookie sheet rather than a casserole dish because that is one of my only cooking equipment. Cook it for twenty-five to thirty minutes or until the banana cake is a delightful golden brown colour! 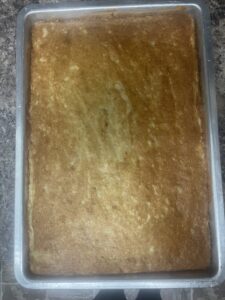
For any baking, just cover the tasty treat with frosting, and it will be 100 percent better, hahaha. So, I threw together more butter and cream cheese with a hand mixture to create a heavenly smooth and creamy texture. Slowly add in vanilla extract and milk until thoroughly beaten into the frosting. Be careful because powdered sugar is used, and you do not want it all over your home (p.s. make sure to try some to see if it tastes good). If the frosting is spreadable, then you can put this on the cake, and for the best result, wait two to three hours to eat the banana cake! 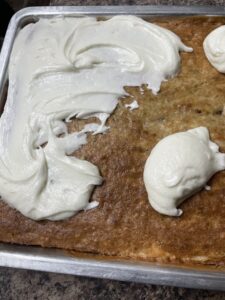
I enjoyed this recipe because of the cake flavours and the memories associated with it for my family. It was pretty simple, but that is fine since I learned something new and finals are approaching. Luckily, I tried to follow the cake-baking rules and succeeded by measuring correctly, making sure the butter was at room temp, mixing for the time provided in the recipe because nobody wants a dense cake, and preheating my oven to 350 F. I now avoid checking the stove because of the problem during the cheesecake week. I definitely think that you should make this Sour Cream Banana Cake for a light and die-for cake that anyone should love since I will try it again after the semester is over for my mom. Thanks for reading, and remember always to have a growth mindset!
As snow constantly falls in Saskatchewan, making the weather cold beyond compare, I had ideas for a hearty meal a few weeks back! There were a few choices, but one came supreme in the battle of lunch proportions: soup and buns. Why not use a can of Campbell’s soup or buy dinner rolls from the grocery store? I say no to that and yes to the challenges of trying new things through online learning!
Before getting to the recipe, you must read a few words about the history of beef cabbage soup and buns. Many cultures claim the dish as their own in Europe, from medieval Russia, England, and Italy, to preserve produce in the winter months, mainly for the peasant classes as early as the 9th century. It was also considered a cure or sickness medicine, described as the traditional Chicken Noodle Soup. They use salted meat like pork, which shows the evolution of ground beef, spices, and broth. Meanwhile, dinner rolls date back to the times of the pharaohs in Ancient Egypt with the start of breadmaking and later out of 18th century Germany called BRÖTCHEN. It has not changed much over the years besides different types of flour, liquid (water or milk), oil, and toppings typical to sweet treats. I hope you enjoyed the history and origin of these food recipes!
The websites I used were The Natural Nurturer and A Pretty Life In The Suburbs. Here is my feedback regarding their attention to cooking/baking. TNN was important to me because it focused on healthy, hearty, time-efficient meals for anyone in a hurry. Taesha is informative by telling the audience which cabbage to choose and cut it. This is great for a beginner in the kitchen with no experience besides my side endeavour during the Sweet & Sour week. They provide a visual step-by-step as I offer you each learning project post. I also enjoyed the section and variety of adaptations, including different cooking methods in a slow cooker, suggestions on meats, and how to change the recipe for your diet. In the future, TNN will be my go-to place to look for homemade soups; oddly enough, the site has a great selection of breakfasts. I will give this site five out of five chef hats for being delicious in taste and knowledge.
APLITS feels more like a standard blog-centred recipe website than the previous one, with a toolbar featuring sweet and savoury recipes. The dinner buns were created during the dark times of 2020 and bring joy to anyone who makes them. It has tips on baking the buns and different ways to use a bread maker. It is short and sweet without many instructions to help the 3 hour and 20 minute time. Also, Jo-Anna is from Calgary, Canada, focusing on recipes, home decor, simplicity, and approachability. I would give A Pretty Life In The Suburbs a lovely and respectable 4.5 out of 5 chef hats because I wanted more on the baking progress to see where a person could improve next time.
One-Pot Unstuffed Cabbage Soup with Ground Beef Ingredients:
- 1 Tablespoon olive oil
- 1 large onion, diced
- 1 pound lean ground beef
- 2 cloves garlic, minced
- 1 Tablespoon tomato paste
- 1¼ teaspoons salt
- ¼ teaspoon ground black pepper
- 4 Cups low sodium beef or chicken broth*
- 15 ounces diced tomatoes
- 14 ounces crushed tomatoes
- 2 large carrots, peeled and diced
- 14 ounces green cabbage, cored & cut into bite-sized pieces, about one small head of cabbage
- ½ Cup long-grain white rice
- 2 teaspoons Worcestershire sauce
- 1 Tablespoon brown sugar, optional
- Chopped fresh parsley, optional garnish
Homemade Bread Machine Dinner Buns Ingredients:
- 1 1/3 cup milk (at room temperature)
- 1 1/4 tsp salt
- 2 tbsp sugar
- 2 tbsp butter (at room temperature)
- 3 1/4 cups all-purpose flour
- 1 1/4 tsp bread machine or instant yeast
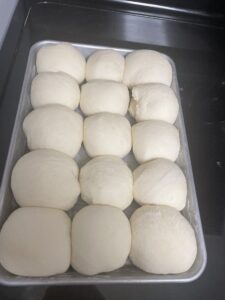 I started with a calm and collected head making the buns because they take the longest of the two recipes. Technology is fantastic since I only had to add the dry and wet ingredients into the breadmaker. After choosing the dough cycle, it did all the mixing and kneading for me in two hours and forty-five minutes. Next was a traditional rose under a tea towel for fifteen minutes. The dough ball/bun shaping was fun, but you must avoid over-touching them with floury hands. I discovered it is also essential to tuck the dough in the greased eight-by-eight baking pan to ensure that they don’t look clumpy or weird! Spacing the balls four in a row with ample room to expand, place them in the oven at 350 degrees Fahrenheit for twenty-five minutes. Then, brush some butter on the buns for a light, mouthwatering golden taste. Once they rest for twenty minutes, it is time to eat with the soup.

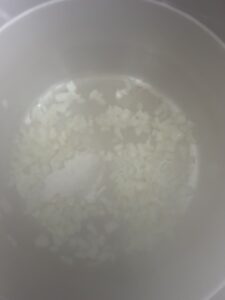 While that was all happening, I multitasked and cooked the cabbage soup. First, I got out my soup pot and added onions until soft and clear (two to three minutes). I messed up a little bit and forgot to add hamburger next. So, break it up into small pieces for five to seven minutes and don’t miss this step. Season the meat with tomato paste, S&P, and cook the garlic. The rest of the vegetables are added slowly with the broth and rice. Sidenote: I realized something was missing and cooked the beef in a separate pan while maintaining the flavour with garlic powder. Mistakes contain the lessons so as not to mess up again! Now let it lightly simmer for twenty minutes. The final touches include Worcester sauce and a little sugar to sweeten it up.
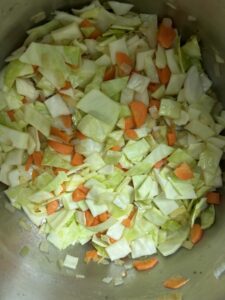
The lesson learned is that you control the kitchen, meaning you can add or experiment with the flavours. I also got to create a healthy dish for once with a delicate balance of ingredients and passion that is economical with the leftovers. For baking this time, it was all about management, the time around it, creating an appealing yet tasty bun, and trusting my instincts with knowledge because I might not know everything or things must be perfect. This was partly why I tried the bread maker; it was a tasty success. I would make both recipes again and want to start being more creative or adventurous with this. Next time, I will explore the jungle for Banana Cake and remember to try your best at everything you do! 
I am making a classic Canadian dessert for Kade’s Kitchen to impress faint-hearted sweet lovers. I have memories of it during family gatherings and reunions. My grandma would always make them and put them next to Butter Tarts on a tray for everyone to devour. Without further ado, say hello to Nanaimo Bars. They are a three-layered no-bake dessert bar with a mixed chocolate walnut coconut bottom base, a heavenly to-die-for custard filling, and a silk semi-rich dark chocolate that helps mediate the delightful adventure.
Nanaimo Bars were first officially created as chocolate squares in the 1952 edition of the Women’s Auxiliary of the Nanaimo Hospital Cookbook. Although it might have been made during the city’s early coal mining settling days, this is problematic with similar baking treats named the New York Slice and Prayer Bar. Hopefully, you enjoyed that sweet slice of history (hahaha, pun not intended)! What is your favourite no-bake dessert?
I used the recipe from TikTok Milkshake connoisseur Spirit Alchemist, who has 6.8 million followers on the platform. His real name is Larry Canam, and he is a 71-year-old X-Military member from Fredericton, New Brunswick. The short video is precise, like a well-crafted recipe from a cookbook, and the steps are to the point. Larry makes it easy and informative for new bakers. The presentation and home-style editing help create a legendary video that will make anyone crave Nanaimo Bars. It made me want to check out the rest of his videos, which are wholesome food videos for responsible desert drink lovers. For more, outside of the World Wide Web, look no further than this unique Milkshake Monday cookbook on Amazon and Indigo.
Here is the recipe video and one from Larry’s Milkshake Monday series. Get ready to read my reactionary tale on the road to fun, joy, and experimentation!
@thewhyteelephant Heres a delicious no bake dessert recipe. The 3 layer Nanaimo Bar. #recipe #dessert #tutorial
♬ vlog, chill out, calm daily life(1370843) – SUNNY HOOD STUDIO
@thewhyteelephant A delicious Nanaimo Bar #milkshake #milkshakemondays with music by @Lance Allen
The Ingredients:
Bottom Layer 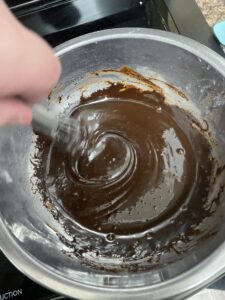
- ½ cup of Butter
- ¼ cup and 1 tablespoon of Cocoa
- ¼ cup of Yellow Sugar
- 1 beaten Egg
- ½ cup of Graham Cracker Crumbs
- 1 cup of Flaked Coconut
- ½ cup of a Nut or Granola
Middle Layer 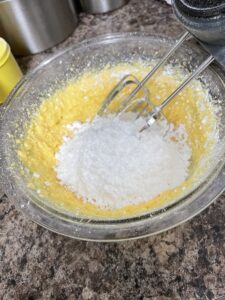
- ½ cup of Butter
- 3 tablespoons of Heavy Cream
- 2 Tablespoons of Custard Powder
- 2 cups of Powered Sugar
Top Layer
- 1 Dark Chocolate Bar
- 2 teaspoons of Butter
I started the recipe by using a scary and new baking technique, the double broiler. I added softened Butter, cocoa powder, and brown sugar to the broiler, constantly mixing until melted. Then, I made sure the beaten egg would not turn into a scrambled, inedible mess by slowly tempering the completed mixture. The DB is an exciting technical process involving two pots and boiling water trapping steam, making indirect gentle heat. Next, in a medium-sized bowl, I added all the dry ingredients for this bottom layer, whipping them together to a refined shape and then putting them into the container. 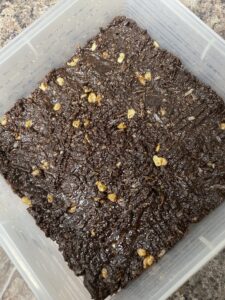
I proceeded to the delectable custard layer using a hand mixture for a fluffy texture. Some advice: I would like my audience/classmates to get used to mixing because that is in a lot of baking, but boy, is it fun to taste in the end. Is it snowing in my house? No, it’s only the powdered sugar, and I followed Larry’s recipe to the tee for this part because no one wants to clean the residue clouds. After all this, I mixed again and patted the custard into my container. Leave the Nanaimo Bar mixture in the fridge for an hour to cool. This will always test my patience because I am consistently hungry. 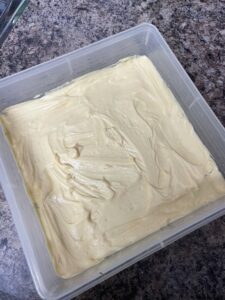
We are close to finishing this recipe since it is time for the dark chocolate layer! I used my microwave to melt the rich dark chocolate bar butter mixture in fifteen-second increments. Remember to keep stirring until the consistency is thin and melted to perfection. I finally poured it over the custard layer by smoothing the chocolate over the dessert area. The Nanaimo Bars were finally completed after a quick ten-minute chill and an arm workout of slicing them into bar shape! 
I hope you enjoyed reading this post; feel free to leave comments about new recipes for me to try or platforms to find some on! Next time, I will pair homemade soup with a lovely bun recipe. Here is a hilarious meme on Nanaimo Bars. As always, try to seek the adventurous side of learning!

Meme from patjames.com
Hello, everyone and welcome to my blog on Digital Citizenship in the classroom! As I am pursuing an elementary K-5 education degree, most of my thoughts will be based on that section of learners. I think teachers should have a one-life perspective on technology in education because it is all around us and inevitable to our current social-community experiences as Ohler mentioned in this article. The Digital Age impacts the children of now with audiobooks, PowerPoint presentations, interactive videos, and other important ways that contribute to learning. As such, we have created a flow for a new perspective in teaching the rights and wrongs of being an informed, good, responsible citizen online. It gives participation and outcomes in Health classes focusing on empathy involving self or others in these online relationships.

Photo by on Pexels
As a future educator, authority, and voice for our schools, I have to question the sources of technology we use today in 2024. This is in light of strengthening internet communities that give people hope or freedom on Discord, Reddit, YouTube, TikTok, Snapchat, and other social media sites. Instead, we have dark, toxic, and insidious users who don’t correctly use the digital web to wreck it for the rest of us. I want to inform the youth about the Saskatchewan Curriculum as a starting point because it does not leave time for safety and ways to appreciate everything around us, like our families and friends (in-person or online). How do we healthily connect and notice the duality of the IRL Fetish? I should try to embrace technology and combine it with the theories that I am being taught during my university education. I will also lead for positive changes, experiment in the future of learning since it will likely never revert, and build relationships in the classroom that have consequences in everything we do—thinking safely, critically, creatively, and in society’s eyes in all forms of citizenship.
Hearing about the limited success of the phone ban highlights the role of the Nine Themes of Digital Citizenship. I want to provide a fair distribution of learning resources on online communication grading platforms like Edsby and Google Classroom that students can freely access from home. They should be taught in group projects to respectfully show their voice and positive collaboration digitally. As a sign of behaviour in my classroom, I would treat conduct the same involving self and others in a set of procedures that must be followed for success. Next, I would consistently implement fluency and digital literacy in ELA classes, tying it to the community by deciphering fake news or literary texts. We have a responsibility to help understand and protect the students so they can achieve a healthy, law-abiding, and preciously observant digital presence in life.
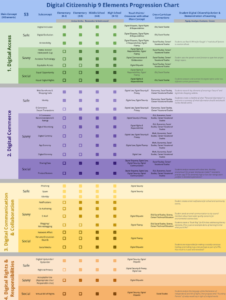
DC Progression Chart by Mike Ribble
Overall, I will be Savvy with a one-life perspective using the Digital Citizenship Progression Chart at whatever grade level I teach in the future. Another tool following the same principles closer to home in our province is Saskatchewan’s Digital Citizenship in Schools and its continuum. Learning about Digital Technology never ends, and I will continue to expand my efforts with evolving resources or skills in my education tool bag. Thanks for reading my blog post, and I hope you have a marvellous day!
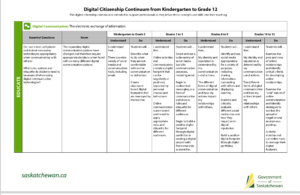
Digital Citizenship Continuum guideline from the Government of Saskatchewan


