This week I decided to work with textures on clay. In wheel throwing it is more challenging to use textures because the clay is so wet and delicate coming off the wheel. There are some techniques that can be used once the clay is leather dry, such as using hand tools to texturize, however, I have never tried these either.
After doing some research on youtube, I decided to try two techniques.
- Flower pressing
- Texture rollers
Check out the youtube videos that I used for texture inspiration and learning here:
https://www.youtube.com/shorts/tZxvvD2TwxY
And how to create a slab-built bowl:
Here is how my experience went:
From the videos, flower pressing seemed like such a simple and elegant way to add a natural texture to clay. You can then glaze the pottery to really make the floral imprints stand out! I mean what could go wrong? Apparently a lot! I tried doing a few different types of flowers and greenery, and they all failed. Other than the stems, the flowers and leaves did not imprint how I was imagining and ended up not looking like much in the clay. As we don’t have many flowers in our yard, I decided to not have any more floral fatalities and leave nature be on this one.
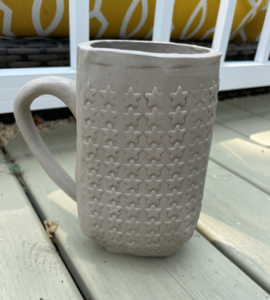
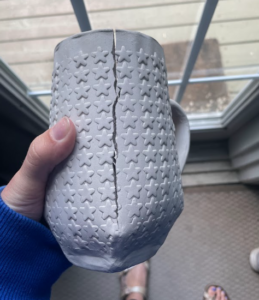
The texture rollers work really well. It took me some time to get a good pace and consistent pressure and I was rolling. I found that the slower you go with the roller, the better! The rollers that I purchased from Amazon were tiny. Therefore, for my bowl, I had to do multiple rolls on the slab. With the texture pattern not covering the entire roller, I found that as I rolled a second or third time, it would start to erase or press out some of the texture from the previous roll. Therefore, if you want to make something bigger or wider, a larger texture roller would be valuable! Once I put together my bowl with the rimmed bottom I was pretty disappointed with the results. The clay did not fold over the bowl nicely and ended up being a wonky, abstract rim. Will I keep this bowl? Probably not. Following making the bowl, I tried to make a textured mug however it ended up cracking as it was drying, so again cannot be used. I think I am going to try making some simple round coasters to fire so that I can see what the textures look like glazed. However, I am definitely learning that texturizing is not my favourite technique!


Next week…
For the last week of my slab-building journey, I am going to do a kiln opening so you can see what everything looks like glazed and fired!

Hey Amy. I have loved watching you try out different techniques as you continue to progress in your slab-building prowess. Very well done! It’s definitely not easy to do, and creating textures looks even more challenging. Our school has a pottery club where one staff member has taken the lead on showing students how to work with clay and create various things. Have you thought of passing this knowledge onto your students once you are done this project?
This is actually something I was think about tackling this year, however due to a sudden loss in my family it just ended up not being the right year to do it. Next year I am on maternity leave, so maybe 2024-2025 will be my year to try that out!
Amy I have loved watching you on this journey of slab-building! In high school we had a kiln and got to do a little bit of clay work. I had memories of this watching your videos when you would say things like ‘score’. Great work and I hope that you have found a hobby that you will continue to do even if it is in a different way.
Amy,
I appreciate your honesty through your learning process. Learning a new skill takes patience, time and practice. You did very well with texturizing the clay. Hopefully you keep learning and developing this skill! Well done!