
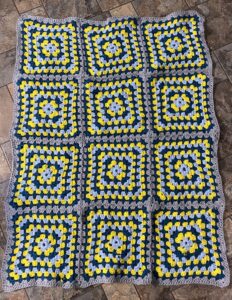
For my sixth learning project post, I have completed all my granny squares and stitched them together! I am pretty proud of all the struggles I have overcome to get to this point. I never thought I would get anywhere close to finishing this blanket but here we are!
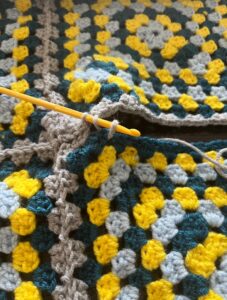
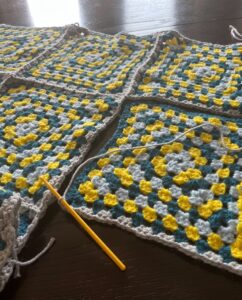
This week I did use YouTube again as it is the easiest online source I have found that I learn best from. I can slow the video down and replay it if needed. I used the ‘join as you go method’ when stitching my granny squares together. I started by stitching the first four squares together horizontally then would individually add squares vertically. It took me a while to get the hang of this new stitch, but it was a bit similar to the stitch I was using to make the granny squares so I caught on quite fast! There were a few times I had to undo some of the progress I had made because I would look too closely and notice a mistake I had made a few stitches back. I did find stitching all the squares together was way easier to learn and took less time then stitching each individual square itself. This technique I chose to stitch them together was easier to get the hang of. After I had all my squares stitched together, I did a double stitch all the way around the border of my blanket to hold them together more securely. The part that I absolutely hated was having to weave in all the ends. It wasn’t hard but it did take a lot of time and more patience than usual!
The video I followed along with to stitch my squares together:
The video I followed along with to weave my ends in (this video is under “Finishing Your Project” on the Yarnspiration website.
Here’s a few pictures of when I was joining my squares together and then the final product of them all stitched together.
Although I did mainly follow along with a YouTube video to do the stitching together process of my blanket, I did also find a pretty neat site called ‘Yarnspiration’. This online site offers patterns, resources and the ability to buy a yarn kit with everything you will need to create the pattern of your choice. In these kits, they list all the materials that are needed and included in the kit, abbreviations for crocheting phrases, and they offer step by step instructions on how to crochet the design/pattern you have chosen. The step by step instructions in these kits are very detailed and they start from the first round of your stitches all the way to your last. This site is definitely something I will look at using in the future to create my next project!
I am almost done creating my baby blanket and just need to add an extra border around it. I am hoping to possibly use Yarnspirations to help me along with this process or another website that I can find. Are there any sites that you can suggest to help me with my final stage?
Here’s the website to ‘Yarnspiration’
https://www.yarnspirations.com/en-ca/pages/how-to-crochet

Hey Payton,
Great work, that looks amazing. You should be supper proud of yourself for pushing through and finally finishing your granny squares and the final product. Even through the hard moments you didn’t give up and that alone is a huge accomplishment!
Hey Payton!
Your blanket looks amazing!!
What kind of border are you wanting to do? I know there are a ton of youtube videos that show you how to do a ton of different borders for blankets from easy to hard.
Hi Payton,
This is absolutely amazing for being only a beginner six weeks ago! Im glad you persevered through the struggles. Im very impressed with your completed granny squared blanket. Great work on joining your squares together. Im excited to see the style of boarder you choose to use with the website Yarnspiration.
Hey Payton!
Again your journey of stitching continues to amaze me. Every week I am eager to learn more about your process and experiences with this targeted skill. As opposed to last week, what I did notice, is that you implemented new tools. Instead of gaining inspiration from TikTok, you utilized YouTube as a means of inspiration to gradually obtain the selected targeted skill. Thank you for doing this Payton! One of the primary reasons I would like thank you for integrating a new tool, is the fact that I do consider myself as and learn more beneficially through auditory, video, and pictorial learning. These channels of learning are more beneficial for me as I find that I can retain the information faster and feel more engaged within the content. Thank you again for doing so kindly Payton.
– Muhammad