
With the weather consistently staying at a nice temperature in May, it was time to get the garden set up. As the pictures will show, we have a large garden in our backyard, segmented into two parts. One side tends to receive more sun exposure but is smaller, so the plants in this section will include carrots, tomatoes, and beets. The larger section lends itself to the larger plants, such as bean and pea plants, as well as potatoes. In between the sections, we have a spruce tree and a collection of flowering plants. Also in the middle is our newest addition from last year: three Saskatoon berry bushes. Why three? Besides the desire for a larger yield, planting several bushes together will aid in cross-pollinating, and therefore promote greater growth and durability. Here’s hoping!
I mentioned in my first learning post that my wife and I have had this garden since we purchased our home. I also mentioned that my role in it has been minimal: gardening is my wife’s grandmother’s pastime, dating back to her time on their farm growing up. Our house, and the garden that came with it, was actually purchased by us from my wife’s grandmother. Thus, when we moved into our house, the garden became an experience between my wife and her grandmother. My only role in the process has been rototilling the garden. But with my wife’s grandmother being less physically able to actively participate in the garden, it’s up to me to step in and help. Fortunately, this provides me the chance to connect this to the EC&I 831 project.
We have a basic garden rototiller that I run prior to seeding the garden. Prior to the tilling, we’ve always cleaned out the garden first (a good practice) and then dumped several bags of triple-mix soil blend and manure. My wife’s grandmother’s rationale was that the soil in these parts is not of a particular high nutrient quality, so she always supplemented for every season. Delving deeper, we can justify the rototilling process by pointing to the benefits of aeration, weed prevention, and soil balance (via https://www.troybilt.com/en_US/knowledge-tb-benefits-of-tilling.html).
Rototilling isn’t particularly difficult, just physically tedious. It always starts with a 15 minute process to get the rototiller running after a season of sitting in the shed. Prime, pull, sigh, repeat. Eventually, it’s up and running, and I can till lines up and down both sections of the garden. Along the way, I tend to dig up roots, un-harvested produce from the previous season, and the occasional peanut buried by a bird.
Here is one side of a freshly-rototilled garden, complete with added triple-mix and manure.
After the tilling came the actual planting. We planted all sorts of seeds: beans, peas, carrots, zucchini, tomatoes, potatoes, beets, lettuce, spinach, and others that I’m sure I forgot. We relied on a garden map devised by my wife for organizing where everything was to be planted. Not everything will be planted today, but at least the rows are complete.
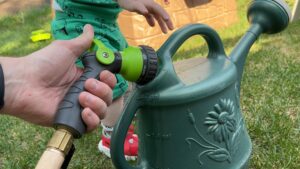 (Here’s a brief little video of us watering the start of our garden.)
After the initial planting, the final step for the day was to give them a good watering. For now, I just used a watering can for each row, rather than the full hose.
With this out of the way, the next step will be to finish planting some of the more accessory plants, and then get into the maintenance pieces. On the way soon, based on previous years, will be an army of ants, aphids, and so on, all seeking to munch on our produce. In addition, with our son, Ben, now wanting to wander all around the yard, we’re going to have to be much more particular about the substances we use to help treat and protect the garden. There’s going to be a lot of research to follow.