Improving my relationship with technology one blog post at a time.

Category: Learning Project (Page 1 of 2)

Learning Project: The Bee All and End All

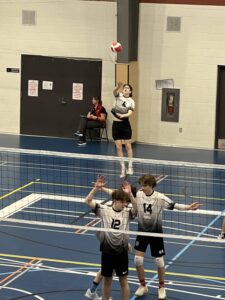
It’s finally spring and further to that, it finally FEELS like spring! My kids are still working through their volleyball seasons, but I am very excited to move into baseball and softball to spend some more time outside. I mean, I say that now as competition continues to take place in a climate controlled and weather protected gymnasium.

Outside weather during baseball and softball season can be absolutely miserable.


Throwback to a 2023 season memory when it was so cold I had a sweatshirt and jacket on, hood up, blanket wrapped around me but had to have my hands out to pitch count and managed to sunburn my nose and the backs of my hands. Thanks, Mother Nature!


<————Weekend weather was great during the 15U Brewers home game this particular weekend in the 2023 season! 😃


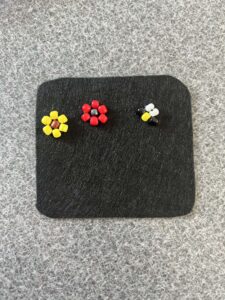
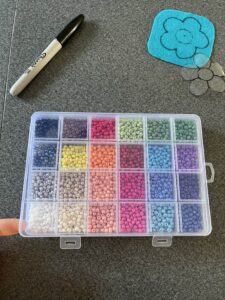
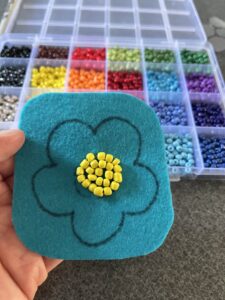
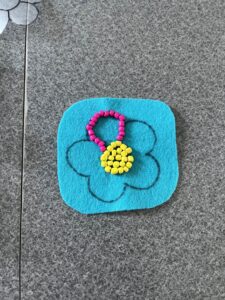
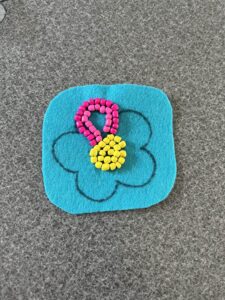
Spring to me brings thoughts of flowers and sunshine and I’ve had the idea that I’d like to bead a bumblebee since my frustration with this project melted away! Sometimes I feel like not only is my phone always listening, but it may also be reading my mind!

Cue this beading project appearing in front of my eyes!
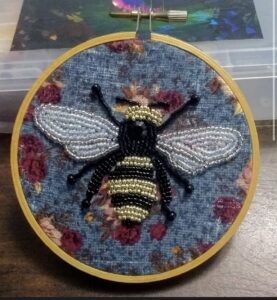

{Check out the original post here: https://www.furaffinity.net/view/37105400/}

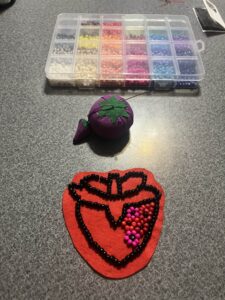
First things first, add buying some more black beads when I’m in Regina to my to-do list since I exhausted by supply beading my strawberry. Second thing, find some cute fabric to try out rather than just a regular piece of felt! I put the call out on Facebook to see if any of my local friends had some on hand since we don’t have much for fabric options in my community and the people came through with some options. I just had to decide which pattern to use! I think I might also try using a craft hoop like in the photo. I’m really upping the ante with this final go!
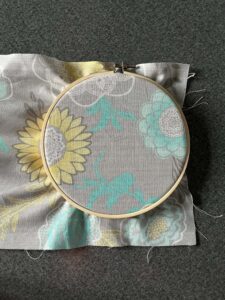
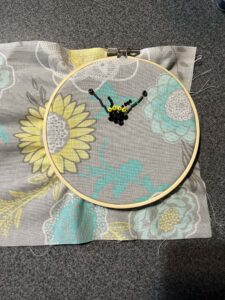
        
The fabric that my MIL had in her “scraps” stash ended up being perfect for this project! I will continue to work on this project as my “bee all and end all”!

Reflection of Learning
Week One:
When I started this project, my inspiration came from the Métis beadwork pieces that I had come across during previous study. The floral beadwork of the Métis people is incredible and seeing as I love nature and flowers, I thought that s simple flower would be a great place to start.
I wasn’t wrong, but I had no idea a simple flower would cause so much frustration in the weeks to come!

The Feels:
Excited
Confident

Week 2: The Very Beginning
Having never done any type of beading before, but recognizing that YouTube offers a wealth of resources, this is where I started my search for tutorial videos.
There are some great video resources available on YouTube and I did start off watching some videos to see what I had gotten myself into!

This Medallion Method of beading was a technique that I ended up using a number of times during my journey so this particular resource was very helpful to me! Spending time looking up different needle and thread or cord suggestions caused me to panic a little, especially knowing how limited our resources are in town! But, I had made up my mind and I wasn’t about to turn back!

The Feels:
Apprehension

Week Three: Paper Aids
I came across a really cool Saskatchewan based resource that offered a step-by-step guide to complete a paper version of a beadwork project that was created by a Métis artist. Little did I know that this resource was about to be the inspiration and the saving grace of my beading project!
I continued to watch videos on stitching methods and kept coming back to Mrs. Chambers on YouTube.

I gave in a purchased some beads at the dollar store because that was the only place in town that offered any sort of options for me. I also purchased some beading cord from the craft supply section at our local Walmart and was feeling like I was ready to go!

The Feels:
Excitement
Overwhelm with the different stitching techniques
Hesitation over my materials


Week Four: Smore Learning
This week I tried out a new website to log my learning project process. If my first attempt at my beaded flower didn’t send my blood pressure through the roof, using Smore sure did!
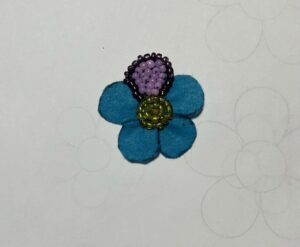
Using my dollar store supplies, this attempt felt like a complete and utter failure to me. I was questioning why I ever thought I was capable of a task like this one! I was also left wondering why my thumbs weren’t as nimble as they seemed like they needed to be! (Not so fun fact, I cut my palm on the lid of a can and required stitches and ever since then my left thumb hasn’t worked properly! So I guess there’s part of my answer!) Better luck  next time?

The Feels:
Frustration
Failure
More frustration

Lessons Learned:
~The “beading cord” that I purchased ended up being way too thick for the beads I was using. Too much time and energy was being spend threading my needle and threading the beads onto the cord. New thread needed!
~Bead sizes and shape matter.
Time to look for some new materials!

Week Five: Why not, Minot?
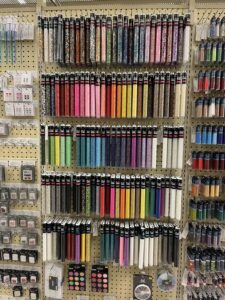

A quick trip to Minot and to Hobby Lobby with loads of bead options revitalized my hope that I might actually be able to make a go of this project! I had done more research in regards to beading cord versus using regular sewing thread and I just couldn’t justify spending nearly $10 USD on a small reel of beading cord, so I stuck with using thread for my project. That week, I attempted another simple flower using the beading techniques I had reviewed in the YouTube videos I had watched and used my new supplies! Results were slightly more appealing…
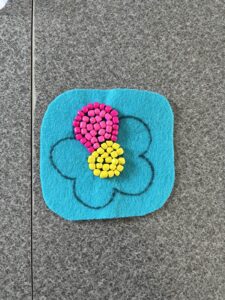
The Feels:
Slight sense of renewed confidence
Less frustration
Content with my bead purchase

Lessons Learned:
~Thread or cord thickness makes a huge difference in the simplicity of threading a needle and manipulating the beads!
~Even craft store beads have a variety of sizes and shapes!

Week Six: Stomach Bug for the L
No progress this week as a virus took out my entire family. I did have a few extra hours to look for inspiration though!
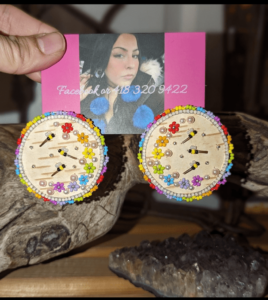
Image credit: Beadwork/Dreamcatchers by Miranda on Facebook

Lesson Learned:
~I’m too old for a gastro bug!

Week Seven: Breakthrough
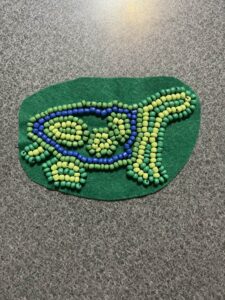
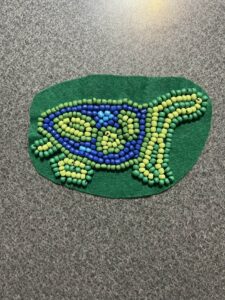
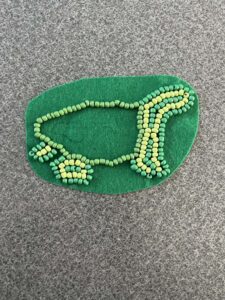
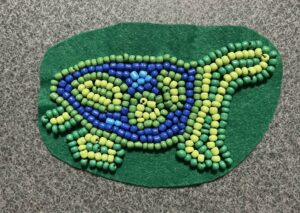
After feeling mostly frustrated, I switched gears and started on my turtle as a representation of Turtle Island. This little project was incredibly meaningful to me, I connected with it and although my progress was slow, I worked steadily and offered myself the grace I needed to gain some confidence!
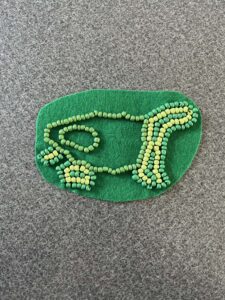
The Feels:
Connectedness
A sense of accomplishment
Renewed sense of confidence

What I Learned:
~Beading is tough! But patience and persistence allow for small successes!
~Slow and steady allows for necessary progress.

Week Eight: Turtle Power
I successfully completed my turtle beading project and am still proud of it! I took it to school to show some of the students that I work with since I had shared that beading was my chosen project for this class and they were all so supportive and had kind things to say. I finally felt like I had accomplished something meaningful!
The Feels:
Accomplished
Joy
Proud

Lessons Learned:
~Different sizes of beads are a good thing!
~Tension of your thread becomes important when beading in spaces where you need some “wiggle room” and where you’d rather have beads stay firmly in place.
~Patience is key!
~I’m actually getting better at this!!

Week 9: Berry  Good Choices
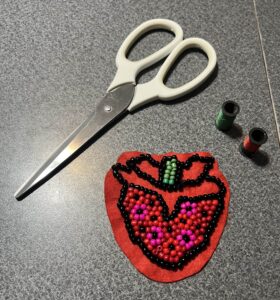
With the help of the algorithms, I was getting more and more suggested posts and accounts to follow that were very specific to beading. This is how I was inspired to start my next project as a post with strawberries came across one of my social media feeds and I was sold! I loved the floral details and the colour combinations. So, off I went with my own pattern and got straight to work!
The Feels:
Content
Happiness
Excitement

What I learned:
~The original medallion method of beading makes the cutest little flowers!
~I really enjoy the colour red!


Week 10: The Berry End
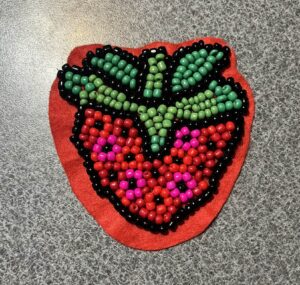
Again, I felt a sense of accomplishment as I finished up this next addition to my learning project.  This was so fun to complete and I am proud of how it turned out. Beading takes me less time, causes me almost no frustration and I can honestly say that I actually enjoy it now!
The Feels:
A sense of accomplishment
Joy
Proud

What I learned:
~Perseverance is key when learning a new skill, even as an adult!
~Tasks that can be overwhelming and unenjoyable at first can turn into projects that offer a sense of fulfillment.


In conclusion……

I abandoned a lot of my “online” learning resources early on in this project. I was overwhelmed by the different stitching methods and very quickly became comfortable with creating my own patterns and just going with the flow. I have definitely come across many more online resources when it comes to new ideas thanks to the good ol’ algorithms! But I didn’t pursue much when it came to tutorial type learning.

This project, as I have mentioned previously, was a huge challenge for me in the beginning. Frustration levels were through the roof, but as time wore on, frustration turned into satisfaction as I practiced the craft and the ever important virtue of patience! I chose projects that were meaningful to me. I love First Nations history, I love nature, I love spring time, I love plants, I love cats… opportunities are endless! A friend of mine has asked that when our schedules permit, if I will guide her through a small beading project. She has been one of my biggest cheerleaders outside of this class so having a real-life person to share the joy with has been wonderful as well.

At one point I thought, “I should have just gone with baking as my learning project.”
I LOVE to bake, but I bake many different things all the time so that felt a little but like cheating (sort of how I feel about using AI 😉).

Just a few examples of things I’ve baked lately:


Shortbread mini egg cookies
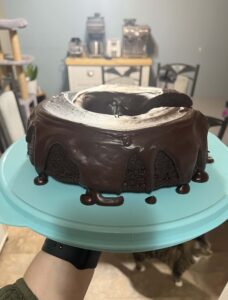


Chocolate Sour Cream Bundt Cake
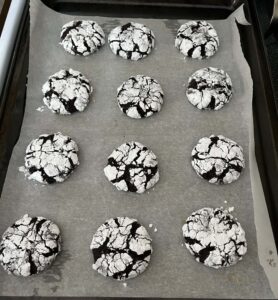


Mocha Crinkle Cookies


Overall, I feel like I learned a lot about myself having worked on a new skill for this learning project. I also proved to myself that I have more patience and perseverance for new tasks! Although frustrating in the beginning, this learning project ended up being something I looked forward to working on each week and it provided a great opportunity for growth and understanding!

Learning Project: A Berry Proud Moment

I hope everyone who celebrates had a wonderful Easter weekend!

Image source: https://www.flickr.com/photos/cardkarma/5644277094

The week leading up to the long weekend was a busy one for me and my family as I spent the weekend in Regina with my daughter for her volleyball tournament, but still managed to sneak in a turkey supper on Sunday.

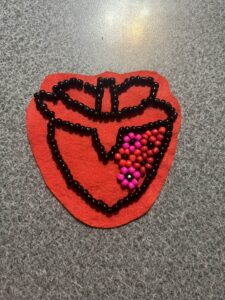
While the turkey was cooking, I continued working on my strawberry beading project that I started last week. I feel like I deserve a pat on the back for my newfound and continued patience for a skill that I initially found overwhelming and completely unenjoyable. Now, if I have the time, I can sit for more than an hour beading away!


Last week I had started to fill in the berry portion of my strawberry using small flowers of varying colours, which is what I continued to do this week.


{Photo from where I left off last week for reference}


Once I finished with the flowers and filling in the blank spaces, I got to work on the leaves. I was running dangerously low on black beads due to the outline of my strawberry and green beads were slim pickin’s because of my previously completed turtle!


My oldest son walked by as I was starting work on the leaves and commented that he thought it was going to be pretty cool when it was all done. Thanks, kid!


My inspiration photo used a combination of greens in the leaves which I recreated using the limited supply of green that I had left.


Isn’t it cute?! I actually love how my little berry turned out and you can’t even tell that it hitched a ride in the mouth of my cat!

Learning Project: A Berry Cute Addition

After finishing my beaded turtle last week, I really wasn’t sure what I was going to start beading next for my learning project. It’s quite interesting (and all-out creepy) how much your online activity influences the suggested posts, sites, groups, etc once you’ve spent some time searching and researching a specific topic. Thank you, algorithms!

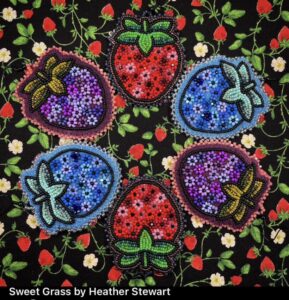
A random bead work post came across my Facebook news feed and it happened to be an indigenous woman with some really cool beading projects that she creates and sells. Her strawberries caught my eye and that’s when I decided I was going to give a strawberry a try! I LOVED the little flower details that filled in the inside of the strawberries. And I loved the variety of colours that she used. I am partial to purples and reds myself so the colours were eye-catching!

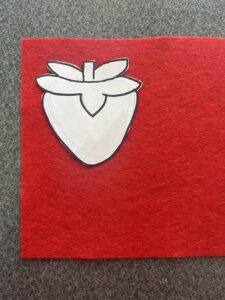
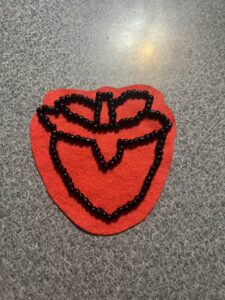
I started with drawing my little strawberry shape, but this time I skipped the step of transferring the image onto a piece of plastic. Instead I just traced the strawberry shape directly onto my felt and got started with the outside edge which I decided to use black beads for.


It is quite amazing to me how much easier this project is now compared to when I first attempted my bead work project. I no longer feel stressed as I work my way through the steps. I’m much better at threading a needle, picking up those tiny little beads and much faster at stitching, too. The one thing I need to work on is my estimation in terms of how much thread I will need in order to complete an entire side or space so that I’m not having to stop and re-thread my needle three times!

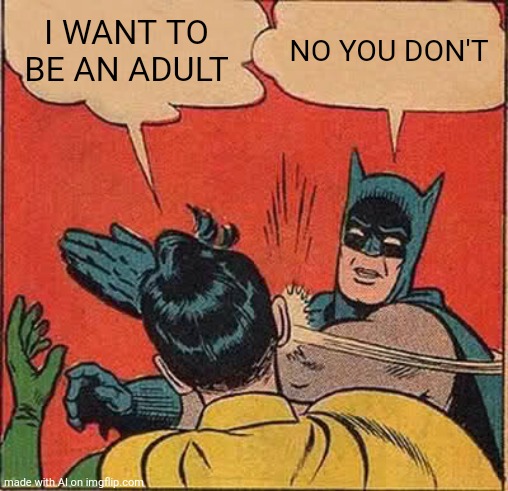
I mistakenly left my project unattended while I took a “break” to do some cleaning.Adulthood | I WANT TO BE AN ADULT; NO YOU DON'T | image tagged in memes,batman slapping robin,adult,adulting,adulthood,child | made w/ Imgflip meme maker

{Adult life…the joys are endless!}

I  finished cleaning one bathroom and came down the hallway and spotted something laying on the floor which wasn’t there before I took my “break”. Turns out it was my strawberry!


(Image credit: https://imgflip.com/i/3yx2sn)


My donkey of a cat had jumped up onto the kitchen table and helped himself to my project!


{He’s so cute though!!}

Thankfully he didn’t rip any of the beads off, he just stretched the thread and rearranged a few of the beads. The felt where he had it in his mouth was a little fuzzy, but the open space will be covered with beads and I was able to fix up the spaces where he moved and stretched the thread. Lesson learned there, my friends! Don’t let the cat think you’re creating a new toy for him!

My mother-in-law gifted me a little sewing kit quite a few years ago and it always sits in the utility cupboard in our laundry room downstairs. I legitimately think my husband used the kit more than I did up to this point because he always took it upon himself to sew our boys’ name tags onto their hockey jerseys! But, I feel like I’ve made up for lost time using the little kit during this project! Just recently there was a post circulating on Facebook that had the history of the little tomato pincushion.  I remember my very crafty mother having a tomato pincushion. Turns out I have a mini tomato pincushion in my kit! Talk about an example of the Joshua Tree Effect!


This little strawberry will keep me busy for this week and I now have a number of new ideas saved on my phone, but does anyone have any suggestions for my next project?


Learning Project Success!

After a slow start, some serious frustration and an illness hiccup along the way, I am SO excited to share that I finished beading my turtle this week!

Is it perfect? Absolutely not?

Do I love it? Absolutely!

Have I been inspired? Absolutely!

At my last update I had just finished beading the outer edge of one of the “islands” on turtle’s back. As I continued on with the other islands, a couple of my beads weren’t held taught and it created a bit of a rough outline. I decided not to worry about it because it made me think about the beautiful, rugged and imperfect coastline that my daughter and I saw time and time again during our visit to Newfoundland in the summer of 2023.

Me and my daughter on the island of Twillingate, Newfoundland.

There is beauty in imperfection. Life would be pretty dull if everything was always perfect!

And now I’m thinking about how many islands I’ve visited in my life…


Oahu Island Map courtesy of  Shaka Guide        Jamaica Map courtesy of Jacqui Oakley

I started off by finishing off the outer edges of the islands and then filled them in with green as a representation of the land that we live and depend on for our survival. Working with a larger space I could definitely see myself adding in an extra colour or some other details.


Once I had each of the three islands complete, I started on the blue beads as a representation of water, our source of life on this earth.

Again, with more space I definitely would have added more layers of blue!


And then, with plenty of patience, my turtle is complete! 🙂

I still haven’t decided what I’m going to work on next, but once you mention “beadwork” or “beading” or search that topic up, the number of posts that start popping up suggesting sites to visit is endless!

A Learning Project Breakthrough!

I am actually really excited to share my progress on my learning project this week! It’s been a challenging couple of weeks in my life so this was a bright spot in what seemed like a never ending tunnel.

Traditional Métis beading has a lot of floral work which is why I started off with a simple flower as my idea for the jumping off point for my project. I think it was probably the initial, and continued, frustration with supplies and how time consuming the actual beading was that really turned me off from continuing on with any more flowers. I also scoured the internet for inspiration and although I have now strayed from tradition, this week I found something that made me feel proud.

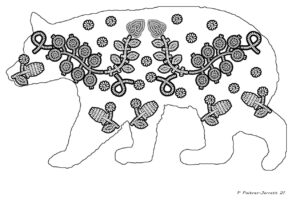
Previously I shared a link to the Sask Culture website where I found some simple animal patters and some “colouring pages” with what resembled beaded decorations.  The instructions for the activity suggested to choose your spirit animal, the animal you are drawn towards. The YouTube video I’ve shared below explains that a spirit animal is much more than just one you are drawn to.

Funnily enough, all I could think about beading was a turtle! But, for me, this was less of a spirit animal choice (although lately you’d think I was related to a turtle – slow moving and quick to take cover) and more of a representational choice. One of my favourite First Nations stories is the legend of Turtle Island. If you haven’t heard this creation story, please take a few minutes to read about it. There are different versions, but the major events share similarities.

                                                       Turtle Island  by Ojibway artist Patrick Hunter


Prayers for Turtle Island print by Jackie Traverse


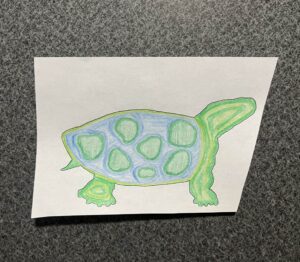
I printed the turtle pattern and shrunk it down by 50%. I spent some time colouring it in so I had an idea of what my beading pattern would look like before I got started.


This time around I was able to find a sturdier piece of plastic in my recycling and didn’t have to use a Slurpee cup! Yay me! Although, still kind of funny, I ended up using the plastic lid to a package of donuts my kids begged me to buy when I went to Costco last week! The plastic was a nice thickness and ended up working really well for my pattern.

   Look at how cute he/she is on that green felt!
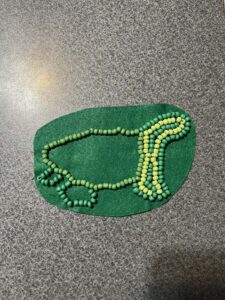


Using some tips from previously watch videos, I made sure I left some extra felt around the edges of my turtle and rounded the corners so that my thread wasn’t constantly getting caught on the edges. I was actually so excited at how well my outline turned out that I didn’t even remember to take a photo before I started filling my turtle in.


Although this little guy has been incredibly time consuming because I’m still SO SLOW (dare I say slower than a herd of turtles stampeding through peanut butter??), I know I have improved! It’s easier to thread my needle, scooping up beads with said needle is easier and faster, oh and speaking of beads – the inconsistencies that I initially thought were a detriment have actually been sanity saving as I work on my little turtle. It turns out that when you’re beading in a space like a head or a foot, it’s actually beneficial to be able to choose a shorter, wider bead or a taller, longer bead depending on the space you’re filling in. Tension of the beads has also been something I have started paying attention to. For example, the turtle’s shell is stitched quite rigidly to the felt whereas there is some movement in the feet and head which made it easier to fill int he open spaces.

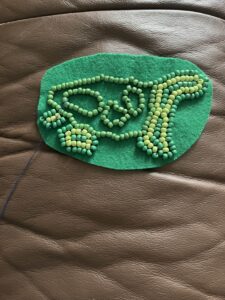
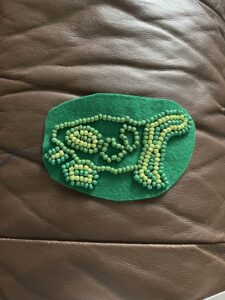
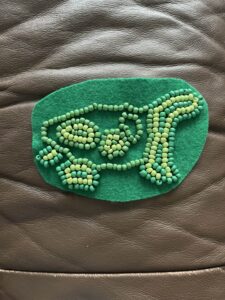
My success this week has been a real breakthrough. Before this week I felt a lot of frustration and very little motivation to continue on with this project, but now I have a renewed optimism! I even did a couple of little test flowers and a bee as practice because I just might want to create my own little scene once my turtle is complete! Until next week….

Learning Project – A Minor Hiccup

Weekends can be busy at my house. All three of my kids are involved in sports and weekends often mean travelling to tournaments out of town.

I was grateful that I was going to be home this weekend and planned to set aside minimum of one hour on Sunday afternoon and dedicate that time to my learning project, but let’s back up to Friday… my daughter fell ill with a stomach bug Friday night through Saturday morning which meant added loads of laundry and just being way more tired than usual.

Cue Sunday – did somebody say SNOWSTORM?! How about we dedicate some time to digging out from the snow that fell overnight Saturday and do some touch-ups throughout the day Sunday. By Sunday afternoon, I really wasn’t feeling well. I tried to deny it as long as I could, but one of my sons fell ill and then it was my turn. So, forget dedicating Sunday afternoon to my learning project!


My school division was named in the rotating strike scheduled for Monday, March 4.  Instead of walking in solidarity, I write this post curled up in my bed hoping that tomorrow I will feel well enough to go back to school.
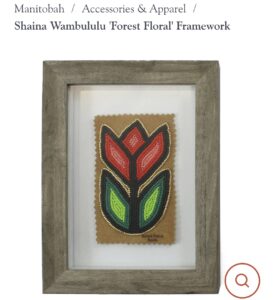


Unfortunately, after the health and weather we were dealt at the end of the week and throughout the entire weekend, I have no progress to update you on. Instead, I will leave you with a collection of photos that I’ve gathered that provided me with some inspiration and am hoping that this week is a better one, in many different senses!


More info and to purchase here: https://www.manitobah.ca/products/shaina-wambululu-forest-floral-framework


I snagged this screenshot and thought I had also saved the facebook page to be able to contact the creator of these simple, adorable earrings. Unfortunately, I did not save the name. I do know that the phone number listed on the card is for a city in Quebec.  I love the simplicity of these earrings with the cute little beads and flowers. I want to try out a similar design, but will need to find the long, cylindrical beads before embarking on the bee journey!


Why not, Minot?

Ahhhh…. Reading Week. A welcomed break from the hustle and bustle of everyday school and learning life.

This week has offered some opportunities for catching up, reflecting and even a trip to the USA with my kids. Don’t get too excited for me – I live as close to Minot, ND as I do Regina, but there is lots to see and buy in Minot that you will never see or buy in Regina!

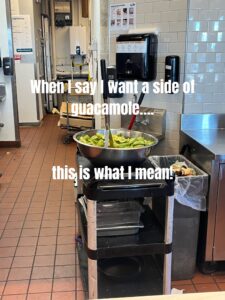
First (and always) stop? Qdoba. Never been? I liken it to a Mexican subway. It never disappoints.

{Check out the size of that bowl! How many avocados do we think are in there?!}

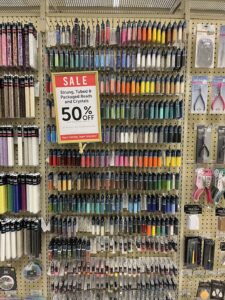
Second stop? Hobby Lobby. Never been? Think American version of Michael’s. I decided I really wanted to see the beads I planned to use for my project in person rather than ordering online and being disappointed in colours, sizes, etc. Hobby Lobby did not disappoint in their bead supply options! Look at all of the beautiful colours! And they were on sale!


I ended up settling on a small selection of multi-coloured beads rather than choosing individual tubes of colours. To get started on an actual project I would consider showing others, I do believe these beads were a good choice. But, I also think I will be stopping at Michael’s during my visit to Saskatoon to grab an even bigger selection of beads should this next beading attempt go well.

Once I got started with the new beads, I was interested to find the inconsistencies in sizes in these beads as well. There must be a trick or a “best source” that seasoned pros use! My second attempt definitely went better than the first, but I’m still slow as molasses in January (so glad it’s not still January!) when it comes to working with beads and thread and felt, etc, etc! I do feel like this process would get easier and I will get faster once I’ve practiced this craft some more!

I don’t love the colour pink, but I’ve decided I’d like to try to bead an animal using the pattern I found previously, and I wanted to save my greens and blues. Here’s the petal I completed with my new glass beads. It’s a very slight improvement, but blood wasn’t shed, tears weren’t shed and no bad words were expressed….out loud, anyway!


There’s Always Time for smore Learning

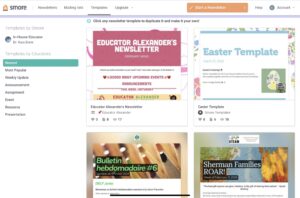
This week I decided to try out smore to chronicle my learning project progress. I’m not very brave when it comes to technology or learning new apps or websites, but my school uses smore for our newsletter so I thought I’d give it a try.

Honestly, I didn’t love this platform.
There are lots of templates to choose from that others created and shared in a number of different categories, BUT you have to work around the information they’ve used in the newsletter as well as the format they’ve created.
It was difficult for me to edit the first template that I chose which caused me to be frustrated (when I was already frustrated with my learning project!) so I ditched one template and started a new, blank newsletter.


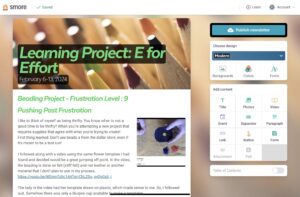
Progress is saved automatically, which is great, but I didn’t like that there was no ‘preview’ option. I like to see what things are going to look like before I hit ‘publish’! I also wish there had been an undo button when I accidentally clicked and dragged a section that I had completed and never was able to move it back to where I thought it belonged.


With your free account, you only get to create three free newsletters before it asks you to upgrade.

The cost isn’t cheap, but if you planned to use it regularly then you could probably justify the subscription. And, with regular use, I’m sure the entire site and process becomes easier to navigate and edit.

I do think that this tool could be used in the classroom to create fun weekly or monthly newsletters to send to families. The template I ended up using was suggested as a classroom newsletter and provided space to add photos with descriptions of what was happening in the classroom. My school already uses this platform to communicate our monthly school newsletter to families, but it would also be easy enough to use as a classroom communication tool.

There are plenty of options to add links to your newsletter, some templates even had moving graphics embedded in them. You’d never move up to the top of the SAMR model using a tool like this, but with adding in different links or including videos or inviting parents and students to view documents where they could edit to provide feedback would at least move you off the shore!

As for my learning project process, please make your way to my newsletter, created with smore, to reveal the blood (literally) and tears that occurred this week.

With the Aid of Paper

It’s pretty interesting the sources of inspiration and help one can find when they are least expecting it. After doing some more research into needle sizes and bead options for my learning project, I was feeling a little bit overwhelmed. Excited still, but overwhelmed. So I decided to do a little more digging into ideas for patterns  and colours – the things that would make this project manageable and winning for me. Ahhhlong came a beautiful post with basically exactly what I needed for inspiration and templates to use in the classroom!

Although I still plan to start “small” with a simple beaded flower, these animal designs are patterns that I look forward to gaining enough confidence to try beading something as intricate!

Thanks to living in a smaller, rural centre, options are incredibly limited for crafting supplies (amongst other things!). As much as I like to shop and support local, sometimes that’s just not possible when it comes to specific tasks such as the beading project I’ve chosen to pursue. Amazon has been my go-to when it comes to searching for necessary supplies and the price is right, Bob!

Fingers crossed that my supplies show up soon (nobody is trusting the UPS tracking any day of the week!!), but in the meantime I will be watching videos on different beading methods (I had no idea there was going to be so many suggested beading methods. Yikes!) and using my paper guides to map out the colour schemes I plan to use.

Looking forward to getting started on this project and sharing some actual photos from my real-life progress!


Métis Beading: The Very Beginning

Does anyone even remember what we did before we had the internet to use as our go-to?


Yeah, actually I do because the internet wasn’t generally used until I was almost a teenager!


How did we survive or accomplish anything before YouTube?!

Library, card catalogue


We went to the library and searched the PAPER CARD CATALOGUE to find A BOOK with the information we were looking for!


Coming from someone who doesn’t access nearly as many tech gadgets/websites/apps as I maybe should, YouTube has been an amazing teacher in other subject areas, and when it comes to my Learning Project, it’s proving to be most helpful.

When I introduced myself as a beginner, the internet has confirmed and reminded me that I am most definitely a beginner. I’ve sewn buttons back onto clothing before or mended a small rip in a favourite pair of mittens, but when it comes to accomplishing something creative with string or thread AND beads? Next level difficult!

Lucky for me, there are experienced people out there who are also able to share their knowledge in manageable steps for people like me. Miss Chambers has posted a series of videos on her YouTube channel that are simple to follow, well laid-out and have a clear goal in mind that she sets out to accomplish during the video duration.

This project definitely seems like something that will challenge me, but won’t frustrate me to the point that I want to toss all of my supplies into the garbage and set it on fire. My plan for this week is to choose a pattern that I can follow easily, most like a simple floral as depicted int he video preview, and decide on the colours of beads I plan to use. Once I have a list of materials, I’m going to get everything ordered online. We have very few options in town that I’ll likely have to order everything online unless I time it right to grab my supplies the next time I’m in the city.

Watching a couple of short tutorials has definitely sparked my excitement for this project!

« Older posts

© 2024 My Ed Tech Journey

Theme by Anders NorenUp ↑