No Crumbs to be Found Here
The Inspiration
While learning how to do some piping techniques last week from this video, I absolutely loved how the rosette pipings looked. This inspired me to want to try icing the entire cake like this, but I knew that I didn’t want any crumbs from the cake to get into my icing if I was doing this. I decided to do a quick google search to figure out how I could possibly avoid this issue, and the results told me I needed to create a crumb coating.
Onto the Learning
The next step was to find a source to tell me exactly how to do this because I was absolutely clueless. I ended up using a blog post from Wilton to do some learning. As I was reading through it honestly seemed simple enough. I was very grateful that they included a description of what a crumb coating does and how to do it. The video that they included in this post also was extremely helpful to my process. I did find that the video was quite long for what seemed like a simple process, so I found myself skipping through to different sections to have a visual of what the crumb coating process would look like. I always appreciate a visual because when I start doing my own version, I have a picture in my mind of how it should end up looking. I also LOVED all of the little tips and tricks that they gave at the bottom of the blog post. I was so excited to see some additional links in this area about “levelling and torting” the cake, but unfortunately the links that are there are broken. Overall, this source was great for learning how to crumb coat!
What I learned:
- The crumb coat is THIN; I should be able to still see the cake in spots.
- Wait until the icing dries before actually icing the cake.
- Make sure the cake is NOT hot.
Leaving No Crumb Behind
Now that I figured out exactly how to do this, it was time to see if I could actually successfully pull off a crumb coating! I was also very excited to see if this would help with the rosette pipings and if I could make a pretty-looking cake. Luckily I had all the supplies I needed to achieve this. This week, instead of making the base of the cake, I decided to use a Betty Crocker box cake. I figured that this would save me some time with the process! I ended up making two cakes, so I could stack them on top of each other with a layer of my grandma’s homemade raspberry jam (and some actual raspberries) between them. For my buttercream, I ended up using my mom’s recipe again which you can find in my last blog. I used TikTok this week to record and edit my video that documents my process. Doing the crumb coating was kind of tricky, but once I figured out the top, it did make the sides a lot easier! I thought that I did pretty great at it, but only time and the next step would tell if I truly did a good crumb coat.
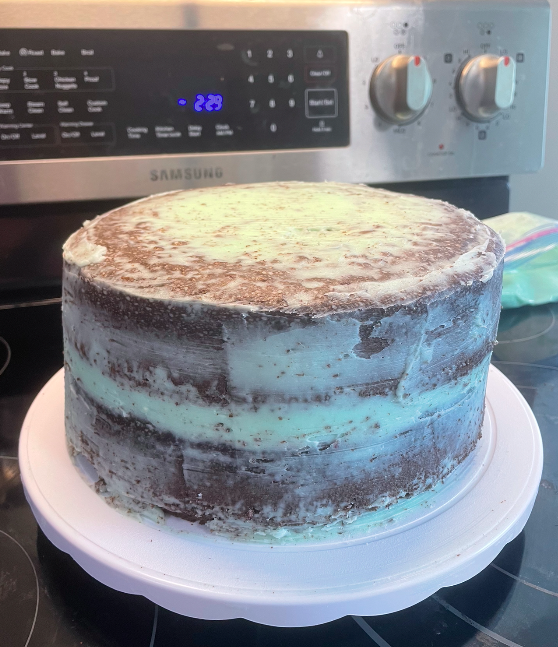
After waiting for what felt like an eternity, I was able to FINALLY start actually icing my cake. I made up a new icing – it was pink (my absolute favourite colour). I used my mom’s recipe again for the buttercream (find that in my last blog here). As I was icing, I was so so SO upset… my crumb coating failed in some areas. In the picture below you’ll be able to see some of the icing on top with crumbs in some sections. I think that I just didn’t make a thick enough layer around the cake which caused this problem. I figured at this point that there was nothing I could do about it, so I just continued on with the process.
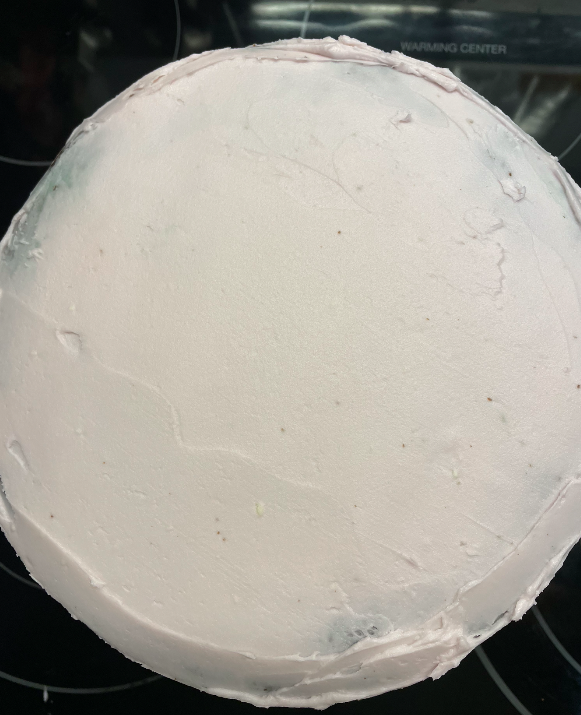
The top of the cake… with crumbs 🙁 
Even more crumbs 🙁
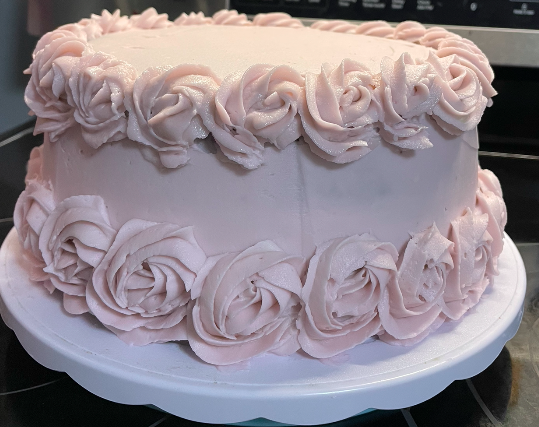
Next was the part where I try out the rosette buds on the entirety of my cake. As I began, some disappointment came around AGAIN! I felt like I couldn’t catch a break. I was running out of icing waaaaay faster than I could have predicted. I had to quickly change up my plan, and I decided to put the rosettes along the bottom of the cake and around the top of the cake. Even though it wasn’t what my plan was, I felt like it turned out pretty good! I mean, I wouldn’t put it in a cake shop window (maybe I’d put it behind like one or two other cakes in the cake display inside), but it is presentable enough. Because my original plan was that I was going to put rosettes over the entire cake, I left the original icing imperfect underneath. It ended up not being covered, so I was slightly upset about that.
Check out the process of making this cake with this Tiktok video I made:
So… I Left Crumbs Behind
Honestly, for my first attempt, I didn’t have too many crumbs that got left to be picked up by my actual icing. I think that I was expecting perfection which is just not attainable for a beginner. As I continue practicing throughout the weeks, I will take what I learn about crumb coating and maybe end up perfecting it!
#Tech Resources I Used:
What did I Learn?:
- Maybe put a teeny bit more icing when crumb coating.
- Make MORE icing than I think I will need… I’ll end up running out otherwise.
- It’s okay for things to be imperfect.
Now… What are Next Weeks Plans?:
- Learn from a new source – Tiktok or Instagram
- Try out a Basket Weave Design.
- Continue practicing the crumb coat!
I absolutely love the process of watching you put the crumb coat on in your tiktok. I am an impatient person so even waiting to for the cake to cool down would drive me crazy. Honesty good on you to have the patience and motivation to keep going. In no time you will be decorating cakes like it’s your day job! Good Luck Johnna!
Hi Johnna,
I have never heard of crumb coating before so that is a really cool idea for effective cake decorating! For your first try, this looked amazing! I enjoyed watching your process of crumb coating the cake. This blog post contains loads of information and pictures to help me understand how hard you have worked at this! I honestly don’t think I have the artistic ability to decorate a cake using rosette pipings it looks absolutely stunning and you should be so proud! Keep up the good work your blog looks amazing! I enjoy how you have set goals for yourself as well for future weeks such as learning from a new source! Your blog is so well organized, thanks for sharing!
Noelle
CommentYour cake turned out so well despite some of your struggles. I started making cakes about a year ago and its definitely way harder than it looks. I found that putting my cake pieces in the freezer for a bit before doing the crumb coat helped to keep the cake from tearing. I also like to toss my cake back into the freezer for a bit to help solidify the crumb coat while I get the remaining icing ready. I made a cake not all that long ago and didn’t realize how much icing the rosette technique actually uses, I ended up having to make more. I’m excited to watch your progress and lean along side you! What other types of cakes do you have planned? Will you play with fondant at all?
Thanks so much for the tips Dayle! I am definitely going to try these out for my next cake – I am sure that they will help a ton. I’m glad I’m not the only one who ran out of icing using the rosette technique!! I definitely thought I had enough until I was about halfway done with the bottom and my icing bag was empty. Next week I’m planning on trying out the basket-weaving technique and then I think I will play around with fondant. I’m a little nervous to try out fondant, but this is the perfect time to learn!
I loved watching your process of putting the crumb coating on your cake through TikTok. Tiktok is such a cool way to document your process and I will definitely have to consider it for documenting my own process. It was nice to see that even though things weren’t going quite as you planned you pushed through it, and adjusted your plan to finish your cake icing. I definitely don’t have the patients you do to create what you are, and I look forward to seeing your icing skills improve on your journey!