Grandmas to the rescue!
I am so pleased to be updating my learning project posts with some positive progress! After the whole “sewing machine not sewing” fiasco, I asked my mother-in-law to take a look at the machine and see if it was threaded right and even able to function properly as it is quite old. Was it broken? Was it missing a part?
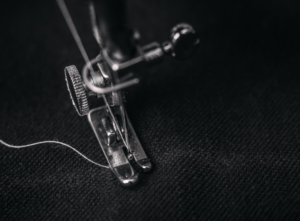
My MIL suggested I try a new needle because perhaps the old ones were either too dull or didn’t fit the machine properly. She gave me a set of new needles. I felt like I was holding my breath as I sat down and changed the needle. I set up my piece of shorts fabric once again and tentatively pressed down on the foot pedal. To my surprise, relief, and JOY, the needle switch worked, and I had a clear row of stitches from one end of the material to the other.

At risk of jinxing myself and this whole situation, I decided to end on a positive note. The next day, I decided to call my grandma and catch up! it had been a while, and I knew she’d want to hear some updates about her next great-grandchild on the way and just chat about this and that. I was excited to share about my new learning endeavor with her old sewing machine. One of the first things she said to me after I explained that I had been having some trouble was, “and you’d oiled the machine?”. Uhhhh what? I oil baking sheets when I make cookies and get the oil changed in my car but oiling this sewing machine would have never crossed my mind. She said that machines definitely need to be oiled every so often, especially after not being used for long periods of time (which is certainly the case here). She said she actually still has the oil for it at her apartment and hadn’t even thought to put it in the box when she’d passed the machine on to me. So needless to say, I’ll be getting that from her at some point, along with an explanation of how to oil the machine.
In the mean time, I wanted to practice my new skill! I looked again at my first row of stitches on the shorts. After coming down from the high of completing the task, upon further inspection, the row was…quite crooked. I clearly wasn’t concerned about precision or appearance at that time, but figured this was a good place to pick up my learning. During our week of exploring a new social media platform, I found several sewing accounts on TikTok that I’d saved for later. These included:
I also found some interesting practice ideas, including sewing on paper towel, or just plain old regular paper, instead of fabric to practice different types of stitches!
@keekrucreations Paper Sewing Day is always fun because that means the newbies have started!! #fcsteacher #learntosew
I figured this was a smart, practical place to start this new stage so I didn’t ransack my closet and destroy half my wardrobe while I still hadn’t purchased any fabric.
I should note here that with all of the troubleshooting and problem solving that this learning project has involved, my goals shifted a little. Initially, I had hoped to be able to create something by the time the seven weeks was up, such as a bucket hat or a little blanket or something! I don’t think I’ll get quite that far as looking at some patterns for certain items (like a bucket hat) might be a bit ambitious for me at this stage. However, I am undoubtedly closer to that goal now than I was just weeks ago. Also, life is busy, and I know I’m preaching to the choir when saying this to teachers in June. Anyway, here is my plan for next week:
- Practice stitches on paper or paper towel to ensure I can make them straight
- Research what to do at the end of a row of stitches. How do I “finish” it off?
- Practice stitches on different types of materials and fabrics
- Optional, depending on how I’m doing – find a very small, simple project and try it!
Until next time.
