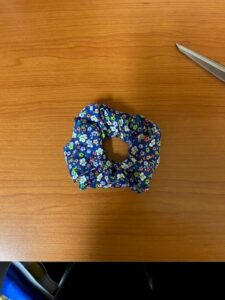
Scrunchie? DONE-chie.
I can hardly believe it.

Well actually, that’s a bit dramatic. After figuring out the ins and outs of the machine, I knew I’d be able to figure out this relatively simple project in the sewing world. Here’s a time lapse of the whole process!
Here’s the breakdown of how it went:
- First, I bought a pack of fabric. It came with 5 different floral styles. I also bought knit elastic, which I ended up having to cut in half to meet the 1/4 inch requirement from the instructions. To be safe, I went with about 1/2 inch wide elastic to give me (and the needle) some wiggle room for errors.
- I let my daughter choose the fabric she wanted as the scrunchie would be for her. Naturally, the first fabric she chose was claimed as a blanket for her baby, so we went with option 2 (toddlers, am I right?)
- I cut the fabric according to the specifications by Damjana at AppleGreen Cottage (here’s the link to the video I mostly followed)
- I sewed the narrow end of the fabric to close that seam
- I then folded the fabric in half lengthwise and sewed that seam shut. This is where I ran into issues
- everything started fine, but eventually, the needle just kept going through the same point in the fabric and the fabric wasn’t rolling along under the presser foot as it had been before. So, I stopped, pulled the fabric away, cut and tied the loose ends, and tried again. I did this probably 5 different times. Eventually, as nothing appeared to be wrong with the bobbin thread, I figured that maybe it was an issue with thread tension and adjusted that. This seemed to do the trick and I was able to finish that long seam.
- Then I turned the fabric right side out
- Time for the elastic. The video I was watching didn’t specify the length of the elastic, so I had to look to Treasurie on YouTube to help me out with this. This tutorial video was a bit more detailed than the other one, and came in very handy.
- I cut the elastic slightly less than the 9 inch suggestion from Treasurie, as the fabric I cut based on Damjana’s measurements was smaller than Treasurie’s. I went with 7.5 inches. As mentioned before, I had to cut that elastic in half lengthwise so it wasn’t so thick.
- I then pinned the ends of the elastic together and was instructed to sew those together. I was about to go and find a needle and do this by hand, but I figured what the heck and let ol’ Singer give it a whirl. It worked fine!
- After that was done, I removed the pins and tucked the raw edge of the fabric inside the edge with the seam. It was then time to sew the ends of the fabric together (the last step). Honestly, I kind of figured this was not the correct way to do this step. I used the machine, which sewed the elastic to the fabric, stopping it from being able to move around within the loop of fabric. I checked out some of my other scrunchies, and all of the elastics inside of them were able to move freely around inside the fabric. I wasn’t sure how I was going to do this without also sewing the elastic, unless I did it by hand. From the videos, there was no mention of doing this step by hand, so I decided to just do a row of stitches right through the fabric and elastic. I figured once it was done, the material is all scrunched up anyway, so it wouldn’t matter terribly, especially for my first try. My harshest critic would be myself and my 3 year old, so I wasn’t all that worried.
- Did that, tied up the loose ends, and admired my creation.
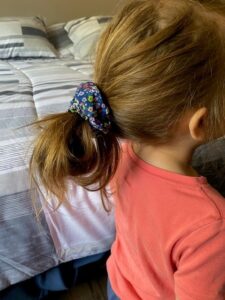
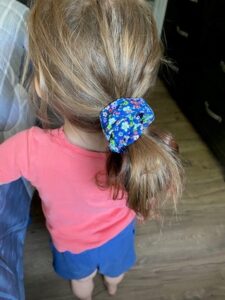
- I ran upstairs and showed my daughter. She graciously modeled it for me:
Thinking back over the last 6 weeks, it’s hard for me to believe that I went from having no idea where to even begin to creating something that will truly be useful for me. I think that’s what motivated me to want to choose this as my learning project-the practicality. I want to be able to sew the odd hole my daughter (and likely future daughter) inevitably get in their clothes, or even sew them something fun like a costume in the future! The scrunchie thing is cool because I could create a scrunchie that matches another fabric that can be worn, like a shirt or a dress or something like that. Finishing this has me thinking about what else I can create. I’m envisioning little drawstring bags for the kids’ tiny toys. I haven’t delved into this world all that much. I’ve explored TikTok, Instagram and YouTube, and I’m sure I’ve just scratched the surface of what is out there in this category.
I also have some final reflections on the learning process itself; ideas that I want to remember and apply to student learning when I get back into the classroom:
- Learning something new is hard, BUT when taken one step at a time, it is way less frightening and overwhelming. Throughout this process, as evident in my previous posts, there were definitely some challenges. At the beginning, when I thought about where I wanted to get to, I almost wanted to give up before I started because it seemed impossible. However, when I actually sat down to start, and just took it one step at a time, it wasn’t daunting. There seemed to be a solution for every problem, even if it extended the time it took to complete that step. I need to remember that for students, they’re learning a whole bunch of new things, every day, all the time. They must feel overwhelmed at times too. As their teacher, I should be reminding them to gently refocus on the first step in whatever it is they are trying to accomplish and not look too far ahead.
- Learning something new is rewarding and provides a feeling of accomplishment. Were there times I wanted to do anything else but sit down and learn to sew? Yes. Did I want to quit? Yes, a few times. Am I happy I didn’t? Definitely. I feel a sense of pride in what I was able to achieve, no matter how small it may seem. I think about how scary it was to take this machine out of the box and set it all up, but I did it, and I’m proud of that! I want to provide more opportunities for students to think about how learning new things makes them feel. I think this will involve slowing down a little and encouraging them to pay more attention to the effects of learning on confidence, self-esteem, and motivation to continue learning.
- It doesn’t always have to go as planned to be a valuable experience. My initial end goal was a bucket hat. Yeah…maybe one day. But with the challenged I faced in this project that slowed down my process a bit, I realized that that project was something to strive for down the road. While it’s important to set goals and have them be as specific as possible, I think there’s something to be said for allowing a bit of room for change and the things that happen that are out of our control. We probably shouldn’t be so rigid with our learning goals and plans that it prevents us from learning something unplanned that is perhaps just as meaningful. Open-ended learning projects like this are tricky in the classroom setting for two reasons: one, they are difficult to assess, and two: kids can get lazy and get away with it. However, the pros still outweigh the cons in my opinion as there is a lot of value and significance in independent learning.
I want to thank anyone who has followed this journey and taken the time to read about it. I know we are all very busy at this time of year as educators and I appreciate the time you’ve taken to get this far if you’ve gotten this far. I hope your experiences were meaningful to you and successful in whatever way that might mean.
Thank you Katia and thank you classmates; congratulations to those of you who are finished your Masters and best of luck to those continuing your educational journeys. Have a wonderful, well-deserved summer everyone!


2 thoughts on “Scrunchie? DONE-chie.”
Great job on completing your sewing project! It’s inspiring to see how you overcame challenges and learned new skills along the way. Your reflections on the learning process and the value of perseverance are insightful. Keep up the excellent work, and best of luck with your future sewing endeavors!
What a fun blog post! I thoroughly enjoyed reading about your scrunchie-making adventure. Your enthusiasm and passion for creating something unique and fashionable shine through your writing. It’s impressive to see how you approached scrunchie-making as not just a creative activity, but also as a way to express your personal style. Your attention to detail, from selecting the perfect fabrics to experimenting with different patterns and designs, truly paid off. The scrunchies you showcased in the photos look fantastic! I hope you continue to explore your creativity and share more of your crafting adventures in the future.