Welcome!
This week, I chose to try out a video and photo editing app called CapCut. I decided on this app as I had seen it promoted on TikTok many times and had never found a good, free editing app. I also planned to document some of my learning projects through videos, so this was the perfect app to explore. I did not get to spend a lot of time exploring this app, but from what I did try out, it was easy to use and included a variety of features. Some of these features include video splitting, animations, text and stickers, audio, and effects. There were also opening and ending cards, and further additions you can use for the stickers, text, and speed.
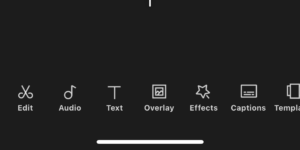
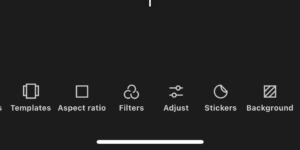
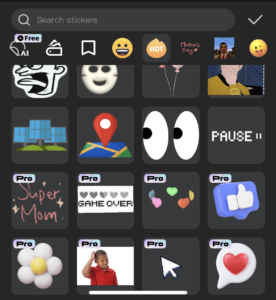
These features had choices available to add to your videos. However, as seen in the photo below, some of these options are unavailable unless you purchase the pro version of this app.
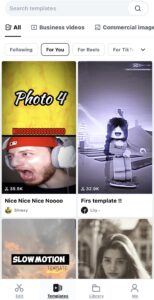
CapCut also includes a feature called ‘Spaces’ where you can upload media and projects you have created to share them. There is a limited amount of storage that is available. There is also a part called ‘Templates’ which is like TikTok’s for you page, where you can explore different videos and find people to follow. You are also able to like and comment on the videos.
How to use CapCut:
- Sign in/Login: Start by creating an account or logging in.
I created a video using the screen recording feature on my iPhone, I will also provide a breakdown here
- Starting project: Go to edit one main screen- tap ‘New project’, select a photo, live photo, or video.
- Transitions: Tap the white box with a horizontal line between clips- select transition- and hit the checkmark in the bottom right corner.
- Add text: Tap text- tap add text- type- edit text to liking- hit checkmark
- Add stickers: Tap Text- Tap stickers- chose sticker- add by tapping
- Length of aspects: Tap the rectangle (see photo below)- drag the white sides on the rectangle to the length desired- tap elsewhere on the screen to stop editing.
- Resize and move: Tap detail- use two fingers and spread to adjust size- move with finger
- Splitting- go to part of video want to split- hit edit- hit split
Tips:
- If you press and hold a sticker, animation, etc. that you like, it is sent to your favourites
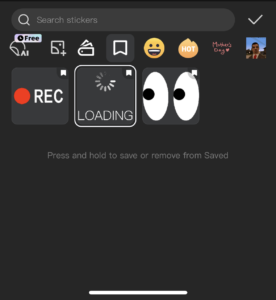
Example of what the favourite tab can look like. - Don’t worry about saving: this app autosaves projects whenever you close it
I may use this app in my future classroom in a few different ways. I would use this app to create instructional and resource videos for students to use. I would also provide this app as a resource for students to use if they wish to complete an assignment by creating a video of some sort. Following the SAMR model, at the substitution level, I might use this app to make instructional videos for students to use at their own pace. I may also use it to edit different photo resources I find. At the augmentation level, I may use this app to create a video that further explains a difficult concept from a lesson or reading. At the modification level, I would have students use the app to create a video for an assignment. At the redefinition level. I may have the students upload their videos and comment on each other’s work.
Your plan to integrate this app into your future classroom is commendable and aligns well with the SAMR model. By creating instructional and resource videos, you are enabling students to learn at their own pace and engage with the material more interactively. The idea of using the app for editing photo resources and creating videos to explain difficult concepts shows a thoughtful approach to augmentation, enhancing traditional teaching methods. Encouraging students to create their own videos for assignments at the modification level fosters creativity and deeper understanding. Moreover, having students upload and comment on each other’s work at the redefinition level promotes collaboration and critical thinking. This comprehensive strategy not only enhances learning but also prepares students for a tech-savvy future, much like how the ‘Car Parking Multiplayer’ mod APK can provide an enriched gaming experience by adding new features and customization options.
To enjoy the unlocked storage space of terabox mod apk, you can download terabox mod from below link:
To enjoy the unlocked storage space of terabox mod apk, you can download terabox mod from a reliable source
Terabox is a cloud storage service designed to help you store, protect, and manage your files. The latest official version offers up to 1TB of storage, while the modded version claims to provide unlimited space, fast downloads, an ad-free experience, and high-definition quality. With AI-powered technology, Terabox makes it easy to search for and back up your files efficiently. The modded version is said to unlock all premium features for free, including faster browsing, downloading, and access to the Terabox Pro version, which typically costs $3.49 per month or $35.99 annually.
Terabox allows you to store various file types, including photos, videos, music, and documents, and supports sharing and online editing. The service boasts over 100 million users and is well-regarded for its focus on data security. Additionally, it offers features like password protection, fast file transfers, and an integrated video player for seamless multimedia playback.
However, keep in mind that downloading or using modded versions of apps could be against the service’s terms of use and might expose users to potential security risks. Always consider these factors when opting for such versions.
Download TeraBox APK latest version unlimited secure Virtual cloud storage full version free. You can safely backup your media files and storage which might include your important data documents.
https://teraboxmodd.com/
यदि आपने कभी सोचा है कि राजस्थान में लोग कई कार्यालयों में आए बिना सरकारी सेवाओं तक कैसे पहुंच पाते हैं, तो आप सही जगह पर हैं। राजस्थान सरकार ने एसएसओ पोर्टल नाम से इसे बेहद सरल बना दिया है। यह आपकी सरकार-संबंधी सभी ज़रूरतों के लिए वन-स्टॉप शॉप की तरह है। लेकिन वास्तव में यह क्या है, और आप इसका उपयोग कैसे करते हैं?
https://ssoidlogins.com/
Beach buggy racing is a high-energy motorsport that takes place on sandy beaches or rugged off-road tracks. Drivers compete in agile, open-air buggies, mastering sharp turns, daring jumps, and challenging terrains. The sport combines speed, skill, and excitement, offering breathtaking views and adrenaline-filled action. It’s a thrilling blend of competition, adventure, and the ultimate off-road driving experience. Discover more https://beachbuggyracing.net/
The more you explore Bloxstrap, the more you’ll master Roblox customization. With every tweak and feature you learn, your gaming experience transforms, unlocking endless possibilities to enhance creativity and take your gameplay to exciting new levels.
ConvertAVIF converts your AVIF to JPG online for free. Simply select your AVIF image below to convert it into JPG.
https://convertavif.com/