Hi Everyone!
This week I tried out something different for my learning project. Not only did I do a small piece, but I also taught my roommate a few basic stitches and she created a piece as well! I am travelling for the month of December so will not be home for Christmas, so we thought we would use our time over the break to do some festive crafts.
I did what I think most anyone would when looking for a DIY project – I turned to Pinterest.
We both found designs that we wanted to do, but unfortunately, they were both being sold by Etsy store fronts. While I enjoy using Pinterest to find ideas for embroidery I have found it is mostly just doing that on the platform, finding ideas. It seems as though there are not as many free resources for patterns or tutorials for hand embroidery as I first expected – it can be a little disheartening when you find a design you really like only to click on it and see that it costs $8.95. Back to the positives, I am able to find a lot of ideas and inspiration on this platform though, and that is how we used it this week.
We both found designs we liked and I figured I had a good idea of what stitches I could use and so I just drew a basic outline of what I wanted and got to work on my piece. Mine used only one stitch – the satin stitch, but I felt like all my recent projects that used a satin stitch just didn’t look as nice as it could – it was uneven and just looked kind of messy. I asked Google for help on “How to make your satin stitch look better?”.

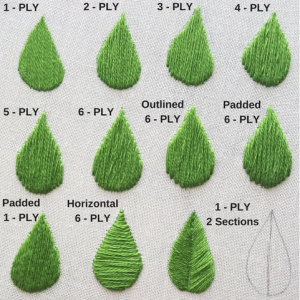
My search brought me to a blog post “Satin Stitch Secrets” by Jessica Lang Embroidery. This post helped me understand the techniques to improving my satin stitch work, using sections and only 1 or 2 ply floss (not what I was wanting to hear as I knew this meant it would take longer). There was also a YouTube video linked in her blog , but I mostly relied on the instructional photo you see in this post.
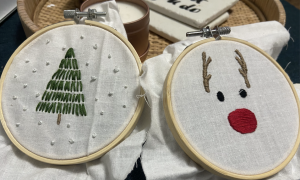
The above also helped me in teaching my roommate how to perfect her project. I taught her how to start off her project, follow a pattern, and three types of stitches (satin, french, and single back stitch). We decided that while doing the tree, the stitches should be a little bit thicker, so taking note on what I learnt from my search – instead of using 1or2 ply like me, she used 6ply with her green floss. When she did her satin stitch, she also used 2ply to ensure she had a neat looking stitch.
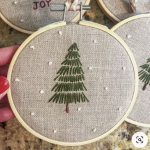
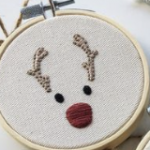
I had so much fun teaching a friend how to do this, I think this is going to be a hobby that sticks after our learning projects are done! My roommate seems to be hooked as well 🙂 Check out our final products below – the next step is to get them finished off and hung on our Christmas Tree!

I love that this journey has allowed me to feel like I am successfully completing DIY projects – Woohoo!

Thanks for reading!


This looks awesome! You make stitching looks so easy. The little reindeer is so cute. My mom used to create a Christmas ornament every year to hang on our tree. It was like a little tradition we had. Seeing this makes me want to take up stitching.