Wrap-Up Summary/ Final Eleventh Blog

It’s time for my ‘Eleventh and Final Learning Blog. I really enjoyed learning through my learning project. That was an interesting way to explore your personal skills, to enhance some tech resources. Though, it was a quick but productive part of my learning.
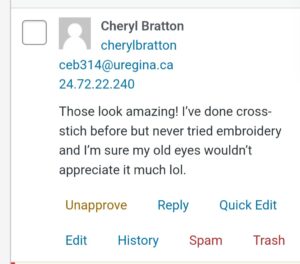
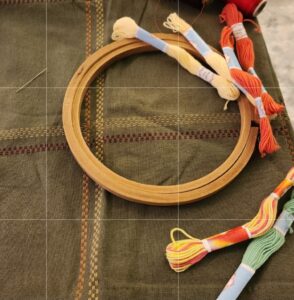
I remember when I first, decided to choose embroidery, for my learning project, I didn’t have any idea about how to get started and where It will flow. That was because of not being an embroidery person. I have attached below my learning along with some classmates comments to peek in to my embroidery journey.

Here is the link about my first blog to see my first try Learning Project#1.

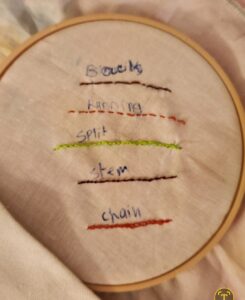
Here is the first and my last learning embroidery pictures to check my improvements.


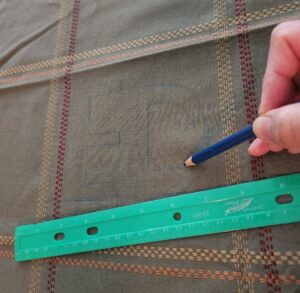
For my Learning Project #2, I worked on my flower embroidery using some basic stitches, I didn’t realize it would turn out pretty neat.

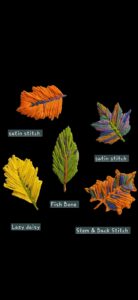
For my Learning Project #3, I continued learning about some stitches to explore some leaves embroidery.


I completed my learning blog# 4 by using a new tech resource, S’more, and created a newsletter for that week.

Learning Project #4 

Learning Project #4(part 2) 

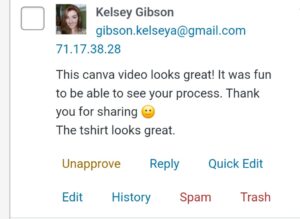
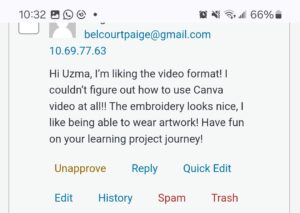
The real fun for my embroidery started when I explored some digital tools to show my embroidery, mainly Canva. After learning about different stitches for my flower/leaves embroidery, I tried some clothes embroidery, and used  Canva to post my work for the first time, and I used some pictures and video templates to show my weekly assignments. If you haven’t checked, I’ve attached the video/ 5th blog link below for my Learning Project #5.


I completed my pillow embroidery for my Learning Project #6 and Learning Project #7.  I used another Canva template to show my Learning Project #6

After a few weeks of learning about stitches, I wanted to experiment to try something different, by myself and I completed flower pattern embroidery for my Learning Project #9. I loved the embroidery I did, on my trousers.

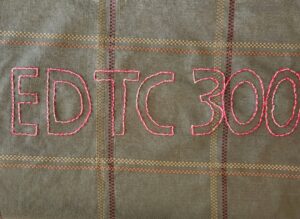
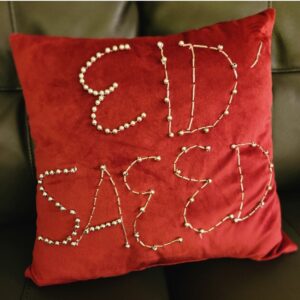
For my Learning Project #10, and Learning Project #10 (part 2), I worked for letters embroidery. I was so happy to compile my both of these  projects through Canva. My friends and family loved it, so, did I. I’ve attached a video below just to have a quick look if you haven’t checked.

At the end of my learning project, I had a thought that embroidery is one of those hobbies that requires some physical investments but it’s a fun way to utilize your extra time and have creativity in multiple ways.

I hope you enjoy reading my embroidery journey. I had really fun to explore my creativity, will try to be consistent using it, in my extra time.

Part 2 of Learning Project #10

I started on my letter embroidery last week, but couldn’t complete it. This is the second part of my letter embroidery. I continued where I left last week. While I was working on my embroidery I noticed that embroidery is just playing around with some stitches. You can add/modify whatever pattern you like. Another interesting thing was to complete surface stitch, like placing the certain position by my finger was the trick to have a perfect design, otherwise It was a pretty flat design.

There were no new materials required, and I completed my letter embroidery by writing “DTC300”. It was tricky to do embroidery around some letters like, the letter “D” and E, rest of them were pretty smooth.

I completed my EDTC3OO embroidery, but I wanted to share my another letter work done, this week. That was basically about the celebration day, called Eid, which we used to have after Ramadan, and it’s coming this Wednesday this year. I wrote “Eid Saeed” which means Happy Eid and I did beading work using some cylinder tubes jewels and some small/bigger jewels. If someone is interested to know a bit more about Eid’, can click Eid-Saeed to check a small presentation I made or check it out here:  Eid-Saeed (1)_compressed

 I really enjoyed my both letter embroidery and beading work. It turned out good!

Background Image in the presentation:  https://images.app.goo.gl/4QKJjvE9UyMEJBEe8

Cyber-Shaming/Digital Footprints

Cyber shaming is the bitter reality of today’s world that does not require a lot to achieve bad things. I agree with what Jon Ronson has mentioned in an article that even one tweet can ruin your life. It can put someone on the edge that can take years to be out of that trauma. In my opinion, it’s necessary to be aware of emerging media resources without ignoring the fact of being more responsible using it. I agree with what Katia mentioned in her article, My example of Cyber sleuthing, “Sadly, catfishing for the cat fisher might be a fun game for me, but it’s not a laughing matter for many others.” Like if you don’t know how to identify and deal with that cat fisher, it’ll be hard to . I think everyone might have an experience of cyber sleuthing or might have been a victim of fraud, someway, personally or with someone in their family. I have a couple examples in my family where they lost their money by trusting their friend and they didn’t even imagine that they could be a victim of fraud by the third party involving their own, so-called friend. The aftereffects ware tragic and painful. I think it’s easier to forget minor loss, but if it’s attached to someone’s dignity, it can be heartbreaking and can ruin your self-esteem and personality for a long run. As we know, it has become so convenient to have access to any kind of social media resources, but there are many people who don’t take care of digital safety. It’s getting challenging to keep you safe from the effects of cyber shaming. I believe everyone should be accountable for their actions, mainly, all adults/parents have to play a vital role, as they are the role models to teach their kids to adopt any positive/negative acts.

https://images.app.goo.gl/ov6KFxL1z8jzaGFG8

Learning Project #10

I was thinking about what I should try for embroidery this week, then I came up with the idea of letters embroidery as I haven’t tried that before. So I decided to have letters embroidery for my 10th learning project. I started to search for different videos to pick the stitches type. Though there are multiple videos that can guide about letter stitching, I chose the ‘Surface Stitch’ out of a few more options provided in the video for letter embroidery. The instructions about the surface stitch can be found in the very first part of the video.

I arranged the supplies I needed including a cloth, thread, frame and a needle.

I started to draw in bold letters and followed the embroidery with the baseline. I used yellow and shocking pink, five strands thread to pattern my design, and started with the stem stitch to complete the outline.

The fun part was the surfacing around the stem stitch, that really fascinated me. I used a Canva template to show my recent work.

I thought I’d be able to complete it this week, but I still need some more time to finish. So stay tuned to have a complete look!

Exploring S’more Digital World!

This post is the sequence of my last learning project # 4, to update my progress regarding using Smore. I was excited about learning to make a flyer, using Smore . To get started, I just used my email account to login and no further details were required. After logging in, I found  different templates as I mentioned in my previous blog.

(all screenshots are from Smore official websites)


I decided to use the weekly updates template and found it easy to navigate through each step. At first I selected my title and added an image as you have the option to choose your own header or upload from the device. I chose my background provided through Smore album and changed colors & the font. I shared some screen shots taken while I was subbing, taken upon the request of a class teacher and had a permission before sharing in my newsletter for learning purposes. As I proceeded, all directions were very straightforward till the end of your newsletter. There’re multiple options to share via email, through social media or in printing pdf form. It was very simple & easy to create my weekly newsletter, and I had really fun making it!

I’ve attached my newsletter copy below, hopefully it’s appealing to my students attention!

Loading indicator

close

Learning Project #4

Use of multiple digital apps have modified teachers’ way of teaching and their student’s learning. I believe digital learning has provided a convenient platform for almost everyone who has access to it, and also helped teachers to be multitasking at one time. They only need to explore and find the right option. As I searched about different digital media apps to choose one that I have never tried before, I decided to write about Smore.


Smore is a convenient way to create some flyers, classroom newsletters, some book reviews & assessments etc. 
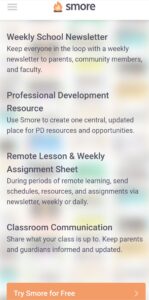
(screen shots for all pics. from Smores’ website)

It can also be used for remote learning to plan some assignments.

Smore can be used for free and with certain price packages based on your school/division preferences. I find it interesting to create different flyers; to introduce yourself to your class & their families, to make some class rules to display, or to provide updates to class families on a weekly basis. You can use different images and highlight some main events to make it attractive and colorful. It’s very easy to use, you can just make an account to get started. You also have an option to use it individually or as a team. I have a plan to explore more about Smore and will make my next post regarding my progress on it. Stay tuned!