Category: Major Digital Project Reflections

BREAD WEEK #6 – Last but not yeast….

Embarking on this journey of learning to bake bread using online resources has been, actually, quite great.  There were tears, laughter, frustrations, some swearing, but also some joy. I wasn’t quite sure what to expect, but I’m impressed with how much I’ve grown in just 5 short weeks. I don’t know why I was surprised about the wealth of information available: recipes, techniques, tutorials, tips, videos, apps, and history lessons from the seasoned vets, professionals, and then just the regular people, like Larry. From regular ol’ white bread, to artisan loaves, to soft and fluffy buns, and from herb-infused focaccia to flavorful bread knots, the online baking community offers a wealth of knowledge and creativity.

Independent, online learning is no joke. It was actually quite overwhelming to see the amount of resources, suggestions, recipes, tutorials, and videos.

Tone It Down Too Much GIF by Hairspray Live!

I think it’s really important to read reviews and feedback from those who have made the recipes. This was a crucial step in choosing the right recipe to follow. As much as I was looking for tastiness, I was also looking for recipes that didn’t take hours upon hours, and recipes that were easy for a beginner.  That said, I’ve realized that the online baking community is very passionate and often shares tips on achieving the perfect texture, consistent results, and experimenting with various fillings and toppings to elevate bread making skills. Bread is not something that can be mastered after one bake.  It takes patience and time….kind’ve like waiting for the dough to rise….it’s all about the journey.

fox tv find your grit GIF by American Grit

Here are some of my key learnings from the past 5 weeks:

  • Quick rise yeast is the MVP.
  • Before beginning, read the whole recipe and watch the whole video.
  • “Kneady” is a super cool app that I’m legit going to keep on my phone and use
  • Kitchen Aid Stand Mixers suck at kneading dough – USE YOUR HANDS.
  • Breadmaking is a time investment – there’s not quick way about it
    ***pssssssst: you could also just buy frozen dough from the grocery store – I won’t judge you.***
  • Although Jaime Oliver is a superstar, he’s relatable and easy to follow. I will 100p be using his recipes in the future.
  • Coat your herbs in some olive oil or they will have no flavor.
  • Larry is deadly at making homemade bread.
  • Focaccia is the best and easiest bread to make. DO IT.
  • Mamma Val is the best, and she gave me a solid base of cooking knowledge to start this project. Thank you for all the years of teaching me how to cook and bake. Love you.

In the end, I did enjoy the learning process and felt a lot of satisfaction creating my own homemade bread from scratch. My house smelled incredible over the past 5 weeks. It was a delightful adventure, and although I’m no expert, there may be a little bit of a bread enthusiast inside my bones.

Bread Oprah GIF

Thanks for following along with me. If you’re ever thinking of trying out basic bread, buns, or focaccia, I encourage you to embrace the opportunity to let the internet (and the “Kneady” app)  be your guide as you experiment, adapt recipes to your preferences, and share your creations with those you love.  Overall, I give this learning project 5 doughballs/5.

fresh raw doughfresh raw doughfresh raw doughfresh raw doughfresh raw dough


Over It Reality Tv GIF by Braxton Family Values

BREAD WEEK #5: Whatever the focaccia want it to be…

I am on a savoury kick, and I thought I would end this learning project with a bread I absolutely love but literally have zero idea how to make: FOCACCIA.

Literally no idea.

do not know schitts creek GIF by CBC

After all of the Great British Bake Off seasons I’ve crushed, I’m not sure I’ve seen a lot of focaccia made. I know Mamma Val has never made it (at least that I remember). But, I was determined to kill it.

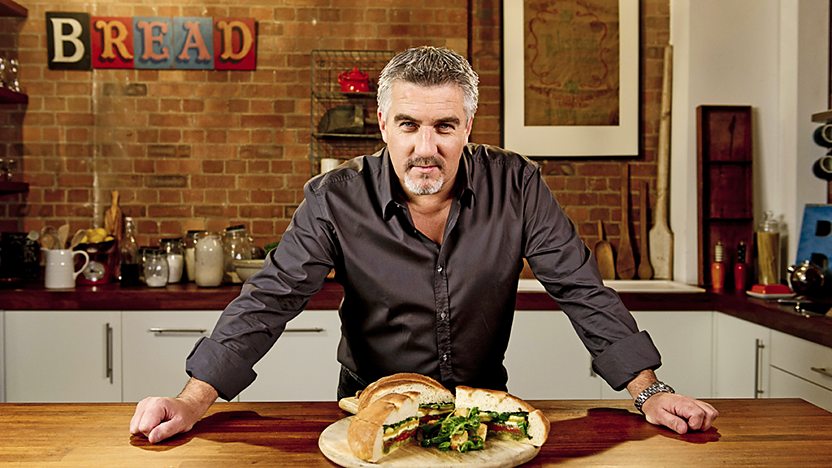
Time to channel my inner Paul Hollywood because he’s the GOAT of bread.

Paul Hollywood's white bread recipe - BBC Food

The GOAT of bread (credit: https://www.bbc.co.uk/food/recipes/paul_hollywoods_bloomer_84636)

I spent this week reading articles like this one and this one, and watching videos like this one about how to make this glorious bread. I learned that there are many different types of focaccia with many different toppings, and depending on the region you visit in Italy, focaccia will likely not look or taste the same. For example,  there’s  “Foccacia ligure or genovese is about 2 cm thick and is soft inside, sprinkled with salt and brushed with olive oil.  Recco focaccia (also from Liguria) consists of two thin layers and soft fresh cheese in between.  Sardenaira originates in Sanremo, and it is focaccia with anchovies or sardines” (“What is Italian Focaccia and their regional differences?“).

My favourite video was this one with Jamie Oliver and his pal, Genarro.  They’re both so cool.  Honestly, I was really hoping Larry would have made a video about focaccia, but he did not. If you’re not sure who Larry is, head back to my week one bread post. Larry is the bomb. While reading and listening to all the tips and tricks about focaccia, there were a couple of repeat suggestions like keeping the dough hydrated with olive oil and to get artistic by following your heart’s desires for toppings. Ohhhhhh, that’s right up my alley (Mamma Val’s, too). I made notes on that and dialed in.

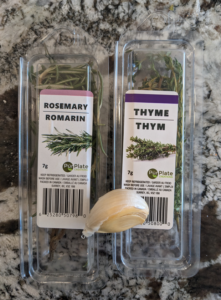
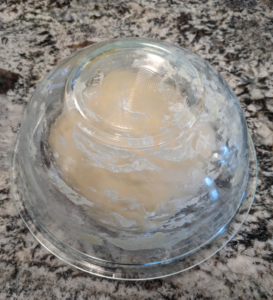
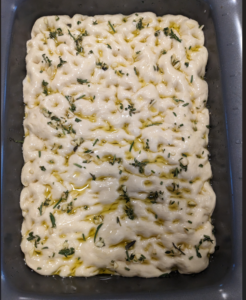
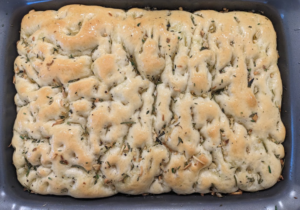
I felt ready and made the decision to follow Jaime Oliver’s YouTube video recipe. He had great comments about how easy it was to follow and how tasty the bread was.  So off I went. Here’s some pics of the process:


Flava Flav.

The rising action.

Welcome to flavortown.

SHE DONE.

Here’s my review of Jaime Oliver’s recipe.  It was so easy to follow.  Nothing was overcomplicated.  I had to pause and rewind it a couple times just to make sure I heard properly and saw it correctly.  This didn’t add any extra *thyme* (see what I did there?) at all.

I loved Jaime’s suggestions for letting the dough rise: simply flip the bowl upside down over the dough to create some humidity for a proper rise. Simple. No need to put anywhere warm. Just leave it alone. I’m curious if this little trick will work for all types of dough?

I love that he offered different options for toppings, but, ultimately, it was whatever I felt would go together. Thanks to Mamma Val’s teachings on cooking growing up, I am fairly confident in my ability to pair flavors.  Rosemary, thyme, and garlic? PERFECTION. Jaime’s tip to put some oil on the herbs before adding it to the top was a solid tip.  He says that if you put herbs on dry, they will taste of nothing. This was such a great tip and will carry this on in the future whenever I use herbs. I can only imagine the flavors I could add for toppings when I make this in the near future. I’m really feeling a basil, tomato, and kalamata vibe.

I also really liked the reminder to “feed the focaccia” with a good oil after it comes out of the oven. Beautiful. Glorious. *Chef’s Kiss*.

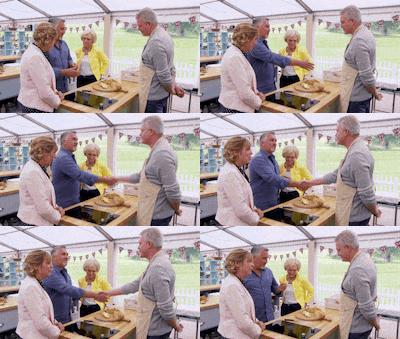
The bread was light, fluffy, flavorful, and overall INCREDIBLE.  I would go so far as to think this would get a handshake from the GOAT: Paul Hollywood. I’m that confident.

great british baking show GIF by PBS

Not me getting a handshake from Paul Hollywood.

Also, please note, even my kids, who seem to have an aversion to green toppings, gobbled it up. I was shocked.

This bread was THAT GOOD. 

Honestly, I feel like I saved the best for last. Of all the recipes I’ve followed, Jaime was the best in not only showing how to do things, but the why behind it. I found it helpful and really appreciated that. I found the both of them fun and engaging mainly because they didn’t take their baking too seriously. I wasn’t even annoyed that I have to let it rise for 40 minutes. That’s how much fun I had baking this bread.

In the end, I would give this an astounding 6 doughballs/5. Ya ya ya. I can do that. It’s my rating scale. It was so good that it deserves an extra one. I said what I said.

fresh raw doughfresh raw doughfresh raw doughfresh raw doughfresh raw doughfresh raw dough


Here’s the video. Go make it. Now.

BREAD WEEK #4: Feeling Knotty

Throughout the week, I continued searching for places that would have easy bread/dough recipes. I came across Caroline’s website: “Caroline’s Easy Baking Lessons” , and I spent some time rummaging through her recipes. She has lessons divvied up into Savoury, Sweet, Fondant (@MrsBruce4th – this may be great for your cake decorating venture), and a few other options. Her lessons are structured so that you start with the simplest and easy for beginners, and then you build on these skills in the subsequent recipes. I wonder if she’s a teacher? She clearly knows how scaffolding works. 😊.  I learned a lot from Caroline, but I decided not to use any of her recipes. Nothing was really speaking to me. I did, however, bookmark her website for the future. I think this is the most informative, useful website I’ve come across thus far.

I kept on my way.

I wanted to venture into flavours and savoury breads/buns. I was really feeling garlic bread or buns of some sort. I went onto Instagram and searched for #homemadebuns #quickgarlicbuns.  I came across some videos, but they weren’t really tutorials and were far too quick for me to follow along. I liked this one , and I saved it for later to try. I went onto TikTok and found this one, but again, it was way too quick AND it required store-bought pizza dough instead of homemade. I bookmarked it as well to try at a later date because  I really like the idea of store-bought pizza dough. What a timesaver!

Amy Schumer Oscars GIF by The Academy Awards

I went to Pinterest and here’s where I found this one. I was going to try it mainly because it had “30-minutes” in the recipe. BUT, I wanted to really challenge myself with a different way to shape dough. I decided to save that one as well because it does look incredible.

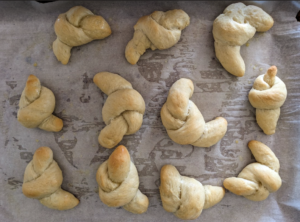
Onward I went, and here is my winner winner chicken dinner: Sam’s recipe for Homemade Garlic Knots.

“These homemade Garlic Knots are made completely from scratch in just over an hour! My recipe is easy (no mixer needed) and makes perfectly chewy, buttery, and garlicky knots. Includes a how-to video!”

I think I’ve officially realized the importance of reading the entire recipe from start to finish; plus, I watched the video a couple of times to get myself started.  Sam’s recipe was super easy to follow all the way through. I like that she added garlic powder to the actual dough. Truth be told: I doubled what she had in the recipe. It just felt right.  I know I should have stuck exactly to the recipe, but this is the cooker vs baker in me. Mamma Val rarely measures when cooking, so I felt her voice telling me to add a bit more.  This is a savoury dough, so we’re basically cooking, right?!

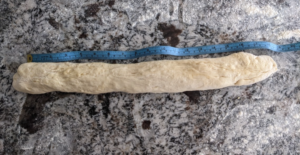
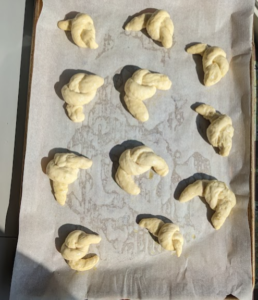
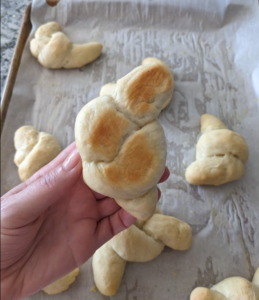
Here’s a some pics of the process:

18 Inches ready to get knotty.

The final rise before the oven.

Golden Knots

Perfectly golden.

Comments from my judges:

“These are your best ones.”

“Can I have all of these in a bowl?”

“Holy cow these are unreal!”

“Mom. I love these.”

***IMPORTANT: the recipe calls for a brushing of garlic butter and basil. Due to my children’s adverse reaction to anything green sprinkled on top, I omitted the green stuff.***

Explore the Best Greenthings Art | DeviantArt

My kids hate green spices.

MY THOUGHTS:

This is the best recipe I have found online.  Sam is right when she says, “Today’s recipe is super simple”.

TV gif. Martha Stewart on Comedy Central Roasts nods with a smile, her fingers to her mouth. She looks at someone off screen and raises her eyebrows slightly in a knowing nod and grin, and then turns her gaze the other direction.

The Queen agrees.

Her timeline was right on par. FYI: I started this recipe at 8:30am and was completely finished by 9:45am.  (Oh, and they were devoured and all gone by 10:15 am). Nothing like a good ol’ garlic knot for second breakfast. Her ingredients were simple. Recipe was easy to follow. No kitchen aid needed. Video was awesome.  She also mentions how to make this dough in advance or freeze it. But honestly, this recipe came together so quickly that I don’t think I would need to unless I had a lot of time on my hands and wanted to freeze batches for busy times. Summertime sounds like a great time to do that!

These would be great dipped in some marinara sauce. I also feel confident enough to add a few things to the dough if I wanted to make more interesting. Bacon? Cheese? Chives? Parm? Ham? Cracked black better and feta? The options are endless.  I will be talking to Mamma Val about options for this recipe to make it our own.  Also, this recipe is kid-friendly. My two younger ones really like to help me in the kitchen, and this is so simple and easy to follow that next time I make these I will enlist their help. This leads me to my last point: next time I make these, I will double the recipe. These were gobbled up so fast that more is always the answer.

Love It Ro GIF by Rosanna Pansino

MORE. MORE. MORE.

Maybe this recipe felt easiest because I’m getting more confident working with yeast and dough. I guess this learning project is doing its intended purpose.

Well played, Katia.

Overall, this recipe gets 5 doughballs/5.

fresh raw doughfresh raw doughfresh raw doughfresh raw doughfresh raw dough


BREAD WEEK #3: I’m So Kneady

I’ve officially graduated from loaves to buns.  I don’t remember Mama Val making dinner rolls, but I do remember her making Ukrainian loves like Pascha and Babka, along with some braided bread recipes. These were typically sweet loaves, but I imagine they followed more of a bun recipe than a basic bread loaf recipe. Since I didn’t have many memories on basic bun recipes to channel from Mamma Val,  I started this week reading some articles about buns. My favourite one is “A baker’s secret for better dinner rolls”.  I actually learned a lot, and my favourite tip is hacking the dough recipe as a make ahead and letting it sit overnight. This will save me time in the future. I need time to be on my side. As a beginner, I found these articles extremely helpful and suggest you read them if you’re interested in making some homemade buns.

To be frank, I really wanted to do the 30-minute dinner rolls recipe from the “Spend with Pennies”.  Not only is it rated 4.86 from 1203 votes, it had me at, hello, 30 minutes.  But, I decided to up my game and step really outside the box.  I started searching for apps. Who knew there are apps dedicated to bread? Not me. Lo and behold, I came across a website called Bread Scheduler that states the following:

Bread-baking is a great hobby. But it’s a pain to plan around our busy schedules. We grew frustrated trying to plan bakes over two or three days without any good tools. We started using Google Docs and recipe websites, double-checking ingredients, and trying to calculate the right time for each step. But we wanted a tool to handle this for us. That’s why we made Bread Scheduler. And it worked! All the photos here are from our actual bakes.”

Ohhhhh was I excited. As soon as I read how it’s a pain to plan baking bread, I felt that in my soul.

Winner! Excited smiling girl sitting on floor with laptop, raising one hand in the air is she wins, isolated on yellow background

Not me. But she’s capturing my excitement.

It has start times for bread and how long it would take. This is my jam.  In case you haven’t picked up on my subtleties, I’m here for all the quick breads. But, soft! (there’s a little Shakespeare for all my ELA pals….)

READ THE FINE PRINT, GABOURY.

Facepalm statue - disbelief, sadness, depression

Get it together, Gaboury.

This website is strictly for sourdough, and ain’t nobody got time for that (except if you do, I strongly encourage you to use Bread Scheduler for timing all the things).

And so, after searching for hours, I found an app called Kneady, and let me tell you – it’s great.

Kneady: Bread & Baking Recipes

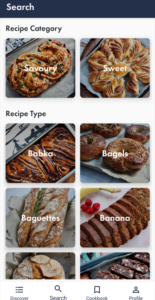
Dedicated to all things bread, this user-friendly, easy-to-navigate app is fantastic. It has a “Discover” tab, featuring challenging recipes, trending recipes, impressive showstoppers, loaves, rolls, and the list goes on. If that tab doesn’t tickle your fancy, using the search tab, you can search via recipe category (like savoury or sweet), recipe type (like bagels, banana, flatbreads, scones, or pretzels), recipe difficulty (easy, medium or challenging), type of flour (rye, Khorasan, all purpose), or dietary requirement (dairy-free, gluten-free, or vegan).

Searching on Kneady

The categories include hundreds of different options to choose from, but WARNING: naturally, there’s a “PRO” option available for purchase to “Unlock all of Kneady” as not all recipes can be accessed for free. I don’t blame them – app developers have to make money, too.  FYI – it’s only $34.00 for the year. If you’re SUPER DUPER into bread and baking, this app is for you.

It’s quite impressive.

My only criticism of the search app is that I would like to be able to actually type in a search instead of having to scroll through the options. That said, there’s nothing wrong with scrolling through and getting inspired. There’s also a “cookbook” tab where you can save your favourite recipe for easy access. I think that’s great but WARNING: you do have to sign up for an account in order to access the cookbook and join the “passionate community”. I’m not quite there yet, so I will hold off for now.

After reading all the things about how to make the best buns and exploring the Kneady app, I chose a recipe under the “Rolls” category. I picked “Super Soft White Rolls” by Amanda Hollington. With an average rating of 4.92 over 1200 ratings, Amanda, you had better impress me. It says it’s easy. PERFECT.

TOTAL TIME: 3h 5m for 12 rolls.

Ugh. Okay. I can do this.

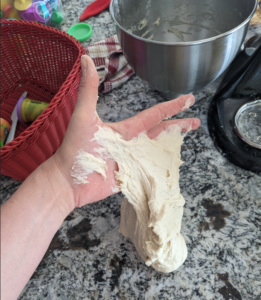
There’s a “baking mode” option where you can just swipe left for the next steps instead of reading the recipe vertically, so I chose that. Bonus: the screen stays on the whole time. I found this very helpful.  It must be stated that my Kitchen Aid dough mixer attachment really struggles for kneading.  I was hoping this would save me time, but, just like last week, I ended up having to knead it with my hands for quite some time. Also, I couldn’t get over how sticky the dough was – probably user error, but it was super frustrating.  The recipe did not mention this as a possibility.

Sticky icky icky.

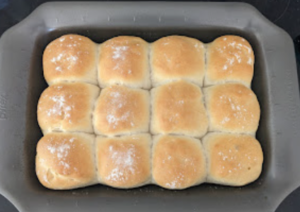
I forgot to take pictures after the sticky dough incident. I was too frustrated. So, here’s the finished product.

I’ve got big buns.

I mean, for 12 buns, 3 hours is a bit excessive.

Here’s my honest review:

The app is great. It’s very user friendly in that they have the step-by-step baking mode, or you can just follow the “traditional vertical style” of a recipe.  My only complaint is that you have to pay for the upgrade to PRO to access all the recipes, but, as mentioned, I understand why they do it. As of now, I will NOT be paying. I will stick with the basic, easy, and free recipes. Of the past three weeks, this app made the recipe the easiest to follow, and I recommend.

Recommendation Thumbs Up GIF by We Hate Movies

But they weren’t very tasty. Or soft.

Overall, because of the ease of the app and “baking mode” option, I would have given this 4.5 doughballs/5. Unfortunately, they didn’t taste very good, so I took off ½ a doughball for a total of 4/5.
fresh raw doughfresh raw doughfresh raw doughfresh raw dough

BREAD WEEK #2: One Hour Bread – spoiler alert….this is a lie

I spent the week reading some articles about bread baking, and I ended up going down a rabbit hole of bread…. Bread 101, the science behind baking bread, bread history, no-knead bread, breading on food, milk-bread, soda bread….and this list goes on . I guess I am ignorant to the passion surrounding bread. Maybe I, too, will become passionate about bread after this project is over.  Eventually, I settled on trying a blogger’s recipe. What caught my eye was this: “Easy fast bread recipe that bakes up soft, fluffy and golden brown in only 60 minutes.” ONE HOUR. Come on folks.  If you read last week, I spent 4 HOURS baking 2 loves.

I repeat: ONE HOUR.

Let’s do this.

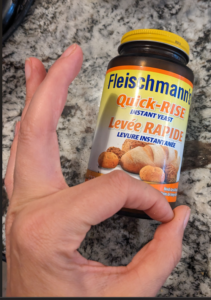
I quickly realized that the reason this recipe only takes one hour is because of this magical ingredient: quick rising yeast.  I am 99% sure Mamma Val used this back in the day. There’s no way she would spend 4 hours on her bread with 3 kids all up “in her kitchen”.  Huge shoutout to Mamma Val again. Naturally, she had an entire jar of quick rise yeast she gifted me. She is the best.

After taking my middle child to soccer one evening, I came home and promptly gathered my ingredients, excited to have fresh bread in one-hour as the recipe claims.  It was 8:00pm, and I was hopeful to be crushing a fresh slice of bread and butter at 9:15pm.  I’m so sorry to report: SugarGeek Recipes:

To begin, I had to warm the milk to a very precise temperature: 110 degrees. I was very worried I was going to scald it, so I took this part slowly, warming up the milk 30 seconds at a time.  Well, it turns out, I went one 30s too long that it ended up WAY over the recommended temperature. So then, I had to let it cool.  Not off to a very good start of the one-hour track.  This recipe calls for the use of a stand mixer with a dough-hook, and since I have a Kitchen Aid one, I was pumped to use it, thinking it would make up for the time spent on not scalding the milk. I threw all the ingredients in the bowl and let the mixer do the work.  I guess I wouldn’t be getting in my muscle work by kneading like last week.  Pffffffffff.

FALSE.

I followed the instructions to the letter, and I kept testing it to get the little see through window without tearing as stated.

NOPE.

Uggggh. So, I went back to what I know best: kneading it by hand for another 15 minutes to get that darn stretchy window.  I finally achieved that, and this dough was ready to rise. (TIME STAMP: almost 25 minutes into the recipe).

Just like I remember Mamma Val doing, it told me to put it in an oiled bowl with a towel over top, and leave it somewhere warm. It happened to be 29 degrees out, so the air conditioning was on.  I had nowhere warm, so I thought I’d try their suggestion of turning the oven on to the lowest setting and setting the covered bowl in.  PERFECT.

Uggggggggggh.

I didn’t read the suggestion correctly, and put the bowl literally in the oven and closed the door.  WRONG. I wasn’t supposed to shut the door because it gets too hot and could kill the yeast. Oh well, 25 minutes into the rising, and it looked pretty good to me. I guess I’ll never know if I killed the yeast or not (TIME STAMP: well over 60mins into the recipe).

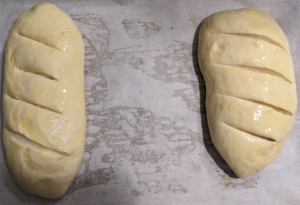
I cut the dough in half and shaped it.  I like that I could just shape it onto a parchment lined baking sheet. I am no artist, but there’s definitely some French bread vibes here. Then, I had to put an egg wash on it.  Egg wash. Pfffffffffffff. What a waste of an egg.  I guess I should I have read all the notes at the end that it could have been milk. Or water. Or something else.  I guess I also should have read that an egg wash is egg and water, not just an egg.

Ugggggggghhhhhh.

Then I had to score the top with four diagonal cuts “at a 30º angle in the top of the loaf, about ¼” deep”. What? I have no idea what that looks like, so I just went for it. Pretty sure I went too deep. And after a solid 90 minutes into this “One-hour bread recipe”, into the oven for 25 minutes.

For sure cut it way too deep.

I mean – the house smells incredible again, so maybe it is worth it?

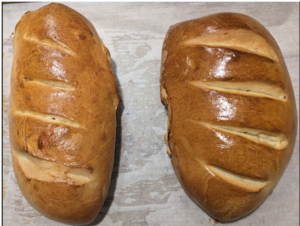
Okay. FINALLY. After one hour and 55 minutes into the recipe, the bread is done. It actually looks fantastic.  I loved the suggestion to take the temp in the middle of the bread, and if it’s between 190-200 degrees, it’s done.  This is a solid tip I will use for the forthcoming weeks.  They were perfectly golden – I guess the egg wash did it’s job.

Looks gooood…with some deep cuts.

I wanted to let it cool longer, but PLEASE NOTE: it’s 10:00pm at this point and way past my breadtime (see what I did there…). I have lost my mojo.

Alas, to quote Larry, “let’s butter a slice and giv’er a taste!”.

Unreal. Light. Fluffy. Tasty. A success.

So, my friends, this is definitely not a one-hour bread recipe for beginners.  This is more like a one-hour bread recipe for seasoned bakers.  In fairness, I should have read all the way to the end before starting. It would have saved me a lot of “pffffsssss” and “ugggghhhhssss”.  I should have clicked on “jumped to video” instead of “jumping to recipe”.  The video was super helpful and made me recognize my mistakes in hindsight.  Also, the mixer she uses looks super cool – I’ve never seen anything like that in all my Food Network watching.  Probs the most important fact of all time: the quick rise yeast saved me 2 hours – I think it’s the real MVP here.

The real MVP

Or, maybe it’s my husband who is getting fresh bread once a week.

Crushing it

One happy hubby.

Overall, this recipe is good, but I still don’t buy that it’s a one-hour recipe, especially if your standmixer doesn’t do its job. I take full responsibility for not watching the video or reading the recipe notes at the end, but let’s be honest, shouldn’t those notes be put within the instructions, not as a sidebar? I feel like there should be, in big bold letters, READ THE NOTES AT THE END BEFORE YOU START.  I do think this bread tasted better, was lighter and fluffier, and much quicker than Larry’s recipe, but I think at this point, I would use Larry’s instead.  I can’t fault the recipe for my user errors, so I’d still give it 4 doughballs out of 5.

fresh raw doughfresh raw doughfresh raw doughfresh raw dough

Stay tuned for next week when I try buns for the first time. I’m quite certain it will be quite bun-ny.

BREAD WEEK #1: Using YouTube, and Larry, to figure it out.

I did a lot of searching for an easy bread recipe to follow. I thought about starting with the Queen, Martha Stewart, and then dabbled in considering the bread master, Paul Hollywood. Alas, I decided to keep it simple for week one. I repeatedly came across mentioning and links to this YouTube video, featuring a man that seems to be pretty confident this is the easiest bread recipe for beginners. With over 8.8 million views, it must be a solid tutorial.  As Larry says, “If you’re a beginner, this is the place to start”.

Howdy, Larry.

So, let’s do this. I tried really hard to follow this video to the letter – I mention this because I have been known to just throw around a recipe and follow my heart in the kitchen just like my mamma taught me (huge shout out to my mamma, Val. She’s the best cook I know).

Baking is a different story. I figured I better stick to exactly what Larry tells me to. Here’s what happened.

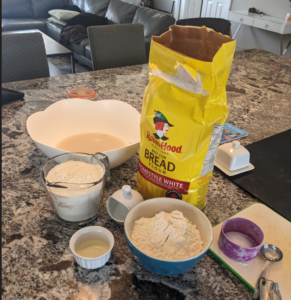
Stage 1: I  got all my ingredients ready and was ready to rock and roll.

Stage one: Get the ingredients into the bowl and mix away.

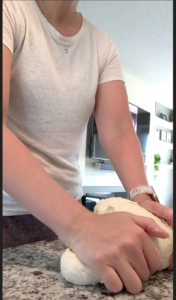
I added the water and yeast in a giant bowl. I always thought you needed warm water and sugar to activate the yeast. Weird that I didn’t have to do that. Once that was in and I added all the other ingredients, it was time to knead the dough for 8 minutes. Yes. 8 minutes of kneading with my hands, which I thought would be no big deal, but let me tell ya. It’s no joke. Who *kneads* (see what I did there?) the gym, when you’re busy pushing and pulling dough? I have to say that kneading this dough was incredibly soothing. In the beginning the dough was very sticky, and I was super skeptical. I need to learn to relax and trust the process because eventually it all worked out and became incredibly pliable. Surprise! Following instructions works.

Working it for 8 minutes.

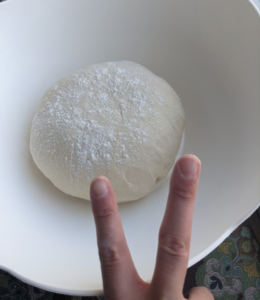
Once I was done, I put it into a giant bowl and covered it. I had to let it sit for an hour.  I thought you needed to let it rise in a warm spot. I found it weird that I didn’t have to do that as I clearly remember my mom doing that with her dough as I grew up.  I tried really hard not to peek during the hour, but I couldn’t take it. At 30 mins, I peeked. I panicked because it didn’t look like it was rising, so I moved it into warmer spot (under the window with the sun shining). It felt right in the moment, and I could hear Val’s voice telling me it needed some warmth. This was the only time I didn’t follow Larry.  Sorry, pal. Val knows best.

Peace out, dough. See you in an hour.

Stage 2: After one hour, I took the cloth off, and it really looked like nothing happened. I didn’t think it rose at all. I thought these things were supposed to double in size! Again, I need to learn to trust the process.  I took it out of the bowl, and as soon as I touched it, it definitely felt much bigger and lighter. The giant white bowl I used deceived me.  Once it was on my countertop, I found Larry’s method for shaping the dough interesting.  I had to spread it out, fold it over, make it into an odd, elongated triangle, and then roll it up into a log and plop it into the buttered pans.  Then, AGAIN, I had to let them rise, covered, for another hour. Honestly, woah. This breadmaking takes a really long time. Sigh. I was starting to lose my mojo.

Young woman lying buried her face in sofa feels tired

Not me getting tired of waiting.

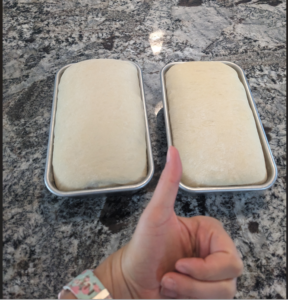
Despite Larry not suggesting to let it rest in a warm place, I put it back under the window in the sun. It just felt right considering it worked out well the first rise. I tried my hardest not to peek again, but I couldn’t resist. They looked fantastic.

Ready for the oven!

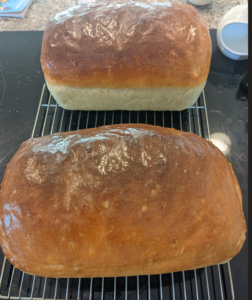
Stage 3: After another hour of rising, into the oven they go. 40 mins at 400 F. The smell was incredible. Good thing I checked them at the 35 minute mark because I thought I smelled burning. They were starting to get a little dark on the top, so I pulled them out and brushed the tops with melted butter, just as Larry suggested, and let them cool.

I made that!

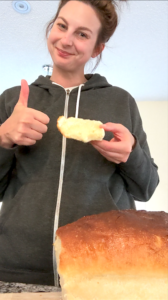
Stage 4: Get at it. It was soft, felt light, and, as Larry suggested “let’s butter a slice and giv’er a taste!”.  Delicious. My kids and husband also loved it. Half a loaf down the hatch, just like that.

DELISH. I hope you’re proud, Larry.


We will be crushing this all week.


Overall, Larry’s video was extremely easy to follow.  I had no problem pausing and rewinding where needed.  I realized that I didn’t use quick rise yeast as the recipe called for. I just used active dry yeast. Are these two different kinds of yeast? I’m not sure if this altered the recipe or not, but, clearly, I have 2 tasty loaves, so it doesn’t really matter. I don’t have much to be critical about except for the fact that I wish Larry would have told me how long the entire process takes. That’s my fault because I didn’t watch the whole video before I started. I will 100p do that next time. Now that I know this about this recipe, there’s no way I could bake bread after work….too many other distractions. This has to be reserved for a weekend when I have 4 hours “to spare”.   I started this at 2:40pm and didn’t get the loaves out of the oven until 6:40pm.  Four hours is a long time to spend baking bread.  Perhaps next week, I will see if there’s a quicker recipe – if that’s even an option. Am I totally naïve, or does baking bread always take this long?

So, Larry. Right now, since I have no comparison, I’d give it 4.5 dough balls/5.
fresh raw dough

fresh raw doughfresh raw doughfresh raw dough


Interested in making this recipe? Here’s the full video I followed. If you try it out, let me know your thoughts!

A legend in the baking…

Bready or not…here I crumb…

The learning project is right up my alley. Ideally, if there was enough time and money was no issue, I would choose either the cello (always been a dream of mine) or pottery (I don’t have a kiln).  So, I think I’ll stick with something in the realm of what I think I’m good at: cooking. BUT. I suck at baking. SO. I think I’d like to learn how to bake bread.  My family loves all things bread, and quite honestly, there is no greater smell than fresh bread. Adding a pat of butter onto a warm slice of homemade bread is divine. Of course, I’ve never filled my own house up with that smell because, frankly, it scares me. I am super confident whipping up a meal, but I have zero experience baking bread. I just head to Cobbs because it’s easy. Duh.

First, white bread.

Then, homemade buns.

Last, focaccia.

I’m thinking I will tackle three different types of bread throughout the next 6 weeks. Two weeks of trying two different recipes for each type of bread. PaulHollywood might be proud of me….

What do you think about that? Too easy? Too hard? Lay it on me.Baking Puns - Nice Buns

© 2024 Gaboury Grows

Theme by Anders NorenUp ↑