I decided to try out Screencastify this week. Screencastify allows you to record your screen. I found it very user friendly. If you follow the link that I put in “Screencastify” you will see that you must have chrome in order to install it, and if you do it is a very simple click of a button to add it to your chrome extensions. That is how you end up activating it, by clicking on it in your chrome extensions. You have to set up an account, if you have gmail (like I do) it is very easy to set up.
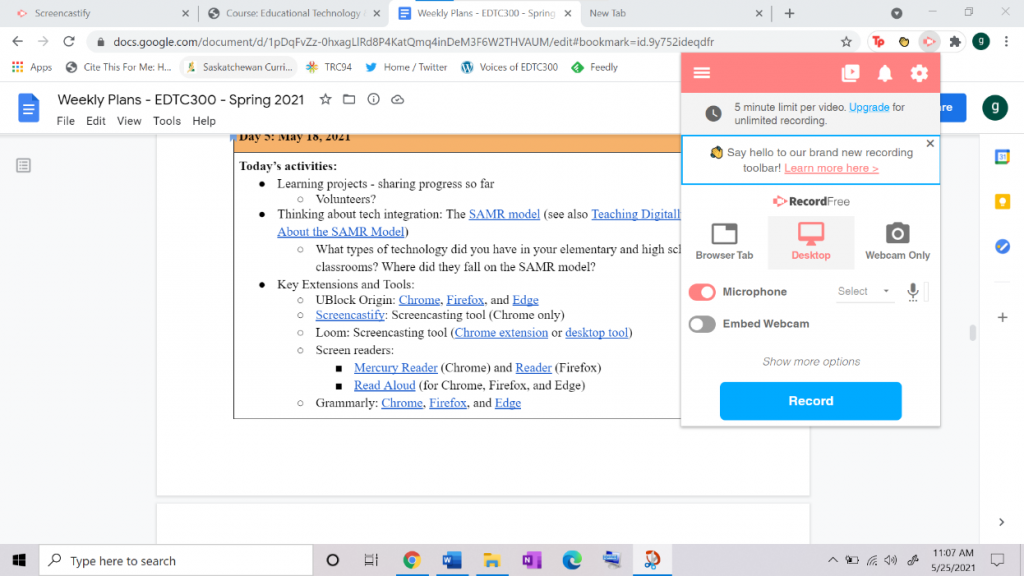
As you can see in the picture above it gives you options on what you want recorded. Now say I only wanted people to see the current tab I’m on but I might need to go to the new tab while I am recording and I don’t want them to see it, then I would click “Browser Tab”. Say I want my viewers seeing everything that happens on my screen so I would choose “Desktop”. If it is an instructional video you can choose to have your microphone on or not as well. If you just want to record yourself talking you can choose “Webcam Only”. There is also the option to “Embed Webcam” which means that a little square video of yourself will appear on the screen while you are also recording your desktop. For anyone who has seen a recorded zoom lecture where you only see your instructors face and their screen, it looks exactly like that.
Now you’re probably wondering, what happens when I start recording? Well, I have a screenshot below to show you:
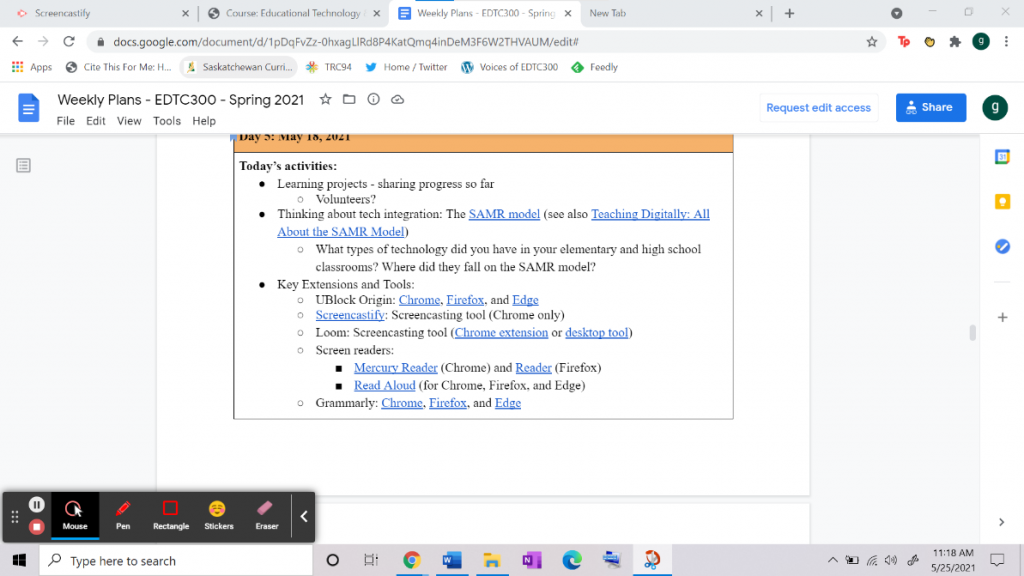
It will count down once you click record and then it just looks like your normal desktop. On the bottom left hand side you will see that little bar. You can draw on it with the pen. If you click “Rectangle” you can put the rectangle outline around things to emphasize or highlight them. If you use one of these and then you need it to disappear you can either click “Eraser” or after you click on and use something there is always the option “back”. If you decide that you need to pause but don’t want to end it you can click that white button with the two lines and then when you are ready to fully end it you can click the red button with the white square.
So now the video is done and Screencastify will automatically take you to this tab:
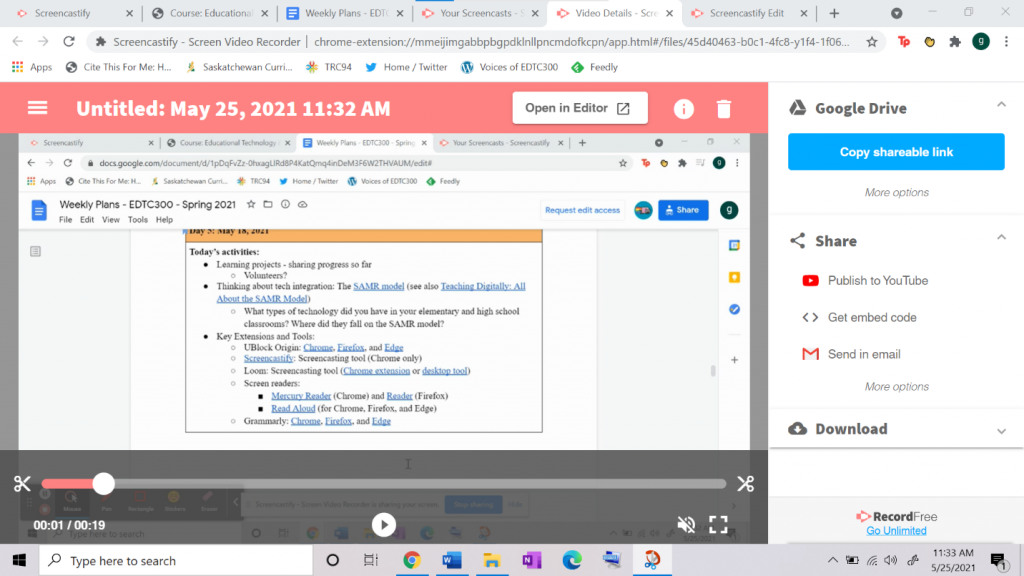
From here you can very easily share the link to this with others or publish to YouTube or any of those options on the right. What I did when recording my learning project this week is I clicked on “Open in Editor” which then took me here:
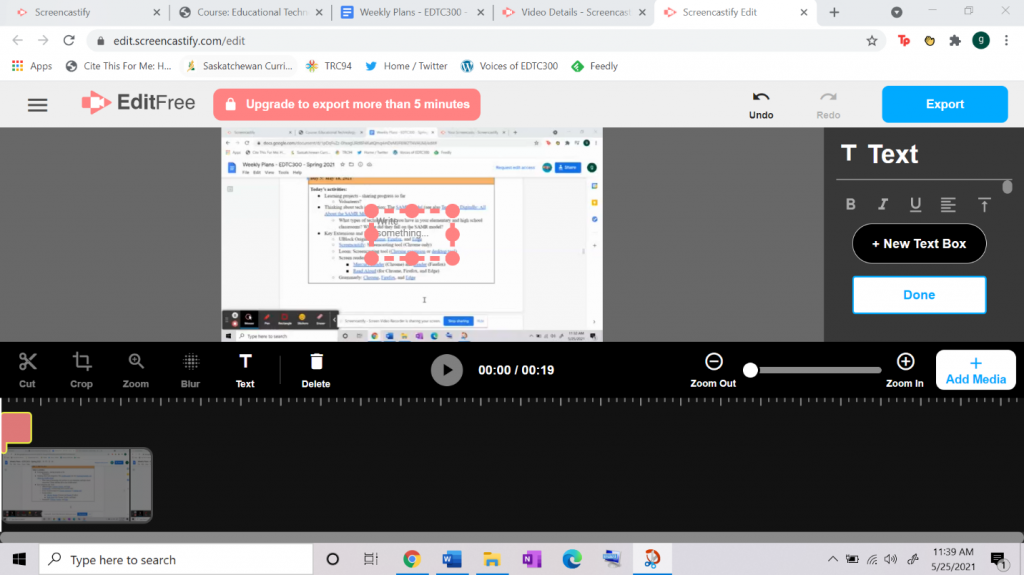
I really enjoyed using this. As you can see, I had clicked on “Text” which very simply means that you can add text. You can choose when it appears and disappears by moving it around or adjusting its length. You can change its size by scrolling down on the right-hand side where you currently see text options. You can cut parts of the video if you wish as well or blur out things that you do not wish to be seen.
Overall, this was a very easy tool to learn and use. This could be used in the classroom if you are ever doing online learning. As well, if there is some kind of resource you are using or project that you know students are going to be needing reminders of how to do or use, you could post a video using this online so when they are doing homework, they can reference that. Another thing is for math’s and sciences, if you know that students really struggle with a concept you could record yourself talking through the notes and post them online. As well if you know students are going to be away and they are missing important notes you could do that for them, so then you don’t have to explain it to them when they get back as they already have the notes and your audio recording. When discussing the SAMR model I believe it fits in with “Modification”. I think it fits there because without tools like this one you would not be able to so easily record your screen and make edits as well as potentially have your face on the screen. I think screencasting resources are great tools for online learning.
As I stated before I used this tool to record my learning for my learning project. I watched Lesson 2 of Sign Language 101 this week. We learnt the ABC’s, colors, numbers 11-20, pronouns, and language tips and then we did a quiz. The instructor showed us signs and we had to answer what they were. So, I used Screencastify to record him doing that and then I used the editor to put in my answers. Here is the video:
Here are the answers:
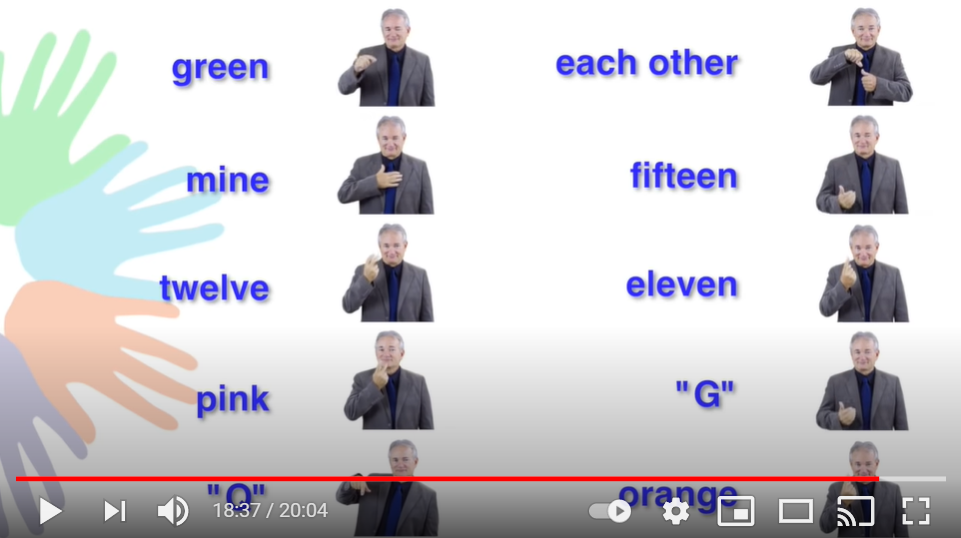
I got all the answers right except for “mine” which I guessed was “my” and “each other” which thought was “everyone”, so close! I enjoyed having the quiz at the end which allowed me to test my knowledge and instead of just writing the answers down on a piece of paper it was fun to pause the video and put my answers right in there with it.

This is great. Very informative….now I want to try it!!
This has convinced me even more to add this to my extensions, great job. I also really enjoyed your questions and answers for your learning project. Great progress made you basically got them all correct. Looking forward to watching you do more quizzes in the future. Good Luck!
This has definitely convinced me to add screencastify to my extensions. I also really enjoyed your questions and answers for your learning project. Great progress made you basically got them all correct. Looking forward to watching you do more quizzes in the future. Good Luck!
I think this tool would be so useful, as you said, for recording lessons or specific reminders. The ability to add text or drawings is so helpful to give the added visual cues!
Thanks for this review and good job on your ASL quiz!