Cake’s Anatomy
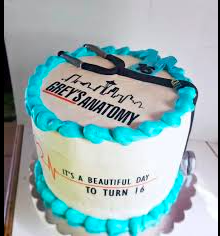
For the past week, I have been absolutely obsessed with rewatching Grey’s Anatomy. I am on my like eighth-time rewatching the show, so I thought it was only fitting that I attempted to do a Grey’s Anatomy inspired cake. Through this process, I have learned what my limitations are, and have been able to set realistic expectations for myself. When I found this cake, I knew it wouldn’t look like it, so instead, I used it for inspiration. I really liked the idea of the stethoscope, the blues, and the EKG lines on the cake. As you’ll see, I ended up taking this in my own direction completely! In last week’s blog, I decided to challenge myself to use fondant and buttercream to decorate my cake along with learning how to level my cake, so that’s exactly what I did.
Turning my Inspiration into Reality
Baking the Cake
This section will be super short this week because I ended up doing the exact same cake as last week! I made a chocolate chip cake using a recipe I found online. It is honestly so delicious, so I couldn’t help myself from making it again! I really appreciate online recipe sources because they are so simple, and super easy to find again.
Leveling the Cake
Unfortunately, when I was taking my video of the levelling process, I didn’t end up hitting record. So, without a visual of what I did, I will try my best to explain it to you all! I went back to using trusty ol’ Youtube to do my learning this week. I simply searched up “How to level my cake with a knife” and this was one of the first videos to pop up! Glady’s Cake Kitchen explained how to do this SO well! I love that she showed it using multiple tools (not everyone has a fancy cake leveler!). As I’ve said in previous blogs, I really enjoy having a video to actually visualize what I am supposed to do, so the video portion of this was amazing. I also really enjoyed that she explained what she was doing during each step, she was incredibly thorough in her explanation. Another thing I really enjoy about Youtube is that it will show you videos similar to the one you just watched, so if the video you’re on isn’t helpful, you can always try out a different one.
What I Learned
- Your cake should be chilled before doing this – it really helps keep it together.
- Instead of trying to “saw” the knife through the cake, you should press into the cake and turn your turn table.
- Apply pressure and turn the cake to “cut”.
- Continue doing this on multiple sections until the cake top comes off!
- This technique works for leveling the top of your cake along with creating layers to your cake.
Fondant Time!
I used the exact same technique from last weeks blog (it was honestly a great video) and used the left-over fondant that I had from last week. If you’re looking for some pretty great fondant, I would suggest checking out BulkBarn! I found that this week I had waaaaay less difficulties rolling it out because I used an excess of icing sugar on my rolling surface. I also remembered to really spend my time on the top of the cake to make sure there were no air bubbles under the fondant. This really did help as I ended up with no air bubbles BUT I think in some areas the fondant was too thin. I say this because I ended up tearing my fondant in a few places. I figured it wasn’t too big of a deal as I was planning on using some buttercream to decorate, and would be able to strategically place it to cover it up.
Now some Buttercream to Decorate!
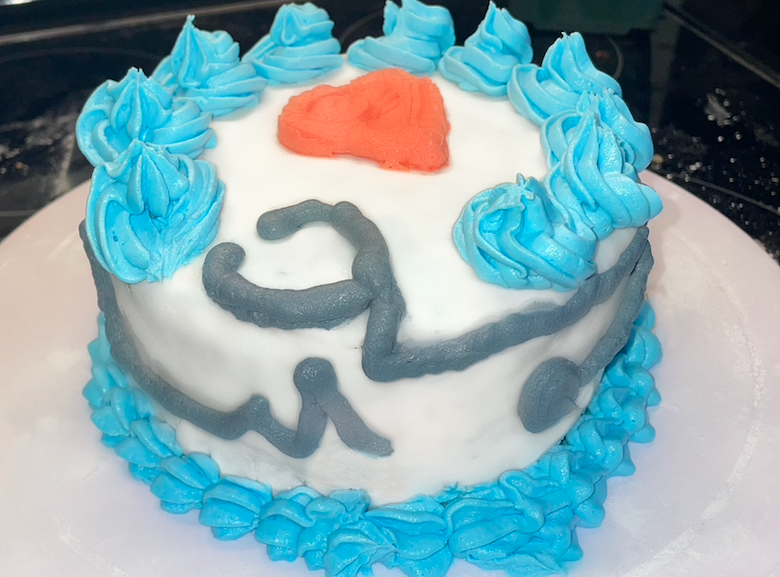
For my buttercream recipe, I just used the same one from my first attempt at decorating cakes! It’s my mom’s recipe, and it has been something I have become really comfortable using over the past few weeks. After I made up the buttercream, I separated it into 3 different containers to add some colour. I knew I was going for a Grey’s Anatomy theme, so I made some blue, red, and black! To colour my icing I just used some cake dyes I bought off of Amazon. I found out quite quickly that it is almost IMPOSSIBLE to make black icing, so I had to settle with grey. This wasn’t ideal, but maybe it was meant to be considering it’s Grey’s Anatomy (so sorry for the terrible joke). Once I had my icing made up, I thought back to my first blog post where I learned a few different techniques on icing and gave those a shot again! I guess MK Cakes was a very influential teacher because I think they turned out pretty great. Then, I just used my reference picture to try create a stethoscope out of buttercream, I don’t think it turned out too bad, but I think using it to cover up the broken fondant wasn’t the best decision. Lastly, I added on the EKG lines along with a little heart on top. I’m sure the EKG lines probably aren’t too accurate for a healthy person, but that’s okay!
The Final Result
Check out my video to see the process of making my Grey’s Anatomy themed cake!
#Tech Resources I Used:
- Youtube
- iMovie Editor
- Pinterest (for inspiration)
What did I Learn?:
- Chilling your cakes before doing anything with them (leveling or decorating) is super important!
- I can actually recall previous learning attempts and use them for new cakes! (Which means I’ve actually learned something about decorating cakes – exciting!!)
- Black dye apparently doesn’t create black buttercream (who knew!)
- It’s a good idea to look for pictures for inspiration NOT expect to create a perfect replica (this is something that has taken me a long time to realize).
- I’m starting to get really quick at video editing with the iMovie editor.
- Youtube is probably my favourite place to learn different skills!
Now… What are Next Weeks Plans?:
- Well … I actually have no more cakes to make for this class! My next post will be a summary of what I have learned from this #LearningProject
Hey Johnna,
I am amazed by all of the different tips & techniques you are using here. Reading through your blog, I figured levelling might be one of the more difficult skills you have completed. I find it very interesting you’re not to “saw” the cake to cut it but press down. I also love Grey’s Anatomy and think a Grey’s inspired cake is perfect! Do you have any birthdays coming up that you can put your new skill towards? Or are you more ready to be done with baking?
Good luck with the rest of your assignments in this class & have a great summer.
– Delaney
Hey Delaney! Thanks for the kind comments:) The next birthday coming up is actually mine in about two weeks, so I might just have to make my own cake. I think baking for a class and baking for fun are two very different things – I like the lack of schedule and freedom that comes with doing baking for myself. I really appreciate all that I have learned through this project, and I’m so excited to apply them in my casual baking time.
Best of luck with the rest of your assignments as well – enjoy the summer!!
Hi Johnna,
Your cake turned out so cute. I love the Grey’s Anatomy theme! I too have been rewatching the show again, but I think this is only about the fifth time I’ve rewatched it. It was fantastic to see that you put so many of the various skills you learned into one final cake and detailed description of the process. I know when I read your posts that I always have things to keep in mind if I ever try to try to make a cake using so of these ideas. I enjoyed getting to follow along with your process! Have a great summer!
Hi Johnna,
I love how you are rewatching Grey’s Anatomy, I have myself rewatched it about eight times as well, such a good show!
Your cake looks amazing and I love that you are using past learnings and building on them. I like how you summarized your learning using a list, it’s such a great and simple way to recap your thoughts.
I hope you don’t give up on baking you’ve made great progress!