Welcome to my party! What is more perfect to practice the skills I have been learning about then to make my very own birthday cake? Now the lessons I am following called for a funfetti cake I chose to use one of Cakes by Courtneys other cake recipes a Banana Cake with Cream Cheese Buttercream Frosting ,and yes it was as delicious as you think it would be; seriously you need to try this. YUMMMMMMY! Here was my focus for my first cake because I learned that it is not just about decorating the cake as much as it is also about creating the cake. So today I focused on:
- What I need to know before starting
- How to bake the best tasting and looking cake (creating a cake from scratch)
- Making the best tasting buttercream
- How to stack and crumb coat
- Using some of the tools and creating straight and smooth edges
I didn’t get into anything fancy decorating wise today, I wanted to focus on what I thought was just basics but man did those “basics” really take time and some serious learning for me! Straight and smooth edges are no joke; it was hard!
Before Starting
This goes for any cake you are making:
- Turn your oven onto the required temperature 30 minutes before starting. You want the oven to reach its full potential before you put the cake in. If you put your cake layers in 5 minutes after it says it is done heating up they will not bake evenly, you really want it at full heat.
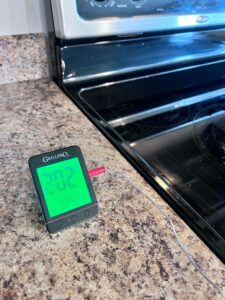 DO NOT use convection bake; it usually runs hot, and then makes your cake dry
- Use an oven thermometer to see if the internal temperature is actually matching what the oven is telling you. Even if it is a few degrees off it can change the way your cake bakes. Get to know your oven
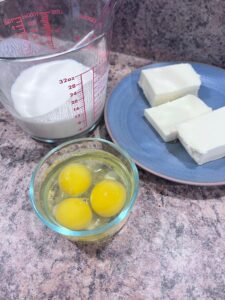
- Now this is another big one, get all your wet ingredients out of your fridge at least an hour before you begin baking. You want those ingredients at room temperature and the reason being is that they will be better absorbed by the dry ingredients. It helps your cake rise more evenly
 .
.- Do not over mix your batter, mix it at a very low speed
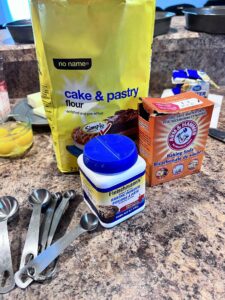
- Use fresh baking soda and baking powder nothing over 6 months old (key)
- Use cake flour if you can. It is a finer flour and will make a fluffier and lighter cake. Highly preferred
Getting The Best Tasting & Looking Cake
To get started Cakes by Courtney recommends that when making a cake recipe for the first time that you follow it exactly as the author intended for you to. Once you have done it, after that, that it when you can make your substitutions to it. I am a slight rebel but also a rule follower at heart so for this cake I kinda went slightly off the beaten path and instead of making this Banana cake a single layer cake I made it into a 3 layer cake. (oooooooooo such a daredevil I was), doing so didn’t require me changing anything to the cake recipe but it did mean I had to double the buttercream but we shall talk about that later.
- begin with room temperature butter, add sugar and vegetable oil
- mix this at a medium speed but after this everything will be mixed a low speed
- scrape down the sides to make sure it is all blending really well, do this after you add the eggs in as well
- For vanilla you can use whatever kind of vanilla you want, it’s all okay
- Now a very interesting step here was alternating my cake flour mixture and buttermilk (I have never used buttermilk in cakes before so that was something new), starting with your cake mixture and ending with your cake mixture. This helps the ingredients blend more evenly. 1/3 flour, 1/2 buttermilk, 1/3 flour, 1/2 buttermilk, finish with 1/3 flour.

blending the cake flour, sugar, baking powder and soda
You can create your own substitute for buttermilk by using 1/2 part greek yogurt, 1/2 part whatever milk you have
- Continue to scrape down the sides of the bowl.
- If you ever want to colour your cake batter you want to fold the colour in, never use your mixer. Because you do not want to ever over mix. Use a spatula
You wanna know why I love this baker? Especially at this step? She says you always have to sample. Bon Appetit, says the biggest mistake a baker can make is not taste testing along the way. She said to lick the bowl clean! OK twist my rubber arm!!! I may have had a taste or two but my kids cleaned it right up.
Creating the Perfect Layers
All her recipes are good for 3- 8″ cakes or 4- 6″ cakes. At this step I then decided that I should be okay to make a 3 layer cake just like I wanted too. To ensure the cake batter is evenly shared you need to use a scale. She uses around 16 oz of batter per cake pan. I found that had more cake batter with this recipe so I just adjusted accordingly. 
This helps the cakes bakes even more evenly, when they come out of the oven they will look more even.
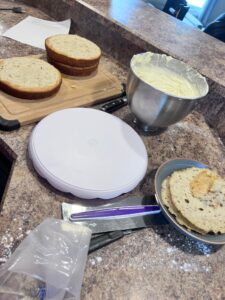
Preparing the pans
In my previous cake making I only ever sprayed the pans. Today I used some tricks I learned in the class.
- Spray the pan including the sides
- Use parchment paper on the bottom ( I traced the bottom of the pan as you can so slightly see if you really look hard in my picture and then cut it out)
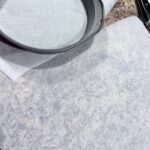
- Then you spray the parchment paper again in the cake pan
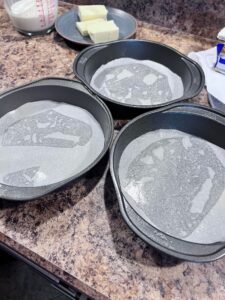
- Once the cake is in the pans use a spatula to spread it out as evenly as you can
Baking the Cake
- It is crucial that once you get closer to the baking time being up that you turn on your oven light and pay really close attention to your cakes
- You will know they are baked perfectly when the top is slightly golden brown and it is not shiny anymore. The sides of the cake are barely pulling away from the sides of the pan.
- The most important part though is you need to put a toothpick in the center of the cake and when you pull it out you are looking for a few moist crumbs on the toothpick
Something I can’t believe I never put 2 and 2 together is just like meat when you take it out of the oven/grill it is still cooking. Of course DUH that means cakes would do the same… it is still baking for about 5 additional minutes afterwards. Surprise!!
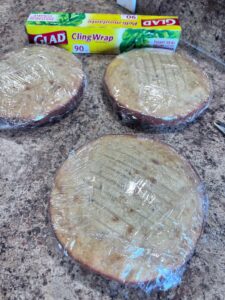
Once the cakes were done cooking I let them cool down for about 15 minutes and then wrapped them up and stuck them in the freezer. Putting cakes in the freezer for at least an hour is a very important step for when you are ready to do the crumb coat.
Making the Buttercream
Everything about about having room temperature ingredients like when you make a cake throw it out the window (her first words in this section) it made me giggle like oooooh kay. You want to have slightly cold ingredients this time. The butter can come out of the fridge about 30 minutes before you begin. This will help get a good consistency in the buttercream. If your frosting ever just falls off the spatual it is because the butter was not cold enough it was too soft and sitting out too long.
Now this is where things got interesting was with her second tip...
Sift your icing sugar… it will help make the icing sugar lighter and fluffier which will help give you a smoother buttercream DO NOT skip this step she said, you will not be disappointed she said… use a big mesh strainer. Well I don’t have a sifter… so I chose to use just my regular strainer like you use for pasta… what a mess!! I do not recommend using a pasta strainer at all, I am sure the metal mesh strainer is sooo much better than this. Now remember earlier I said I doubled my buttercream recipe so that meant 12 cups of icing sugar…
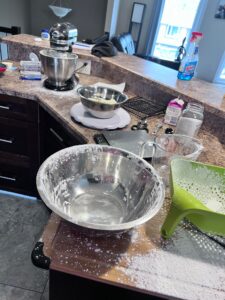
It got my floor, all over my counter, it was just a mess…. I gave up… then my husband walked in and ask what in the world I was doing, so I explained. He said “you know if you use a whisk you can also get the same results a similar one”…. Go away Gord, I never asked you…. UHHHHH.
Another tip I learned is to measure my icing sugar first and then sift which I did.
So now I am at the point where I can add my buttercream ingredients together so off I went following the video and the recipe. My second mistake in the buttercream was trying to double it all at once. What I should have done was make single batches and then combine them after. My mixing bowl in my Kitchen Aid was not even close to being big enough but I tried anyways…. OH MY! Yep this is exactly what happened even mixing on low speed…
So at this point I paused and took a deep breath in. Split what I could in half and tried again in smaller batches then combined them afterwards. Even with these hiccups I will call them, the buttercream still tasted AMAZING! It was light and fluffy.
Stacking & Crumb Coating The Cake
Now that my cake has sat in the freezer for a hour it is ready to begin staking and applying the crumb coat.
- On the cake board apply a small amount of buttercream in the middle. This helps keep the cake in place and not slide around on the board
- The first 2 layers put top side up
- Using 3/4 cup of frosting and the off set spatula, put the frosting in the middle of the first layer and spread it around. Using the turn table move the frosting to the sides coming towards you. Try to keep it really level with the cake. This is an prime opportunity to level out the cake without having the cut away too much. Get eye level with the cake “get into a cake squat”.
- Put the next layer on and do your best to get it centered and repeat.
- Pipe a rim of frosting around the edge if you need that support
- Use a light touch always! If it is too hard to spread around, put it into the mixer and whip it up some more
- For the last layer, put it top side down, it has the least amount of crumbs on it and also should have a nice smooth top.
Crumb Coat Time
- Using a crumb coat is key in locking in those crumbs so they do not appear in your final buttercream frosting.
- Apply a thin layer of frosting. Let it then sit in the freezer for about 15 minutes. This does not need to be pretty.
- Start on the sides of the cake
- Use the straight spatula
- Turn the cake away from you
- Bring the spatula towards you
- Go towards the bottom but do not go over the cake board
- Add a little bit to the top, use the offset spactual on the top.
- Now using the cake scraper, starting at 1:00, left hand does all the turning, the right hand holds the cake scraper at a 45 degree angle, and lightly go around it. Only go from 1:00 to 4:00 then go back to 1:00. If you are left handed it’s 11:00 to 7:00. This is to only get 1 scraper line
-
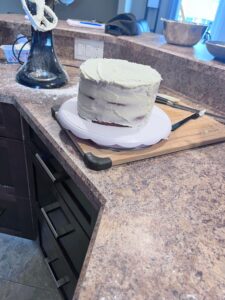
- Crumb Coat Completed
Final Stages of This Birthday Cake
Mastering the art of straight sides and edges is not joke. I need much, much, much, more practice with this!
- The top of the cake comes last, start with the sides
- If the crumb coat ever becomes not cold, put it back in the freezer
- Spend a couple minutes with a wooden spoon whipping the buttercream up, it helps get all the air bubbles out of the frosting and make it silky smooth.
- Use the straight icing spatula go around the cake focusing on the top first
- Begin working your way down your board once the top is done.
- Wave back and forth as you apply the remaining icing, using the turn table and apply the icing towards you
- Don’t frost in front of you, it is just awkward
- Now using the cake scraper
- Keep your eye on the scraper
- Use 1/4″ of the scraper. use a 45 degree angle the whole time this will smooth everything out
- Use a light touch
- Start at 1:00 and turn the table all the way around
- Do some spakelling if you need to, to help fill in the holes. Do not add a ton of frosting.
- Always clean off your scraper
- Do not over work the buttercream. Get it applied within 15-20 minutes. This is done for a couple reasons: the crumb coat will thaw, and for your sanity
- This was huge! Oh man was I getting frustrated it just wasn’t perfect. I need to work on the 45 degree angle part…
- There will never be a cake the is perfect all the way around.
- Tears are not worth it, cake = happiness.
- Each time I make a cake I will get better and better
- Put the cake back in the freezer in about 15 minutes
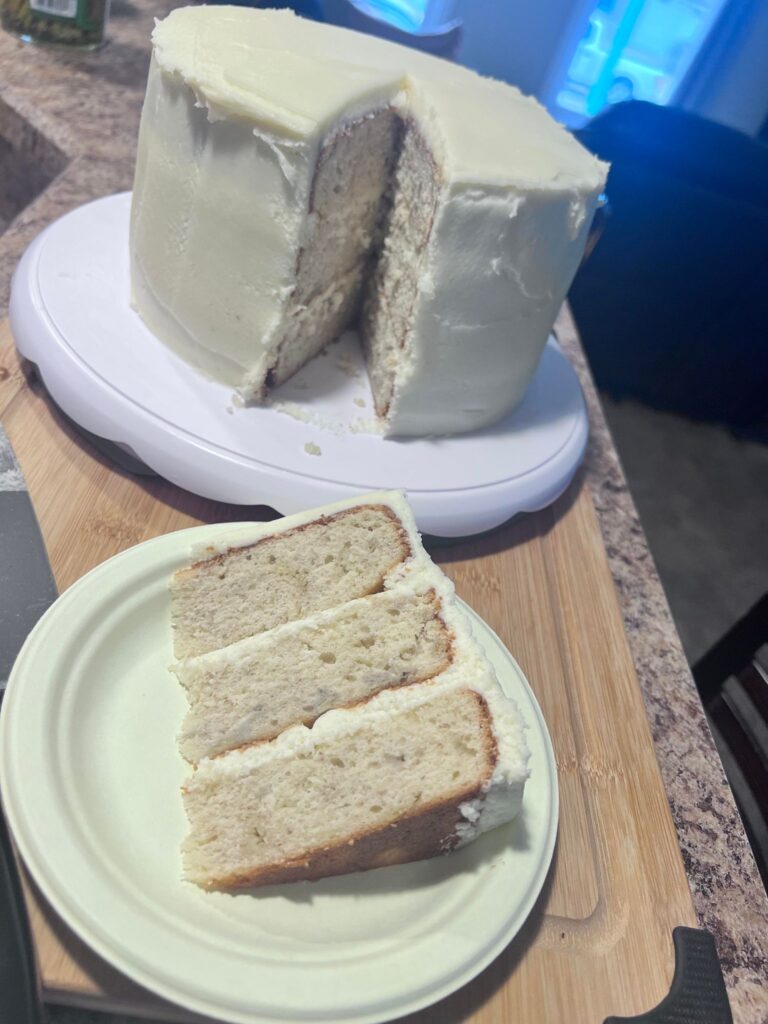
TaDa! Here is my first finished cake
Wow, Christine! This whole blog post is just *chef’s kiss*. Your humor, your visuals, your impeccable details (I can’t imagine how long it took you to type up this post!) – top notch! I am SO not a cook or a baker, but I love me some Food Network and like to think I’ve learned some tips for my non-existent cooking by watching those shows. Your cake looks amazing – I am drooling just looking at it! Can’t wait to see where you cake adventures take you next – you are killing it!
Thanks Kara! I try to show a bit of my personality within my posts. It was a longer post but I am thinking now that I posted about the actual cake making portion that my future posts will be about tidying up my mistakes and showing my growth and then getting into more decorating details like piping, drips and such oh and figuring out how to make smoother edges, I definitely need to work on that. Thanks for stopping by Kara, any suggestions for my next cake flavour?
Well first off Happy Birthday! I loved reading your post and learned some very important details along the way. I have baked but not often from scratch as I do not make the time for it. I love all the images that you share of the journey. You are doing a wonderful job so far.
Way to go, Christine. Your final product looks incredible. I have to say tell that reading your post really resonated with me in all my bread baking. My goodness is cake baking a time investment. All the tips I read about though, I’ll be sure to note next time I make a cake, which may be NEVER. For now, I will continue to live vicariously through your project. Keep up the hard and outstanding work.
Christine,
You could be on the Food Network! I was totally invested in your post and could not not wait to find out how everything worked. I appreciated your humour and honesty. My kitchen always looks like a natural disaster occured after baking. Thanks for the great tips! The oven preheating tip and sifting of the icing sugar were two of my favourites. Your cake looks mouth-watering! I can’t wait to see your next project!
I am so happy you were able to take away a few tips and I also very happy to hear that I have a fellow baker who isn’t afraid to admit that their home also looks like a disaster after baking; it’s the truth am I right?