
This week I decided that rather than just recording the finished product of my work animating, I would record a video explaining the process as I did it. The fact that I tried to explain what I was doing while working resulted in many takes required! This meant that I needed a program to edit my many clips together in order to remove mistakes and produce something worthy of sharing on my blog.
I decided to try using Davinci Resolve which can be downloaded for free here. Right away I can tell you this program was overkill for what I needed!
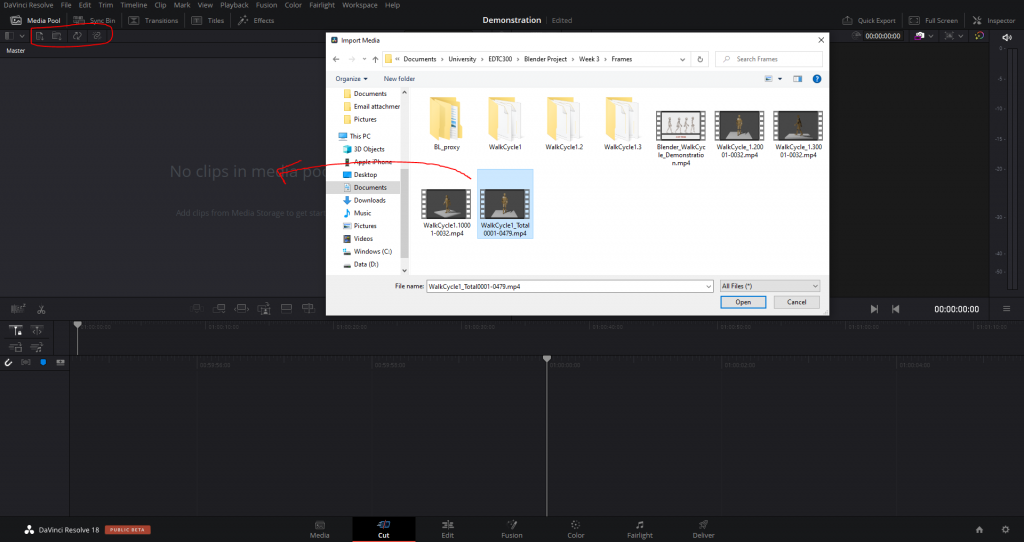
When you first open a project, you will see this screen. I have labeled some of the important areas of the screen in the image below.

If you look at the red box in the image above you will see we start in the “Cut” module. This is where much of the work gets done adding and snipping video and audio clips in the “Timeline”. The “Media Pool” is where you store the video and audio clips you wish to use. You can add clips by clicking on the buttons in the red box or by dragging the clips from a file browser into the pool as shown in the image below.
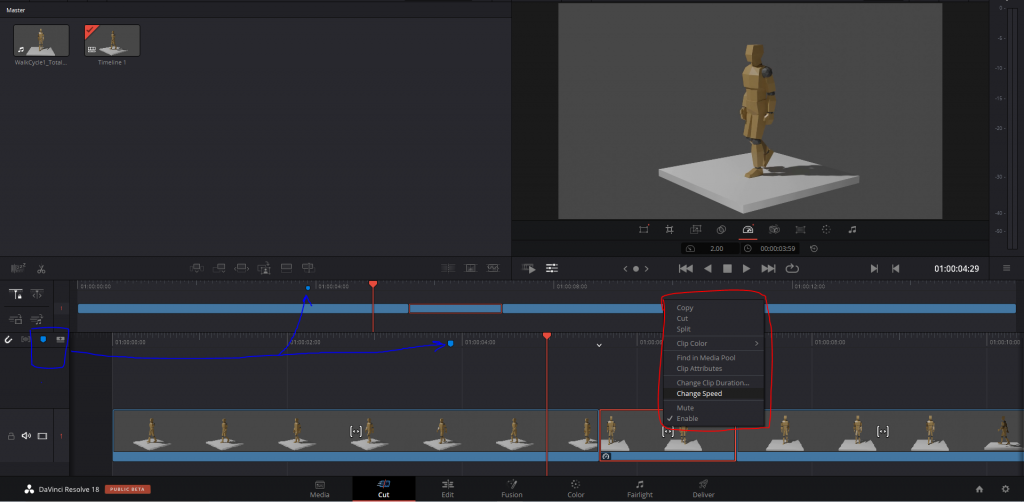
Once clips have been added to the timeline, you can view the project in the “Preview Display”. The Top bar of the timeline allows you to scroll through the entire project, while the bottom bar allows you to scroll through seconds at a time, even going frame by frame.
You can add markers which appear in both bars of the timeline in order to identify sections you need to work on. If you right-click on the lower bar you will see the various options in the red box in the image below.
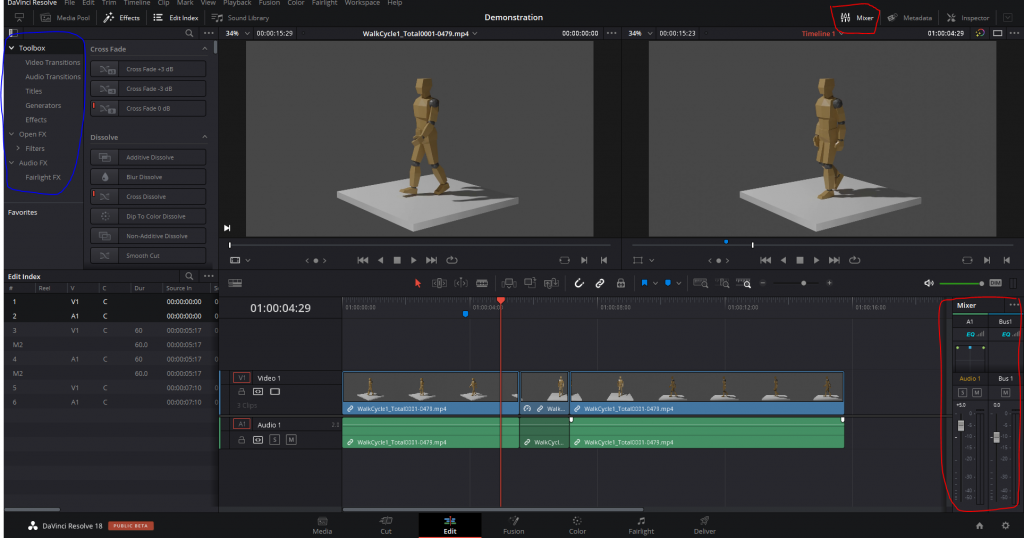
In the Edit module you have the ability to open the mixer in the top right which allows you to control audio levels and, in the top left you can see the toolbox which includes tools such as transitions and titles.
There are MANY more tools and resources available within Davinci Resolve! It is a complicated program that was pretty overwhelming so this was as far in depth as I got while using the tool for my learning project.
I hope to continue to explore with this program and learn more about it as I keep working on my animating and editing!