Summary of Learning
Reply

Over the duration of this course, we had the opportunity not only to learn, but to contribute to the learning of others. The internet provides access to endless information, and with social media, there is the opportunity to easily share knowledge and resources with countless users. These contributions primarily took place in three digital spaces:
Twitter Experience
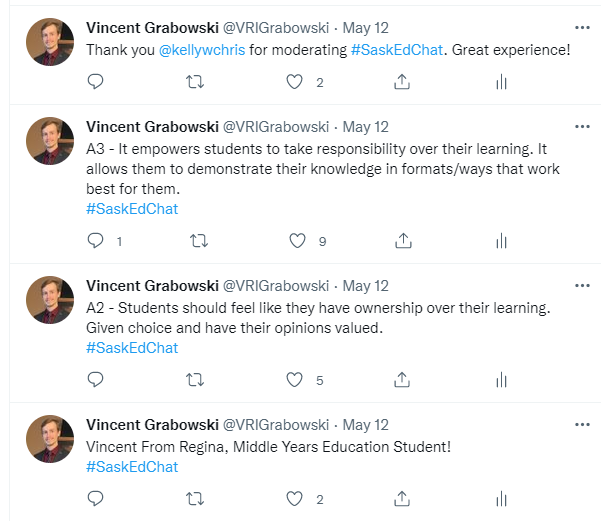
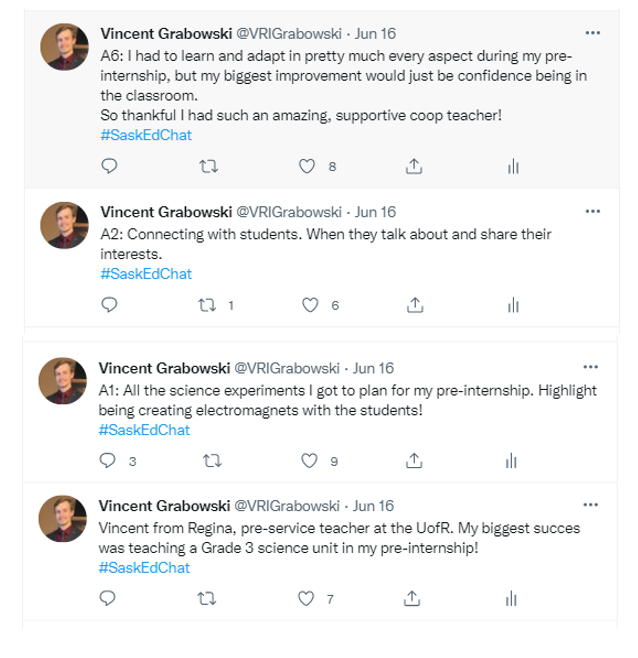
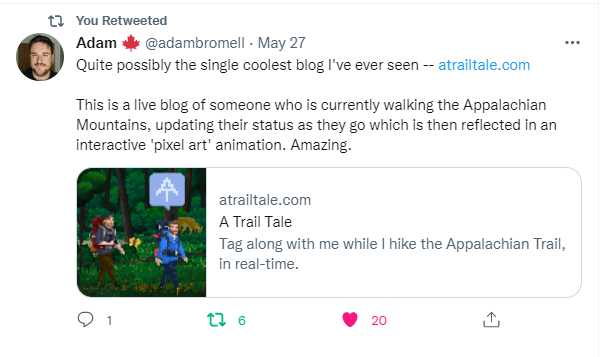
Before taking EDTC300 I had almost no presence on social media. I am a pretty private person and the thought of posting content for the world to see made me pretty uncomfortable. While I do believe Twitter is a fantastic tool for sharing resources and networking, I personally found it to be pretty overwhelming. That being said I did find myself getting more comfortable using it by the end of the class. Since creating my Twitter account in May, I have participated in Ed Chats, Shared resources, retweeted other user’s posts, and regularly posted updates on my learning project.
Discord Experience
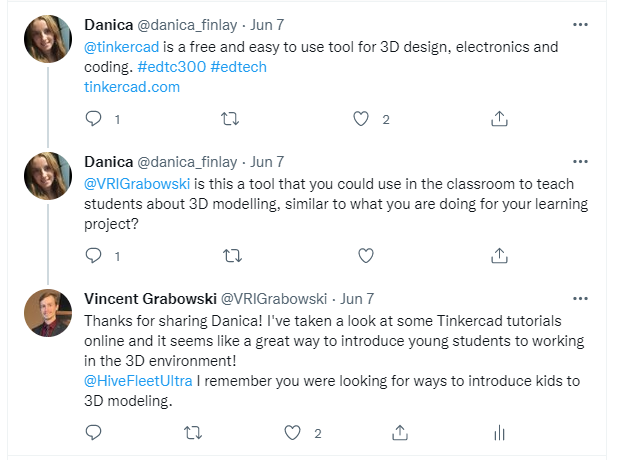
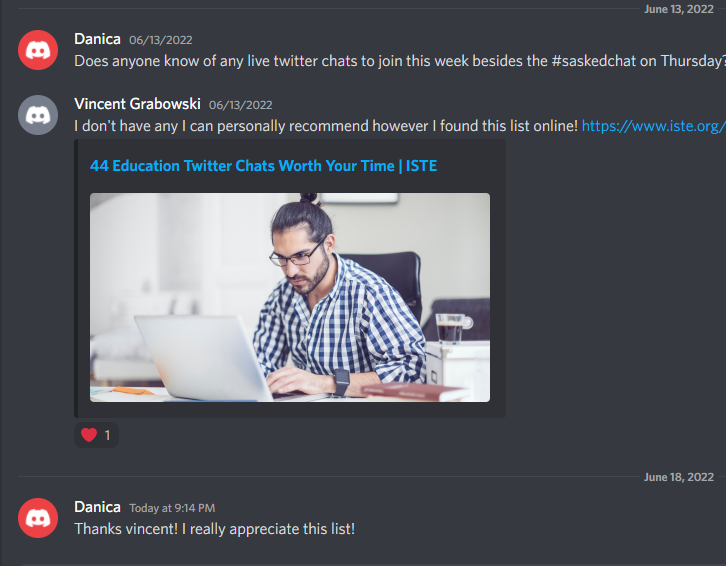
Discord is actually the one tool I had experience with prior to taking this course! That being said I only used it for voice chats with my friends while playing video games, so seeing it utilized as a place to ask questions and share resources was new to me. I found that often when classmates asked questions, people were very fast to respond. Often problems were solved before I had a chance to open my phone! I was able to use discord to share a resource with a peer who then continued the interaction on Twitter.

Blog Posts Experience
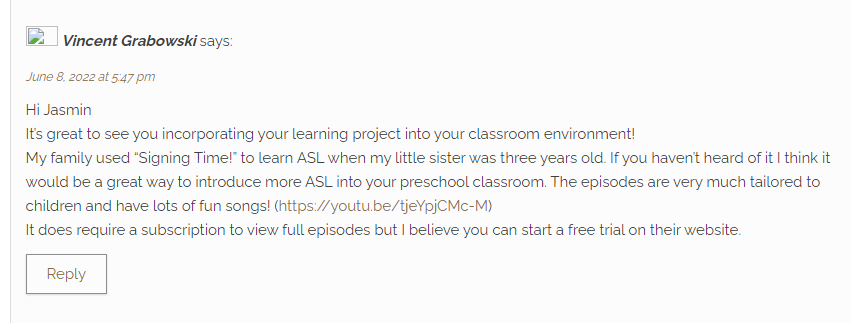
Commenting on peer’s blogs was interesting as it felt like a more personal, one-on-one experience compared to just sharing resources with the world on Twitter. I often found it hard to comment on other’s work when they were learning about something I had no experience with. Something that kind of clicked with me at the very end of the course is that offering praise and encouragement is enough reason to comment on someone’s work. I don’t need to be able to offer new information
Explanation of Learning Project
With this course coming to an end, it is time to look back and reflect on all that I have accomplished in the past six weeks! For my learning project I decided to challenge myself and learn how to create 3D animations. This is a skill I had always been very interested in, but never actually took the first steps. After researching various options of animating software, I could potentially use, I settled on using Blender, a totally free modeling and animating software! A recap of each week can be found below:
Recap of Each Week
Learning Project Week 1 – Reanimating Old Dreams: Learning Project Introduction
One of my very first experiences with blogging. I explain my motivation for choosing animation as a skill to learn as well as potential goals I would like to accomplish. I also explain my choice in which animating software I wanted to use for the project.
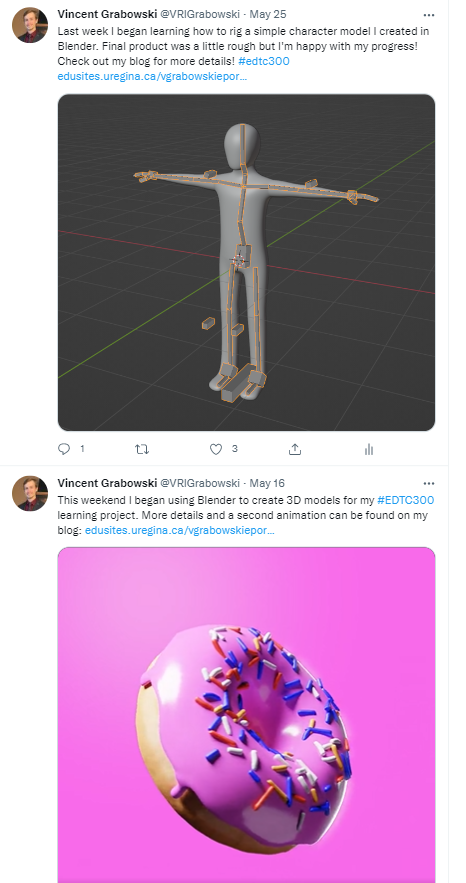
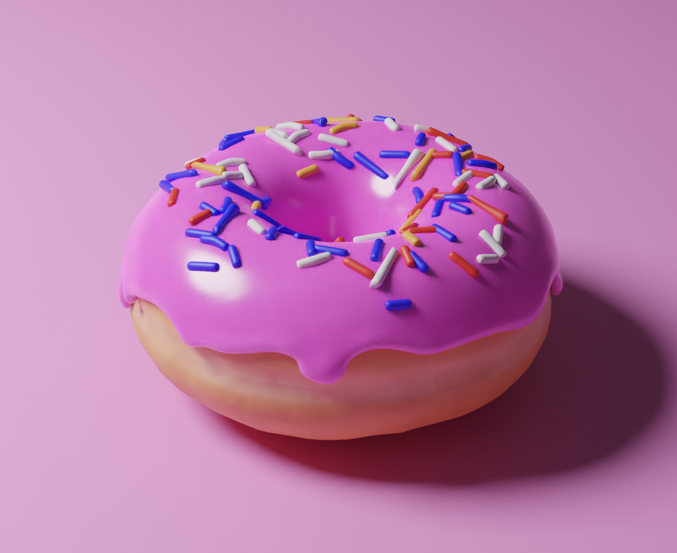
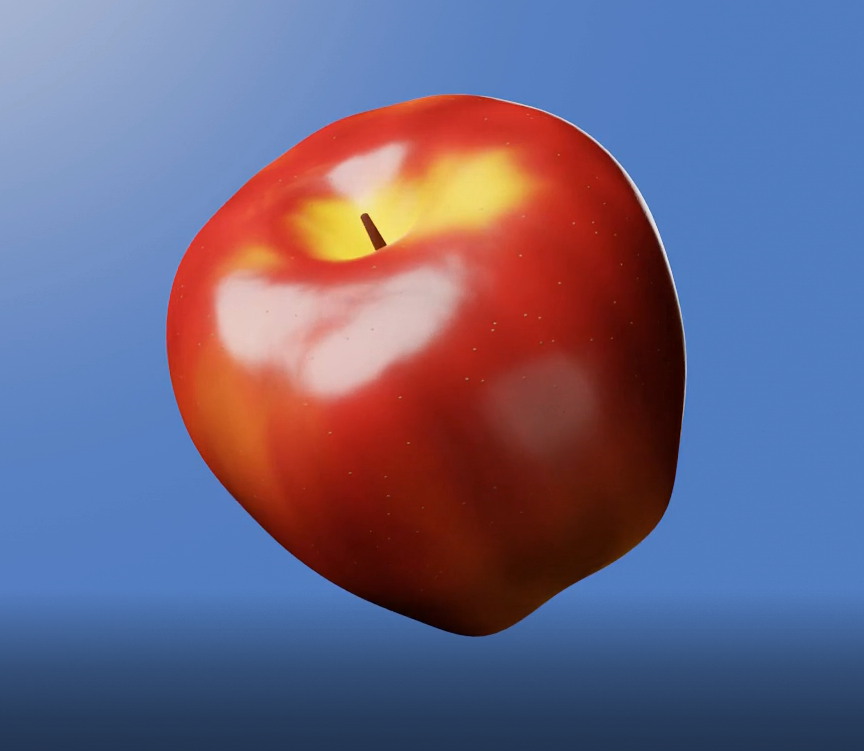
Learning Project Week 2 – Donut Judge the Process: Creating 3D Models
Week 2 is where I begin using Blender for the first time. I use a tutorial series by Blender Guru on YouTube in order to create a 10 second animation of a donut spinning. After finishing the tutorial, I test what I have learned by creating a similar animation of an apple.
Learning Project Week 3 – Strike a Pose: Character Model and Rigging
In week three I use the modeling skills I learned before in order to create a simple character model. I follow another YouTube tutorial by Ryan King Art in order to create an Armature Rig which is then connected to the character model to shape it into different poses. This was in preparation for future weeks where I could then animate the character model moving.
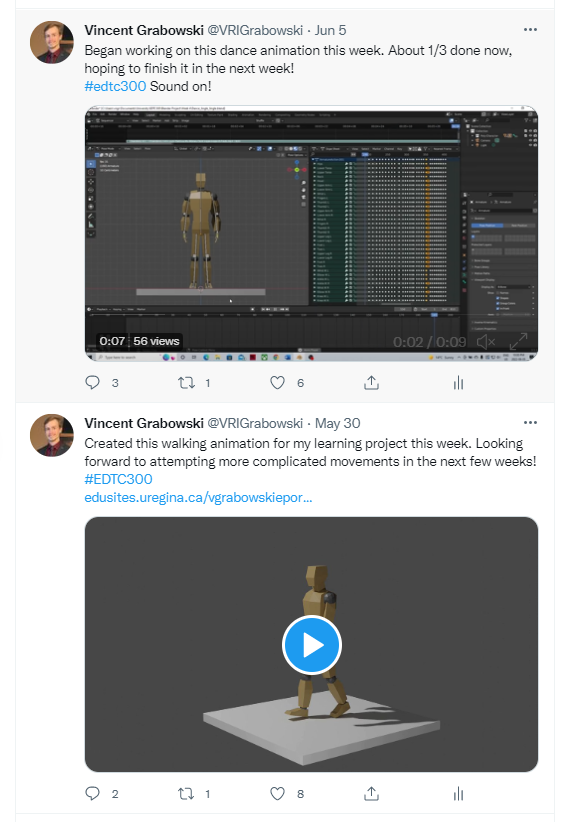
Learning Project Week 4 – A Step in the Right Direction: Animating a Walking Loop
In week four my goal was to animate my character model in a walking loop. I was not happy with the character model I created the week before I decided to create a new character using a video by Grant Abbitt on YouTube as inspiration. Once I had a posable character model that I was happy with, I created a 32-frame (approximately one second) animation of the character completing a walking cycle, which could then be repeating over and over again to give the impression of walking.

Learning Project Week 5 – My Model Don’t Jiggle Jiggle, It folds
This wee I built on the skills I learned from the walking cycle animation and applied it to a more complicated task, a TikTok dance. I explored using TikTok as a learning resource and found many tips/tricks that would be useful in the future. Because the dance was so long, I only animated the first 200 out of 600 frames this week, with the goal of finishing the animation in the next week.
Learning Project Week 6 – Dancing Across the Finish Line!
This week I completed animating the remainder of the TikTok dance I began in the previous week. I edited and uploaded a video showing the entire process of the animation including work I did the previous week. I explored a new website called Blender Nation as my learning resource.
Assessment of Personal Learning Progress
| Prior to Learning Project | Post Learning Project |
| – Minor experience creating 3D models from previous course. – Only brief experience animating 2D scenes. – No experience editing videos. – No experience recording screen and audio for videos. No desire to share things I created online. | – Created more complicated 3D models with variety of detail. – Animating complex movements in synch with music, in a 3D environment. – Recorded and edited videos showing my progress using screen-recording software. – More confident presenting my work to the digital world. – Desire to continue learning new skills and uploading more content. |
Reflections on Using Online Sources
When I began this learning project, I was confident I would be able to find countless tutorials using the Blender software available on YouTube. My intention was to look into a different channel each week an reflect on how each channel compared to the others. This is what I did for the first three weeks. However, upon digging deeper and what the internet had to offer, I found a variety of different sources that could be utilized for various learning purposes.
YouTube is, in my opinion, still the very best way to learn how to animate. The search function is very well optimized, so if you know what you are looking for you will most likely be able to find it. Creators are allowed to upload much longer videos than on other sites, which allows for more complex, detailed, step-by-step tutorials and explanations. I am glad I chose to use this site in the early weeks of my project as I feel it propelled my learning to the point where I was comfortable enough to then explore other resources.
Blogs that I have explored offer an interesting combination of text, pictures, and words. When I was creating the walking animation in week 6, I found it was a valuable format for teaching the theory of what goes into a walking animation, so that I could then apply it into the Blender workspace.
Knowing how TikTok has a limitation on the length of videos uploaded, I did not think it would be a very useful source. What I found was that there are many short videos that showcase specific tips or tricks in the short time frame allowed. Something I have found about Blender is that it is so complex, there are a million different tools and tricks I have no idea are even possible. With this in mind I think where TikTok (and other social media sites like Instagram and twitter) shine is by showcasing these small tricks to make users aware of their existence. Then afterwards they can research more in-depth tutorials on sites like YouTube. Additionally, these sites are great for inspiration!
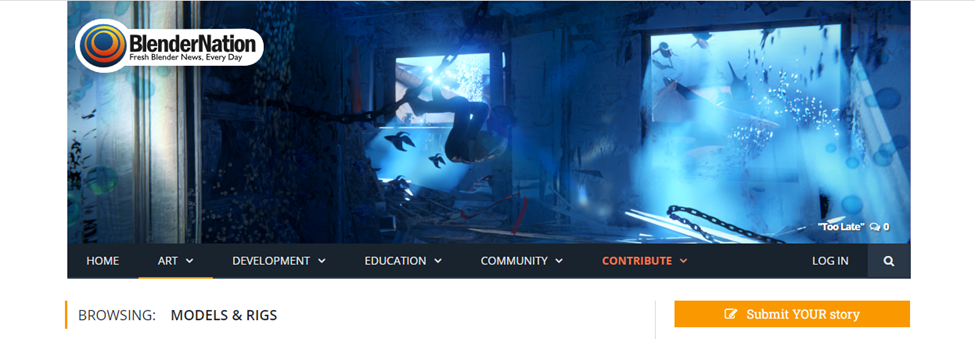
The last resource I checked out was a website called Blender Nation. This site had a lot of content, from tutorials to models and rigs available for download. While investigating it I found that the search function was not very optimized. I feel this resource would be best used similarly to TikTok, for inspiration of discovering new tricks, as well as downloading resources such as models created by other users.
Final Thoughts – Moving Forward
I am incredibly thankful this course has given me the opportunity, and push, to pursue learning this skill. It was always a dream of mine, but one I never thought I would actually take the leap for. After all, who has over six hours of free time to learn how to create a 3D donut?! I am very proud of all I have accomplished in the past six weeks. Moving forward, I would spend more time on detailed modeling. While focusing on learning animation this project, I had my character model dancing in a grey void. I think a nice challenge and change of pace would be to create a detailed 3D environment, with some simple animations to bring life to the scene. A cozy coffee shop or a nature trail are two options that come to mind when thinking of what’s next. I hope I will be able to find the time to continue this hobby well into the future.
Thank you very much for following me on this journey!
This week I continued working on animating my simple character model doing the viral TikTok dance “Jiggle Jiggle” originally posted by @Jessqualter. It was quite a grind to complete the rest of the dance! For reference last week I animated approximately 200 frames, and a good portion of the dance moves were repeated so I was able to copy and paste key frames in order to save time. This week I completed the remaining 400 frames of the actual dance, and added some extra animation in the first couple seconds of the video before the dance begins.
While working on this project, I continued to use TikTok for referencing the dance. I also looked up the dance on YouTube as this way I could slow the video down to ¼ speed in order to analyze the movements for each step of the dance. I found this was necessary in order to accurately align each step with the music, it would have been way more difficult if I had only used TikTok.
While working on the animation during the last two weeks, I tried to take some time to record my screen after each step, in order to explain my thoughts and showcase my progress. I used OBS Studio to record my screen and audio and then edited the clips together using Davinci Resolve. I have included the walkthrough video below for those who are interested in seeing the multi-day process. You can also find the finished dance animation.
Resource Explored:
This week I was continuing working on the dance animation I started last week. Therefor, I did not need to find a specific tutorial or anything. This opened up my resource exploration and I focused on exploring sites that I felt could be helpful if I chose to continue working on this skill after this course is finished. The site that stood out to me the most was called BlenderNation. This site has so much to explore, including:
The amount of content to explore was pretty overwhelming. On the “Models & Rigs” section alone, there were 61 pages! I did find that the search function was not entirely optimized, as I would get quite a few results that seemed to have nothing to do with what I was looking for. With that in mind, based on my initial experience, I feel as though this is a great site to use for motivation or inspiration. Or in order to learn random tips, tricks, and skills. However, I don’t think it is the best site to use if you have a specific task/ skill you wish to learn. In those instances, I would probably stick with YouTube.
Self Reflection:
I am very happy with the progress I made this week. Gong into it I was not certain I would be able to complete the entire dance. I believe this 2-week project has been a fantastic way to develop my own comfortability using Blender and leaves me at a good starting point to explore more complicated tasks/projects in Blender.
There was one part of the animation, where the character steps around in a circle, that I was not entirely pleased with. I feel like the animation of the arms could use some further refining, but I had to opt to leave it as is for now in order to accomplish my goal of completing the dance for this week’s blog post.
I also did spend a lot of time looking for new sites and resources before settling on BlenderNation. I found a few interesting blogs like this one by Brad Ferguson. However with Brad’s blog, while it would be a good resource for learning 3D modeling, has not gone very far with animation. Therefor I opted to skip over it for my resource this week.
This week we took a deeper look into Digital Literacy. Similar to the “Digital Fluency” element of digital citizenship we explored in the past, Digital Literacy is defined by The American Library Association as “the ability to use information and communication technologies to find, evaluate, create, and communicate information, requiring both cognitive and technical skills.”. According to the National Council of Teachers of English, Digitally Literate people must be able to:
In order to “participate effectively”, “engage critically”, “promote culturally sustaining communication, and “counter unproductive narratives”, users must have the ability to differentiate between real and fake content. This is an incredibly important aspect for our students to understand if we want them to be able to navigate, and exist in the digital world.
According to the video “Helping Students Identify Fake News with the Five C’s of Critical Consuming” studies have shown that only 25% of high school students were able to identify real news stories. Digital tools allow anyone to create fake, but convincing messages in order to achieve any number of desired outcomes including sowing division and generated views and revenue. This is concerning considering the quantity of false or misleading information that is presented as facts in the digital world. In fact, studies show that misinformation gets more traffic than real news, as discussed in the article “Developing Critical Literacies: What We Need to Know in a “Fake News” World”.
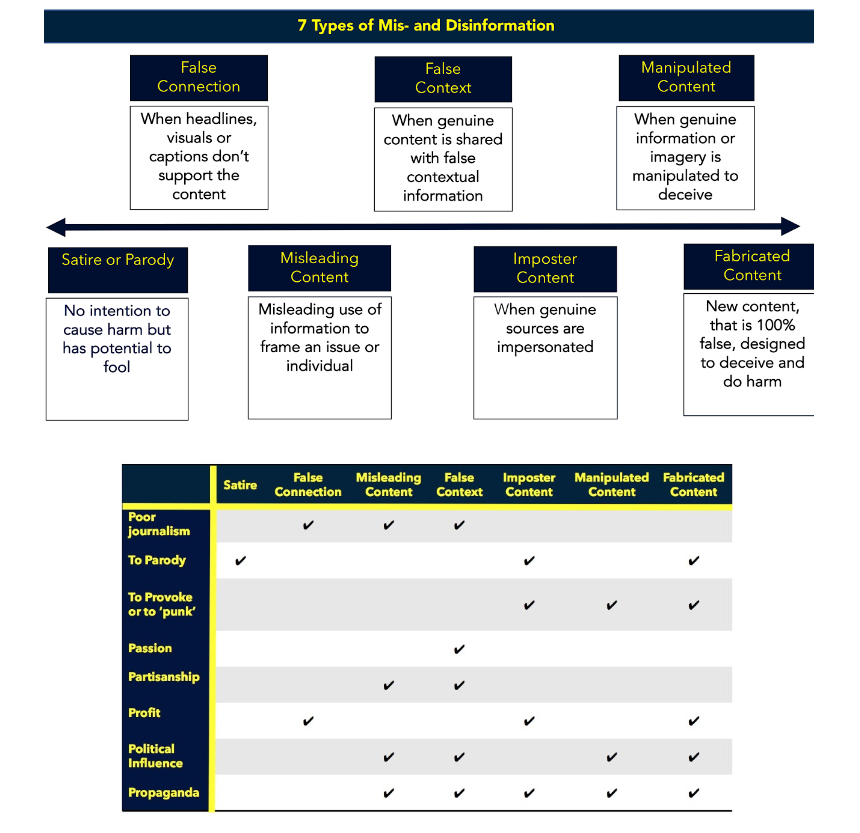
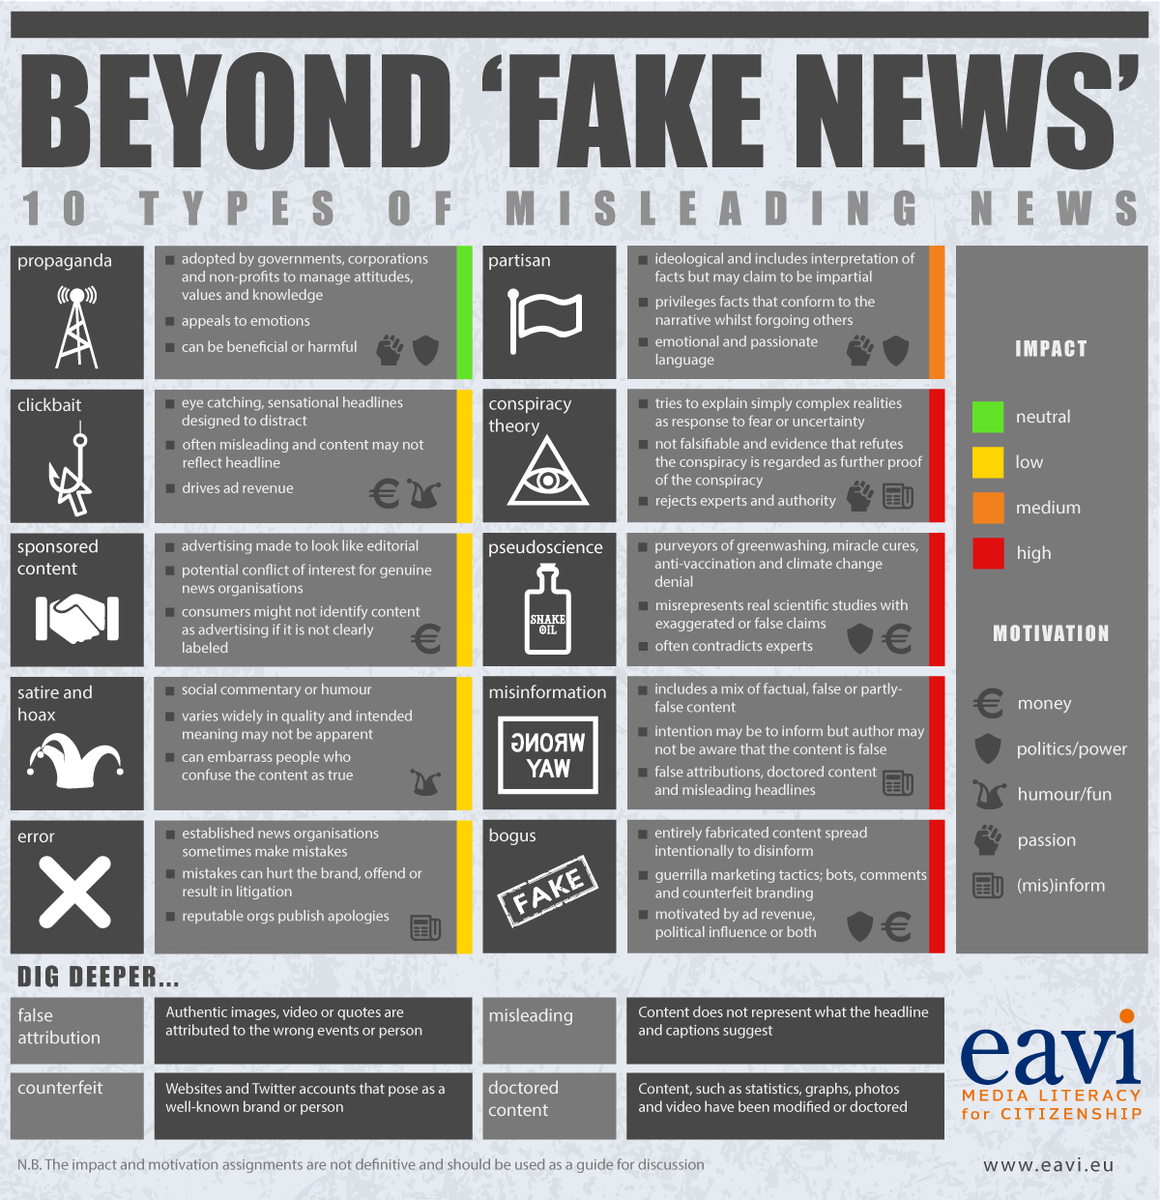
So how can we help students safely navigate the internet? One way to start is to teach them about the different types of misinformation. This can be done using models like the ones created by Claire Wardle or Media Literacy for Citizenship. (Shown below)
After students have an idea of what types of misinformation there are they still need to be able to identify it. As a future middle year teacher, the students in my classroom will most likely have plenty of exposure to misinformation online. One strategy that students could be taught to help evaluate online sources is the “5 C’s method”
One Connection that could be made to the grade 7 curriculum would be the ELA outcome CR7.7.
CR7.7: Read independently and demonstrate comprehension of a variety of specialized information texts including non-fiction books, grade-level instructional materials, articles, reports, reference materials, instructions, advertising and promotional materials, and websites.
With this outcome you could emphasize the importance of digital literacy when viewing information texts online. After practicing strategies to identify fake content students search out their own articles, or be provided with them, and as part of their comprehension identify whether they believe the article is real or not. With notable connections to indicators:
Identity had been forever changed by the Internet: formerly it had meant “who you really are” but now it meant “any one of a number of persistent faces that you can present to the digital universe.
– Neal Stephenson
This week we explored the concept of Digital Identity and investigated the kinds of presence people project onto the digital world. We were also asked to read two articles about digital identity. The main takeaway from these articles was that the identity people showcase on social media does not accurately reflect their entire lives. Many people only show the highlights and project an ideal life, while others go as far as displaying different identities for different corners of the internet. This makes sense as different sites can be used to reach different audiences in order to serve different purposes.
The Question is, can you keep these identities separated from each other, and separated from your real life? As technology grows more and more prevalent in every day life the answer seems to move closer and closer to “No, you cannot”. Two videos we watched delved into the consequences that can occur when you are not careful about what you put online. In a Ted Talk by Jon Ronson, we see how a single tweet made by Justine Sacco resulted in the whole of twitter uniting with the goal of ruining her life. I will admit, I remember when her tweet went viral. I was not on twitter and did not actually participate, but I had no sympathy for her. I never did hear her side of the story, and I had no interest in it.
I think it is easy to look at people being shamed on social media and think that they should know better than to post whatever it was that got them in trouble. Especially when I myself am very private and post almost nothing online. However, after watching the Ted Talk I thought about how easy it is to misinterpret what people say in the digital world. Even when messaging loved ones who know me better than anyone else, there are times when they interpret my words in way I had not intended. In the case of communicating with loved ones, there is opportunity to communicate and work through the misunderstanding. However, it seems internet strangers rarely grant that luxury.
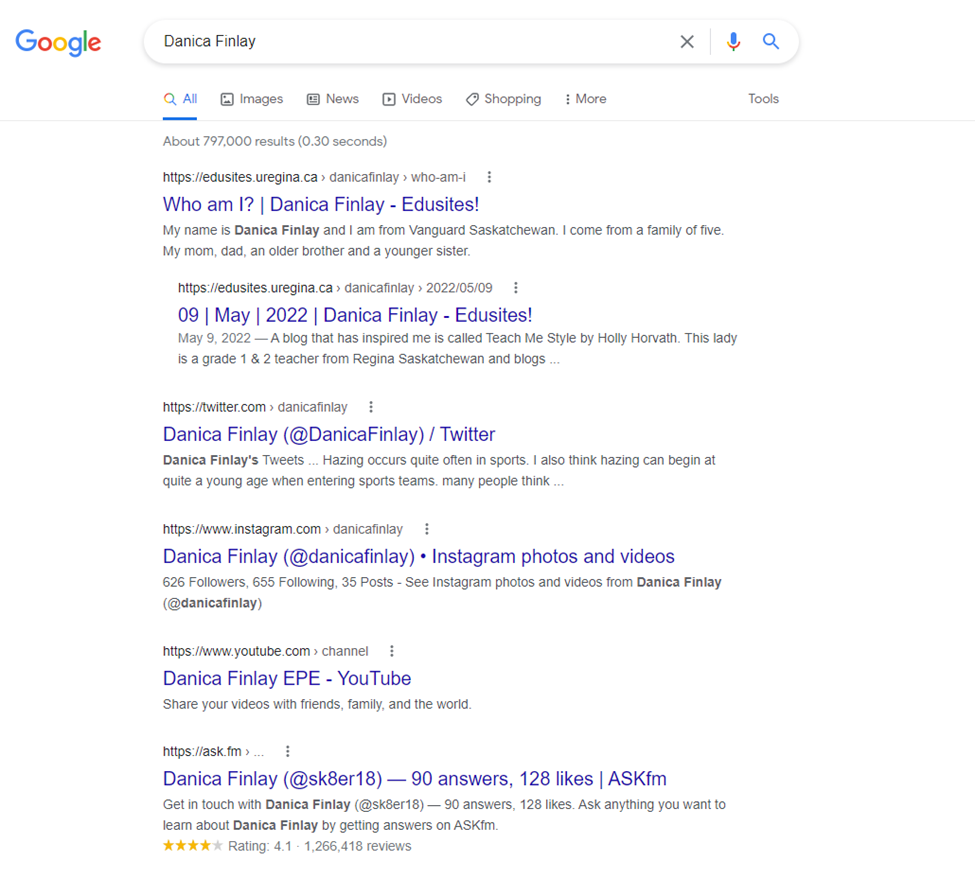
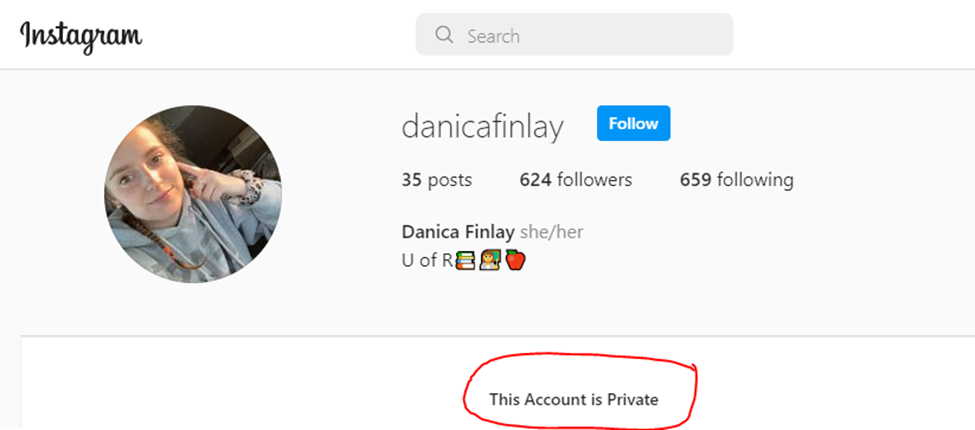
With these ideas in mind, my task this week was to cyber-sleuth my classmate Danica Finlay in order to see what kind of identity they present to the digital world. With a quick google, I was immediately able to find a variety of her social media accounts as well as her ePortfolio. Her Instagram was set to private and I was not able to explore her facebook without an account of my own. From those two sites, I was still able to see where she went to school and that her pronouns are she/her. I also found that she has a YouTube channel with one public video for an assignment she did in an EPE class.
Her ePortfolio is where you can find the most information! On this site you can find information about her and her family, where she grew up, her education history, and her teaching philosophy and belief statements. She also has example lesson plans and a ton of resources linked. Something I thought was really cool was her section of quotes that stood out to her.
I think the digital identity I was able to find portrays Danica as a compassionate and dedicated future educator. She has done a good job of managing her online presence in a way that should benefit her and the way she is perceived by future employers, peers, and parents!
Digital citizenship is defined by Ribble as “the continuously developing norms of appropriate, responsible, and empowered technology use”. With the increase of technology usage and access to social media among children the reality is that educators must be prepared to teach students at all grade levels how to navigate and participate in the digital world. Ribble identifies nine key elements of digital citizenship:

As someone who will be in a middle year’s classroom for my internship this fall, I have decided to focus on that age range when making connections to the Saskatchewan curriculum, specifically grade 6. The subjects I believe have the most potential when it comes to making connections to digital citizenship are Health, English Language Arts, and Social Studies, however teaching . The first outcome I will talk about is the Health outcome USC6.1:
“USC6.1: Analyze the factors that influence the development of personal standards and identity, and determine the impact on healthy decision making (including cultural norms, societal norms, family values, peer pressures, mass media, traditional knowledge, white privilege, legacy of colonization, and heterosexual privilege).”
This outcome can be connected with the element “Digital Health and Welfare” as well as “Digital Etiquette”. The conversation of personal standards could be expanded to identify how peoples’ standards and boundaries may be different online. How they behave online and what treatment they will accept from others. Additionally, they could explore how their standards may be affected or challenged by what they see on social media. For example, how the “Devious Licks” trend on TikTok encouraged students to vandalize and destroy their school bathrooms, an act that they would most likely never consider appropriate before seeing the trend.
The next connection I found comes from the ELA outcome CR6.2:
“CR6.2: Select and use appropriate strategies to construct meaning before (e.g., considering what they know and need to know about topic), during (e.g., making connections to prior knowledge and experiences), and after (e.g., drawing conclusions) viewing, listening, and reading.”
This outcome could be connected to the element “Digital Fluency”, specifically media literacy. For this learning outcome, students would explore accessing information online. They could be given strategies to critically evaluate information before, during, and after they read it online.
The final connection I will discuss comes from Career Education outcome LW6.1:
“LW6.1: Examine effective practices such as responsible decision making, cooperation, and accepting diversity and predict their continued importance in one’s own career.”
This outcome can be connected to “Digital Etiquette” and “Digital Communication and Collaboration”. With indicator c), students could be taught about how their online identity and presence can be seen by anyone and look into how they choose to present themselves may affect future job opportunities. The can also take this opportunity to practice collaborating with others online, for example doing a group task/project where they can only communicate via email or other digital communication methods.
This week I began working on the final animation for my learning project! I have decided to animate my character model doing one of the many viral dances found on TikTok. This is no small task! Therefor, I will have to continue working on it next week, and hopefully complete a finished video for the end of our class. For reference, the walking animation loop I created last week was one second long and had 32 frames, while the dance I have chosen to animate as a final project will require just over 600 frames!
So, what is the dance I have chosen? I’m glad you asked! I chose to animate the dance created by TikTok user @jessqualter for the song “Jiggle Jiggle” – Note: I have seen multiple titles for the song but this is what is listed on the original TikTok video. I chose this dance for a few reasons. First, it went viral only in the last few months, which I feel makes it a more relevant choice than other dances. Second, the dance has many moves that are repeated/mirrored. This means that, for animating, I can save time by copying and pasting!
Naturally, I used TikTok this week in order to search for and select the dance I wanted to animate. Because I was already on the platform, I decided to see if I could find any resources for learning animation in Blender. I was pleasantly surprised by what I found! Because of the video length limitations of TikTok, I do not believe it is a platform that lends itself well to tutorials for beginners. However, I was able to find multiple videos that share other websites and tools to use for animation. The first example was this video which shows a website you can use to create a custom character and download it into Blender fully rigged and ready to animate. Another video shows a website where, after creating your own character model, you can upload it to the website and the website will create animations for you, which you can then download and import back into Blender!
The following video shows the progress I made this week, I have completed approximately 1/3 of the total frames I will need to animate.
My hope is to have the dance completed for my final learning Project post next week, with it, I will hopefully have time to include a video that walks through the animation process and my thoughts while I was working on it, including the portions I animated this week.
Self Reflection:
I think I had a good start to animating the dance this week though I am nervous about whether I will finish next week or not. One of the things I have picked up on while working is that, even though I am able to copy and mirror dance moves that are repeated, I need to go in and make some adjustments to each one. If they remain exact copies, I find the moves end up looking robotic.
Resources Evaluation:
I was pleasantly surprised with what I was able to find on TikTok this week. As I mentioned, the video length limitation means the platform is not suited for complicated step-by-step tutorials with explanations for beginners. However, there is a decent number of creators sharing what seem to be incredibly useful tools. Even though these tools were not applicable to my project this week, they are certainly tools that I would like to explore using in the future.
Plans for Next Week:
This week I decided that rather than just recording the finished product of my work animating, I would record a video explaining the process as I did it. The fact that I tried to explain what I was doing while working resulted in many takes required! This meant that I needed a program to edit my many clips together in order to remove mistakes and produce something worthy of sharing on my blog.
I decided to try using Davinci Resolve which can be downloaded for free here. Right away I can tell you this program was overkill for what I needed!
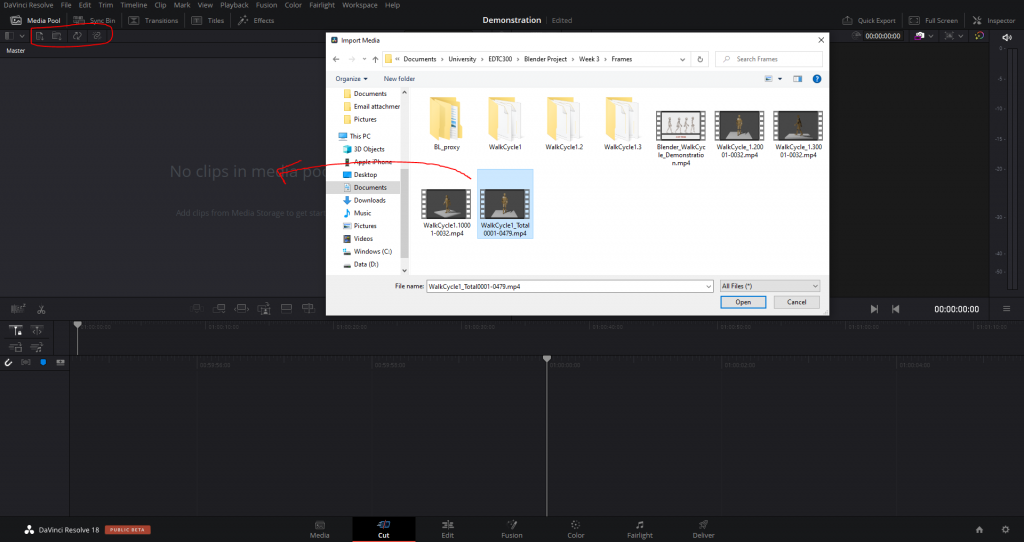
When you first open a project, you will see this screen. I have labeled some of the important areas of the screen in the image below.

If you look at the red box in the image above you will see we start in the “Cut” module. This is where much of the work gets done adding and snipping video and audio clips in the “Timeline”. The “Media Pool” is where you store the video and audio clips you wish to use. You can add clips by clicking on the buttons in the red box or by dragging the clips from a file browser into the pool as shown in the image below.
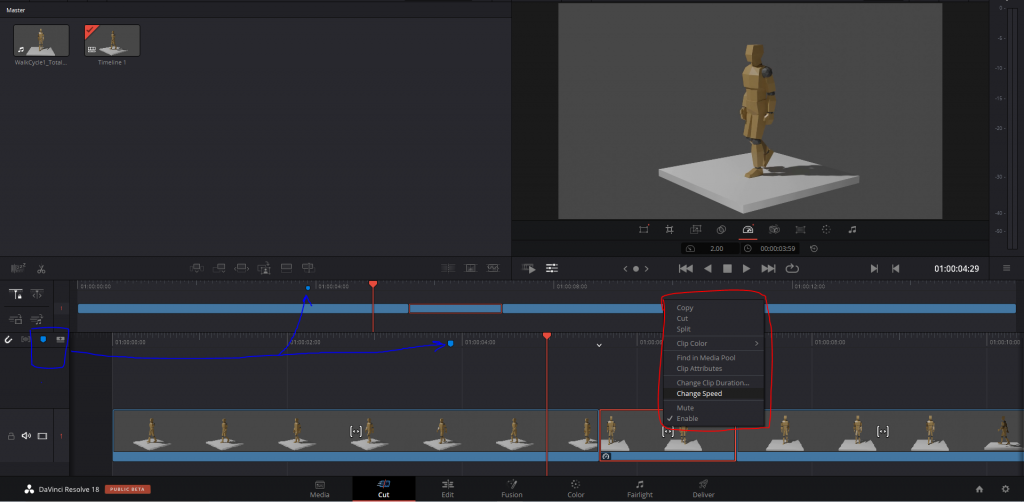
Once clips have been added to the timeline, you can view the project in the “Preview Display”. The Top bar of the timeline allows you to scroll through the entire project, while the bottom bar allows you to scroll through seconds at a time, even going frame by frame.
You can add markers which appear in both bars of the timeline in order to identify sections you need to work on. If you right-click on the lower bar you will see the various options in the red box in the image below.
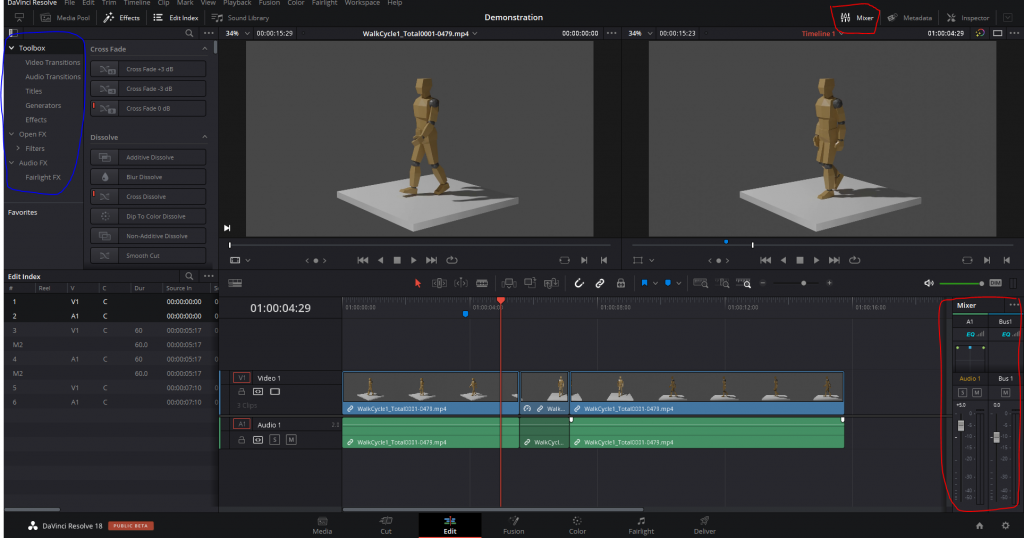
In the Edit module you have the ability to open the mixer in the top right which allows you to control audio levels and, in the top left you can see the toolbox which includes tools such as transitions and titles.
There are MANY more tools and resources available within Davinci Resolve! It is a complicated program that was pretty overwhelming so this was as far in depth as I got while using the tool for my learning project.
I hope to continue to explore with this program and learn more about it as I keep working on my animating and editing!
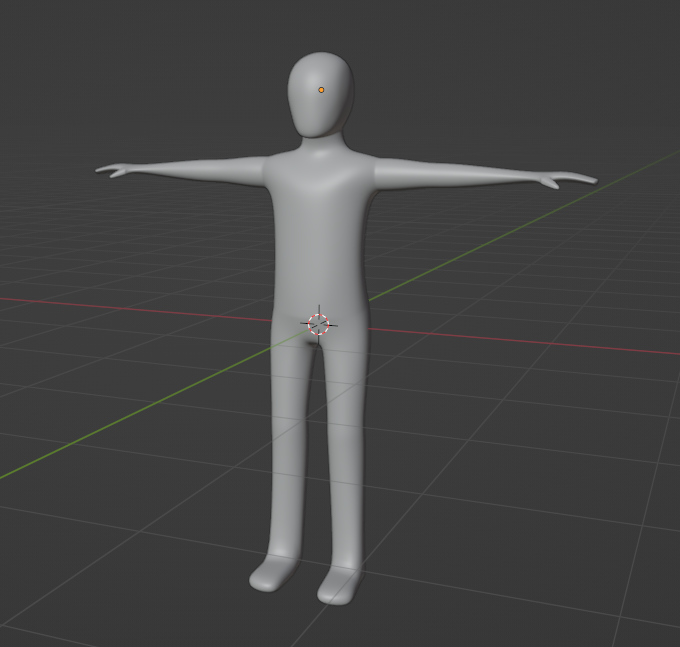
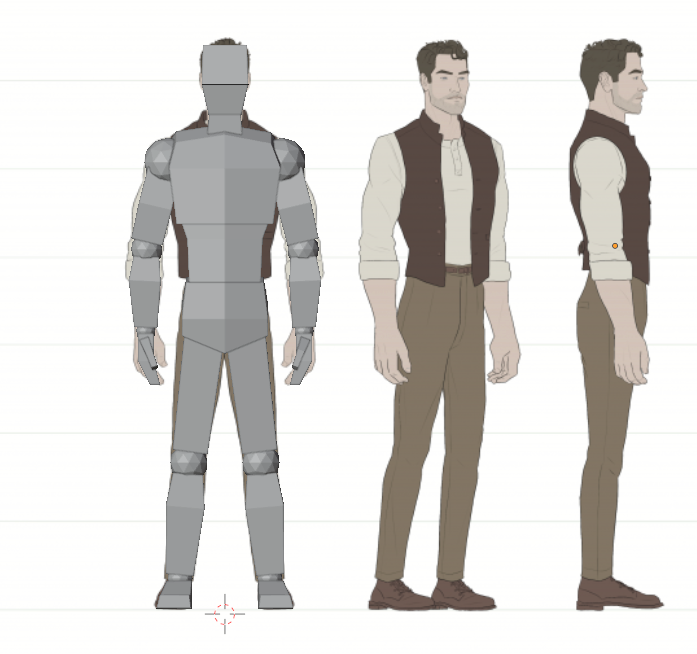
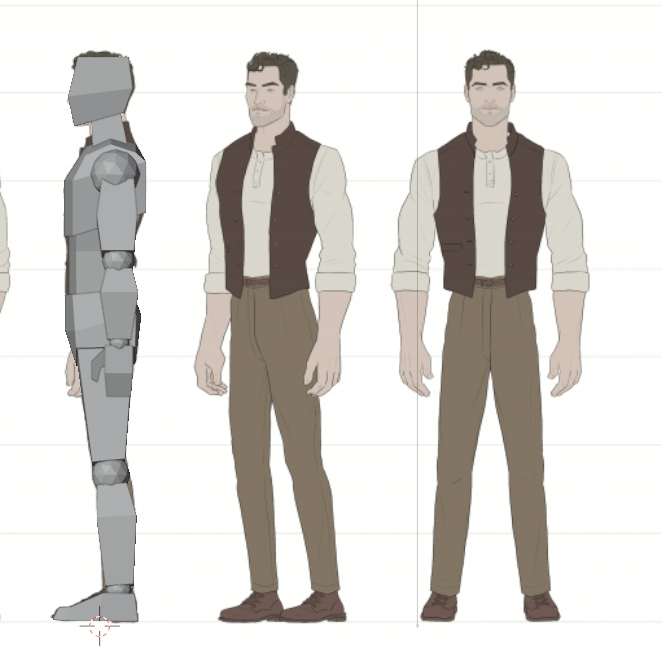
Last week I created a basic character model and learned how to rig it using an armature skeleton in order to manipulate the model into various poses. My goal for this week was to use that character model and learn how to animate a walking cycle. As I mentioned in my previous post, the character model I created had some issues with joints deforming when I would bend them. I was still pretty happy with what I had made, but I decided I would try creating a new character model, this time using a different approach.
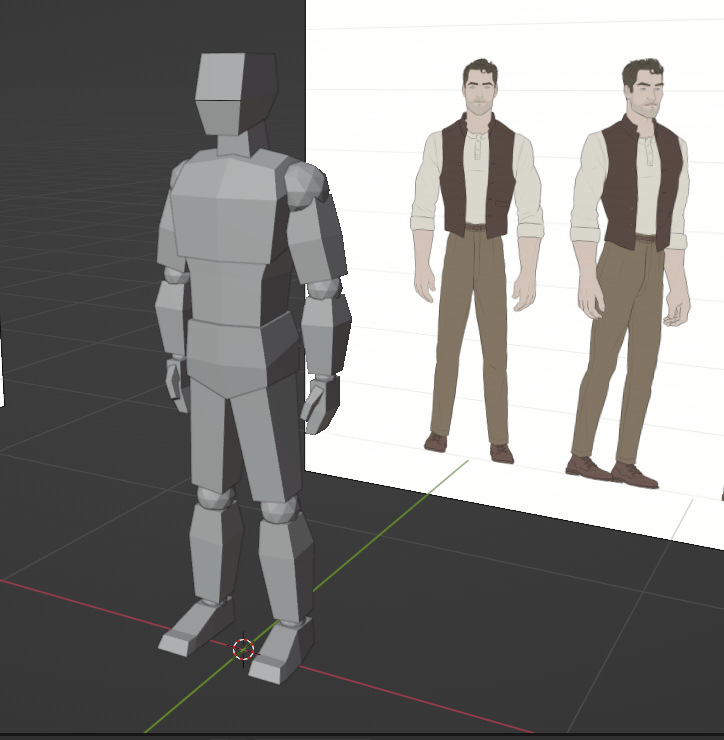
The model I created last week was a single object. This meant that when I moved the armature skeleton inside it, the model had to stretch and deform a little in order to fit the shape of the rig. This week, I got inspiration from Grant Abbitt on YouTube, who created a tutorial on creating a low-poly character model which can be found here. With this model, I made each piece of the model its own object, which could then be attached to the individual armature bones I wanted to control them!
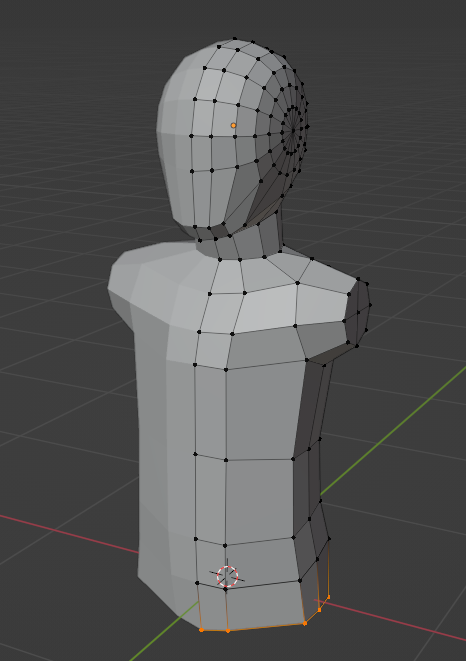
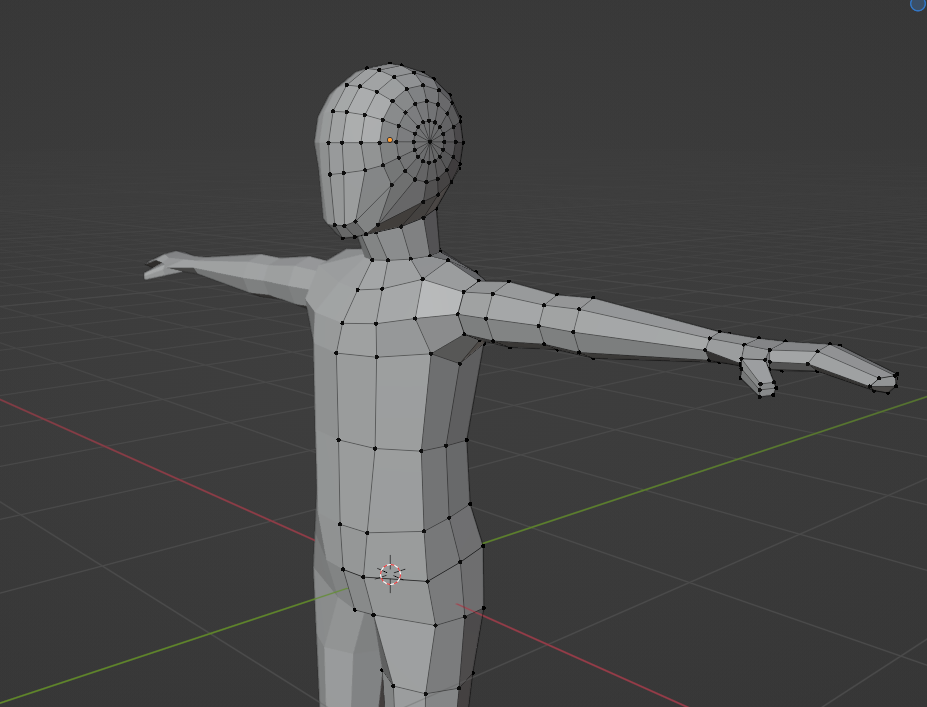
I downloaded a character turnaround I found on google in order to use it as a reference for the size and general shape of my character model. However, rather than attempt to copy more details, I created my model with the intention of making it look almost like a crash-test dummy. The reference image can be found here.
The images below show my new character model with the reference images in the background.

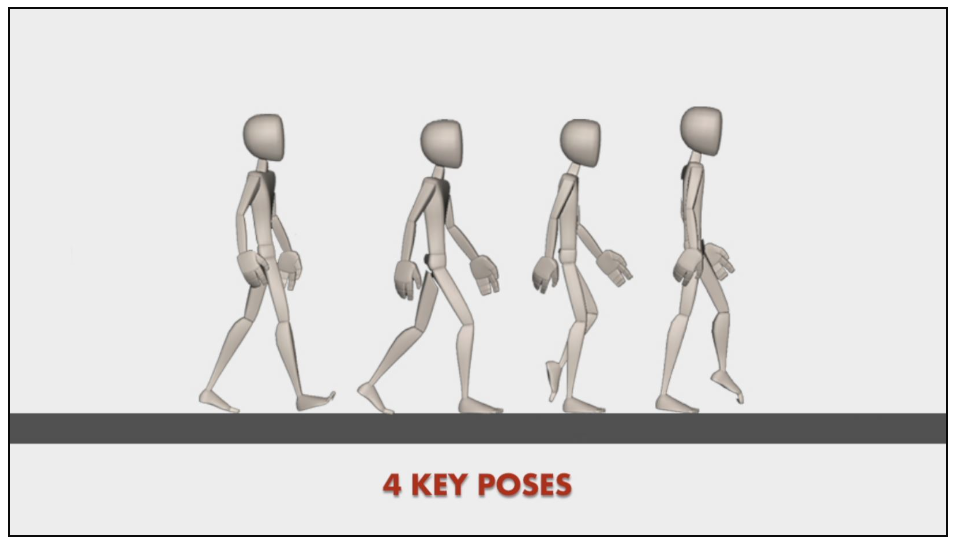
Now on to animating! I followed the same tutorial I used last week in order to create the armature skeleton to control the model. While looking into what actually goes into creating a walking cycle, I came across a website for Rusty Animator. This site has tutorials, blog posts, and even a podcast! One of the tutorials available is for creating a walking cycle. A walking cycle has four key poses: The Contact pose, Down pose, Passing pose, and Up pose. After completing these four poses they are repeated, this time mirrored, in order to create the second step.
When it came to creating my walking cycle in Blender, I only needed to create these four poses for my character model and inserting them at key frames in my animation. I could then mirror the poses for the second half of the walking cycle. Once done, Blender actually moves the armature rig in the frames between the poses I created to switch from poses to pose. Therefore, I only had to manually create 4 out of 32 frames in the walking cycle animation!
The first video below demonstrate the process I used when creating the walking animation and the second shows a clip of the final animation from various angles.
Self Reflection:
I ended up creating a new character model this week and even though it is more blocky and less detailed I am much happier with it than my previous model. There are some areas which I would like to improve on the model, such as allowing movement of the toes and fingers.
I am very pleased with how the walking animation turned out in the end. One detail I did notice after finishing the render is that the knees turn outwards slightly during the animation and this was something I missed because I was primarily working in the side view perspective.
One thing I found this week while exploring tutorials is that there are countless methods for setting up the armature skeleton. I would like to explore different ways to set up my model rig to see what feels best and see if I can improve some of the areas I mentioned above.
Resources Evaluation:
This week I found another YouTube channel (Grant Abbitt) which I used for guidance when creating my new character model. From what I saw exploring their channel, their videos are tailored towards specific tasks rather than general tutorials. A lot of the videos I saw were much shorter than other tutorials I’ve explored. I think their channel is a good resource for me to use at this point in my learning journey, however if I came across them in my first week, I would not have been able to follow along very well.
Moving on to my actual goal for this week, creating the walking loop, I was very excited to find a non-YouTube resource! The Rusty Animator website was a fantastic place to learn about creating walking cycles. The creator is clearly very knowledgeable and does a great job of explaining the process and theory that goes into animating. Their tutorials show you the steps to achieving the animation you want while diving deeper into explaining the thought process which allows you to learn how to make an animation of your own rather than a copy of exactly what you are shown. I will definitely be exploring this resource further in the upcoming weeks!
Plans for Next Week: