Summary of Learning Project

Throughout the semester I wanted to learn how to do my hair better. I wanted to learn new ways to do my hair for my everyday life. I did a total of 9 different hairstyles. I originally said I would learn 2-3 per week, but this semester got the best of me and I tried my best to learn 1 a week. Throughout the semester I did enjoy learning new skills within my hair styling. This learning project helped me learn how to edit and upload videos to Youtube (which is something I’ve mastered). These skills that I’ve learned will help me throughout the rest of my career as a teacher.

The Start of My Hairstyling Journey! 

This is my first post were I give my backgorund of hairstyling. (which is very little)

Post #2 My TikTok Hair-do’s 

Here is where I start my hairstyles, these hairstyles have been a staple in my daily life.  Here is also where I start to understand how learning through TikTok social media works.

Post #3 I Finally Learned How to Fishtail Braid! 

I have always wanted to leanr how to fishtail braid. I was so excited when I realized how easy it was to learn through Youtube. I had never really tried to leanr through videos like this and finally doing so gave me a new confidence that helped me throught the rest of my learning project.

I am a Social Media Influencer! 

This is where I really started to learn how to use video editing and how to post to on youtube. I found it very helpful to learn to you VN and Youtube as I had to make and upload a video for a different class this semster.

The Perfect Going-Out Hairstyle 

Here I take another look at learning through Youtube. I was very impressed as I couldn’t find export the videos i wanted from Instgram. YouTube has always been easy to use and the videos are longer and easier to stop when I get behind.

My New Fav 

This hairstyle was found on Pinterest. It was an easy to follow video that was easy to find and a great way to learn. Pinterest was a great tool to help my learning.

Perfecting my Video Editing Skills 

In this post I was looking for a new video edtior but found that I VN the editor I had used previously was the best. I tried Canva but found that it was more for presenting videos that have already been edited. After trying Canva I tried iMovie. I found that iMovie wasn’t what I was looking for either.

This One Didn’t Work Out 

Here I decided I would give iMovie a second chance. I knew I wouldnt run into the same problem I had in my last post beace this video was much shorter and didn’t need to be speed up. I found that iMovie worked perfectly for this type of Video.

Taking a Deeper Look at Video Editing 

This post I took a deeper look at VN thw video editor that I found was my favourite and the easiest to use. I decided I was going to add a little more to my vidoes. It was alot of fun to take a deeper look.

 

Taking a Deeper Look at Video Editing

For this week I decided to take a deeper look at my favorite video editing app called VN. I have talked about VN before and how good I believe this app to be, but today I wanted to take a better look at what it can do. I didn’t think of taking this deeper look before I recorded my video. If I had I would have broken the video into smaller videos so I could see how well I could get the video to be seamless. I had to work with what I had and just kinda play around and add fun things like stickers and some effects. Well I was playing around and I found a lot of cool features like fading videos in and out, something called mosaic where you can blur a subject’s face out, reverse, freeze and so much more. Although I did not use all of these features in my finished video I did enjoy figuring out how they work and what they do. I found it so fun and easily added a little more spice to my normal videos by adding stickers. There were so many stickers to choose from and there were so many ways to incorporate them into your video. I decided it would be fun to add some cute hearts to the start of my videos and at the end I decided to say a little thank you by adding a sticker. Then I found the effects and added a little fun to the very beginning. Taking a deeper look at VN helped me understand video editing so much better. 

This week’s hairstyle was a fun one. I found this week’s inspiration on TikTok. I didn’t do the slick back because I have never been a fan of that look on me. The hairstyle came out the same without the slick back. To start the hairstyle I had to bring my hair into a high ponytail. I wanted to put in my favorite scrunchie but forgot to add it. After I had my hair in a high ponytail I simply had to divide the ponytail in half and braid each half. I started with the top half and then brought it over my head so it wouldn’t get in the way


This One Didn’t Work Out

Today I wanted to give iMovie a try again. This time I tried a hairstyle that didn’t take as long, so the video was much shorter and didn’t need to be sped up. Once I put my video into iMovie it was very easy to find what I was looking for. It was very easy to input my video into the app, since I looked at the app last week I had a good idea of where I was looking and how to use it. This was very helpful when I was using the app and editing my video. When using iMovie I found it easy to take away the background noise and add music. It was super easy because there was already music ready for me to use on the app. I think iMovie is very useful if you are editing a simple and short video. Last week when I tried with a video that was more complicated and much longer, iMovie wasn’t very helpful and couldn’t do what I was looking for. Today when I used iMovie it was simple and got the job done perfectly. 

The hairstyle I tried today was from TikTok. I thought it was going to work out so well and be so easy. Although it was relatively easy it didn’t work out as well as I wanted it to. The video showed the girl curling her hair but today I didn’t have time to get that fancy. To begin the hairstyle I started by sectioning my hair into a half-up and making a little ponytail at the back of my head. After this, I took the ponytail and made a gap between my hair and my head. After I had the gap I fed the ponytail through the gap from the bottom. Once I had done this I tried to pull the ponytail a little tighter to help create the look I was going for. Unfortunately, the look did not turn out, it was a little disappointing but sometimes things just don’t work out the way you want them to. 


My hairstyle that just didn’t work out

Perfecting my Video Editing Skills

I found my inspiration for my hairstyle on pinterest, but that’s not what I want to talk about today. I thought I’d give video editing another try. I wanted to use a different app than I had used previously, but that didn’t work out quite how I wanted it to. To begin looking for a new platform I went to my app store on my ipad, and typed in “video editor”.  The first couple that came up were Canva and VN. VN video editor was the platform that I had used previously for this class. When I first saw Canva I was excited to use it because it is a platform that I like to use frequently for other classes and I have played around with making some posters. When I got into Canva it took me a second to find where I could edit a video. When I finally did find where I could edit my videos it was a little disappointing because I could tell that it wasn’t what I was looking for. It appeared that its use was more for making a video for a presentation. There was no place to speed up my videos, add music, cut clips, and I also couldn’t figure out how to put my two videos together to make one. After this I decided to try iMovie to edit my video, I had high hopes for this one as I have used it a couple times before. I was still disappointed by the platform. When I went to speed up my video it would only allow me to speed it up a little bit, but I needed to speed the videos up much more. So after trying to figure out iMovie and not getting what I want I decided to just go back to VN. Once I started editing my video on VN it was so easy. I could speed it up just the right amount, I easily added music and easily figured out everything I needed. As much as I wanted to learn a new tool I think using the tool I already knew worked out way better. 

Now to the actually hairstyle, I was disappointed by the hairstyle. There was nothing wrong with the hairstyle itself. It took me a very long time and I struggled with keeping all the little braids separate. To start the hairstyle I put my hair up into a high ponytail with my favorite scrunchie. After I put my hair into the ponytail I took a small chunk of my hair and started braiding it. I then finished braiding the first chunk and then proceeded to continue this process until the whole ponytail was little braids. I was supposed to put a little elastic ponytail onto all of the little braids but my mother did not have any, so I just left them without. Everything worked out fine and it was kind of cute, but it definitely won’t be a hairstyle I will be doing again.

My latest hairstyle


My New Fav

If you haven’t noticed by now that I like to braid my hair, you will see again how much I do. I’ve been looking on everything I can think of for new hairstyles that I would actually be able to do and would actually wear. I have been thinking of ways to find new hairstyles and I have only been looking on social media. Social media is such a big part of my life that it is easy to find inspiration. I found this hairstyle when I wasn’t even looking for it. I found this hairstyle on Pinterest. Let’s talk about Pinterest, there are so many ways to use Pinterest. There are so many ideas and how to’s that go into great detail. Pinterest uses eye-catching pictures and posts to grab the attention of those scrolling. Although not all recipes and instructions on Pinterest work out or are reliable. There are a lot that are as easy as they claim to be. I go to Pinterest for mostly recipes and tattoo ideas, but this time this awesome hairstyle caught my attention. 


My New Fav Hairstyle

This hair style has to be the easiest one I’ve done so far. This has to be one that I will work onto my go to hairstyles. To start the hairstyle I started by creating the start of a normal low braid at the base of my head. After this I broke the three pieces of the normal into two halves. I then put one of the halves into a scrunchie so I would not mix the halves up. After I put one of the two halves into a scrunchie I broke the half into three pieces so I could begin braiding the half. After I was done braiding the first half I put a ponytail elastic on the end and began on the second half. When I started braiding the first half I was worried that the braids would not stay tight. That was not the case. Both braids were tight at the top and turned out perfectly.


The Perfect Going-Out Hairstyle

 I have been in a rut while trying to find inspiration for my learning posts. I have mostly been trying to find my inspo on Instagram and TikTok. Throughout my posts, most have been from TikTok as they are the easiest to export to my laptop. I find awesome ideas all over my Instagram but can’t export them and give credit to the creator. This is still something I am trying to work around as there are a couple of cute hairstyles I really want to try but can’t seem to figure out how to export them so I can share the videos here. Well, I’m still trying to figure out my issue so I decided I would take a look at YouTube. I never seem to be disappointed when it comes to YouTube. YouTube is something I am fairly familiar with and can navigate fairly well. To start my search I put “easy braid hairstyles” into the search bar which brought up a lot of different types of braids that weren’t what I was looking for. So I decided to try “trend braid hairstyles”. I found a video that was exactly what I was looking for. Before I started doing the hairstyle I shared the link to my laptop to make sure I could use the link within my post. Overall YouTube was very easy to use and simple to bring onto my laptop. 

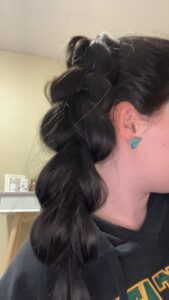
Now to the hairstyle. Today I wanted something a little more than what I normally do, as I am going out with my friends this weekend. The hairstyle needed to be cute, easy and out of my face as I would be dancing my heart out. I decided to do the Viral Faux Braided Ponytail. The whole hairstyle consists of using little ponytails to create a big faux braid. To start I put my hair up into a high ponytail, after I had my ponytail as I liked I flipped my ponytail in front of my face. After I flipped the ponytail in front of my face I split it into two parts. I took the bottom piece and split that in half again and then brought the two pieces on each side of the top part and then secured the two pieces with a small ponytail. I then repeated this process down the length of my hair. I think this hairstyle turned out well and will definitely be one of my go-to going-out hairstyles.

My Viral Faux Braided Ponytail


I am a Social Media Influencer!

I felt like I was the coolest social media influencer the whole time I was recording and editing my video this week. My procrastination was taking over me as I kept putting off recording. I thought it was going to be difficult to edit the video and to be honest, I thought I was going to look terrible. To my surprise, I was wrong on both accounts. The editing process went a lot smoother than I expected. The whole editing process took about twenty minutes. I thought about using my Mac but landed on using my iPad. The idea of using a video editor wasn’t completely new to me, but I wanted to try a completely new app. So I went to the app store and found VN Video Editor. Before I even downloaded the app I took a look at the preview and ratings & reviews. The preview caught my eye, because of the simple look of the app and its features. The reviews raved about how simple and easy the VN Video Editor is to use. Once I got the app downloaded and ready to use, I simply allowed access to my camera roll and selected the videos I wanted to use. After I selected the videos I cut the parts I didn’t want and sped up the part I wanted. The process of speeding up my videos took some trial and error, but once I figured out what speed worked best it was a breeze. After all my videos were at the speed I liked I added some music. There were so many opinions of music to choose from right on the app. I chose an upbeat happy melody that added some much-needed life to my video.  In the end, I had to upload my video to YouTube to be able to add it to my post. This wasn’t that big of a deal to me because I had previously uploaded different class projects.


Using VN Video Editor in the classroom added some life to group projects, simple presentations, and regular assignments. With this tool, you could modify simple classroom assignments into something fun and interactive for your students. The idea of bringing new technology into the classroom is something we see often, but is it all equal? With the SAMR model we can start to see at what stages we are bringing technology into the classroom.“…[T]his educational technology model stands for Substitution, Augmentation, Modification, and Redefinition.”(Tammy, 2022) This model helps us see how well we can incorporate new technology into the classroom of all ages. 

Let’s talk about my learning project now! As you can see in my video I tried a new twist on a classic high ponytail braid. The high pony braid is not a new idea to me, this has been a hairstyle I have been using for many years. So when I was scrolling through Instagram and saw the perfect twist to an already great hairstyle I had to give it a try. It was super simple to start, I just simply pulled my hair into a classic high pony after this, we see the new twist! I section off my hair into three parts as if I were going to start a classic braid. Instead of braiding the three sections, I take one section and braid the section. Now I should have one small braided section and two non-braided sections. After this, I simply braided all three sections together to create a beautiful braid with a fun twist. 

Tammy. “Teaching Digitally the SAMR Model.” The Owl Teacher, 23 Sept. 2022, theowlteacher.com/all-about-the-samr-model/.

Post #3 I Finally Learned How to Fishtail Braid!

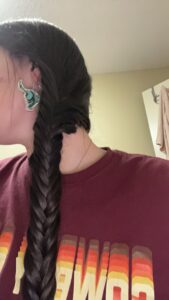
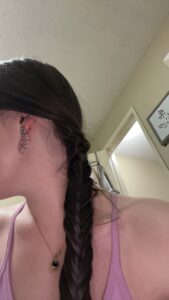
I’ve always wanted to learn how to fishtail braid. I have always admired girls with long beautiful fishtail braids. I thought it would be so different and I would never be able to get it. So I went to my good friend YouTube to show me how it’s done. I found the perfect video and caught on to the braid in about five minutes. I started by just using a smaller chunk of hair from the front of my head so I could really see what I was doing. After I had gotten a good idea of what I was doing with the smaller chunk and gave all of my hair a try. I didn’t have it down well enough to start at the back of my hair, so I did more of a side braid. I did have some trouble doing all of my hair but I pushed through and it turned out good enough that I could wear it all day. The next day I re-watched the perfect video and got to work practicing my fish tail. On the second day, I got really adventurous and tried to start it from the back of my head like I would do with a regular braid. I got it done and it was a little bumpy but I thought it was pretty good for my second try. On my last try of the week I did the same as the second day and just tried to get the hang of it. I wouldn’t say I mastered it over the week but I definitely know what I am doing and will be doing a fishtail braid a lot more. 

My first real attempt

My second attempt

My last attempt

Now let’s get into learning from YouTube. I do find it a little overwhelming to scroll through and pick what video is going to work best for me. To help this feeling I just decided I would give the first five videos a watch until I found the one that worked best for me. I think this helped me catch on to the actual braiding part because I had watched so many different ways. I did come across the perfect video that really broke down and showed me every step I needed to do the braid as best as I could. Overall I found that I enjoyed learning from YouTube, it had a lot of videos to choose from and the videos went into really good detail. 


Post #2 My TikTok Hair-do’s

Post #2 

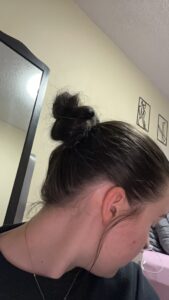
The first hair-do I did this week was a simple messy bun. The idea of a messy bun seems easy, but as some may know it is not so easy. The messy bun is supposed to be messy but can’t be too messy, because then it falls out and defeats the point of putting up your hair. The messy bun I tried was actually very simple to do. The part that took the most effort was making sure there were no bumps on the top of my head. The actual bun was just simply making almost knots. I started by putting my hair into a simple ponytail, then I started the almost knots. The almost knots are the part at the start of the knot when you cross your two strings over each other. I didn’t have the gel to slick my hair back but that wasn’t what I wanted to learn from the video. 

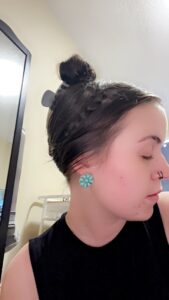
My second hair-do of the week was a simple claw clip updo. I love claw clips, they are my go-to when I need to throw my hair up. So well I was scrolling through TikTok and saw this hair-do I had to do it. It was very easy to do and was done in about five minutes. All I had to do was braid some front pieces of my hair on both sides and then put the rest up in a claw clip. This will definitely be a hair-do I will be doing more often.

My claw clip hair-do

My messy bun


Now let’s talk about the way I learned these hair-dos. Yes, I found them on TikTok. I won’t lie, I was scrolling and I wasn’t looking to learn something new or to like what I learned, but I did. I wasn’t expecting it to go well either. I didn’t think I would be able to get all the little details in the small amount of video. I did have to watch the videos multiple times but I did like that I could stop the video very easily. The ease of also knowing the app so well was something I found helpful.


The Start of my Hairstyling Journey!

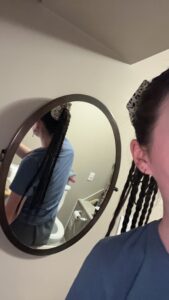
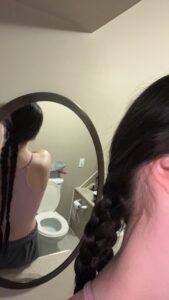
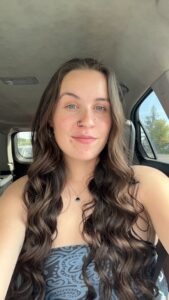
My hair has always been very long and I have always gotten compliments on how long and beautiful my hair is. My mother always kept my hair very long as a child, and other than the few times i chopped my hair off I have always tried to grow it past the waist of my pants. I have started to take better care of my hair these past couple of years. I started getting better shampoo and conditioner, hair oils, and heat protectant. These small changes have helped me become more confident about my hair, but I still haven’t mastered putting my hair into fun hairstyles. I know the basics like a basic braid, pony tail, half ups, curls and on special occasions some bubble braids. I’ve always wanted to learn how to do French braid, but I thought I might as well start there and work my way to cute functional styles.

The rare bubble braids

My go to curls

I have been seeing so many hairstyles I would love to try and fine tune on TikTok and Youtube. I decided that I am going to try 2-3 new hairstyles a week. I will document each stye and how well or not well it went, the challenges, the good, and what I would change for next time. I plan on keeping track of my fails and my positive moments helps me learn from my mistakes and pros. I hope to find a new confidence in not only my hairstyling ability but in my self and how I see myself in the future.