Summary Of Personal Learning
1
Throughout the semester I wanted to learn how to do my hair better. I wanted to learn new ways to do my hair for my everyday life. I did a total of 9 different hairstyles. I originally said I would learn 2-3 per week, but this semester got the best of me and I tried my best to learn 1 a week. Throughout the semester I did enjoy learning new skills within my hair styling. This learning project helped me learn how to edit and upload videos to Youtube (which is something I’ve mastered). These skills that I’ve learned will help me throughout the rest of my career as a teacher.
The Start of My Hairstyling Journey!
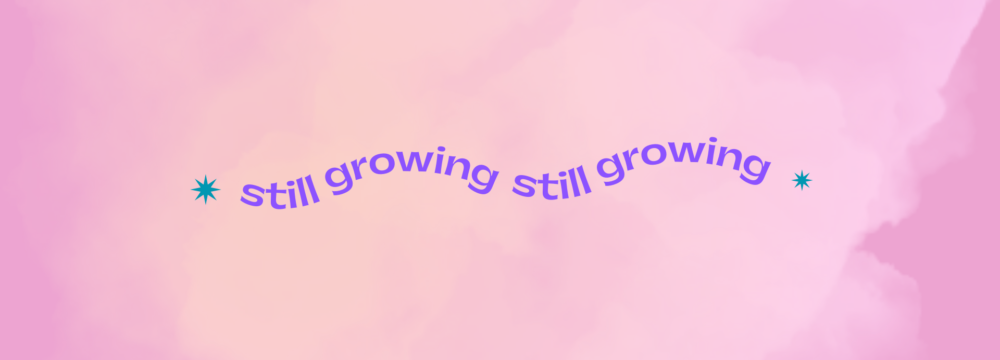
This is my first post were I give my backgorund of hairstyling. (which is very little)
Here is where I start my hairstyles, these hairstyles have been a staple in my daily life. Here is also where I start to understand how learning through TikTok social media works.
Post #3 I Finally Learned How to Fishtail Braid!
I have always wanted to leanr how to fishtail braid. I was so excited when I realized how easy it was to learn through Youtube. I had never really tried to leanr through videos like this and finally doing so gave me a new confidence that helped me throught the rest of my learning project.
I am a Social Media Influencer!
This is where I really started to learn how to use video editing and how to post to on youtube. I found it very helpful to learn to you VN and Youtube as I had to make and upload a video for a different class this semster.
The Perfect Going-Out Hairstyle
Here I take another look at learning through Youtube. I was very impressed as I couldn’t find export the videos i wanted from Instgram. YouTube has always been easy to use and the videos are longer and easier to stop when I get behind.
This hairstyle was found on Pinterest. It was an easy to follow video that was easy to find and a great way to learn. Pinterest was a great tool to help my learning.
Perfecting my Video Editing Skills
In this post I was looking for a new video edtior but found that I VN the editor I had used previously was the best. I tried Canva but found that it was more for presenting videos that have already been edited. After trying Canva I tried iMovie. I found that iMovie wasn’t what I was looking for either.
Here I decided I would give iMovie a second chance. I knew I wouldnt run into the same problem I had in my last post beace this video was much shorter and didn’t need to be speed up. I found that iMovie worked perfectly for this type of Video.
Taking a Deeper Look at Video Editing
This post I took a deeper look at VN thw video editor that I found was my favourite and the easiest to use. I decided I was going to add a little more to my vidoes. It was alot of fun to take a deeper look.
To start out the semester I had the opportunity to help Sarah Miller create her blog. After the first class, we were asked to create a blog using WordPress, Edusites, or Edublogs. I have had a WordPress blog since my first year. I have had to work my way through learning how to create an aesthetically pleasing and functional. Sarah and I met in the Ed building to start her blog from scratch. I taught her how to create a post, add pictures, links and everything she needed to know about posts. After I had finished teaching her everything she needed to know about posts, I helped her create her categories and showed her how to make sure her posts go into the proper categories. We worked through everything she needed to know for about an hour. Helping Sarah was a great way to refresh myself on how WordPress works and how to create posts.
Throughout the semester myself and Jenna Rhodes would meet and do homework for about an hour every Wednesday. Well, Jenna and I would meet and we would help each other with our posts. We would discuss the topics of our upcoming assigned blog posts so we could grow a deeper understanding of the topics we needed to write about. When either of us had a question we would work together to figure it out the best we could. I helped her figure out some technical difficulties she was having with her blog site. Throughout the semester I helped Jenna work through many things and she did the same for me. Working with Jenna was a great way to help grow my understanding of the class.
The idea of a digital footprint is something that people have been trying to tell me about for years. I was a child that grew up right in the middle of this digital world. I have had a Snapchat, Instagram, and Facebook account since I was eleven. My life has been all about social media since I got my first iPod touch. I still remember how excited I was when I got my first Snapchat account.
My digital footprint is something that I have been creating for almost ten years now. I will say, what my digital footprint looked like has not been something I was aware of for all those years. People like my parents and teachers did tell me about how the internet is forever and that anyone can see what I post, but the idea of forever didn’t seem real to me. I have always been a pretty smart poster, but I was still a child who thought she was unbreakable. I never had any of those scary stories happen to me, and I am so thankful.
Nicole Lee’s “Having multiple online identities is more normal than you think” is exactly how I use my social media accounts. I have a Snapchat account where my life “ is raw and more visceral”(Lee, 2016). My “Instagram is for friends and people who know me through the internet.”(Lee,2016). Lately, I have been feeling as if my Instagram is too public. I have made my account private within the last couple of years, but I was always concerned about my numbers of followers so I allowed everyone to follow me. This created my followers and account to become more of a popularity contest. Then VSCO became more popular and that became my account where I posted what I wanted. My VSCO is where you see who I really am and what I really love. My “Facebook is for keeping in touch with family and friends”(Lee,2016). This is where I post my wholesome picture that I want my grandparents, aunts, and uncles to see. I get to see all my baby cousins grow up, I see all of the reposts my grandma makes about politics. All of my different types of social media accounts are “indicative of how multifaceted human beings are.” (Lee,2016).
My lesson plan will be for a grade 6 health class. I looked through the curriculum of many grades to find an outcome that could work for a lesson on digital literacy. I think the topic of digital literacy should have its own outcomes. Still, throughout my looking, I did not find anything that even came close to bringing up digital safety, literacy or citizenship. I found it a bit disheartening, as the digital world has become such a big part of our everyday life. We teach street safety, sexual safety, and so much more that helps children be safe within the physical world. Why not the digital world?
The outcome I found that comes the closest to relating to digital literacy is “USC6.5 Analyze the influences (e.g., cultural, social) on perceptions of and personal standards related to body image, and the resulting impact on the identities and the well-being of self, family, and community.” (Saskatchewan Ministry of Education 2009). My thoughts behind using this outcome was teaching the students to spot fake news and fake reports and then use their knowledge to point out fake news relating to body image.
To start my lesson planning I took a look at “ Lesson plan: Fighting Fake News” by Rachel Roberson. The lesson lays out how to warm up the class with some quick writing prompts. The writing prompts questions about what might be consequences of fake news, if the students think they can spot fake news, and if students think they could be fooled. These are good questions to see how much students understand about the topic. After students write down their answers I would ask students to discuss in small groups and then come together as a bigger group and discuss as a whole class. After our discussions I would show two videos How to choose your news – Damon Brown and Can you spot the problem with these headlines? (Level 1) – Jeff Leek & Lucy McGowa. These videos give great strategies to decode the world of fake news and even strategies to help with social media. After the students watch these videos I would ask them to discuss within their small groups about what they think these videos are teaching us. I would ask the groups to take a look back at the questions from the writing prompts to see if their answers had changed. After they had a chance to discuss I would ask them to share some of their ideas with the whole class. Once the discussion has wrapped up I would ask students to complete Break the fake quiz to test out their new strategies.
For this week I decided to take a deeper look at my favorite video editing app called VN. I have talked about VN before and how good I believe this app to be, but today I wanted to take a better look at what it can do. I didn’t think of taking this deeper look before I recorded my video. If I had I would have broken the video into smaller videos so I could see how well I could get the video to be seamless. I had to work with what I had and just kinda play around and add fun things like stickers and some effects. Well I was playing around and I found a lot of cool features like fading videos in and out, something called mosaic where you can blur a subject’s face out, reverse, freeze and so much more. Although I did not use all of these features in my finished video I did enjoy figuring out how they work and what they do. I found it so fun and easily added a little more spice to my normal videos by adding stickers. There were so many stickers to choose from and there were so many ways to incorporate them into your video. I decided it would be fun to add some cute hearts to the start of my videos and at the end I decided to say a little thank you by adding a sticker. Then I found the effects and added a little fun to the very beginning. Taking a deeper look at VN helped me understand video editing so much better.
This week’s hairstyle was a fun one. I found this week’s inspiration on TikTok. I didn’t do the slick back because I have never been a fan of that look on me. The hairstyle came out the same without the slick back. To start the hairstyle I had to bring my hair into a high ponytail. I wanted to put in my favorite scrunchie but forgot to add it. After I had my hair in a high ponytail I simply had to divide the ponytail in half and braid each half. I started with the top half and then brought it over my head so it wouldn’t get in the way
Today I wanted to give iMovie a try again. This time I tried a hairstyle that didn’t take as long, so the video was much shorter and didn’t need to be sped up. Once I put my video into iMovie it was very easy to find what I was looking for. It was very easy to input my video into the app, since I looked at the app last week I had a good idea of where I was looking and how to use it. This was very helpful when I was using the app and editing my video. When using iMovie I found it easy to take away the background noise and add music. It was super easy because there was already music ready for me to use on the app. I think iMovie is very useful if you are editing a simple and short video. Last week when I tried with a video that was more complicated and much longer, iMovie wasn’t very helpful and couldn’t do what I was looking for. Today when I used iMovie it was simple and got the job done perfectly.
The hairstyle I tried today was from TikTok. I thought it was going to work out so well and be so easy. Although it was relatively easy it didn’t work out as well as I wanted it to. The video showed the girl curling her hair but today I didn’t have time to get that fancy. To begin the hairstyle I started by sectioning my hair into a half-up and making a little ponytail at the back of my head. After this, I took the ponytail and made a gap between my hair and my head. After I had the gap I fed the ponytail through the gap from the bottom. Once I had done this I tried to pull the ponytail a little tighter to help create the look I was going for. Unfortunately, the look did not turn out, it was a little disappointing but sometimes things just don’t work out the way you want them to.
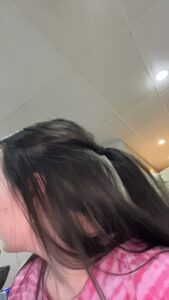
My hairstyle that just didn’t work out
I found my inspiration for my hairstyle on pinterest, but that’s not what I want to talk about today. I thought I’d give video editing another try. I wanted to use a different app than I had used previously, but that didn’t work out quite how I wanted it to. To begin looking for a new platform I went to my app store on my ipad, and typed in “video editor”. The first couple that came up were Canva and VN. VN video editor was the platform that I had used previously for this class. When I first saw Canva I was excited to use it because it is a platform that I like to use frequently for other classes and I have played around with making some posters. When I got into Canva it took me a second to find where I could edit a video. When I finally did find where I could edit my videos it was a little disappointing because I could tell that it wasn’t what I was looking for. It appeared that its use was more for making a video for a presentation. There was no place to speed up my videos, add music, cut clips, and I also couldn’t figure out how to put my two videos together to make one. After this I decided to try iMovie to edit my video, I had high hopes for this one as I have used it a couple times before. I was still disappointed by the platform. When I went to speed up my video it would only allow me to speed it up a little bit, but I needed to speed the videos up much more. So after trying to figure out iMovie and not getting what I want I decided to just go back to VN. Once I started editing my video on VN it was so easy. I could speed it up just the right amount, I easily added music and easily figured out everything I needed. As much as I wanted to learn a new tool I think using the tool I already knew worked out way better.
Now to the actually hairstyle, I was disappointed by the hairstyle. There was nothing wrong with the hairstyle itself. It took me a very long time and I struggled with keeping all the little braids separate. To start the hairstyle I put my hair up into a high ponytail with my favorite scrunchie. After I put my hair into the ponytail I took a small chunk of my hair and started braiding it. I then finished braiding the first chunk and then proceeded to continue this process until the whole ponytail was little braids. I was supposed to put a little elastic ponytail onto all of the little braids but my mother did not have any, so I just left them without. Everything worked out fine and it was kind of cute, but it definitely won’t be a hairstyle I will be doing again.
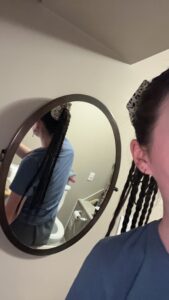
My latest hairstyle
If you haven’t noticed by now that I like to braid my hair, you will see again how much I do. I’ve been looking on everything I can think of for new hairstyles that I would actually be able to do and would actually wear. I have been thinking of ways to find new hairstyles and I have only been looking on social media. Social media is such a big part of my life that it is easy to find inspiration. I found this hairstyle when I wasn’t even looking for it. I found this hairstyle on Pinterest. Let’s talk about Pinterest, there are so many ways to use Pinterest. There are so many ideas and how to’s that go into great detail. Pinterest uses eye-catching pictures and posts to grab the attention of those scrolling. Although not all recipes and instructions on Pinterest work out or are reliable. There are a lot that are as easy as they claim to be. I go to Pinterest for mostly recipes and tattoo ideas, but this time this awesome hairstyle caught my attention.
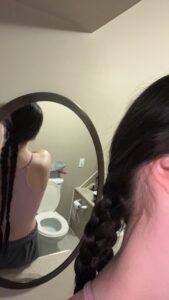
My New Fav Hairstyle
This hair style has to be the easiest one I’ve done so far. This has to be one that I will work onto my go to hairstyles. To start the hairstyle I started by creating the start of a normal low braid at the base of my head. After this I broke the three pieces of the normal into two halves. I then put one of the halves into a scrunchie so I would not mix the halves up. After I put one of the two halves into a scrunchie I broke the half into three pieces so I could begin braiding the half. After I was done braiding the first half I put a ponytail elastic on the end and began on the second half. When I started braiding the first half I was worried that the braids would not stay tight. That was not the case. Both braids were tight at the top and turned out perfectly.
Hour of Code
I found Hour of Code to be so fun and a great stepping stone into the world of coding. To start my journey on Hour of Code I was brought to the learn page where there were hundreds of different types of learning activities that were all designed for children. Well, doing a quick look through I found many learning activities that I knew my little sister would absolutely love. Having a wide range of topics is a great way to help get students engaged. Students will be more likely to want to give their full attention when they have the choice of what they are doing.
I choose to learn some new coding skills with the T-rex Hour of Coding. This specific learning activity because it reminded me of the game that came up on Safari when there was no internet connection. The little game of theScreen Shot 2024-03-22 at 6.07.50 PMjumping over the cactus brought back members of my childhood. That being said I had a deeper meaning well I was doing the learning active.
Now, lets get into the things I learned today. Well going through the active I go to make a loop to keep the t-rex moving and music playing. After I made the loop I had the chance to learn how to make the T-rex Jump when I pressed the space bar. Then I learned how to create a loop to randomly generate cactus that were obstacles for the T-rex to jump over. I then learned how to add nosies for when I collected coins, jumped and when the game ended. Within learning how to add noise I learned how to create a end to the game when he T-rex crashed into a cactus. The next step taught me how to create a loop that increased my score everytime I collected a coin. Then I got the chance to customize the colours of the game.
Overall this experience was awesome and helped me gain some useful knowledge about coding. I found that the website was super user friendly and student friendly. I felt that the website was made for students. This type of website is important to have available for students who may have an interest or to help students find a interest.