This week I tasked myself with making a wood-cutting board. My idea was to create something similar to what is depicted in the image below. Using a few different colours of wood to create a pattern.
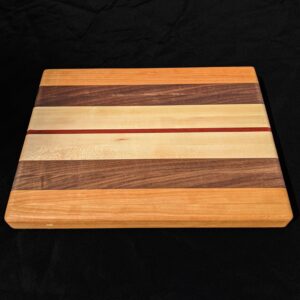
Cutting Board created by PaulTheMaker
Seems simple enough, but now I needed to pick what type of wood I would be using. My technology for this build was blog posts and websites as they are not normally my first place to look when tackling a DIY project. I found a very informative post by Virginia Boys Kitchen which outlined 5 criteria to lookout for when selecting your wood.
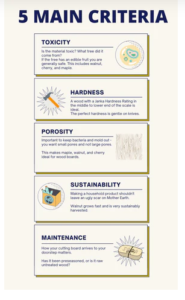
5 Main Criteria for Selecting Wood – Virginia Boys Kitchen https://virginiaboyskitchens.com/blogs/features/best-wood-for-cutting-boards
The category that stood out to me the most was the toxicity section. I would not have been actively thinking about that if it were not for this article. They do not go into extensive detail on the subject but note that any tree that is bearing fruit or nuts is probably a safe option for wood type. based on my previous knowledge of woodworking I know that some wood is treated with chemicals to allow it to last longer outdoors, so we will definitely be staying away from that.
A second note is the hardness of the wood. We will be needed a hardwood board for this build as it offers durability for the wood but also a proper board selection will not dull your knife as quickly. Wood types we will be looking out for include, walnut, cherry, maple and acacia. With this in mind I went out to search for my lumber, however, this is when I ran into my first problem. I could not find the type of wood I needed. Being that my hometown only has 2 small lumber stores I was limited on my selection. I was able to find some oak (not ideal for cutting board) and repurposed some old scraps I found laying round my dad’s garage. I decided that I wouldn’t be able to use this particular cutting board for it’s intended purpose but it would be a good way to practice for when I am able to acquire my desired lumber.
Now that I have my materials, I was ready to begin crafting my cutting board. I found a very helpful guide on this home depot website. They also gave an idea of what types of wood you should be using which was a great way to cross reference my information I had found before.
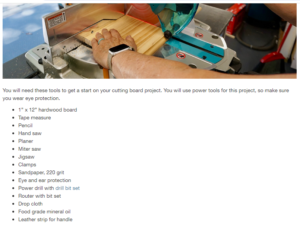
HomeDepot.com https://www.homedepot.com/c/ah/how-to-make-a-cutting-board/9ba683603be9fa5395fab901c8502155
I found it very helpful that the website included all the different tools that were needed for the projects. This allowed me to gather all of them beforehand and resulted in a more efficient workflow. I did not have all of the tools needed for such as a router, however they are used for finishing the build and not a overall critical item for my new intent of having this be a practice cutting board.
To begin the construction of my cutting board I used the website FixThisBuildThat.
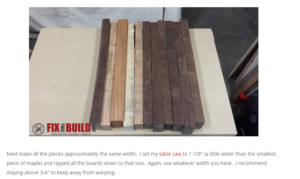
FixThisBuildThat.com https://fixthisbuildthat.com/how-to-make-a-cutting-board/
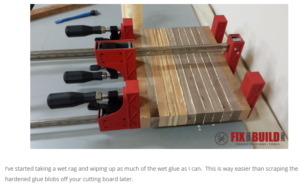
FixThisBuildThat.com https://fixthisbuildthat.com/how-to-make-a-cutting-board/
This website was just as good as any DIY video I have watched. Every step of the way they added a picture for reference and a small description of what to do next. I will say however, that the website does assume that you have some basic knowledge of how to use the equipment. For example, when setting the table saw, the website says “I set my table saw to 1-7/8,″ but it does not show you how to do that. Where as with a gif or video you are able to see the maker physically preform all of these actions resulting in replicating the actions a little bit easier.
Overall I would say I gained a lot of information from these websites and I think using a website for woodworking projects is a great option. The most helpful usage was the ability to research materials and what tools you will need to complete a specific job. With the only major downside being that the progress of the build is completed in steps with at times ambiguous picture references. Actions like setting up your tools, or how to sand properly not included.
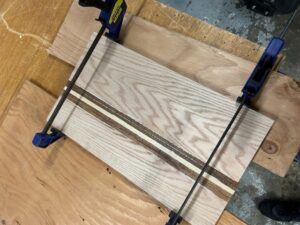
Here is an image of my progress! I am still waiting for the glue to dry, and I’m hoping to finish sanding tomorrow!
Leave a Reply