Learning Through Living

Category: EDTC300 (Page 1 of 3)

Summary of Learning in EDTC 300

This is my final post of the semester and I wanted to take some time to say thank you all for a wonderful experience! I am grateful for the friends I have made along the way and all of the helpful knowledge that I have acquired. I am excited to finally bring it into the classroom. Thank you to all who have read and commented on my posts, it means a lot!

Below is a video of my summary of learning, I hope you enjoy!

Until next time,

Kyle Tatton

Reflecting on My Contributions

During the course of the semester, we were tasked with engaging within our classroom community. There were several ways in which this could be achieved including commenting on others’ posts, the class discord page, replying to comments, and any other ways in which you were able to help your classmates with the class content for online technology. Over the last few weeks, I have enjoyed reading through posts made by my classmates. Being that I was very new to blogging when we first started it was extremely helpful to gain knowledge and inspiration from everyone’s posts. The wealth of creative minds in this class truly helped me to learn a lot. I also enjoyed seeing everyone’s progress on their learning projects. It helped drive me to try new things and step out of my comfort zone. It was also very informative to read what people had the say about the class content. It gave me a lot of ideas for my future students.

The first example I have for my contributions of class learning is some of the comments I have made. I have also provided links to each of the original posts, which I highly recommend you check out.

Amanda: Feed the Machine

Raisa: Hey, it’s time to crochet!

Megan: Downward (or Upward?) Dog

Chantelle: Métis Beading: The Very Beginning

Cheyenne: Mental Health and Technology – Learning Project post

Another contribution I made to the class learning was on our discord page.

One of the students was asking about adding a contact page to their post. I was able to find a video that outlined the steps that could be done to add this page. I did however, try it on my own page and was unsuccessful, therefore I concluded that it might be specific to which theme you are using. Some themes will have the ability to create a contact page while others will not.

There were a few times in the semester where I replied to comments on my own posts.

Learning Woodworking with Online Magazines

Digital Detective with Maya Ahokas

Finally there was an instance outside of class where I had a classmate reach out to me about the layout of her blog. She was struggling with menus and categories.

We went back and forth on Instagram a few times however, this was only confusing us more. I suggested that we create a zoom meeting so that she could share her screen and we could work through the issue together. We were able to determine that she had been creating pages instead of posts, which we were able to fix!

Overall, the experience of blogging has been very fun and it was helpful to have an engaged classroom.

Thanks for reading my post!

Time to Sweep Up The Shop: A Review of My Learning Project

The time has come to wrap up my learning project! At times it has been a fun relaxing experience and other times it proved to be quite challenging. However, I am happy with the results of the overall experience. When I started this journey I did have some woodworking knowledge but I wanted to build on what I knew and make it a more independent affair. Most of the other learning projects followed a somewhat linear path building on a skill or one particular project. Mine on the other hand became a collection of small projects along the way. Being that much of the focus of this blog was to find different online resources to learn your skill, I gave myself a goal to try and find a different medium of online technology to use each week. I am proud to say that I was successful at doing this barring a couple of weeks where I had some repeats, but overall it went very well!

Week 1 – Time to “Branch” Out: An Adventure in Woodworking

I was very excited for this project, however a little nervous still about the blogging side of things as this is not something that I have done before. I am much more comfortable with the medium now.

  • Introduction to learning project
  • My previous experience with woodworking
  • My inspiration for choosing this topic
  • Introduced what I would be building first

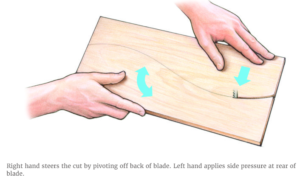
Week 2 – Constructing a Cutting Board

The was the first week actually starting my learning project. I remember that initially I struggle to decide what online resource I wanted to use but settled on blog posts and websites as it was something new to me. I always use YouTube videos for tutorials. It turned out to be a successful process after a while. Most of the time spent in the shop this week was locating all the tools and getting a good setup and feel for everything.

  • Inspiration for the build
  • Explored a blog post about different materials to use for the build
  • Consulted a website with helpful tool tips for the project
  • Constructed my cutting board with the help of a step by step DIY website

Week 3 – Woodworking in a Virtual World

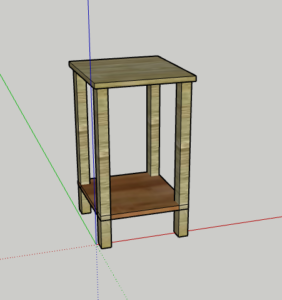
I have had a few proud moments throughout the learning project process but I’d have to say this might top that list. I was searching YouTube and some websites for inspiration about what to create for the week and I stumbled across a 3D Modeling video. I was very intimidated by the task as it was extremely out of my comfort zone but I knew I needed to give it a try. I am happy to report that it was wildly successful and I have even went back to design some more project within the program.

Week 4 – Flip That Camera on and Start Recording!

This was a fun look at the FlipGrid program that allows teachers to create prompts for the students, who then record video responses to those prompts. I think this is a great alternative to paper assignments and can be a nice exciting change for your students.

Week 5 – Follow Along With Me: Woodworking YouTube Videos

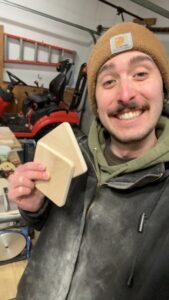
The was a very fun week in the shop as I was able to use some equipment that I have not used before. I wanted to make some coasters for the house and it turned out to be a fairly easy thing to find a tutorial for on YouTube. Everything started out pretty standard however, when it came to rounding the edges of the coasters I did not have the proper tool that was shown in the video. So I decided to, for the first time, use a belt sander and free hand the rounding of the edges. Although is does not result in every coaster turning out to be exactly the same size, I am super happy with how they turned out!

Week 6 – Learning New Woodworking Tips With TikTok

I use TikTok on occasion, however, never did it dawn on me to use it as a form of learning. This post I did just that. I remember finding it somewhat difficult to find exactly what I was looking for, but once that algorithm knows that I am interested in woodworking I am sure I won’t be able to get away from thought videos.

  • What is TikTok?
  • How TikTok can be used for inspiration
  • Videos are good for tool tip, and tricks
  • A look at some positives and negatives of the source

Week 7 – Woodworking With Kids

This week I was very reflective on the educational process of woodworking, and how I could get students of all ages involved, not just high school level students. Pinterest was my website of choice this week, and it offered a plethora of craft ideas that I think students would really enjoy.

Week 8 – Learning Woodworking With Online Magazines

For this post I was looking for something a little outside the box, which led me to the idea of searching for a magazine. The search was more than successful as I found a website that provided a magazine subscription, along with blog posts, a podcast, and helpful videos. It really is a nice one stop shop for all your woodworking needs.

  • Why magazines and woodworking?
  • Deep look at the website
  • Finding out it is more than just magazines
  • Potential benefits of a woodworking podcast

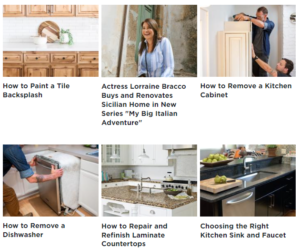
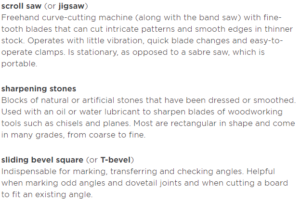
Week 9 – Using Television as a Learning Tool for Woodworking

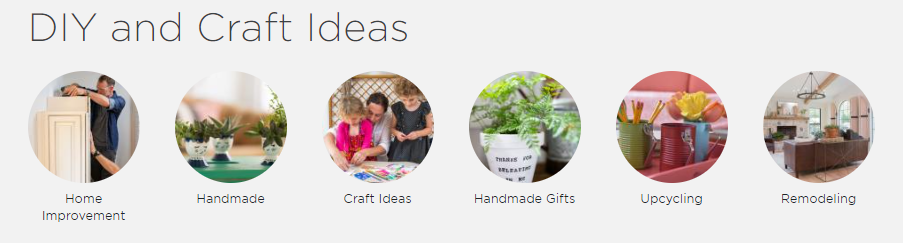
I was reminded of the TV shows I used to watch when I was younger, and became excited about the potential that the HGTV network to bring to my learning project. Their website was full of helpful tips and went beyond woodworking, so I would definitely recommend that everyone gives it a look for their home improvement or craft needs.

  • Overview of the website
  • Who can benefit?
  • Helpful tool glossary

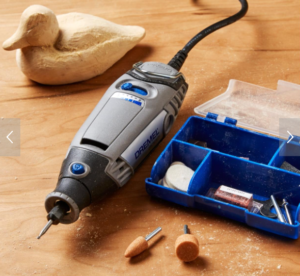
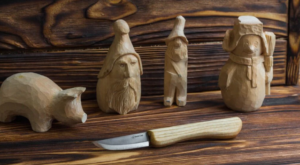
Week 10 – A New Form of Woodworking: Wood Carving

  • Introduced the topic of wood carving
  • Shared the interest I got from a BM Sculptures video
  • Explained the difference between dremel carving, and whittling
  • Overview of my progress (or lack of progress)

Closing Remarks

All in all this that been an incredible experience! I feel as those I have gained a wealth of knowledge about using online resources for a topic on interest. I think as a future teacher I feel more established and confident to guide and gear my students to the right places when they are searching for how to content. From my humble beginnings of thinking that tutorials were only on YouTube to morphing into someone who now will look for magazines, podcasts, and blog posts, I feel as though I’ve learned a lot.

In terms of the woodworking itself, I definitely feel more comfortable in the shop and using the tools at my disposal. Finding the time between four other classes and personal commitments was challenging at times, but when I did manage to get into the shop it always put a smile on my face and definitely sparked a passion that I’d like to continue in the future.

I am happy I was given to opportunity to spend some time woodworking and I am truly grateful to everyone who has commented on my posts.

Signing off one last time, thank you for reading my post!

I wish you all the best!

Kyle Tatton

A New Form of Woodworking: Wood Carving

For this post, I wanted to try something a little different. I have been caught up in a rabbit hole on YouTube, watching wood carving videos. Some of my favorites are by a creator named BM Sculptures. His signature style is to combine the wood with a clear epoxy resin and carve an animal out of this mixture.

A favorite of mine is this bear as at the end of the video he takes some time to create a small salmon out of wood to place in the bear’s mouth which really elevates an incredible piece. As with a lot of professionals showing off their talents, they do it in such a seamless and flawless way that makes the video think, you know I think I could do that! And I was beginning to develop some of those feeling while watching these videos. Now I am not going to sit here and claim that my first piece would look like this or even be a large scale build but I did have the inspiration I needed to give it a try! I do also appreciate how BM Sculptures is very transparent in his video, showing mistakes and failures along with beautiful finished products, and he is frequently asking for advice from views. I think that also lend credence to the feeling that anyone can give this a try if they are willing to put in the time!

Now that I had my inspiration, I needed to find my design. I wanted to continue with the animal theme as I figured this was a pretty popular item that I would be able to find a fair amount of tutorials about, and I just thought it would be fun to have an animal carving! Initially, I was thinking about carving a wolf as they are one of my favorite animals, however, I decided that they might have a few too many intricacies for my first attempt, and decided I would follow the lead of my inspiration and crave a bear.

Before we dive too much more into the design I want to spend some time distinguishing between dremel carving and whittling. A dremel is a power to used for cutting, carving, sanding, and polishing, either wood or metal.

https://www.leevalley.com/en-ca/shop/tools/power-tools/rotary-tools/71188-dremel-3000-variable-speed-rotary-tool?item=17J1710

The process of whittling, involves a knife, most often specialized knives of different sizes, to create a sculpture out of wood.

https://beavercrafttools.com/blogs/ideas-inspiration-carve-hacks/suitable-whittling-projects-for-beginners-everyone-will-succeed

For this project I wanted to try my hands at dremel carving. With my design and material all set it was time I found a tutorial video. After a bit if searching I came across a video by Log’s Carving Club which had exactly what I was looking for!

In the video he uses hardwood as it is easier to carve stays together better. Unfortunately, I have to drive out of town to to acquire the hardwood that desired and I was unable to do that in time for this post. However, I tried anyways with some pieces of scrap wood I had around the shop. This proved to be difficult to work with as the wood kept splintering and messing up the design. I had to call it on attempts as I was running out of wood that fit the size I needed. It was good practice with the dremel however, so I am feeling a little more confident with that! I am excited to try again in the coming weeks when I am able to get my hands on some hardwood.

Thanks for reading my post!

Until next time!


Using Television as a Learning Tool for Woodworking

When I was younger, my family and I would often watch HGTV in the morning as everyone got ready for the day, as well as after supper. We enjoyed the real estate shows as well as the reno show, and upon reflecting on this experience I was reminded of all the fascinating design ideas presented in these shows. So I decided to do a search on the HGTV website to see what I could find.

https://www.hgtv.com/design/topics/diy

https://www.hgtv.com/how-to/home-improvement

The home page provides a handy selection tab that allows you to navigate between what project types you are looking for. Some selections like the home improvement tab have additional categories to select from such as, painting, home improvement ideas, kitchen remodeling, bathroom remodeling, basement remodeling, and curb appeal.

Quickly I became aware that this website offers a lot more that just woodworking. There are simple how tos, such as how to remove a dishwasher, or kitchen cabinets. I think is this great for people who have acquired skills while woodworking who want to expand upon that domain to make home improvement style work. I do believe that this can go both ways though, and someone can start out with doing small reno projects and move onto more specific woodworking tasks.

As I have mentioned previously in the blog, woodworking comes in a number of different forms. I have been particularly focused on the crafting side of woodworking, such as making cutting boards, or coasters. These are more passion projects as it would be easy to simply go and buy these items from the store. But I think it is just as important to learn the skills needed to cut and add trim to your house, or frame out and build a woodshed for example, because these are things that can save you some money in the long run. And I believe that this is an excellent website for those kinds of tasks and learning.

https://www.hgtv.com/lifestyle/clean-and-organize/tool-glossary

One last section of the website I want to point out it the tool glossary tab. Here you are given the name of the tool and a small description of its purpose. The is great for someone starting out but also to get a better explanation on a tool that they are maybe hearing about in research, on videos, or in podcasts.

Overall, a very helpful website that I recommend you check out if you’re interesting in anything DIY. As I mentioned it is way more than just woodworking.

Thanks for reading! Until next time!

Learning Woodworking with Online Magazines

For this blog, I wanted to try something different in terms of online media, and that was to explore online magazines. My intrigue with this was that magazines have the potential to have a high variety of content all in one space. This would be great for someone who is starting out with woodworking because you would have the possibility of having some small tips, projects, and tool options all in one spot.

One magazine online magazine that I found is called FineWoodworking.com which is a paid-for subscription, but they do have a good overview on the home page. After some further searching, I was able to see that this website was more than just a magazine website, they offer, a podcast, videos, how-tos, shop tips, and more. It is important to not that these features on the website are free to access!

https://www.finewoodworking.com/

The home page is easy to navigate and proves a few selections for the viewer to click on, as seen in the picture above. Personally, I was very intrigued the the podcast as this is a form of media that I had not considered to research. Woodworking can be a slow mediative process that required a lot of patience. A podcast such as this one highlighted in the website can be a great way to have some background noise and learn some new things as you work.

When look at the how tos I came across a video link that discussed how to cut curves using a bandsaw. This was created in a blog style but was taken from the podcast which is nice to see that you don’t have to listen to the whole podcast to receive it’s benefits.

https://www.finewoodworking.com/project-guides/shop-machines/a-trick-for-cutting-smooth-curves-on-the-bandsaw

Overall, I think is is a great website that can be very useful for anyone looking to get into woodworking.

Thanks for reading my post!

A Look into AI Learning in the Classroom

This week we were to look at an AI tool that we could use in a classroom setting. I decided to try out Speechify which is an AI reading program. My intrigue with this website stems from my own struggles with reading throughout my elementary and high school experience. I could always read the words on the page however, it took a lot of concentration and would result in a very slow reading process. This intense concentration would also hinder my retention at times due to the fact I was spending so much energy just reading what the words said. After finding out that I had mild dyslexia a sense of relief rushed over me as I realized it wasn’t that I couldn’t read it was just that I had a learning disability that made it slightly harder for me than others to read the same thing.

At times, still to this day, I find myself reading the words with my eyes but having a completely different conversation in my head about what homework I am going to do next, or if the dog got fed etc., only to realize that I just “read” three paragraphs. I then have to go back and re-read them, which adds to the time spent reading. I have found that putting background noise on the TV or playing music helps with this, however, it can prove to be just as distracting at times.

So once again this is why I wanted to try Speechify, it gives me the opportunity to listen to the text but also visualize it as it it being read to me. You can upload any number of pdfs or text files for the program to read, which is super helpful.

https://app.speechify.com/item/a4546f43-aee0-4f3e-a260-204a7a0e92e6

As seen in the photo, when the AI is reading, there is a highlighted section which allows you to follow along. In addition to this you are able to pick the speed with which you choose to have the AI speak. This is very helpful for people like me who are slower readers.

https://app.speechify.com/item/a4546f43-aee0-4f3e-a260-204a7a0e92e6

The final section that I want to discuss is the ask AI feature. Here you can ask any number of questions about the text and within an instant get an answer.

https://app.speechify.com/item/a4546f43-aee0-4f3e-a260-204a7a0e92e6

In terms of using Speechify in the classroom, I think it would be great for students, like me who had a little difficulty with focus while reading, as well as for those who read at a slower pace. The ask AI feature can also be used as a helpful tool for students to summarize longer pieces of work but also as a form of a check. What I mean by this is I could have the students summarize a piece of writing on their own and then go online to the AI tool, to check their summarize and see if they have missed anything. As mentioned about the AI tool can also be helpful for deciphering theme and other literary items that a present within the text.

Overall, I think Speechify is great and I can see myself using it not only for personal use but also as a enhancement in my classroom. Personally, I believe in AI as a form of augmentation for a students learning but I do no this it should take over the creative process of writing an essay or being the only way students find literary devices. These are important skills for students to learn and be able to use but if they use AI as a form of aid to this I think it is no different then using Google to help you research.

Thanks for reading, see you next week!

Digital Detectives With Maya Ahokas

This week we were tasked with collaborating on an activity surrounding our digital footprint. The premise of the activity was to use your best detective skills and find as much information as you could about another person. I partnered up with Maya Ahokas and I have to say I was quite astonished at times by the level of detail she was able to obtain about my life while searching around. I won’t spoil anything here but I highly recommend you go and check out Maya’s blog if you are interested in what she was able to uncover!

As for my search, google was my jumping-off point. This brought me to her LinkedIn, Facebook, Instagram, and of course her blog. This article by Nicole Lee talks about how it is common for people to have multiple social media platforms and that each one has something different to offer about one’s personality. For example with myself, my Instagram is my most common curated app, where I share fun photos of exciting things that I have done recently. Facebook is for my family however, I rarely check it now, mostly just using it for Facebook Marketplace. In Maya’s case her blog was the best place for me to find out any personal information such as her year of education, interests and a little bit about her early teaching experiences at Seven Stones Community School in Regina. Her blog states that she is a very athletic person so this led me to search from some of her sports accomplishments. I was able to find out which high school she attended based on her Junior basketball photos, and after a few google image searches I was able to determine she played softball, as there was a team photo on Facebook.

Speaking of Facebook this was the place where I was able to find out more information regarding Maya’s family. I guessed the relationship she had with each family member I found which we thought was interesting. This also led me on a detour into some of her brother’s accomplishments in sports. However, getting back on track, we both struggled to find any relevant information about each others political views as this is not something we discuss much online. The video below goes into the potential dangers of sharing one’s views online and how in an instant your life can be changed by something you say.

Maya and I do not intentionally avoid sharing our views online, it is just not something that we deem necessary. Maybe it is a subconscious understanding of the potential consequences, but I see it more as us just enjoying our private lives.

My first impressions of Maya as a person based on her digital footprint are very positive. She seems like an outgoing, kind, respectful, and helpful individual. Based on her work experience she is committed to help the youth within her community and as an employer (especially of a school) this is exactly the type of person I would be looking for. I can tell that Maya is very passionate about the things that she loves however, she is also very humble about this. We have gotten to know each other a little more outside of this assignment and as we shared with each other what we found. If I had any advice for Maya in terms of her digital footprint it would be to brag a little more! She is incredibly accomplished as a softball player, traveling to several tournaments in the United States. She is also doing a lot more work with the youth than is posted online. Being humble is good but it also doesn’t hurt to give yourself a little pat on the back every now and then to celebrate how awesome you are!!

As I mentioned before head over to Maya’s blog and show her some love!

See you all next week!

Can You Tell the Difference? A Dive into Identifying Fake News

In today’s world, there is an infinite amount of media to consume. Some of it can be educational, some can be entertaining, some are just for laughs, and others are to inform. Being connected to what is happening in the world around us is very important as it can aid in determining the small and large decisions that we must make. But during a time when everyone wants to have the next big headline, and satire is often indistinguishable from reality, how do you tell who is recounting the true story?

To begin, we must be equipped with critical thinking skills that can be developed in school. The article How do we teach students to identify fake news, explains that using websites such as “FactsCan, org, Snopes, Hoax Slayer, and tools like Google’s “search by image” feature,” can help students begin to think critically about the information they are consuming. An interesting point to note is that FactsCan and Hoax Slayer are no long active websites which is a shame in a time when arguably we need them the most. This article goes on to state that students should be aware of bias by referring to who is posting the information. Katherine Koskie has created an excellent worksheet about bias in the news. She highlights that their are many different biases including, bias in the headline, bias in the images, bias in word choice, bias through the selection and omission of information, etc. This worksheet would be great to give to students as it provides three example articles for them to work through to find these biases. There is also an interactive media chart that can be used to explore the bias and validity of a source.

Another important not to make with students is the potential harmful consequences that can occur when spreading fake or misleading information.

https://archive.nytimes.com/learning.blogs.nytimes.com/2015/10/02/skills-and-strategies-fake-news-vs-real-news-determining-the-reliability-of-sources/


https://archive.nytimes.com/learning.blogs.nytimes.com/2015/10/02/skills-and-strategies-fake-news-vs-real-news-determining-the-reliability-of-sources/


This New York Times article provides good examples of this topic. As seen in the image on the left, there are clickbait articles that are fairly easily determined as false, however, make the reader think for a second. All in all these types of posts to not have any real harm present other than spreading meaningless facts that are not true. The image on the right, as the article explains, created a much more harmful result. The FBI claimed these two individuals as suspects of the Boston Marathon bombing. Upon seeing this several forms on the internet began digging through thousands of videos and images trying to find as much information as they could. What started out as a genuine attempt to help resulted in images being fabricated/ altered, false accusations, and any small piece of potentially incriminating information being posted everywhere, all in an attempt to be the one that solved the crime.

I do not think there is one easy answer for this problem, nor is there one specific way to teach students about misinformation and disinformation. However, we must open the door for them and shine light on this issue. Helping them to gain some critical thinking skills and hopefully getting them to stop for a second before believing everything that they see and hear. False information is only going to get harder to spot so we must treat it as the serious issue that it is.

Thanks for reading! See you next week!

Becoming Comfortable with Coding

During class when we were first presented with the task of exploring code, I was struck with panic. I have never been exposed to coding other than while talking to some of my university friends who were taking computer science classes. The way they described it went right over my head and seemed extremely complicated. However, I suppose this makes sense as they were learning how to code websites and games and more complex entities, using scripts such as Java, Python, and C++. To me, it seemed like I would have to learn a completely different language, and to some extent that is true however, there are resources out the to make this process a lot less daunting.

One such website is called Hour of Code. The concept is to teach code in a video game-like setting which makes the process of learning code more approachable and would be very engaging for students. It is geared towards everyone, from pre-readers to grade 9 and beyond.

There are a number of check boxes, as seen above, that allow for teacher and learners to select their available material, which subjects they would like to focus on, and generally modify their experience to best suit their needs. 
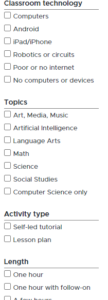
Some that stood out to me is the pre-reader section as I believe this could be extremely helpful for English as a Second Language learners. Although most of the themes are aimed at pre-school level students, there appears to be several options that do not have a targeted age and are more generalized experiences.

When I went to try out the program I selected an application from the grades 2-5 range. I thought this would give me the widest range of options when it came to difficulty. I decided on a program called Code Farm: Plant a Garden. Your goal is to create code for a robot to collect and/ or plant food on a designated path towards a target. When entering into the game you are greeted by a video outlining the game as well as how robots are used in real world farming settings. A link to the video can be found here.

The first mission sees you debugging already existing code which I think is a great way to learn the program. However, after this you are on your own for the next level. It does take some trial and error to get the spacing correct as there are no designated lines or square to indicate 1 meter which can prove a bit frustrating.

Here is an example of a debug level, where you must run the code to see the issue and then fix those mistakes so that your robot can collect all of the plants. The code does become fairly advanced fast as there are a lot of different things to think about all at once such as movement, sensors, and planting and plowing gadgets therefore I would recommend this game to someone who is at least slightly familiar with using the tools of coding.

Overall this was a pleasant and enjoyable experience and I am definitely going to be spending some time on the Hour of Code website to test out some programs for my classroom.

See you all next week!

« Older posts

© 2024 Kyle Tatton

Theme by Anders NorenUp ↑