3D printing is the future, the final blog post.

The end of the beginning..

The semester is coming to an end, and although it was stressful I have developed several useful skills I will be implimenting in the future. As part of the EDTC 300 course we were tasked with picking and developing a skill, and blog about our progress throughout the semester.

I have been eying up 3D printers for quite some time, so I figured this course was the perfect excuse to buy one. The skill I focused on throughout the semester was learning how to operate the machine, and let me tell you.. it was alot more work than I thought it was going to be.

I had, and continue to have, significant amounts of failures. However, that is part of the learning process and I am grateful I had the chance to crashcourse this technology. It was expensive, the health implications are dubious at best, and the failed prints were demoralizing.

Now that I have my whining out of the way, I can confidently say that I believe in this technology and whole-heartedly believe it will be a staple in many workplaces in the future. I also believe that teaching students how to use this while they are in high school will set them up for success. All of my pain and suffering was so I could have a greater understanding of this machine, and make the mistakes that my future students can learn from instead of making them themselves.

Learning project recap

Week 1 and 2: Introduction, inspiration, intention, and goals.

Week one was an introduction to my topic, my learning goals, and the reason I chose this topic.

Week 2 consisted of my first mistakes, and an overview of what went wrong and how it could be prevented in the future.

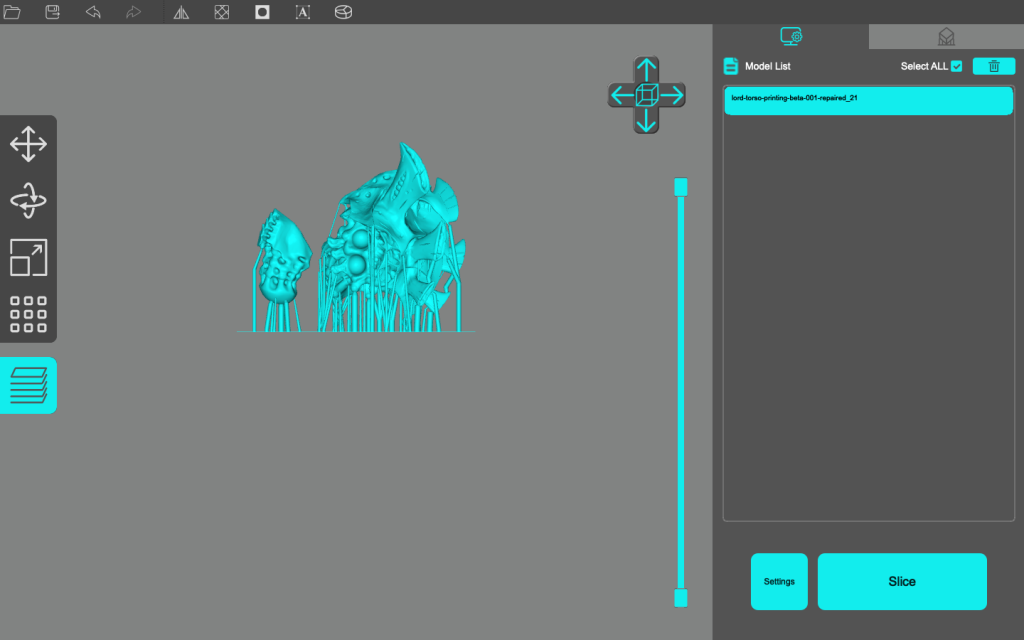
Week 3 I continued where I left off with week 2s blog. I gave a detailed explanation of what 3D supports are, their critical role, and showed what happens when models are supported.

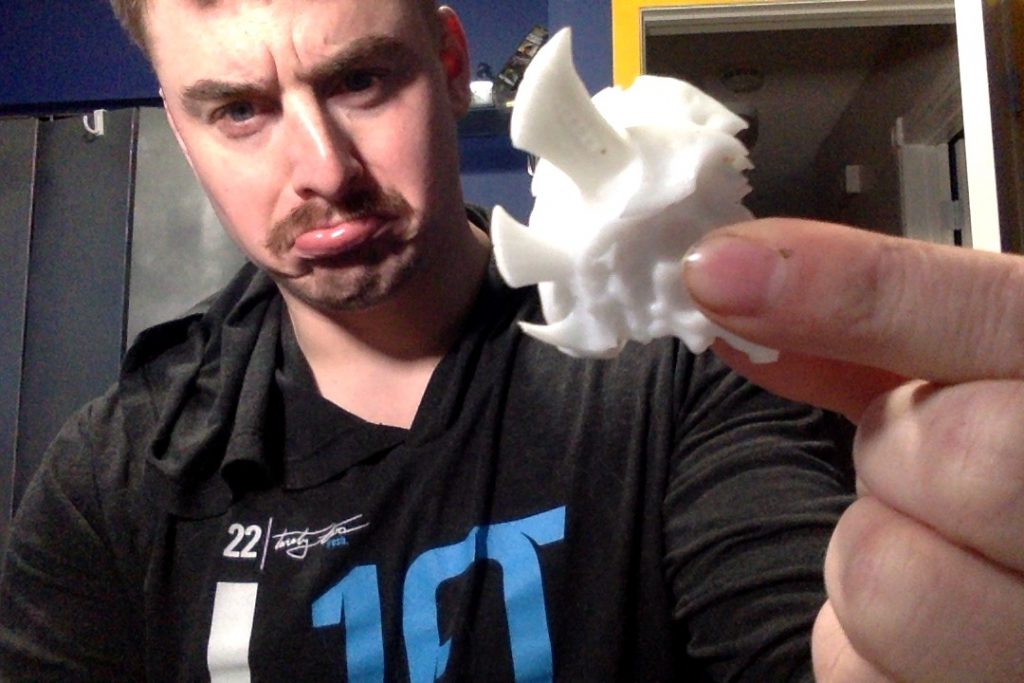
Week 4 consisted of another shot at the first model. This time it was a successful print.

I spent this week making a youtube video walking everyone through the process of using a 3D printer.

I used week 5 making another, more detailed video to refine the video editing skills. Tutorials will be crucial for teaching this skill in the future.

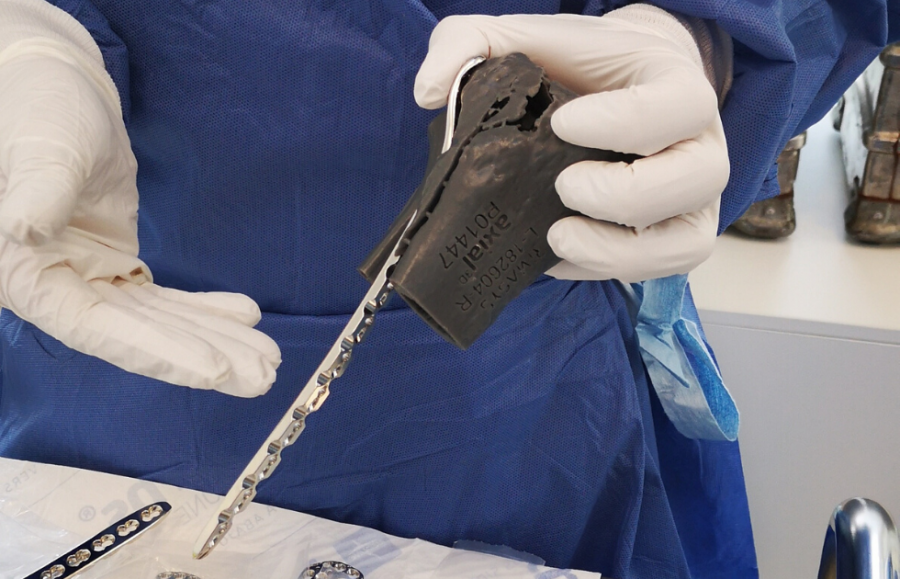
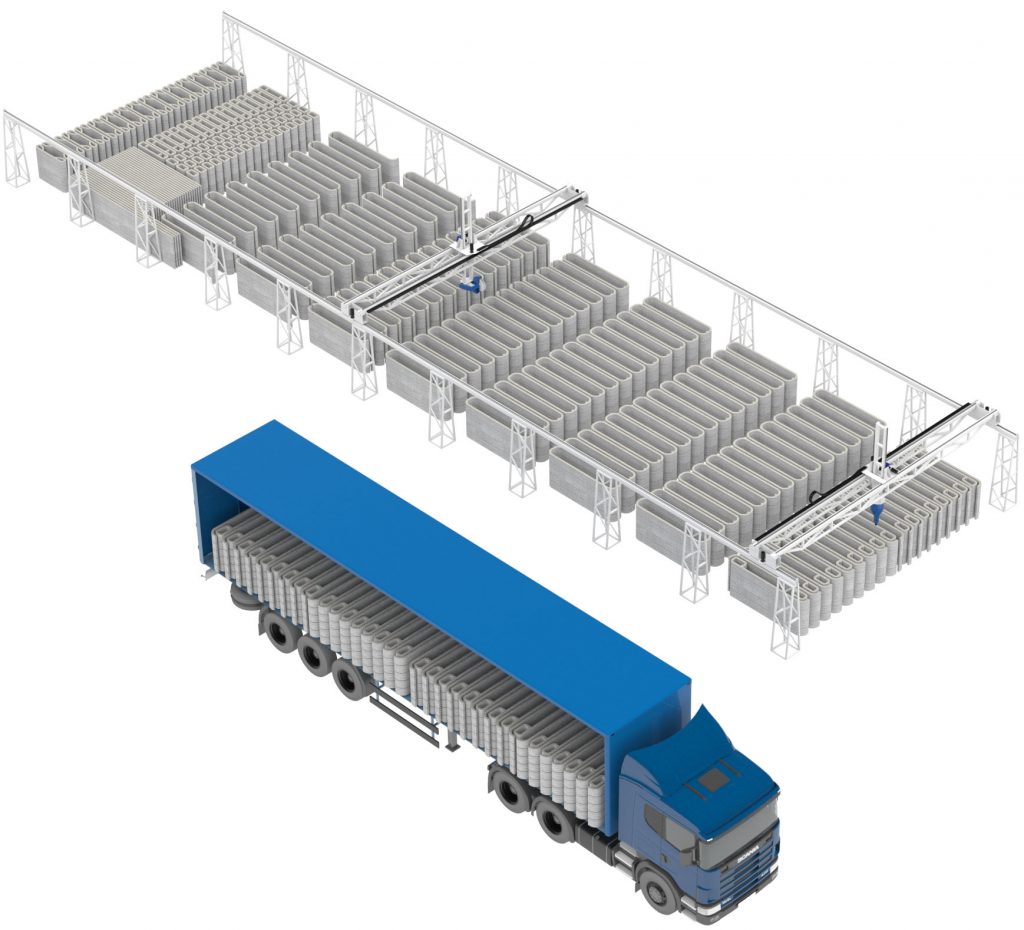
The sixth, and final blog post, was a short essay explaining why this technology is crucial to the future, how students will aplly this information, and applications of this skilll in several professional fields.

The learning process was slow, and required failures to hone my skills. It is hard to quantify the improvement other than anecdotal evidence.

The print failure rate has dropped to less than 10% (roughly 1 in ten still fail due to used error), but this is down from 60% (which also included the time I failed so hard I broke the printer and needed to return and get a new one).

Reflections on the process of learning online.

The 3D printing community is still incredibly small, and finding a tech focused community in central Saskatchewan is about as hard as it sounds. Luckily, I was able to access websites and videos that walked me through the process. It also allowed me to ask questions annonomously without feeling embarrassed.

I enjoyed creating models, printing them, painting them, and posting them to the internet all from the comfort of my own home. The feedback loop was a great motivater, and it allowed strangers to give me feedback which helped me fix problems I didn’t even know existed.

Example of a 3D printed model that I painted for a charity during June.
Another 3d Printed model I printed and painted for a charity during June.

The feedback on the social media sites helped keep me excited to 3D print and paint more models. It also embedded me into an online community that promoted the future applications of 3D printing.

Final thoughts

What started with infatuation after seeing a 3D printer in the library at the university and the new lab at one of the highschools, ended in me developing a new skill. When I eventually get a job teaching I would love to teach students how to use 3D printers, and with the evergroing field and access to this resource I predict I will have that opportunity. With greater access to the tech, students will require teachers that have the know-how and the proficiency to properly pass on that information to the students.

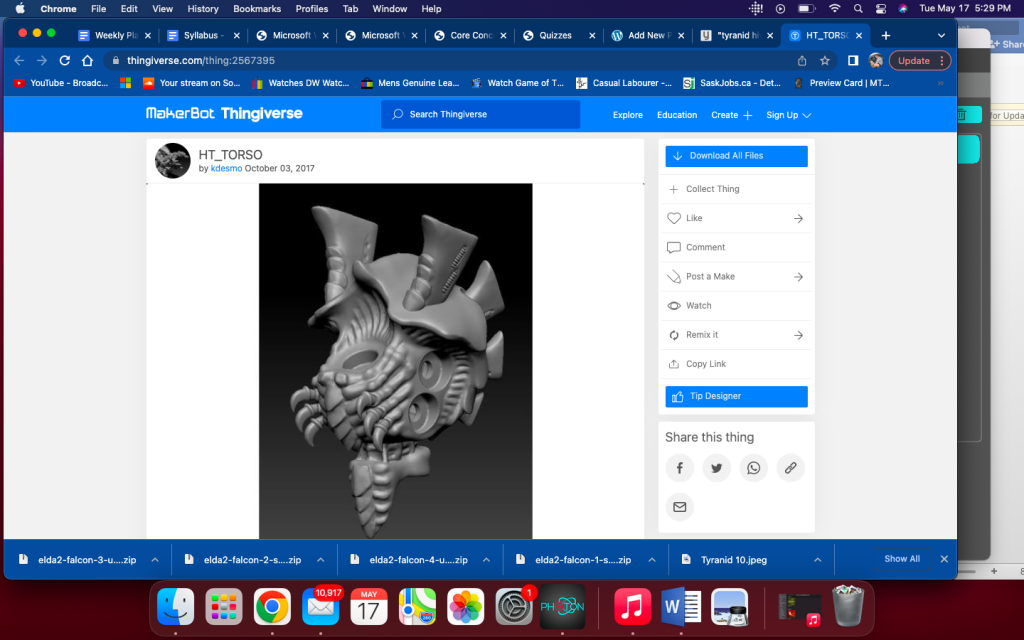
I am happy that this course gave me the opportunity to get better at something that has applications in the field I plan to work in. In addition to using this skill in a professional capacity, 3D printing is a hobby unto itself. I have come to enjoy finding models to print, and it has granted me access to an infinite well of potential models to paint. I have meshed two of my hobbies together, and I do not foresee myself ever being bored while at home again.

This is my summary of personal learning.

Applications of 3D printing, and the future printing objects.

The last couple progress blogs have been videos outlining how to 3D print things, showing what you can print with low or no talant/skill in the field. I figured I would use this weeks post to explain WHY 3D printing is important to not only the future of tech, but fields such as construction, medicine, and future robotics engineering.

Accoring to Investopedia “Three-dimensional (3D) printing is an additive manufacturing process that creates a physical object from a digital design. The process works by laying down thin layers of material in the form of liquid or powdered plastic, metal or cement, and then fusing the layers together.”(Investopedia, https://www.investopedia.com/terms/1/3d-printing.asp).

When people think of 3D printing they invision little miniature, like the ones I was printing for the Youtube videos that last few weeks, and other knick knacks used for household decorations. The world is on the presipice of integrating that same technology used for menial printing for personal use into most professional fields, and students should have access to this tech earlier so they have a greater chance of taking advantage and advancing its applications in the future.

3D printing in Medicine

https://formlabs.com/blog/3d-printing-in-medicine-healthcare/

This article is slightly outdated (printing 2 years ago) and even it has revolutionary applications that will help patients recieve a greater degree of care while in hospitals.

Explaining procedure prior to surgery. (Photo from https://axial3d.com/latest/how-patient-specific-anatomical-models-are-transforming-pre-operative-planning)

1.) Patient-specific surgical models – Have you or any of your family members had to recieve a repairative surgery? Great, this example is for you. 3D printing allows doctors (once they are trained) to scan and print bones and organs into a resin so the patient can physically hold what they are going to have repaired. This allows for the doctor to easily explain the precedure, better explain recovery techniques, and take the patients imagination out of the equation to lower pre-surgery anxiety.

2.) New medical devices and instruments – The most notable aspects of having medical professionals be adept in 3D printing is that A.) It will allow medical offices easily create patient-specific medical prototypes in-house, and B.) It will significantly reduce the price of medical prototypes, as much as 70% according to Alex Drew (a mechanical project engineer at DJO Surgical, a global provider of medical devices.) (reference https://formlabs.com/blog/3d-printing-in-medicine-healthcare/).

3.) Affordable, envelope pushing prostheses – There is no reason for prosthetics to cost an arm or a leg. Here is a very short video of $50 prosthetic hand vs a $42,000 one..

There are many other current applications, such as 3D printing Biofilm to use as skin graphs or printing the perfect orthopedic insole, to speak about, however the potential future applications are what get me excited. Teaching students how to utilize this tool earlier could evolve the medical field.

3D printing in engineering and construction.

Would you believe me if I told you that in the future houses could be 3D printed with construction material? Well, I’ll save you the suspense. It is already happening, and has been happening for years.

Lets assume you already own a house, this might get you excited. Although there is no mass production yet, 3D printed fences are becoming more and more popular and readily accessible.

Teaching students about this tehnology earlier in their development will allow them to find and develop new applications for it, opening up new doorways for themselves and society in general. Outside of professional applications, the most exciting part of 3D printing is that it reduces barriers to entry for product development. Kids, adults, and hobbyists can all produce their own personal products from the comfort of their own home.

Project post #5,

Another week, another blog. It has been a super busy 2 weeks, and I haven’t spent much time in the lab. A group of nerds and myself went travelling around Canada to play a competitive boardgame, so I have been couch surfing and staying at AirBNBs. While on the road I was inspired for a few projects to try, and here is the updates.

Firstly, it is pride month so I 3D printed am alternative torso for a plastic model that I won at one of the tournaments so I could paint it as an entry for the next model contest.

Now on to the meat of the blog. This part will only make sense if I share some exposition and context beforehand. My group of friends play a massive board game called Warhammer40K. The universe is massive, the lore is literally unending, and the hobby consists of endless possibilities. During the trip my friend and I got talking about a certain faction in the universe, and they are called the World Eaters. Needless to say, they are the bad guys.

https://warhammer40k.fandom.com/wiki/World_Eaters
Angron (hahah I know, real creative), Source: Games Workshop

I mentioned I was focusing on 3D printing for this course, and that it would be cool to make a fully custom set of miniatures with the printer. That was they would be unique, and more importantly save about $1000 to build and paint. I documented the printing of the test models so I could show you guys the process of using a printer, work on my phobia of my own voice on recordings, and gift the miniature to him as a tease of things to come!

10 minute tutorial of the printing of a test miniature

I will keep you posted, and give you an unneccissary update sometime during the week when I am done painting him!

Dabbling in videos.

This week I had a chance to create a short video, and boy howdy did it not go as smoothly as I wanted. It was interesting to make short clips to document the process of my recent 3D print, and even more interesting that I consciously remembered to take short clips.

I took short clips of the pre-print, mid-print, post-print and the assembly of the model. I used IMovie on my Mac to put put the video together. The software was fairly easy to navigate through, and after I figured out how to synergize my Google drive account to link my phone’s videos and my computer hard drive things were super easy.

iMovie allowed me to click and drive the MP4 files after I downloaded them off the Google drive. After adding a title and inserting transitions between the short clips the video came together by itself.

I kept things extremely simple, and doing this side project was insightful for me. I realized that I hate my voice, and how to change my approach in the future. I think I will continue to document my projects in the future because it’s really cool, and relatively quick, to make a video documenting the process and final product. Even if Noone ever watches them, I’d love to imagine one day I will want to look back and see the progress I’ve made.

First print, corrected and finished.

I wasn’t planning on updating everyone on the failed torso print, however I figured there was too much suspense for you guys to handle.

I went back, corrected the dimensions, fixed the supports, and gave the print another shot. This time it was a success, and the print came out perfect. I was able to splice it into other legitimate Games Workshop model bits and bobs.

Sidebar: The importance of using 3D printing for established boardgames is significant because it gets rid of the cost barrier, and allows more people to participate. The opensourced nature of 3D printing allows STL creators to get paid reasonably for their talent, and the overarching company (in this case Games Workshop) still makes a boat load of cash selling their textbooks, lore novels, and authentic models. Being able to print this torso allowed me to make two Hive Tyrants (name of the model in the board game) with a single $70 dollar kit.

This was the print with a 20 minute paint job. It will look great eventually!

The next project is to build a good guy in giant power armour so kids that join the TableTop gaming club can play as humans or space bugs! Stay tuned.

First Blunder Cont..

To pick up where I left off, we were just exploring the importance of supporting models.

Roughly 3 hours into this print I had this feeling of dread, and as I watched helplessly I noticed that there was an obvious part of the model I forgot to support. The printer was mezmorizing, however I knew at the end of the long awaited print I would be left with a useless piece of resin.

Resin printers seem like something out of the future, and this is a short video of a time lapse.

Instead of having a super nifty model at the end of my first print I was left with this.

Failed print number 1. Ignore the dirt nail, that is paint from another craft.

The model was inadequately supported near the bottom (top, because it prints upside down). This led to a total mess on the FEP (thin plastic layer that sits on the bottom of the resin vat), and a half printed model.

The goal for next week is to pre-support the model better. I will make a step by step of how I improve this. This will be my guide, if anyone wants to follow along with me!

https://ageofminiatures.com/guide-to-3d-printing-miniatures/

First assignment update, first 3D blunder.

Okay, let me preface this by saying I have been in the model hobby community for 2 years. It was my COVID hobby that replaced sports. I know my way around miniatures, and I have painted hundreds. That being said this is my first time branching out into making my own miniatures with resin.

To make a long story short, I am currently building and painting a bug themed army for a game called Warhammer 40,000. The barrier to entry for a game like this is the cost, so my goal is 3D print models to play with. (think Dungeons and Dragons, but on steroids)

I purchased a kit to start with, and noticed it had extra parts so you could build alternate stances/weapons. Instead of discarding those I figured I could print another body to use those parts on, so I did some internet sloothing. I found a STL file for $5 bucks, paid the creator, and downloaded it hoping it would be what I was looking for.

Files after downloading them from www.Thingiverse.com

After paying the creator and downloading the STL, it was time to turn this file into a 3 dimensional model. Most people in the 3D community pay for slicers (software used for breaking 3 dimensional objects into hundreds of layers that will print one at a time). I don’t have the money for those, so like the broke student I am I used the basic software that came with the printer.

File after being imported into the software.

The file immediately turns into the 3D object, however I had to add supports. Supports are those little strings you see in the photo. They serve one purpose, and that is to make sure the model itself prints without chunks falling off during the print. And this is where I made my first blunder.

I totally didn’t add enough supports so near the end of the print the model failed to print the last 10%. I will post a follow up as the results come out.

My start of my journey into the future..

This is the first blog post in a series that will take place over the summer. The goal of the summer is to learn a new skill, that will hopefully develop into something bigger than just that. Before I explain what I chose to learn and develop, I need to explain a little bit of context.

I recently did a pre-internship placement and noticed that schools are beginning to develop the field of tech for kids, primarily expanding on AUTOCAD and 3d printing. This got me thinking so I spoke with a group of friends about the potential of this for kids. One of my friends was already dabbling in 3D printing and explained it to me, and my other friend who sells medical equipment to hospitals mentioned that doctors are beginning to implement this in hospitals.

I am a hands on learner, and Youtube was not scratching my inquisitive itch, so I splurged. I recently bought a 3D printer so I could self teach about the tech.

Anycubic 4k Mono Source: Anycubic.com

Throughout the summer I have the time, resources, and access to the tech to teach myself how to use the machine and software. In addition, I am planning on starting a Youtube channel to document my experience, upload the products, and vlog my summer throughout the journey so I can use the videos to reference when I eventually get a teaching gig. I have always wanted to make videos, especially tutorials, so this will give me the perfect opportunity.