Before we begin, I would like to present you with the option of engaging with my learning project this week via Fotobabble and/or this blog post. If you are interested in following along using the Fotobabble, check out Tiny Terrarium Talks here.
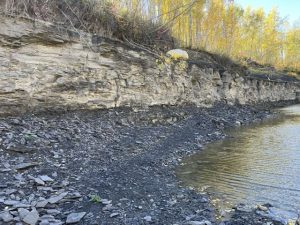
This week on my terrarium travels led me and my boyfriend to a shale bed. We had decided that we wanted to go on a terrarium date and being that I hadn’t taken him to the shale bed yet we devised our plan. We decided to start with tiny terrariums as to get a sense of what the process was and see how things worked.
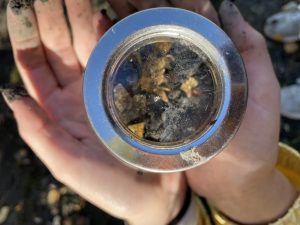
We started our terrariums by layering some loose rocks and shale into the bottom. Then we added a layer of dirt, followed by a layer of shredded leaves, topped with more dirt. We finished our base by adding a some more shale and rock as decorative features.
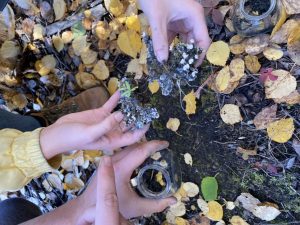
As we were headed back to the river bed, we came across moss growing on the ground. It wasn’t typical moss as it had mushrooms and fungus growing on it. We decided to both incorporate a piece into our terrariums. My boyfriend’s had a small plant growing out of the moss and mushrooms while mine was mostly mushrooms.
After climbing down the shale ledge and crossing the small river stream, we found some tiny shells to add to our ecosystems. As we explored the river bed I came across a plant that looked familiar. Although I do not advise touching unfamiliar plants, I decided that this plant was the final element that I wanted to include in my ecosystem. While harvesting a sprig of the plant, it started to release the familiar smell of mint, which leads me to believe that I now have wild mint growing in my terrarium.
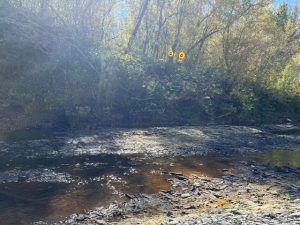
Before climbing out of the river bed and back up the shale layer, my boyfriend and I added a small handful of river water to our glass jars. Then we tightly sealed the lids, put them away for safe keeping and crossed our fingers that they wouldnt break on our way up.
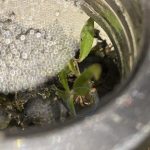
On our drive home from the shale bed, I was examining both of our terrariums. I noticed a beetle had somehow managed to find a new home in my boyfriend’s terrarium as well as a centipede. Although I have thoroughly examined mine, there is no sign of life aside from plant life and creatures to small to see with the naked eye.
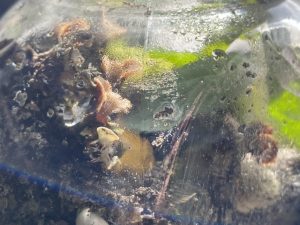
The next day when I went back to check on our terrariums I was happily surprised. The mushrooms in mine were happily flourishing and not affecting the other plants inside the jar at all. Furthermore, both my green moss and mint plant had taken over night and were still looking healthy. In my boyfriend’s jar, Mr. Beetle and Mr. Centipede had been hard at work rearranging their new home and making tunnels through the base. Both bugs as well as the small plant growing out of the moss-fungus appeared to be happy and healthy.
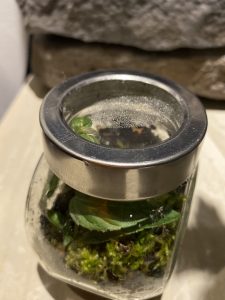
Day two of the sealed terrariums has led to some interesting insights. Surprisingly, my green plants still remain unaffected by the mushroom and mold spores present from the leafs and fungus. Furthermore, my mint plant has grown and is now touching the top of my jar lid. I am unsure whether or not I want to break the seal and trim it, or leave it to see how it responds to its sealed environment. In the second jar, Mr. Beetle is still doing well, however, I have not seen Mr. Centipede. As mentioned in the Fotobabble, I’ll be keeping an eye out for him.
Next week, my goal is to make a large terrarium that has a charcoal feature in it. I am curious to see how the terrarium with charcoal grows and sustains itself verse the terrariums without. Additionally, I am super excited to be making a larger terrarium. I would like to include a piece of drift wood within this jar. I think it would be a cute additional feature where plants can grow or insects can crawl (if any happen to find there way in during the process).
Wow this is awesome Kaelynn! I find these little terrariums super interesting… Probably because I’m brutal when it comes to plants but my wife and I got one as a wedding gift over a year ago and it is still doing great. The process is super interesting and I look forward to seeing how to larger tiny terrariums look. Good luck with your progress!
Thanks Marcus! I’m excited to compare the tiny and larger terrariums to see if the difference in space and size effects the ecosystem or its processes within the jar. It’s reassuring to hear that yours is still doing well after a year ?
Wow I really love your Fotobabble for this post! I have never heard of this app before but it seems like a really great tool to use in the classroom. Thanks for sharing!
Thanks Amy! If you’re interested in learning more about the app, I made a seperate blog post sharing what I liked about it as well as a guideline of steps to follow for creating your own. If you’re interested in checking it out, here’s the link:
https://edusites.uregina.ca/stirringinthecinnamon/2022/09/26/babbling-about-fotobabble/
Hi, Kaelynn! This is super interesting! The link to the Fotobabble wasn’t working on my computer, but I read through the blog post. I am amazed that everything is still growing and thriving! I do not know much about plants, but I’m excited to continue reading your future blog posts.
Hi Emma,
Thank you for letting me know that the link unfortunately did not work for you. I tried the two separate links in both blog posts and they seem to be working on my end (although I had to wait a bit longer than anticipated for the site to load in).
If it still isn’t working, you may need to create a free account which you can do here: https://app.fotobabble.com/login/register
Hopefully that helps, good luck!
Your project is so interesting! Do you think this is something a high school science class could explore throughout the semester? It seems like such a fun way to experiment with ecosystems. I can’t wait to see what the charcoal does to the terrarium!
Thanks Ava!
I would absolutely love to explore it for a high school science class. Being that I learned more in depth about the photosynthesis and cellular respiration of plants in high school, I believe creating these ecosystems would be useful to provide a scaled down real-life example of the aforementioned processes. All around it’s a great hands-on learning experience for many students in regards to the science curriculum. It can serve as an introduction to plants in elementary school through to critical analysis of different environmental processes in high school. Furthermore, it can be used while creating cross-curricular lesson plans. For example, one may chart or graph plant growth as time progresses (math) while learning about what a plant requires to grow (science).