Learning Project #8 Turned out Unsuccessful

What an exhausting weekend I had, it was filled with some sickness and tiredness.
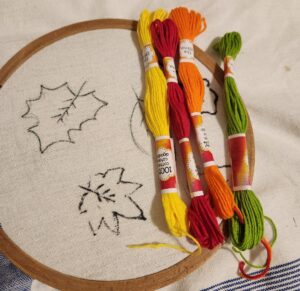
I was really excited about my next learning project and piled up all the necessary materials already, so I might be done early this week. But sometimes things turn around in a different way.

Last Friday, my daughter woke up in the middle of the night with her stomach upset and felt like she has nausea. I made some herbal tea with mint/cinnamon, and ginger, and thought to take her for welkin clinic in the morning. You might be thinking, I’m a herbalist, absolutely not, I heard these home remedies from my parents. My daughter didn’t throw up but had a painful night. I was glad she started to feel better next day, but guess what, I had another sad news that one of my friends brother passed away, so Sunday got occupied for the condolences purposes, as weekend is the flexible option to adjust some extra tasks.
That was the story of my hectic weekend. I couldn’t manage to complete my, this week’s learning project, but I will work on it next week. It was kind of a short weekend for me as I had a class for Saturday.
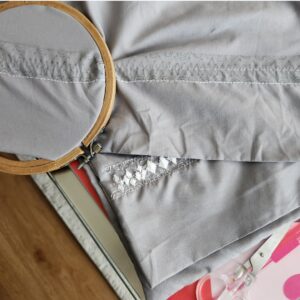
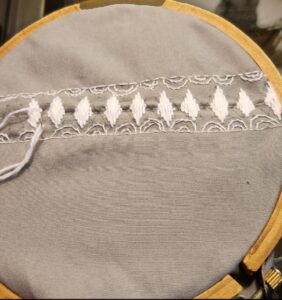
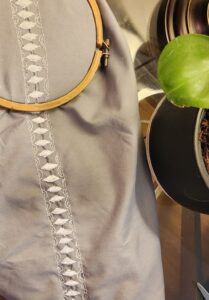
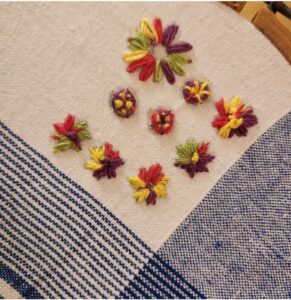
It was my plan to do embroidery on my casual dress trouser, but it didn’t work out.

I didn’t start anything yet, just collected my supplies, hopefully I will work on it for my next week learning project.

Learning Project #7

As I mentioned in my previous blog to work on my second pillowcase embroidery next week, so, I completed it using the same material,  I mentioned in my previous blog. I had a plan to use a different digital app or at least a different template to show my work, but I couldn’t find any specific one, hopefully for my next blog.  I simply completed my pillow case embroidery and attached some screenshots below.

There’s a slight difference in having Stem stitch for my recent work because I wanted to try in a different way. As I didn’t use any actual video demonstration without using a template, so I thought to try uploading my video for today’s project. I tried, but no luck this time. I will try again for my next learning project. Though, my pillow case embroidery was time taking, comparatively to my earlier learning projects, but  it wasn’t boring, I enjoyed it.


I mentioned in my very first blog about how to print your design by pricking  pattern and using some ink to shade your design. I was exploring some ideas for my future learning project, I found a video, it has a demonstration of how to print your design by pricking. The description can be found at the very last 8 minutes of the video.

Digital-Citizenship

“Digital Citizenship is more than just a teaching tool, it is a way to prepare students for a society full of technology.”

-Dr Mike Ribble

There was no use of internet when I went to school, but computers were used for the research purposes lately, during my secondary education. We used to study physical books and get prepared for the final exams. There was a long distance education available though, but not online. For long distance education, students had some designated schools/institutions in their own city, to have their classes in-person. Though there were no cyber safety issues for the learning, I remember there were some safety concerns regarding use of some social media apps, either on phone or on computer. Facebook was trending as we have tik tok or Instagram these days. It was pretty convenient to reach other people’s personal picture galleries from Facebook through their friend’s list. It was considered to avoid saving personal pictures in any social media app for the privacy reasons.
I like how we have unlimited digital resources available now to learn, teach & communicate, but there’s a strong need to increase our kids’ awareness about digital safety. We as educators have a lot of responsibilities to teach our kids about cyber safety. I feel that social media is so accessible to everyone these days, and there are less people who pay attention to taking care of everyone’s privacy. I believe it’s everyone’s personal responsibility to see how they have to be careful to share their personal stuff and why. It can take a second to pass a comment on social media to create an unpleasant feeling by exploiting someone’s personal stuff.
I really like how it’s mentioned in
The IRL Fetish , the essay by Nathan Jurgenson, “Thoughts, ideas, locations, the identity,…………. .almost everything else are finding their way on social media.”

Google URL

I really enjoyed reading Nine Elements of Digital-Citizenship  as they are all well related to digital literacy these days. I will pay attention to all of these to teach my students to be aware of digital safety for those tools, they’re using. I found digital fluency, from Nine Elements of Digital-Citizenship , very interesting as it explains well the needs to be aware of digital citizenship. It’s described in the article “Digital Fluency is the process of understanding technology and its use. The better educated or “digital fluent,” students are, the more likely to make good decisions, like supporting others instead of making negative comments.”
Having more digital learning opportunities, we have more ways to teach our kids and make their learning easier.

I feel people are more aware than before about their personal privacy but there’s a still need to play everyone’s own part to learn more about digital citizenship.

Learning Project #6

I’ve planned to do embroidery on my pillow case this week for my learning project. I was thinking of trying something simple to work on. After searching a few videos, I ended up picking one out of many because it has beautiful different patterns. I chose the pattern out of some different designs in the video and drew on my pillow case. I have attached the instructions video, I hyperlinked & renamed it:

Hand Embroidery Designs

After collecting the supplies and tracing the design, I started to work on my embroidery. It was fun to have some borders done with stem stitch, but I didn’t like having stem stitch for the diamond embroidery. So, I thought of changing my pattern using 5 strands of thread instead of using one strand which I used previously.

You might notice the difference of both stitches to have my diamond embroidery above.

I really like the satin stitch, so I used a satin stitch to complete my pillow case. It turned out good!

As I enjoyed using Canva to record my last week’s learning project, I thought of exploring something more, to capture my pillow embroidery work through it. I used a free Canva Video Template and and recorded my work through it. I found an interesting thing this time as I was uploading my pictures in the template, it shows multiple options to present your video in the animation option. I had a different layover, and had fun creating it. I had a trouble to upload my video, I just used video compressor to have my file to 1MB and uploaded it. I have a plan to complete my second pillowcase for my next week’s project, so stay tuned!

Learning Project #5

It’s time to continue working on my next learning project blog. I wanted to record my learning experience in a different way this week. As I was exploring different resources, I was intrigued to learn about Canva. I heard a lot of good stuff about it lately, so I thought to explore.  I decided to document my this week’s learning project using Canva. As I had access to it, I didn’t  find it difficult to get started, just required any option for login, I used my email and used some features for my recent blog.
I wanted to experiment with some clothes embroidery this week, so I decided to do embroidery on my daughter’s tees. She expressed her interest having some roses, so I drew a small pattern and framed it with the t-shirt. I followed the same rose embroidery pattern which I learnt  in my previous blog. I have also attached another video for my recent week inspiration.

review.https://youtu.be/cyRu65kLJPM?si=9AyPIqhNq8vDFG2U

The supplies I needed were thread, frame, needle, and a t-shirt. I drew the pattern on the shirt and started my embroidery.

I recorded my work through Canva as I didn’t have any videos yet in my post, so I thought I would have a new experience. It was very quick and turn-out amazing! I have attached my learning project below, it was fun learning about Canva!


Exploring S’more Digital World!

This post is the sequence of my last learning project # 4, to update my progress regarding using Smore. I was excited about learning to make a flyer, using Smore . To get started, I just used my email account to login and no further details were required. After logging in, I found  different templates as I mentioned in my previous blog.

(all screenshots are from Smore official websites)


I decided to use the weekly updates template and found it easy to navigate through each step. At first I selected my title and added an image as you have the option to choose your own header or upload from the device. I chose my background provided through Smore album and changed colors & the font. I shared some screen shots taken while I was subbing, taken upon the request of a class teacher and had a permission before sharing in my newsletter for learning purposes. As I proceeded, all directions were very straightforward till the end of your newsletter. There’re multiple options to share via email, through social media or in printing pdf form. It was very simple & easy to create my weekly newsletter, and I had really fun making it!

I’ve attached my newsletter copy below, hopefully it’s appealing to my students attention!

Loading indicator

close

Learning Project #4

Use of multiple digital apps have modified teachers’ way of teaching and their student’s learning. I believe digital learning has provided a convenient platform for almost everyone who has access to it, and also helped teachers to be multitasking at one time. They only need to explore and find the right option. As I searched about different digital media apps to choose one that I have never tried before, I decided to write about Smore.


Smore is a convenient way to create some flyers, classroom newsletters, some book reviews & assessments etc. (screen shots for all pics. from Smores’ website)

It can also be used for remote learning to plan some assignments.

Smore can be used for free and with certain price packages based on your school/division preferences. I find it interesting to create different flyers; to introduce yourself to your class & their families, to make some class rules to display, or to provide updates to class families on a weekly basis. You can use different images and highlight some main events to make it attractive and colorful. It’s very easy to use, you can just make an account to get started. You also have an option to use it individually or as a team. I have a plan to explore more about Smore and will make my next post regarding my progress on it. Stay tuned!

Digital Learning

Digital media and the use of technology has elevated our living in multiple ways; we can learn online, communicate easily, use multiple online resources to run our life by sitting home,… etc. It’s interesting how Michael Wesch in his video (An Anthropological Introduction to YouTube) describes the new culture of media as “……..the replication and the spreading of happiness……celebration of new forms of empowerment ……a celebration of new and unimagined possibilities.”
He further described “….media is not the content, media is not just the tool of community, I think the media mediates human relationships and when media stops human relationships stops.”
There’s no doubt that media & technology brought people closer by eliminating the distance barriers.

In regards to the use of digital tools in my future classroom, I would say it’s inevitable. In the digital world, I will try to promote digital learning as much as possible because its fun to learn via technology. There are different learning apps kids use to improve literacy, reading, math’s by using Raz kids, Mathletics, Epic or any other learning apps. I observed that kids enjoy learning through any digital apps.

Another good point is that, It’s convenient to reach out to parents using digital tools; Edsby/ Seesaw or through any other digital apps, approved by their school division.

Epic

Mathletics

Edsby 

SeeSaw 

(hyperlinked in MS)

These days, we can’t ignore the importance of including digital learning, but we have to be aware of the challenges we can come across. I believe we’re one global community, but it requires a big responsibility for how to use it properly. In my opinion, each parent/adult needs to teach their kids about some healthy boundaries and safety concerns. If we teach our kids about digital boundaries and a responsible use of media, it can be helpful to keep balance in our life.
Toni Bates in his open textbook, Teaching in a Digital Age talks about how to keep balance in the digital age. In the topic,  About the book and how to use it,  he explains about the use of technology as, “It’s about helping your students to develop the knowledge and skills they will need; not so much digital skills but thinking and knowledge that will bring them success in a digital age.”


(Book Title & the title page was linked using MS)

Hand Embroidery

It was exciting to select my next hand embroidery blog. I learnt about some floral embroidery last week, I planned to have learning about leaves embroidery, for this week’s post. While I was searching for some instruction videos, I found an interesting youtubers page, where she has posted not only her instructions, but she also attached a free pattern to  print out. If you just hit the link provided or search @NeyCrafts, you’ll be able to find all her creative work along with her social media networking guide & links. She also has some other good craft ideas and small embroidery business ideas there. I found it interesting, so I thought of sharing.

https://youtu.be/cL2xIa9MTrw?si=WX7iRxqsGmAPoqz_ 

After printing my pattern on the cloth, I gathered some supplies. I used 5 strands of thread, a piece of cloth, a scissor, and a frame.


I started to follow the instructions for Fish Bone Stitch, Stem Stitch, Back Stitch, Lazy Daisy, and Satin Stitch. I played around with my phone camera to highlight, by using crop & modify option.

I really had fun exploring and learning  more about embroidery. It seems a bit difficult before starting, but as I kept going, I enjoyed it. I found it a bit time taking because of some detail work, but overall I had fun!!


Hand Embroidery

It’s time to take my next step in learning about hand embroidery. Following a period of reflection, I decided to create some floral designs as I wanted to learn about how to stitch simple flowers. I selected the video for some guidance after browsing on you tube.

I chose a few stitches because I wanted to stitch them on my kitchen towel. I used multicolored/tie dye thread that complimented my cloth.

After drawing a few flowers, I started to follow instructions provided in the video.
The flower patterns were woven rose stitch, daisy satin stitch and sunflower lazy daisy stitch. I used 5 strands multi-colored threads to make it colorful. I spent some time understanding each step before to get started. The cutest of all flowers was a rose for me but I enjoyed making daisy satin stitch. It was very quick to make and elegant after!