• EDTC300,  My Learning Project

    Part 7: In My Animation Era

    ╭────────────────────────────────»»❀❀❀««────────────────────────────────╮

    “Every human is an artist. The dream of your life is to make beautiful art.” 

    Don Miguel Ruiz 

    ╰────────────────────────────────»»❀❀❀««────────────────────────────────╯

    Hello everyone, 

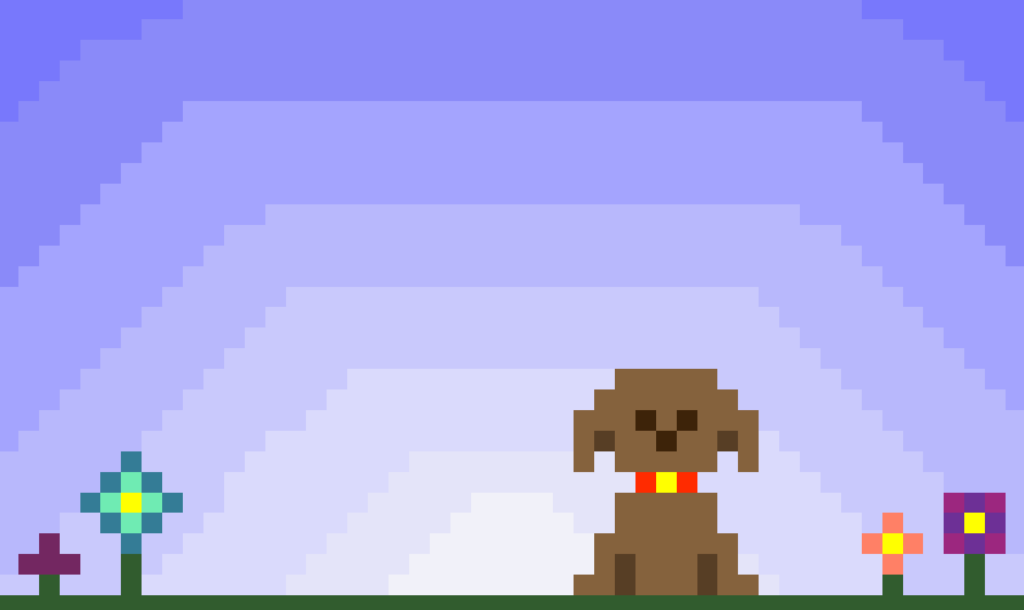
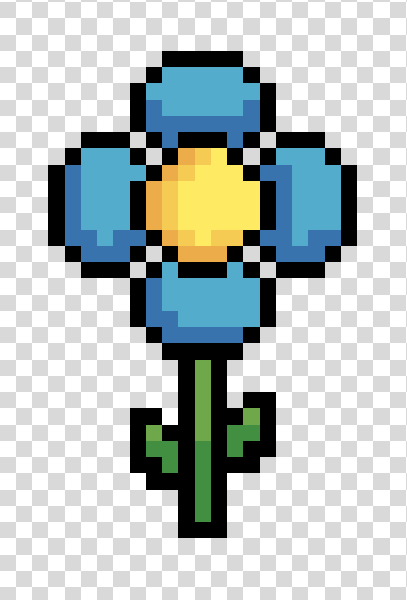
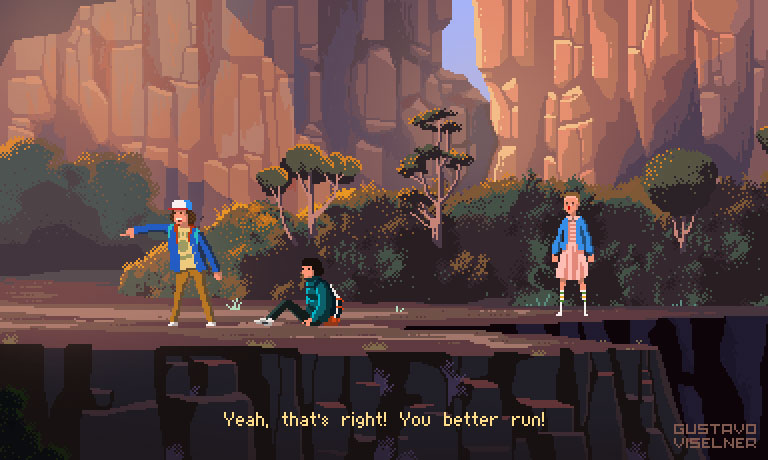
    For my learning project this week, I decided to embark on an entirely new journey: animation. Now, what I found out… after some extensive research … is that you can create animations, such as video games or television shows, using only pixel art! Through combining various pixel art images – also known as sprites – that represent your game characters, objects, or backgrounds, you can really bring an art piece to life. To show you an example of what I mean by sprites and pixels, I provided an example of one of the video games I used to go crazy for when I was younger which incorporates both elements:  

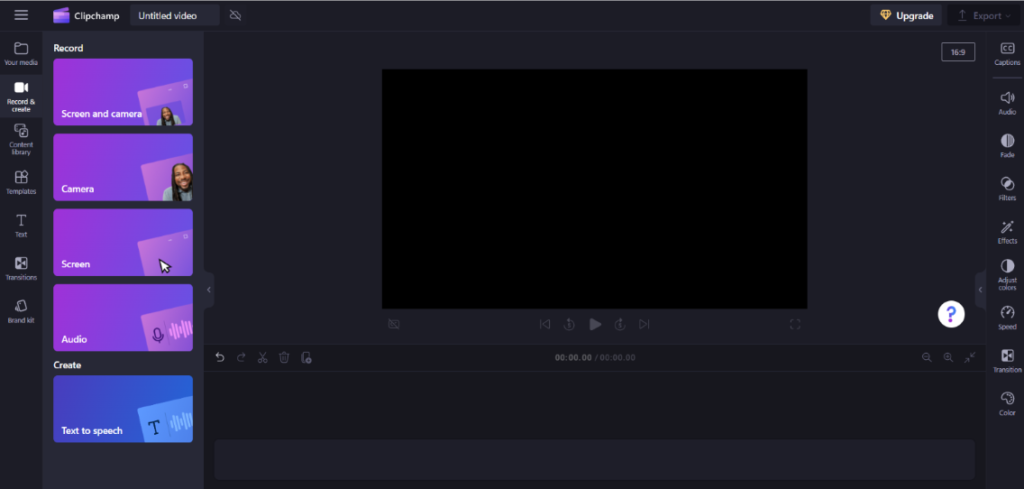
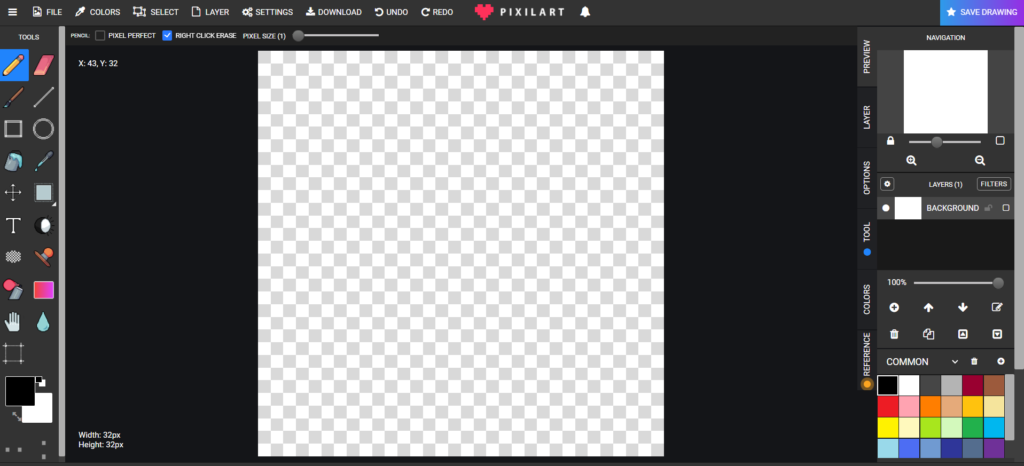
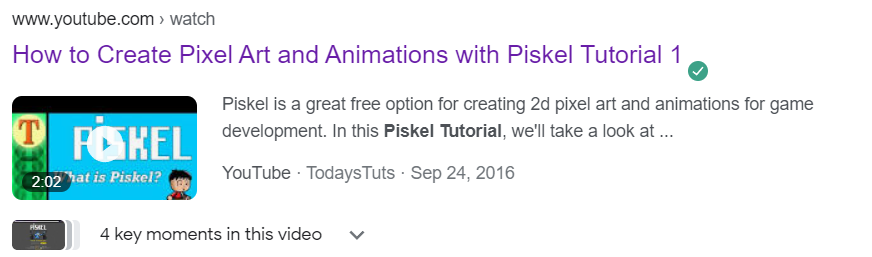
    Once I conducted some research, I decided to dive right in. After a quick Google search, I found a website called Piskel. Piskel is a “free online editor for animated sprites and pixel art”, so it sounded perfect to use in theory. However, I quickly found out that there was no tutorial within the website for how to use the program… not even those pop-up tutorials which one typically skips. Sooo… I was back to square one. Instead of restarting, I decided to take to YouTube to find a tutorial on how to use the Piskel program.  

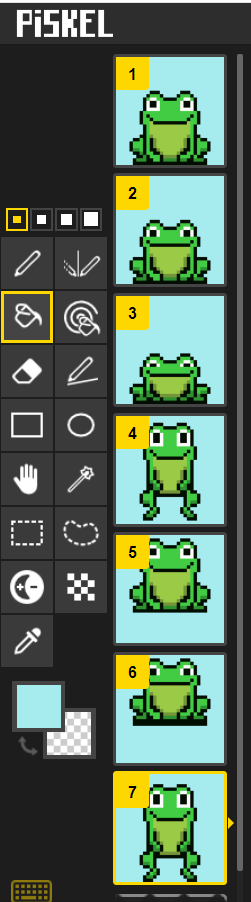
    Once I became familiar with the Piskel program, I then went to the Mega Voxels website to find a good animation template… and I did! I really enjoyed this tutorial. They go through each frame step by step, and it was extremely easy to follow. 10/10 would recommend. From there, I got to work.  

    My frames
    The final animation

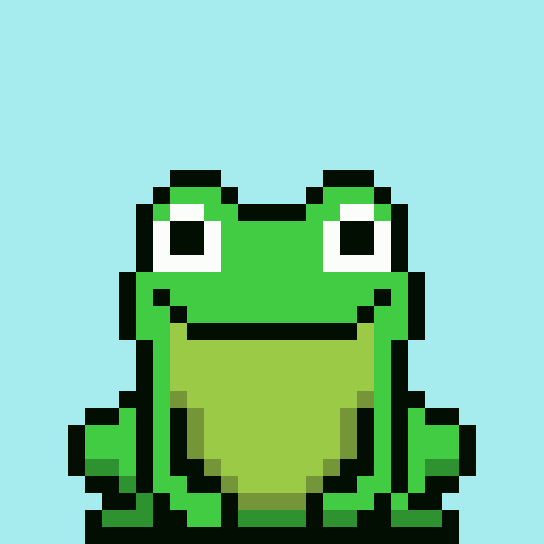
    Overall, minus the lack of tutorial, eraser tool, and undo/redo button, I really enjoyed the Piskel website. Although it took some research time, it job the job done… and for FREE 😎! 

    I hope you enjoyed my animation this week! Next week I might even try a video game… who knows. Speaking of, were there any pixelated video games you enjoyed – or currently enjoy – when you were younger? If so what ones.  

    Have a wonderful week!


  • EDTC300

    Too Little Too Late

    ╭────────────────────────────────»»❀❀❀««────────────────────────────────╮

    Welcome everyone,

    In today’s digitally driven world, it is crucial that individuals – both young and old – understand the concepts of cyber safety and digital citizenship to best ensure safe and responsible digital use. Upon reflecting on my own schooling experiences, I noticed that cyber safety was often treated as an afterthought. It was not until specific events – like cyberbullying – occurred that my school would address cyber-related topics. For example, after an incident had occurred in relation to the spread of intimate photographs, our school responded by bringing in the Regina Police Service (RPS). Although this intervention from the RPS sounded good in theory, the presentation was conducted in a reactive way – scare tactics – rather than a proactive way – education into proper use. Thus, leaving us with large gaps of knowledge as opposed to new understandings.  

    When teaching concepts such as digital citizenship, it is important for educators to always answer the why – and the occasional why not – questions. It is one thing to say, “be kind online,” and it is another to explain WHY someone should be kind online. Those why or why not reasonings are what youth – and adults – need to hear and understand in order to make informed decisions on their own. Going forward, I intend on including the resources we explored this week into my teaching practice, starting with Jason Ohler.  

    In “Character Education for the Digital Age“, Jason Ohler sheds light on the urgency of addressing digital citizenship within schools. He challenges the notion of treating students as leading two separate lives—one offline and one online—and advocates for integrating their digital experiences into their broader educational journey. Ohler emphasizes the importance of nurturing capable digital citizens who can balance individual empowerment with social responsibility, a sentiment that resonates deeply in today’s digitally saturated world. 

    Mike Ribble’s framework of nine elements of digital citizenship offers a structured approach for educators to cultivate responsible digital behavior among students. From digital access and communication to security and privacy, each element addresses crucial aspects of digital citizenship, providing educators with a roadmap to empower students to navigate the digital world confidently and ethically. 

    The nine elements of digital citizenship
    The Nine Elements of Digital Citizenship (©2020 Let’s Talk Science).

    Additionally, the S3 Framework – Safe, Savvy, and Social – provides a practical guide for teaching digital citizenship, focusing on protecting oneself and others, educating oneself and others, and respecting oneself and others in the digital realm. By incorporating these principles into education from an early age, educators can equip students with the necessary skills and knowledge to navigate the complexities of the digital world responsibly. 

    Thank you so much for reading!

    ╰────────────────────────────────»»❀❀❀««────────────────────────────────╯

  • EDTC300,  My Learning Project

    Part 6: BREAKING NEWS 🚨

    ╭────────────────────────────────»»❀❀❀««────────────────────────────────╮

    “Life is a blank canvas, and you need to throw all the paint on it you can.”

    Danny Kaye

    ╰────────────────────────────────»»❀❀❀««────────────────────────────────╯

    Well everyone,

    Today marks a day in history for my learning project. On March 5th at 12:05 AM, I received my first PixilArt follower – and no, it was no someone who was coerced. My post today has two shoutouts, the first goes out to user @xavierarnaiz for being my first follower… I will remember you when I make it big. My second shoutout goes to Chantelle T. Chantelle gave me the challenge of making an animal on PixilArt! To mark my halfway point, I decided to mix my past projects together.

    To start, I made the landscape, which was a skill I got to work on in Part 5. Instead of blending the layers together, as I did last week, I decided to use a rainbow formation to create a sunshine effect. From starting lighter, to going darker, it added some contrast into the sky – as oppose to a unified blue background.

    From there, I took my skills from Part 3 to add some flowers to my landscape. My focus here was the animal I was about to create, so I decided to keep the flowers nice and simple.

    Now, Chantelle had the preference of either a cat or a dog… or an apatosaurus. To see what tutorials I could find online, I decided to stick with the dog tutorials due to the large selection of content – although an apatosaurus would have been perfect haha. I took reference from the tutorial to create my head, and added a body as I saw fit.

    Image of my PixilArt image

    Overall, I am super pumped about how this turned out! Although it is rather simple, this was my first time making a PixilArt picture on my own, without directly following a tutorial. I find that I am becoming increasingly more comfortable with creating content independently – something that I could only dream of in week one.

    On that note, I have a question for all of you. Whereabouts are you along your own learning journey path? Do you feel as though you are still bound to tutorials? Or are you at a point where you feel as though you can start venturing out on your own? Let me know what you think in the comments below.

    Thank you all so much for reading. I hope you have a wonderful week 😊!

  • EDTC300,  My Learning Project

    Part 5: Learning All About Landscapes

    ╭────────────────────────────────»»❀❀❀««────────────────────────────────╮

    “The painter has the Universe in his mind and hands”

    Leonardo da Vinci

    ╰────────────────────────────────»»❀❀❀««────────────────────────────────╯

    Welcome everyone,

    Today, I am going to try and push myself outside of my comfort zone by creating a PixilArt landscape. Last week, I really enjoyed the ClipChamp program, so I am going to use the same video software to document my progress!

    As demonstrated in the video, I began by looking up various PixilArt landscapes to gain inspiration. After doing some digging on Reddit website, I found a link to an amazing blog, called SLYNRD, that goes through various tutorials such as animated, static, and mini PixilArt projects. It was just my luck that the author provided a landscape pixeling blog, so I had the opportunity to learn and follow along using only this resource.

    Although I want to say that the tutorial was easy to follow along with… it was not. Instead of providing a video, the tutorial was a continuous Patreon presentation on loop that could not be paused. The slides – having roughly 10 seconds on content each – moved far too quick for me to follow along and/or keep up with. If I missed a step or demonstration, I had to watch the whole loop again until I got back to that point. After getting frustrated, I just decided to stop watching the tutorial and try to figure out the process – specifically the clouds – on my own. Though I had troubles following the tutorial, I am extremely happy with how my project turned out.

    The finished product:

    My PixilArt Landscape
    My PixilArt Landscape

    Now, I want to try something new for next week… and I need your help. What should I create next?! Let me know in the comments below.

    Thank you so much for reading. Have an amazing week!

  • EDTC300,  My Learning Project

    3…2…1… ACTION!

    ╭────────────────────────────────»»❀❀❀««────────────────────────────────╮

    Hello everyone, 

    Today I am going to be trying out a new video recording app called Clipchamp. Clipchamp is a downloadable Microsoft program that lets you record your own audio, desktop, and front camera… or if you are feeling fancy, you can record all three of these things at the same time. There is even a text to speech function!  

    Screenshot of from desktop of the Microsoft Clipchamp PC app
    A screenshot from my desktop of the Microsoft ClipChamp PC app

    Although Clipchamp is a Microsoft program, you do not need a Microsoft account to use it. All I did was download the Clipchamp PC app onto my computer, and it gave me the option to either create a new profile or log in using a Microsoft or Gmail account. Since Gmail is a free to use platform already, you can essentially get Clipchamp for free so long as you have an existing account. There is also an “Upgrade” option, however, nothing within the list of upgrades will affect your overall experience within the app. You can make unlimited videos, with unlimited time restraints, all within this one – free – platform.  

    As future educators – specifically in the digital age – this is an AMAZING tool for creating online lectures and/or video guides. If you bring a PowerPoint or Google Slides presentation onto your desktop, you can record a digital lesson – with the option of – using your self-facing camera and audio that can play in the place of an in-person lecture. If any of you have taken an asynchronous class or have watched video tutorials on YouTube before, then this video-recorded lecture format may be familiar to you.  

    On the topic of using Clipchamp in the classroom, I provided an example of how Clipchamp can be used to fit each level of the SAMR model below:  

    • Substitution: The ability to teach a lecture digitally versus in person 
    • Augmentation: The ability to go back and edit and/or fix mistakes in a lecture 
    • Modification: The ability for students to collaborate with peers and create multimedia projects online 
    • Redefinition: The ability for students to collaborate globally on video projects  

    Overall, the Clipchamp PC app is a relatively easy program to navigate. Without any sort of tutorial, it took me roughly 15 minutes to figure out the basics. From there, I was flying through the process. To give you an example of Clipchamp in action, I have linked Part 4 of my learning project below. I hope you enjoy!  

    ╰────────────────────────────────»»❀❀❀««────────────────────────────────╯


  • EDTC300,  My Learning Project

    Part 3: It’s Go Time 

    ╭────────────────────────────────»»❀❀❀««────────────────────────────────╮

    “The role of the artist is to ask questions, not answer them.” 

    Anton Pavlovich Chekhov 

    ╰────────────────────────────────»»❀❀❀««────────────────────────────────╯

    Welcome everyone, 

    Today, I am going to create my very own PixilArt image. To start, I began by logging into my PixilArt account that I created in Part 1. From there, I clicked the “Start Drawing” link in the top right corner which took me to my very own workspace 🎉! 

    To be completely honest, it took me a long time to start feeling creative. I stared at the blank screen for 5 to 10 minutes before I even made an attempt to draw something… and then I changed my mind and wanted to start again. To put myself back on track, I decided to look up PixilArt video tutorials. After scrolling for some time, I found a tutorial that was both fun and achievable for me as a beginner… a perfect starting point!  

    My progress halfway through the video:  

    My desktop at the halfway point

    Here is my finished product:  

    My flower 🙂

    Overall, I am super happy with how this turned out! Although the author used a different pixel art platform called Adobe Illustrator, the tutorial was extremely easy to follow, and the content transferred to PixilArt extremely well. I am excited to see what is in store for next week.  

    Thank you for joining me along my learning journey! 

  • EDTC300

    Social Media… An Infectious Joke or A New Cultural Order?

    ╭────────────────────────────────»»❀❀❀««────────────────────────────────╮

    Welcome everyone, 

    In our lecture this week, Introduction to the Digital World, we had the ability to explore the different ways in which our modern-day technologies have evolved. Messages that once took weeks to arrive – through the form of mailing systems – now can be sent and received in a matter of seconds through online portals such as iMessage or Gmail. Telephone calls that once were stationary – through the form of a landline – can now be made anywhere… from places such as the middle of a deserted grid road or the washroom. These changes, especially in the content and tools that we use, have led to an evolution in relationships. To specifically pinpoint this evolution in relationship, we must look to the technological advancement of social media.  

    As noted by Michael Wesch in his video, An Anthropological Introduction to YouTube, social media is the new way of creating community. Social media is not just about information, but “it is actually about linking people and it is about linking people in ways we have never been linked before,”. Through the lens of a future educator, with hopes of building community within a classroom, this would mean that we should be taking more digital approaches within our classrooms to better keep in tune with relevant practices. An attempt I have seen at this is through the Minecraft Education programs on school computers.  

    It is tricky to answer what this might mean for schools in general going forward. Similar to other scenarios, if we want to keep our teachings and content in line with the ever-evolving digital landscape, we must practice adaptability and innovation. Rethinking the idea of schooling and education in our networked, participatory, and digital world requires a shift in pedagogy towards a more dynamic and interactive approach. This entails bringing digital literacy, critical thinking, and collaboration skills into the curriculum to prepare students for the challenges and opportunities of the digital age. 

    However, balancing the challenges of our new digital reality with its possibilities is not always the easiest task. While digital technologies offer a huge potential for enhancing learning experiences, they also bring forward concerns regarding privacy, online safety, and the digital divide. Educators must navigate these challenges by promoting a culture of responsible digital citizenship and providing guidance on navigating the digital world ethically and safely. 

    Thank you so much for reading, 

    Emma 

    ╰────────────────────────────────»»❀❀❀««────────────────────────────────╯

  • EDTC300,  My Learning Project

    Part 2: What Are Pixels?!

    ╭────────────────────────────────»»❀❀❀««────────────────────────────────╮

    “Art washes away from the soul the dust of everyday life” 

    Pablo Picasso 

      ╰────────────────────────────────»»❀❀❀««────────────────────────────────╯

    Hello everyone, 

    I am back to my PixilArt grind. As I was preparing for this week’s post, I found a large gap in my learning process… I did not know what a pixel was. So, instead of ploughing forward, I decided to take a pause in my initial plan – which was creating an art piece – to bring myself back to the basics.   

    Here’s what I learned: 

    • “Pixel art is a digital art style that utilizes individual pixels to create 2D images, known for its blocky, low-resolution aesthetic often associated with early video games and limited color palettes.” – Chat GBT 
    • Pixels are short for “picture elements 
    • They are the smallest indivisible units of a digital image or display 
    • Pixels are used in almost everything technology related! Like TV screens, video games, digital photographs, monitors, et cetera. 
    • Higher resolution images have more pixels, resulting in greater detail and clarity 

    Essentially, think of pixels like individual puzzle pieces. They come together to form a greater picture.  

    To find some additional pixel art information, I typed in “best pixel art pictures” into Google. It led me to this link, which blew me away.  

    A picture created using Pixel Art that depicts a scene from Stranger Things
    Pixel Art TV by Gustavo Viselner

    Although I may not get to this level of expertise by the end of the semester, I now have a solid foundation of what pixel art is used for and where people can go with it. 

    Thank you so much for reading, I will update you all next week!  

  • EDTC300

    Tech Habits: Facing My Social Media FOMO

    ╭────────────────────────────────»»❀❀❀««────────────────────────────────╮

    Welcome back everyone,  

    This week, we had the opportunity to discuss a new topic: technology habits. In our day and age, technology is a part of almost everything we do, specifically in the form of mobile technology. Although mobile technology has its benefits, like waking someone up in the morning or teaching a new learner how to cook, to remain beneficial – as opposed to harmful – technology, like most things, must be used in moderation.  

    Snapchat SVG Vector Icon Instagram 1 SVG Vector IconTiktok Logo Logo SVG Vector Icon

    According to my iPhone Screen Time data, I use Snapchat, Instagram, TikTok, Spotify, and Maps most frequently within my daily life. Although certain tools, such as group chats on Snapchat or focus-based playlists on Spotify, occasionally help along my academic pursuits, these apps – I will admit – are primarily used for leisure and social interaction.  

    To stay organized and productive, I heavily rely on:  

    Out of these resources, I will absolutely RAVE about the OneNote Desktop App. It is how I take notes and organize content for all my university classes. Through the app, you can import PDF files, PowerPoint slides, or screenshots and highlight desired content – in any colour you want 😉. As well, there is an amazing ruler function that keeps these highlights straight and clean looking! You can create a notebook for each class and add dividers for any week or chapter you would like, and you can close any notebooks you are no longer using (which will be saved in the app if you wish to open them later). Although it took me a little while to get used to, I absolutely fell in love with OneNote because it keeps me organized and allows me to have all my work in one place…#notsponsored it is just great! 

    Image of my OneNote desktop layout
    Here is an example of my OneNote layout

    A current tech-related distraction I am facing is the habit of mindlessly scrolling. Whether that be scrolling on my Instagram feed or my TikTok for-you page, I lose track of time without even knowing it. This habit wastes tons of time within my day that I could be using on other things. For example, I would rather scroll through TikTok for two hours than finish a reading I have for class.  

    To create a better balance between my academic and personal screen time, I have been wanting to A.) Limit my time on these apps using the App Limits function or B.) Delete these apps altogether. I have tried, at many times throughout my life, to just delete my social media altogether. However, this introduced a new challenge… FOMO. Life milestones, event invitations, or updates from my friends and family are something I feel as though I would be missing out on if I deleted my social media. Specifically, Snapchat. My sports teams, friends, and family make plans through the group chat function on this app, making it a staple in my daily life. As of right now, the feeling of FOMO is something I have not been able to overcome… and as a result I am still an avid social media user.  

    If anyone has any good advice on FOMO, please let me know in the comments… I am in need of it haha.  

    Thank you all so much for reading!  

    Have an amazing week,  

    Emma 

    ╰────────────────────────────────»»❀❀❀««────────────────────────────────╯

  • EDTC300,  My Learning Project

    Part 1: Exploring the Wonders of the Digital Art World

    ╭────────────────────────────────»»❀❀❀««────────────────────────────────╮ 

    “Every child is an artist. The problem is how to remain an artist once he grows up.”   

    – Pablo Picasso 

    ╰────────────────────────────────»»❀❀❀««────────────────────────────────╯ 

    Welcome everyone,  

    Come along with me as I embark on my #LearningProject journey!  

    While planning out my project, I wanted to learn a skill that could not only push me outside of my comfort zone but also be transferable to a classroom environment. As I introduced in EDTC300 Blog #1, I had the opportunity to work at Educating Youth in Engineering and Science (EYES) camp this summer, facilitated through the Faculty of Engineering. During the planning of activities, I noticed a significant gap in my technological skills. Not only were these skills outside my comfort zone, but they were also entirely foreign to me. To be a strong educator, I believe that you must find and deliver content that your learners can relate to. In our tech-focused culture, I have observed that many young learners show great interest in the digital world, from video games to social media. So… what better option to push myself and explore than the art form of pixel art! 

    Upon my research, I found a free online resource called PixilArt. Through this program, learners can: 

    • Create a free account using only an email and password 
    • Save drafts or completed work to an account 
    • Follow other artists or friends 
    • Publish art projects to an online public community 
    • Access the art projects of others in the public community 

    They even have classroom signup options! Woohoo. This looks like a great teacher resource to use if you have access to internet, tablets, and/or laptops.  

    Image of PixilArt logo
    Screenshot of PixilArt logo

    To begin, I made my account and was ready to jump into creating. HOWEVER, I needed to learn how to use the program first. To become familiar, I watched a tutorial video going over all the functions and wonders of the PixilArt program. From there, I spent the rest of the hour playing around on Pixilart, exploring the functions of the toolboxes on the left and right sides.  

    Image of PixilArt program taken from desktop
    Screenshot of PixilArt platform

    My goal for next week is to make my first art piece. Going forward, I have scheduled time for my project every Sunday (starting January 22nd) for a minimum of one hour. As of right now, I do not have a desired outcome. I just want to become familiar with what PixilArt is and how to use it 😊! 

    Thank you joining me along my journey!