Wrap It Up & Stitch It Down

It’s been quite the experience to start learning how to use my embroidery machine. Picture this: a university assignment hovering over me, the task at hand – to learn a new skill using online resources. I decided to dive headfirst into the world of digital stitching and come out on the other side with a newfound skill. It sounds intimidating, doesn’t it? Well it was in the beginning!

I was quite confused when I turned on my embroidery machine for the first time. The computerized graphics, hoop sizes, and thread tension were all unfamiliar terms to me. The fun part is that I didn’t let the initial difficulty stop me. You see, I have a deep-seated passion for all things crafty. Making things, be it knitting, crocheting, or scrapbooking, has always brought me comfort. So I jumped straight into the realm of machine embroidery, equipped with determination and an abundance of online resources.

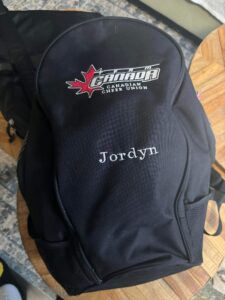
After a few weeks, I’m happy to report that I’ve not only mastered the fundamentals but also discovered a brand-new passion. I’ve come to see the enormous potential this ability holds for my small side business, beyond just succeeding in my university assignment. Imagine personalized wall art with delicate stitching, monogrammed tote bags, and possibly even custom-designed clothing. The options are as unlimited as my goals.

The point is, though, that I’m not stopping here. Focused on surpassing my own expectations, I’ve set my sights on bigger and greater projects. Therefore, accompany me on my journey as I proceed to navigate the world of needlework, one stitch at a time.

A recap of every post:

Week 1- Threaded Tales: Unraveling the Art of Embroidery

  • Introduced my crafty self and other crafts I have made in the past

Week 2 – Stitchin’ Stories

  • My first project! (Got very lucky it was successful)
The trial backpack! My own in case there was any mistakes.

Week 3 – Navigating the Threads of Learning

  • Learning the Software and realizing some first mistakes

Week 4 – TikTok 101: From Curiosity to Creativity

  • Made one of my first TikTok’s showcasing a project of mine!
@jordyn.e.osborne

babe’s first outfit —> an eternal sweater 🥹 #embroidery #diy #mamajs

♬ counting stars – audiosqv

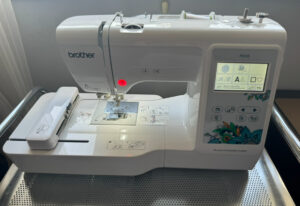
Week 5 – Adapting Goals and Growing

  • Realized I haven’t shown my lovely machine yet, so posted a pic of that!
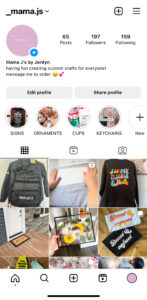
  • Resetting some goals and posting to my side-gig instagram, @_mama.js ,  to bring in more orders!

Week 6 – Crafty Keychain Chronicles

  • Trying to make some new keychains for my cheerleading gym

Week 7 – Band together with Digital Efficiency

  • Creating a Google Form for a mass order!

Week 8 – Triumphs & Trials

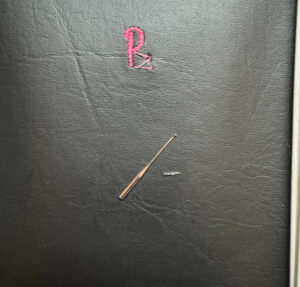
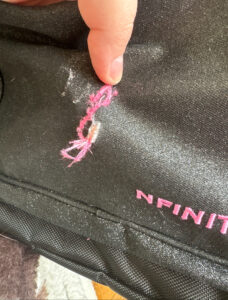
  • Lots of mistakes to overcome! Broken needles, wrong threads, ripped products.

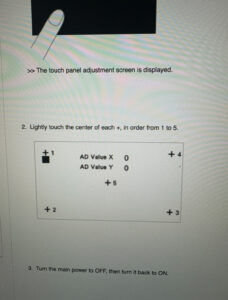
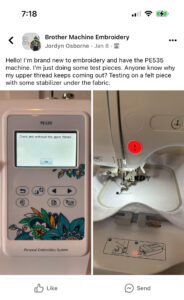
Week 9 – Overcoming Technical Issues and Discovering Surprising Thoughts

  • Finding a YouTube who has lots of resources to help me along the way!

Week 10 – Crafting Meets Loyalty

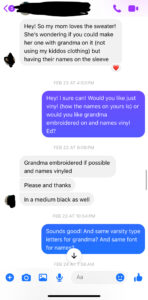
  • A repeat customer ordered a second product from me <3
Finished project!

Week 11 – Wrap It Up & Stitch It Down

Personal Assessment:

Next, let’s discuss assessment. When I think back on my experience becoming an embroidery machine “expert”, I am drawn to assess not just the technical abilities I have gained but also the personal development that goes along with it. My assessment’s initial goals were to become knowledgeable with the machine’s fundamental features, including learning about its complexities, resolving typical problems, and being acquainted with its different stitches and methods.

However when I learned more about the craft of needlework, my evaluation standards grew beyond simple technical ability. I discovered that I was evaluating my capacity for innovation and adaptation, for thinking outside the box and bringing my ideas to life. Every project turned into an opportunity for me to reflect on myself, challenge my limits, and discover the countless possibilities that this craft had.

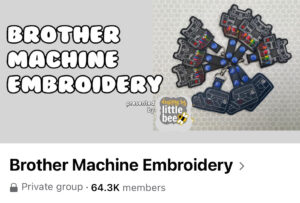
Furthermore, I was unable to overlook the crucial influence that internet resources had on the direction of my learning. These virtual experiences, which ranged from YouTube courses to online forums, became my go-to places for motivation, advice, and occasionally a much-needed pick-me-up when things got hard. I then had to consider the value of community when evaluating my learning—the friendships formed with other enthusiasts, the ideas that were shared, and the group knowledge that helped me progress.

As I reflect on my learning and successes, one thing becomes very clear: this journey is far from over. With each stitch and item done, I discover new levels of potential waiting to be unlocked. So, equipped with the lessons gained and abilities developed, I push forward, eager to face whatever difficulties lie ahead and continue to exceed my own limits.

Online Learning Reflection:

Reflecting on my journey of learning to use my embroidery machine, one thing that leaps out is my reliance on the internet for guidance. In today’s digital age, the internet is an enormous collection of knowledge, with an abundance of tutorials, guides, and groups ready to share their experience. And let me tell you: I made great use of it!

Navigating the world of online learning provided unique challenges and rewards. From the comfort of my own home, I began on a virtual adventure of discovery, utilizing the wealth of information at my disposal. YouTube became my classroom, with experienced embroiderers helping me through the complexities of machine settings and stitching techniques. Online forums provided a place for problem solving and companionship, linking me with other enthusiasts who shared my interests and offered essential help.

However, despite the convenience of online learning, the issue of distinguishing reliable sources from the noise of misinformation remained constant. With a critical eye and a good dose of reservations, I went through a multitude of resources, cherry-picking those that matched my learning style and goals. Trial and error became my mantra as I experimented with various techniques and absorbed the knowledge offered by experienced embroider-ers.

But here’s the beauty of online learning: it defies limits. Regardless of geography or time zone, I discovered a global community connected by a shared love of embroidery. Across locations and communities, we united over our shared passion for the craft, forming ties that went beyond the digital realm.

I’m incredibly appreciative of the wide range of information and assistance that online learning has provided me with as I think back on the experience. My journey of growth and discovery has been greatly influenced by the world of online interaction, from overcoming technological obstacles to finding new creative opportunities. Now that I have acquired new abilities and a feeling of community, I am excited to carry on with my online education and explore all of the opportunities that lie ahead.

Final Thoughts:

As I finish writing this reflection on the journey I’ve taken to become proficient with my embroidery machine, I am overcome with a feeling of satisfaction and thankfulness. What started out as a university assignment turned into a life-changing experience that gave me a useful talent and enhanced my life in ways I never would have thought possible.

I’ve learned the value of persistence and the limitless potential that each of us possesses via the highs and lows of this assignment. Every thread, every finished item, was a tribute to my resilience and joy of creating. And I sincerely appreciate that.

I am appreciative of my friends’ and family’s constant support, who encouraged me throughout my doubtful moments and celebrated each accomplishment. My mother ordering a shirt from me, my boyfriend helping me untie some crazy knots. Their support gave me the motivation to keep going even when the path ahead appeared daunting.

I’m appreciative of the supportive online community that helped me along the journey and gave me advice, motivation, and companionship. In a world where communication has no bounds, the friendship among enthusiasts who are all passionate about stitching gave me comfort.

Lastly, I would want to express my gratitude for the chance to keep developing and learning—both personally and as a craftsperson. This adventure has given me a newfound drive to explore new creative possibilities and push the boundaries of my existing knowledge.

I’m excited to see where this newfound ability will take me, and I look forward to the future with optimism. In spite of the unknowns that lie ahead, one thing is certain: I will keep making my way through life, one stitch at a time, and I will welcome every obstacle as a chance for development and self-discovery.

So let’s celebrate the adventure, the knowledge gained, and the friendships made along the road. May we never stop creating, inspiring, and appreciating the beauty of handcrafted objects.

Thank you for following along this journey and see you next time!

Crafting Meets Loyalty

It has been quite the adventure, and I’m excited to share the last chapter of my machine embroidery experience with you! Thinking back on the highs and lows of this learning project, I can’t help but feel proud of how far I’ve come and accomplished.

I had the pleasure of finishing a unique job this week for a repeat client: a stitched appliqué granny cardigan that would undoubtedly warm the lucky recipient’s body and heart. Equipped with recently acquired abilities and a sharp sense of observation, I devoted my entire being to each seam, guaranteeing that every component was completed with precision and consideration.

The truth is that this project involved more than just learning the ins and outs of machine embroidery. The goal was to encapsulate love and nostalgia while infusing each thread with sentiments and memories that would last a lifetime. I let her choose exactly the fabric she wanted as it wasn’t finished with clothes from her grandchildren like my ‘Mama’ sweaters have been in the past. I paid close attention to alignment and spacing. And because of the strength of internet connections, I was able to work in harmony with the buyer at every stage, making sure that their vision was realized down to the last detail.

Enter Facebook – my trusty companion in this digital adventure. I was able to easily communicate with the customer through a few mouse clicks, going over design details, sharing progress reports, and exchanging ideas. Thanks to the ease and accessibility of social media, what could have been a laborious effort of exchanging emails was instead a smooth collaboration.

I was amazed at how far I’d gone since the start of this adventure while I was putting the finishing touches on the grandma sweater. A university assignment that eventually turned into a passion project was motivated by the desire to do something significant and unique.

Finished project!

Now that the sweater is finished and prepared for delivery,I therefore said goodbye to this phase of my learning endeavour with a feeling of thankfulness and excitement for what lies ahead. Even though there were many obstacles and disappointments along the way, in the end, the triumphant and meaningful moments were what made the journey worthwhile.

I would like to express my gratitude to everyone who supported and encouraged me over this journey. Cheers to the potential of imagination, tenacity, and the limitless opportunities that arise from taking on new tasks.

Happy stitching!

Overcoming Technical Issues and Discovering Surprising Thoughts

I’m here with another report on my quest to become a master machine emroider-er, and this week wasn’t so exciting, but I still learned a few things! I was using internet resources to guide me while I worked on my learning project, but as I became more involved, I came across an unexpected turn of events that really inspired me.

Imagine this: I’m working feverishly to bring my newest design to life while I work on a new embroidery project. All is OK until all of a sudden there comes a disaster – my embroidery machine decides to have a tantrum and starts beeping threateningly before crashing to a stop. The screen on my machine goes black and my my buttons weren’t working to go back to the Home Screen at all. I start to feel panicked and desperately try to think of a solution, but nothing seems to work. Let the irritation begin!

Luckily, there were many of excellent troubleshooting solutions on the Brother website! The phrase “at your side” appears on their website, and wow did they come through for me! I started with the classic IT procedure and turned my computer off and back on. Thankfully, my screen came back to life, but it didn’t display the typical starting screen. It went to a strange screen with some numbers on it instead. Brother gave me detailed directions on how to fix it, as previously mentioned.

Brother’s website support

Equipped with fresh insights and a renewed motivation, I proceeded to identify the problem and apply the recommended solutions. And sure enough, the issue is fixed after a few nervous seconds of trial and error, and my embroidery machine hums triumphantly back to life. Nothing tastes sweeter than victory!
The best part, though, is that the experience doesn’t finish here. Encouraged by my accomplishment, I’m motivated to continue stretching the limits of my imagination. Now that I have a lot of internet resources at my disposal and a renewed sense of self-worth, I start a string of experimental initiatives, each one bigger than the last.

I even went a step further and discovered a YouTuber, called ZDigitizing, who posts numerous Brother machine troubleshooting mistakes and solutions. They also have LOTS of business suggestions and tips and tricks! That’s absolutely something I’ll have on hand for any more situations! Add to bookmarks? YES!

I’m reminded once more of the value of perseverance and the limitless opportunities that arise from embracing the learning process when I think back on this week’s events. So let’s embrace the unexpected, conquer obstacles, and never stop pushing past the boundaries of what’s possible.

Happy stitching!

Triumphs & Trials

It’s time for another update on my continuous quest to become a machine embroidery master. Fasten your seatbelts, for this week has been an exhilarating journey filled with mistakes and unanticipated detours. But really, isn’t that the main goal of learning?

Let’s begin by talking about a few of my first mistakes—believe me, there were many! I soon realized that making errors was an unavoidable part of the process as I took my embroidery machine into new terrain. My first attempts were far from ideal, with uneven stitches and misaligned designs. The thing is, though, that I didn’t allow these failures demoralize me. Rather, I saw them as valuable teaching moments, with every error acting as a springboard for development.

Let’s now discuss broken needles. Yes, they turned into my worst enemy this last week. Broken needles appeared to be an issue with a couple projects I tried, whether it was because I was using the machine too much or because I was using the incorrect tension settings. But instead of giving up, I looked for advice from my reliable internet source. After a brief search, I found a useful Reddit forum on needle upkeep and troubleshooting, which gave me the knowledge I needed to avoid similar mistakes in the future. Equipped with this acquired knowledge, I replaced the damaged needles and returned to my stitching pursuits.

But wait there’s more! Things get better—or worse, rather. Imagine this: a ripped backpack as a result of a poorly done attempt at embroidery. A twisted ball of thread and a broken needle appeared out of nowhere as I worked excitedly on a personalised backpack for an athlete. Her grandma just bought her this brand new backpack and wanted me to embroider her name on it before she even got it. How cute?! Then I made a mistake and ruined it and caused a huge rip.

THE hole! 🙁

The final outcome? Where my lovely design was meant to be, there was a huge hole. What a nightmare for anyone who crafts! Thank goodness, a quick idea came to my mind and I thought, I would make the next attempt a little bit bigger to cover the rip with new stitches. After much perseverance and a few well-placed stitches, I was able to save the backpack and bring it back to its previous glory. Problem solved! (I forgot to take an after photo!!!!)

Here’s a peek at the highs and lows of my most recent machine embroidery escapades, guys. Even with the difficulties and frequent setbacks, I’m more committed than ever to persevere and keep improving my craft. After all, the journey is meaningful because of the hiccups along the way.

Until next time, happy stitching!

Band Together with Digital Efficiency

I wanted to reach a wider audience with my name embroidered bag services. I explore the specifics of optimizing orders with contemporary digital technologies in this blog post. I discovered a smooth way to broadcast messages to a sizeable number of people at once by utilizing the Band app, a cutting-edge platform for group communication that we use at my cheerleading gym. This was very helpful in getting the word out about the order process and made sure that everyone was engaged and communicating effectively.

My post to the Band app inviting people to fill out my Google Form!

My post on Band included a link to a Google Form that I created. It was so easy and efficient to make this form with Google Forms for those who wanted to order backpacks. I was able to create it personalized with options for choosing colours, and customization elements like the specific embroidered names you’d like on your item all thanks to Google Forms’ user-friendly process. Easy tracking and organization of incoming orders was made possible to which I then transferred that information to a Google Sheet to keep on track.

Overall, I was able to organize a simple and easy backpack ordering process by utilizing digital resources like the Band app and Google Forms. This example highlights how technology is revolutionizing daily life by streamlining routine chores and improving group communication and managing logistics efficiency. It made it so I didn’t have to ask every single person all the questions by myself! Work smarter not harder! 

Happy stitching!


Crafty Keychain Chronicles

With a computerized embroidery machine, making keychains combines creative expression with practical crafting, making it an intriguing and satisfying hobby. It was a wise decision to start with inexpensive synthetic leather from Fabricland since it guaranteed cost-effectiveness without sacrificing quality. The process of customizing begins with cutting the fabric into strips, which enables the use of varied sizes and forms for different designs.

the font examples I sent potential customers

Creating the embroidered patterns gives each keychain a unique touch, whether it be with a person’s name or, as in my case, the names of cheerleading teams. The embroidery machine meticulously and precisely brings these works to life, be the intricate designs, symbols, or initials. There are opportunities for experimentation and artistic expression during the selection and refinement process of the designs, which may be a creative journey in and of itself. I show the buyer a screenshot of the possibilities I can currently perform along with some colour options, and I offer a wide variety of fonts!

The keychains are made functional and appropriate for daily use by adding specialized metal clamps that connect the ends and attach key rings. Still, it can be a laborious chore to manually cut out any extra strings in the last stage. This painstaking attention to detail, even though it is repetitive, guarantees a polished finish and elevates the product’s overall quality.

In the end using a computerized embroidery machine to create keychains is a rewarding combination of creativity, skill, and attention to detail. Every stage of the process, from material selection to design refinement and final touches, goes into making distinctive, customized keychains that are both practical and visually beautiful!

Happy stitching!

Adapting Goals and Growing!

After reading some comments, I realize I’ve never actually shown what my fancy machine looks like! So here it is, in all its glory. Someday, I’ll have an even bigger one that can do more than I ever imagined! 🙂

I wanted to increase my embroidery skills by buying a new hoop to allow larger projects as part of my continual learning journey. I was excited to see how far I could push my art and looked forward to the hoop’s arrival, picturing the elaborate patterns and large-scale sculptures I could make. But after receiving it and trying to utilize it with my existing embroidery machine, I ran across a problem. Upon discovering that my specific machine was incompatible with the bigger hoop size, my aspirations of making headway right away were dashed.

Left one is my new hoop, the right one is the one that came with my machine! its a 4×4 working window! Which will have to do for now.

However, I made the decision to change course and establish a new objective for myself rather than moping about the setback. I made the decision to concentrate on growing my audience and improving my abilities with the tools I now have. I was able to see the setback as a chance for personal growth and development rather than as an obstacle to my progress because it caused a perspective change. With well-defined objectives and benchmarks, like reaching a specific quantity of sales, I can strive towards eventually purchasing a more sizable embroidery machine.

3d render illustration of a meter guage with the text word Maximize Your Potential on white background. Dial has min minimum and max maximum level

I used Instagram as a resource when I wanted to look into new channels for sharing my experiences while documenting this educational experience. I kept my audience updated on my goals, challenges, and progress with visually appealing postings and examples.  By pushing myself to share what I’ve learned in new formats, like on social media sites, like Instagram and my personal crafting page @_mama.js, I not only increase my audience but also encourage accountability and a sense of community among crafters. This event serves as a reminder of the value of flexibility, perseverance, and lifelong learning when pursuing one’s passions and objectives.

my crafting instagram! @_mama.js


Happy stitching!

TikTok 101: From Curiosity to Creativity

Since its 2017 introduction, TikTok has grown to be a well-liked platform for short-form video production. TikTok offers something for everyone, regardless of interests: dancing challenges, comedic skits, instructional content, and do-it-yourself lessons. With just a few touches, users can easily produce and share films thanks to the app’s user-friendly layout.

Now, if you’re anything like me, you may be a little reluctant to use TikTok at first, particularly if you weren’t raised with it (anyone remember Vine?!). But do not worry! TikTok is surprisingly user-friendly, and with a little help, you can quickly start making your own videos. Thankfully, when I ran into trouble and had any questions, I was able to just ask some of my younger friends to help me out! 

Basic Instructions and Tips
  • Make Your Own Video: To begin creating, tap the “+” button located at the bottom of the screen. To improve your video, you can select from a wide range of effects, filters, and soundtracks.
  • Include captions and hashtags: To make your movies more visible, include relevant hashtags in the captions and include any necessary instructions or context.
  • Interact with Others: Establish connections with the TikTok community by like, commenting on, and sharing other users’ videos.
step 1: click the + icon at the bottom of your screen to create your own TikTok
step 2: upload media from your phone or take live photos
step 3: this is when you would select your media! apparently it maxes at 35 items!
step 4: add special effects such as fonts, filters, stickers, music, etc!
step 5: create a caption that describes what your video is about (if you want) and hit post for all to see!
How TikTok Can Be Used in the Classroom

Let’s now discuss how TikTok can be used in the classroom in accordance with the various SAMR model levels:

    • Substitution: TikTok can take the role of more conventional information-presentation techniques, such textual reports and presentations, at the substitution level. As a creative substitute for written tasks, students might make quick instructional videos to show that they grasp a subject.
    • Augmentation: TikTok augments learning sessions with interactive components including text overlays, music, and visual effects. TikTok is a tool that teachers may utilize to engage pupils with multimedia content, which will make learning more dynamic and interesting.
    • Modification: By enabling students to work together on video projects, share their work with a larger audience, and get immediate feedback from peers and teachers, TikTok can be utilized to change learning experiences at the modification level.
    • Redefinition: Learning is redefined by TikTok, which gives students the ability to produce and distribute creative content that adds to wider dialogues and communities. TikTok can be used by educators to provide real-world learning opportunities that encourage students to express their creativity and think outside the box.
Documenting Progress in Your Learning Project

I used TikTok to record my DIY project progress for this blog article. See how I turned a sweater into a stylish mama sweater using the buyer’s own baby onesies by watching the video below!

@jordyn.e.osborne

babe’s first outfit —> an eternal sweater 🥹 #embroidery #diy #mamajs

♬ counting stars – audiosqv

In summary, TikTok is a useful resource for creativity and education in addition to being a platform for enjoyment. Teachers can use TikTok’s capabilities to engage students, improve learning outcomes, and encourage digital literacy skills by integrating the app into the classroom. So why not attempt TikTok? Who knows, maybe making and sharing videos becomes your new love!

Happy stitching!


Navigating the Threads of Learning

I now wanted to try some more fonts and materials.

Through the Facebook group I mentioned before, most people mentioned they use a software called Embrilliance. I did some research and found there is a free version of this software so I downloaded it. However, when I opened it, I had NO IDEA how to use it. Even their website looked a little outdated and hard to follow. But I dialled in and read the instructions from the website.

I purchased some fonts from Etsy and did some tappy happy clicks to learn how to transfer those purchases to Embrilliance. I’m sure I could have looked up how to do it exactly and much quicker, instead, I just tried a couple times by trial and error. I knew I had to save my design from the software to a USB then put that USB into my embroidery machine. Thankfully I had one of those sitting around at home!

I found out that the new colour of thread I bought was not the right ‘weight’ and was not working when I tried one of my bought fonts on the machine. And I found this out by asking in my Facebook group on why my thread was breaking!

Happy stitching!

Stitchin’ Stories

As I have mentioned, my baseline started at the bottom, BUT, I finally opened the box and set up my machine!

However, as I took out the three (overwhelmed already that there was three!) instruction books, I didn’t jump in right away.

First thing I had to do, was find some material to do some trials on. I’m a competitive cheerleader and thought I would try to put my name on my backpack first. They all look alike, so why not make it easier to find my own by labeling it! Looking back, that was quite the ambitious first project, but it was my own backpack, so if I screwed it up, I didn’t wreck another else’s belongings.

From my brief knowledge learned through my first Facebook group I joined, I knew I also needed a stabilizer material to go on the back side. So I ordered some online through Amazon. Later to find out it wasn’t the right kind and I would further need to go buy a spare adhesive as well. Quickly realizing this hobby is going to be an expensive one. Whoopsie! 

As this was just a trial, I just used the fonts that are preloaded on the machine.

Put my backpack in the frame, inputted my own name in the machine, and figured out how to get it to start embroidering by trial and error pushing a couple buttons!

I got lucky! 

My first attempt worked out quite good and even centred on the bag!

Happy stitching!