Never stop learning, because life never stops teaching

Author: Curtis Meger (Page 1 of 4)

Final Networked Learning

As the semester and EDTC 300 comes to a finish, the “Final Networked Learning Post” gives me an opportunity to share the many ways in which I have contributed to the learning of others throughout the semester. In the beginning, I was unsure of how I was going to impact the learning of others effectively. As the semester went on, I realized I had nothing to worry about, as long as I kept up in the weekly plans and contributed to breakout rooms during class 

I have learnt so much from my classmates along the way and I hope they can take something from me and everything I did during this course. 

I want to start by discussing some of my experiences with breakout rooms during class time. I truly believe this has grown to be one of my strongest areas in online classes. Since online classes have become much more normal since the pandemic, I have adjusted accordingly. It was a goal of mine to have my camera on for every class, because we all know talking to a black screen is not very much fun. I tried to start every breakout room by asking how everyone is doing, making small talk, give input on questions that were put forward, and ask critical questions to challenge group members to think outside the box. Not only do I feel super comfortable stepping up to lead discussions in breakout rooms, I would often volunteer to talk for my group back in front of the entire class. 

Being an aspiring teacher, my mindset is that, if I cannot communicate to my classmates on zoom, how am I supposed to communicate to my students in real life? It is something I have taken pride in over the years and continue to build confidence in speaking towards larger audiences. With this mindset, I hope people that were in my groups appreciated my willingness to be open and challenged themselves to be open as well. Being on zoom gives a great opportunity to work with others in a safe space. It enhances our ability to collaborate, share ideas, and work as a team from the comfort of our own homes. During every class, my main goal was to lead by example.

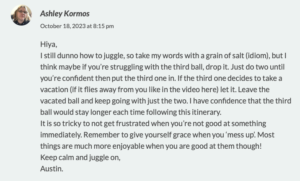
During my learning project, I feel I gave classmates many tips, tricks, links, and content on everything to do with juggling. I referred to a professional juggler many times throughout the process and tried to implement things from him. His video will truly teach you everything you need to know. 

Here are some examples that classmates could takeaway – 

I started out with 0 skill in regard to juggling, take a look

This is where we are now!

So, how did we get there?

  • I went down to two balls, for anyone looking to learn to juggle, this is a great place to start

  • Think about the phrase, throw throw catch catch with two balls and do it over and over

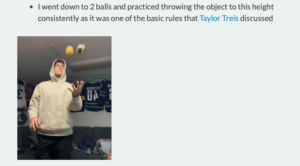
  • If you have issues with throwing the ball away from your body, put yourself close to a wall! It forces you to learn where to throw the ball

Practice throwing 1 ball to eye level, key points:

  • Only make eye contact when it gets eye level
  • Use peripherals to catch
  • Great rhythm practice
  • Move around to increase difficulty

Once you have done some drills to develop your skills, back to trying ball juggling. For me, the 3rd ball was a problem for a long time, but it is about trusting the process and being consistent with throws.

Other drills that helped me along the way was to juggle two balls with only 1 hand, this is meant to increase handspeed and also increase your tracking skills. Another tip is to call out the balls as you throw them – 1,2,3 and repeat as you continue, this makes it easy to get in a good rhythm.

Just know that if you put your mind to something and practice, it is possible!


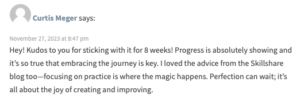
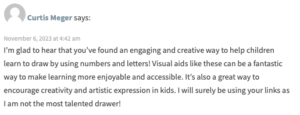
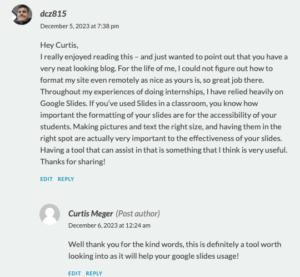
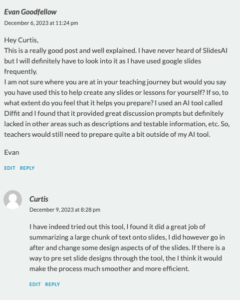
The 3rd way of contributing to the learning of others was through blog post replies. I was very consistent throughout the semester on replying to my peers and giving input on their content. While I had many replies, many of them were incouraging, looking back I think I could have done more critiqing rather than just having positive reinforcement. Here are some examples:

_______________________________________________________

_______________________________________________________

_______________________________________________________

_______________________________________________________

_______________________________________________________

_______________________________________________________

_______________________________________________________

Through the blog posting, I also had classmates engaged with me!

In this class, the blog posting was such a big component. In the beginning, I was not a confident blogger but I decided to roll with it as best as I could. Blogging is like having your own online diary where you can write about anything you like. In our case, we got to write about many different things and add our own twists to it. It’s a cool way to share your thoughts, stories, and even show off things you’re good at. When you write a blog regularly, you get better at writing and learn some other cool stuff like making things look good on the internet. I definitely feel that my writing improved over the semester.

While this course had many different aspects, I felt I did a solid job at contributing to the learning of others and took pride in being a valuable contributer to the course and everything it had to offer.

So You Think You Can Juggle – Final Learning Project

Learning to juggle offered me various valuable benefits. Before engaging in this activity, one of the things I wanted to focus on was my hand-eye coordination,  juggling challenges you to precisely track moving objects and synchronize your hands’ movements. The process of juggling encourages the development of ambidexterity, as both hands are utilized. Beyond the physical aspects, the cognitive benefits are evident as you have to focus on timing and attention. It contributes to the refinement of my motor skills, both fine and gross.  

  • Improve hand eye coordination
  • Development of ambidexterity
  • Focus, attention, and timing
  • Persistence and patience
  • Intrinsically rewarding
  • Challenging to learn

As I experimented with various juggling patterns, I find joy and entertainment in this skill, making the learning journey both valuable and enjoyable for me.

While I still have trouble juggling for an extended amount of time, I am proud of how far I have come. Can my girlfriend still juggle better than me? Certainly. Do I still get frustrated when practicing? Absolutely I do. But I have shown glimpses of good habits along the way. 

Full Recap

Not a Juggler, Yet

  • Reasons to want to learn to juggle
  • Resources I think I can use include
  • Focuses to start out
  • Progressions
  • Other reasons I want to learn
  • Wikihow to start the basics

Strugglin’ to Juggle

First take on juggling, jumped right into it after not trying for a long time.

Youtube lady named Taylor Tries really helped jumpstart the juggling process. 

Valuable lessons

  • All about messing up and getting better in little increments
  • Dont get frustrated
  • Enjoy the journey
  • Bean bags are the best way to go

Trying iMovie

Tried out Imovie and had some success making a video

In terms of use in the classroom,  iMovie can be a great tool for:

  • Digital Storytelling
  • Virtual Field Trips
  • Interviews
  • Peer Reviews
  • Digital Portfolios
  • Collaborative Projects

Went into the SAMR Model

Substitution:

At the Substitution level, iMovie could be used as a basic video playback tool. Teachers and students use it to watch educational videos or films

Augmentation:

At the Augmentation level, iMovie starts to enhance the learning experience. Teachers and students use basic editing features to trim or add text to videos.

Modification:

The Modification level involves more significant changes to the learning experience. In this case, iMovie is used to create multimedia presentations or reports.

Redefinition:

At the Redefinition level, iMovie is used to transform the way students learn and demonstrate their understanding. It enables tasks that were not possible without technology.

Back to Basics

I had a reply on a posts of mine about going down to 2 balls instead of 3, this ended up helping immensely and was a big focus of mine.

  • I went down to 2 balls and practiced consistency, it was a Taylor Treis tip
  • Practice “throw, throw, catch, catch” pattern down.
  • Started to get a rhythm
  • My girlfriend had a great tip for me, I was to practice against a wall so that I am forced to throw the ball in an area where I am going to catch it, without it hitting the wall. 

Good to take ideas from other people and use your resources. 

Positive reinforcement from classmates really helped along the way.

Making Progress

Realizing that with lots of practice, juggling is not impossible 

Found a professional juggler on youtube and I watched him religiously

Started to explore Tik Tok and fell in love with the video creating process

Wanted to incorporate juggling into my routine before hockey practice as a way to warm up

Two birds is right!

Main ideas from the professional

  • Peripherals
  • Consistent throws
  • Make eye contact with the ball at its highest point
  • Give your hands information about it where it will land
  • Move around to increase difficulty

The sand filled balls are way better to juggle with than anything that I tried

3 Ball Juggling

Really gaining traction with going back to 3 ball juggling

My youtube instructor has helped me so much in my juggling journey,  3:35 of this video will gave me many tips. 

For anyone interested in juggling, the wall tip is extremely useful.

Tik Tok also made the content process a breeze, editing and audio options are great.

At this point, still struggling getting the 3rd ball in the air and caught properly. Rhythm is right there. 

1 Hand?

Back to my youtube coach, he does a great job explaining what the benefits are for practicing juggling with 1 hand.

Benefits

  • Precise hand-eye coordination
  • Using both your dominant and non-dominant hand
  • Extra level of challenge 
  • Motor coordination and dexterity.
  • Persistence

I found success with throwing the balls high, tried to incorporate the height aspect to the 3 ball juggling

Calling 3 Balls

Counting out which ball is being thrown was tricky to start but once I got the hang of it, became smooth.

Some of the key things I focused on

  • Not getting frustrated
  • Throw the balls closer to my body
  • Find a good rhythm
  • Get all the balls to the same height
  • Focus on each ball at the top

6:11 of the Jack Kalvan video does a great explanation.

Walking Backwards

Walking backward while juggling can do many things:

  • Improves coordination
  • Fine-tunes motor skills
  • Enhances multitasking abilities
  • Forces you to throw the ball in the air more towards your body

(Way harder than it looks)

He makes it look easy

Final Thoughts

I started learning to juggle to improve how my eyes and hands work together. But to also learn the new skill, it turned out to be a fun challenge!

I learned some cool tricks from YouTube, and my girlfriend gave me good tips too, like practicing against a wall. My classmates supported me, which was nice, and even got some much needed criticism along the way.

I tried using a video tool called iMovie, and it can be handy for school projects too. Learning to juggle wasn’t just about the balls; it was also about making content and being creative.

I faced some difficulties, but I got better by practicing with two balls instead of three. I even tried juggling with one hand, it was a great way to increase hand speed. And walking backward while juggling? Way harder than it looks…

So, in simple terms, learning to juggle taught me not just about juggling but also about being patient, having fun, and finding new ways to learn. Even if I’m not a pro yet, I’m proud of how much I’ve learned and the cool things I can do now!

Walking Backwards

Walking backward while juggling improves coordination and fine-tunes motor skills. Juggling itself engages cognitive processes like hand-eye coordination and spatial awareness. Doing both at once enhances multitasking abilities. While walking backwards, it forces you to throw the ball in the air more towards your body. For people like me who struggle with throwing the ball in a good area, this is a great drill for practicing.

Jack Kalvan shows this in his youtube video, while he is a professional and makes it look easy, trust me when I say I make it look incredibly hard.

If you practice it enough, it does benefit your throwing habits.

Calling 3 Balls

6:11 of this youtube video does a great explanation of how calling out which ball is being thrown can help.

While I found it did help me a small amount, I still have a long ways to go if I want to be a fluent juggler.

Here’s how it went

Some of the key things I need to focus on is not getting frustrated, throw the balls closer to my body, and find a good rhythm, get all the balls to the same height, focus on each ball at the top.

1 Hand?

Jack Kalvan does a great job explaining what the benefits are for practicing juggling with 1 hand.

Some benefits include:

  • Precise hand-eye coordination, enhances your ability to track objects
  • Strengthening and coordinating both your dominant and non-dominant hand
  • Adds an extra level of challenge with timing
  • Regular practice can enhance your motor coordination and dexterity.
  • Persistence and patience

I found success with throwing the balls high, I found it gave me time to throw the second ball and react to the ball coming down.

I want to incorporate this height aspect to my 3 ball juggling.

3 Ball Juggling

My youtube instructor has helped me so much in my juggling journey,  3:35 of his video will give you everything you need to know about juggling 3 balls.

I have gained lots of confidence but still need to fine tune some things.

My throws need to be consistent and to practice that I have been focusing on juggling infront of a wall so that I am forced to keep the throws close to me.

For anyone interested in juggling, the wall tip is extremely useful.

Tik Tok has also made the content process super easy, the endless editing and audio options have been awesome.

Hour of Code

I think this level of coding is an important skill for students of all ages, including middle and younger years students. Coding encourages students to think critically and solve problems. Programming involves breaking down complex tasks into smaller, more manageable steps, which encourages logical thinking and analytical skills. It can also provide a creative aspect for students to express themselves. In today’s digital age, understanding how software and technology works is a fundamental aspect of digital literacy. Coding is also a valuable skill in many professions, including technology, engineering, science, and mathematics. Introducing coding at a young age helps students develop a foundation for potential future careers in these fields. In the teamwork aspect, coding projects often involve collaboration. Students would need to work together to brainstorm ideas, troubleshoot issues, and contribute to the completion of a project. This fosters teamwork and interpersonal skills. 

While everything I just discussed is great for students and their learning, one of the most important aspects of this coding experience is that it is an element of play and experimentation into learning. Interactive platforms and tools make coding enjoyable, turning education into an engaging and exciting experience for students.

Incorporating coding into the curriculum for middle and younger years students could provide them with a well-rounded skill set that goes beyond traditional subjects, preparing them for a technology-driven future and instilling a love for learning.

Here is some screenshots and descriptions of my coding experience.

  • Started the coding journey with a Minecraft Voyage

  • Had a great introduction video that was engaging

  • Began the coding with simple tasks in the dark grey box near the top of the screen

  • Started to get interesing with the use of “repeat until goal” tabs

  • Really liked the congratulations messages coming up even if I didnt complete the puzzle with the minimum amount of lines

  • The use of different terrain in the pictures was engaging

  • The “repeat until goal” got interesting with different colours of corals

  • Even though there was lots of lines, the repeat (x) amount of times was a cool tool

  • The last level was a creative one and could play around with different things, thought this was a great wat to finish.

  • A certificate at the end is a great visual reward for students

SlidesAI

What is SlidesAI?

SlidesAI is an AI-based presentation extension made for Google Slides.

If you’re already a Google Slides user, SlidesAI could be a potential option for you. If you are not familiar with Google Slides, it may be difficult to use. SlidesAI is simple and focuses on generating image + bullet-point slides. Most people use AI-generated presentations as a starting point, which makes this structure more than enough in most cases. SlidesAI is easy to try due to the free tier and low-cost paid options that are offered.

There are a couple of ways to install the extension.

  1. Go to Google Slides and start a new deck.
  2. Press the “Extensions” drop-down, select “Add-ons” and click “Get add-ons”. This will trigger the Google Workspace Marketplace pop-up.
  3. Search “SlidesAI” at the top, select the add-on and install it

Tell SlidesAI what kind of presentation you want

This is where you provide SlidesAI with a prompt,  the AI will then create your slides. You can provide a short brief, but SlidesAI works best with longer text input, and recommends at least 500 characters for the best results. This window has two sessions:

  1. Text: This is where you input the prompt, and select the number of slides and type of presentation. You may be tempted to write the prompt in the same way as you would for ChatGPT but SlidesAI works best if you just paste text that you want to turn into slides.
  2. Themes: Here you can customize the look and feel of your presentation in the same way that you can pick themes in Google Slides. You can also choose your bulletpoint style for additional customization.

Using SlidesAI, here are some ways teachers could leverage this tool in their respective classrooms:

1. Time Efficiency:

  • Teachers can save time on creating visually appealing slides by using SlidesAI’s AI-powered generation. This is particularly beneficial for educators who need to prepare presentations regularly.

2. Visual Engagement:

  • The tool can help in creating visually engaging slides with images and bullet points for someone who may not be creative. This visual appeal is aimed to capture students’ attention.

3. Content Starting Point:

  • AI-generated presentations can act as a starting point for teachers. Educators can use the slides as a foundation and then customize them according to the specific needs of their lessons.

4. Consistent Formatting:

  • SlidesAI can help maintain a consistent and professional formatting style across all presentations. This is especially useful for teachers who want a consistent look for their teaching materials.

5. Ease of Use:

  • Since SlidesAI is a plugin for Google Slides, teachers who are already familiar with Google’s presentation tools will find it easy to integrate into their existing workflows. If educators are not familiar with Google Slides, their the SlidesAI demo videos are really clear and easy to follow.

6. Free and Low-Cost Options:

  • The availability of a free tier and low-cost paid options makes it accessible to educators with varying budget constraints. This affordability can be especially advantageous for teachers in resource-limited settings.

While AI tools like SlidesAI can be powerful aids, it’s crucial for educators to review and customize the generated content to ensure accuracy, relevance, and appropriateness for their specific educational context. Additionally, maintaining a balance between automated tools and personalized teaching is key to effective education.

It is important to always consider the educational goals, the needs of the students, and the pedagogical approach when incorporating AI tools into teaching practices.

Personal Stance

I believe AI has the potential to personalize learning experiences by adapting to individual students’ needs and learning styles. This could lead to more effective and tailored educational experiences for all students. Adaptive learning paths, engaging learning environments, real-time feedback and assessment are a few things that have been popular topics when researching how AI is being used in the classroom.

While the potential positives are significant, it’s important to continually address challenges such as data privacy and the ethical use of AI.  Additionally, educators play a crucial role in interpreting AI-generated insights and collaborating with AI systems to provide a complete and well-rounded education.

« Older posts

© 2024 Curtis Meger

Theme by Anders NorenUp ↑