Coding with Tracy (the turtle)

This week I experimented a little with coding! I knew a bit about what coding was, but can safely say that I’ve never had even the slightest experience with it so I was initially a little nervous going into this week. I hopped onto Code.org and looked for something that peaked my interest in their Hour of Code tutorial sections that is meant for beginners. There were tons of activities that I could tell were geared towards younger children, which I think is a great way to get them interested in learning about code. There was also a ton of different age and grade ranges! I selected one that featured a turtle named Tracy that was geared towards grades 6 and up.

The tutorial began with a short engaging video that told me a bit about what coding was. The speaker talked about code as a ‘language’ which I thought was a great analogy for students (and myself) to understand. I could tell this one was geared for a slightly older audience as the speaker mentions how Tracy moves along a Y axis and an X axis, which is a concept that would maybe be a bit too confusing for elementary aged students. The speaker says that we need to communicate with Tracy in a language that she understands, so adding capital letters or forgetting the parentheses around the numbers means that Tracy doesn’t understand what we are saying. Before I knew it I was trying to spell out the first letter in my name!

This was a bit of a tedious process, and also required me to use a lot of brain power to figure out which way I wanted Tracy to turn, as well as how far I wanted her to move! Luckily the program was super simple to use, and it would stop wherever my last command was, making it easier for me to see where I had left Tracy and where I wanted her to go next.

After 19 commands, Tracy finally drew an A. Next was block letters! This was even more tedious and took me 35 commands to get a proper form, and by the end my fingers were a little sore. Still, it was relatively straightforward and was pretty fun too!

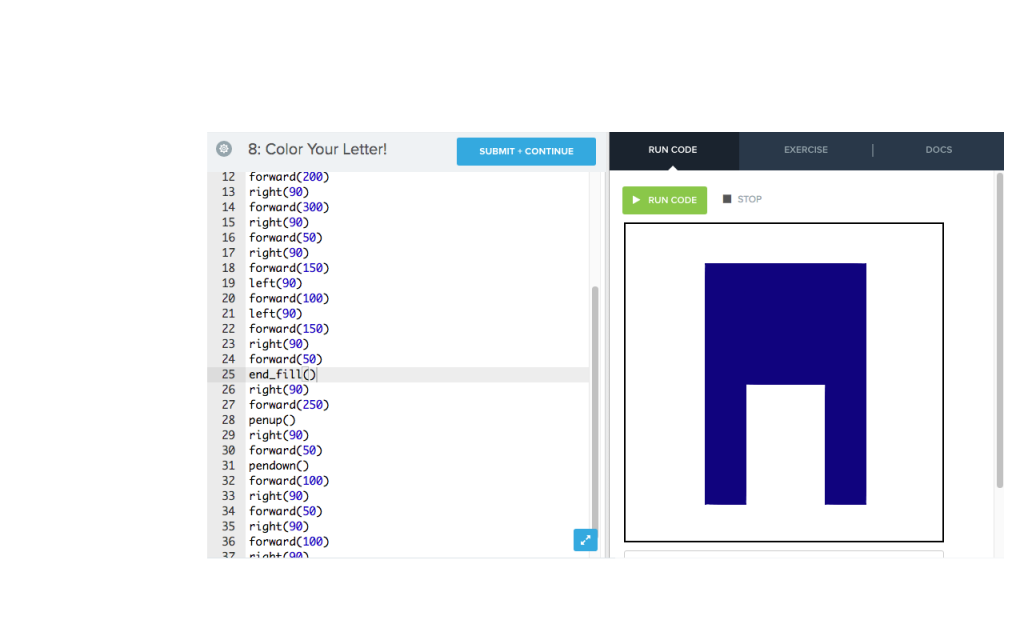
The very last step was to fill in the my letter with a colour. Thankfully I had copied my code from before, so all I had to do was paste it and add the appropriate commands. I hit a road block though when I couldn’t figure out how to make the space in the letter not be coloured in. There wasn’t a tutorial on how to do so, and even though I’m sure I could have figured it out after awhile, I eventually gave up!

Still, I really enjoyed learning a bit about code, and doing it in this way was easy, fun and engaging. Code.org would be an amazing resource for anyone teaching code in the classroom! I think learning about code could be a really valuable thing for a lot of students. It’s something I never really learned about it, but I have a few friends who now do it as a profession. Learning about code would definitely appeal to certain types of students and could open up a new passion for them that they didn’t even consider as a possibility. I also think its great for students to gain a deeper level of understanding about how technology works as technology is something that is used around them every day and will be a huge part of their future.

My Summary of Learning

I can’t believe how quickly this class has flown by! In my video below of my summary of learning, some of the things I talk about are the SAMR Model of tech integration, Flipgrid, Padlet, Socrative, Peardeck, the North American House Hippo PSA, Amanda Todd’s story (I watched this and this documentary through this class). I referenced this and this picture found from the linked websites about online stranger danger. I used Prezi to help present my info and I edited my video through IMovie.

Where the Green(ish) Grass Grows – Week 5

Phew! This week is going to look a little differently than my other weeks, because I broke my phone and lost ALL of my pictures and videos (back up your phones everyone!) so I came to the end of the week with almost nothing to show! So I haven’t included a video this week, but I was able to snap a couple pics. Thankfully this week didn’t include any huge projects, just a few odds and ends.

This week I finally got around to pressure washing the deck. This process was much more tedious than the fence due to all the nooks and crannies on the deck railing, and it also left me a little worse for wear. Because I had to stand on the ground to get the outside of the deck, all of the water from the pressure washer sprayed back onto me, so it wasn’t a very enjoyable few hours! Still, the job is done and we can finally get to staining next week, which I’m very much looking forward too. Visually, pressure washing the deck didn’t make all that much of a difference as it did with the fence, so the reveal will come next week after I’ve stained it! I was pretty familiar with what I was doing since I’d pressure washed the fence already, but I did check out this resource that had a quick and easy guide! One thing that I liked that they noted was to make sure your pressure washer is not on too high of a setting, because you can damage the wood (also can cause injuries to yourself as well if you’re not careful and wearing proper footwear). It also made me realized that I need to sand the deck as well before staining, so that will be another project for next week.

Speaking of the fence, I broke out the new can of stain this week to begin staining the fence. I didn’t get finished completely because it randomly started to rain (typical), but the difference was pretty shocking! I knew I picked a darker colour, but it was a little more drastic than I was expecting!

After on the left, before is on the right!

I like the colour of the natural wood but the dark stain is not as bad as last weeks fiasco so I think I will just learn to love it! I’m excited to see what a change it will make. My last little project of the week was tackling something new. The latch on the back gate was getting to be a bit of an issue as the latching mechanism didn’t line up properly and was pretty warped, so it made it a bit of a pain to open and close the gate! I picked up a new latch from Canadian Tire and found this great resource. This website was great because it really goes over everything, plus has some really helpful tips if you are needing to replace hinges! I did a good examination of the hinges on my gate and I think they will hold up for awhile longer, so I left them as is.

The new latch

Installing the latch was pretty quick, although I’m glad I took the time to check out how to do it online (and not just because it is required for this class) because getting everything lined up was a bit trickier than I expected! But it works great and I’m pretty pleased with it now. I’m really looking forward to next week as I’m going to be attempting to lay down some grass seed to fix the big patches in our lawn, and then just finishing up the other big projects. The end is near and I’m excited to see everything come together!