It’s hard to believe that this is my final post for this learning project! This has been such a crazy yet rewarding experience. Before I get into everything, check out the short video below for my final backyard transformation!
Learning Project Recap
Below is a quick recap about what I did each week of this project!
Week 1: This was my very first week of my learning project where I established my baseline for going forward. I chatted about what I hoped to accomplish over the seven weeks, learnt a little about pruning trees, and even discovered a robins nest under my deck. Very unfortunately, the robins nest was attacked by crows a week later and abandoned by the parents. 🙁
Week 2: My second week was pretty intense! I purchased and potted some plants from a local greenhouse (if you look closely in my transformation video above, you can see how well they have flourished!). I also built a garden box using an amazing and simple resource, and began my very long pressure washing journey. I tried to stain a portion of the fence, but check out Week 4 for an update on that. As well, I found an app that had an easy quiz section that helped me identify some of the trees and shrubs in my backyard.
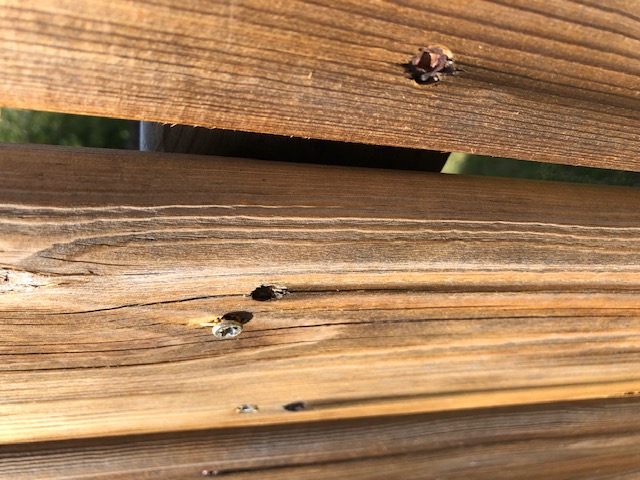
Week 3: This week is when my rain problems started. I found a quick and dirty little resource that helped me formulate a DIY splash block for under our rainspout, and struggled to fix one of my loose fence boards!
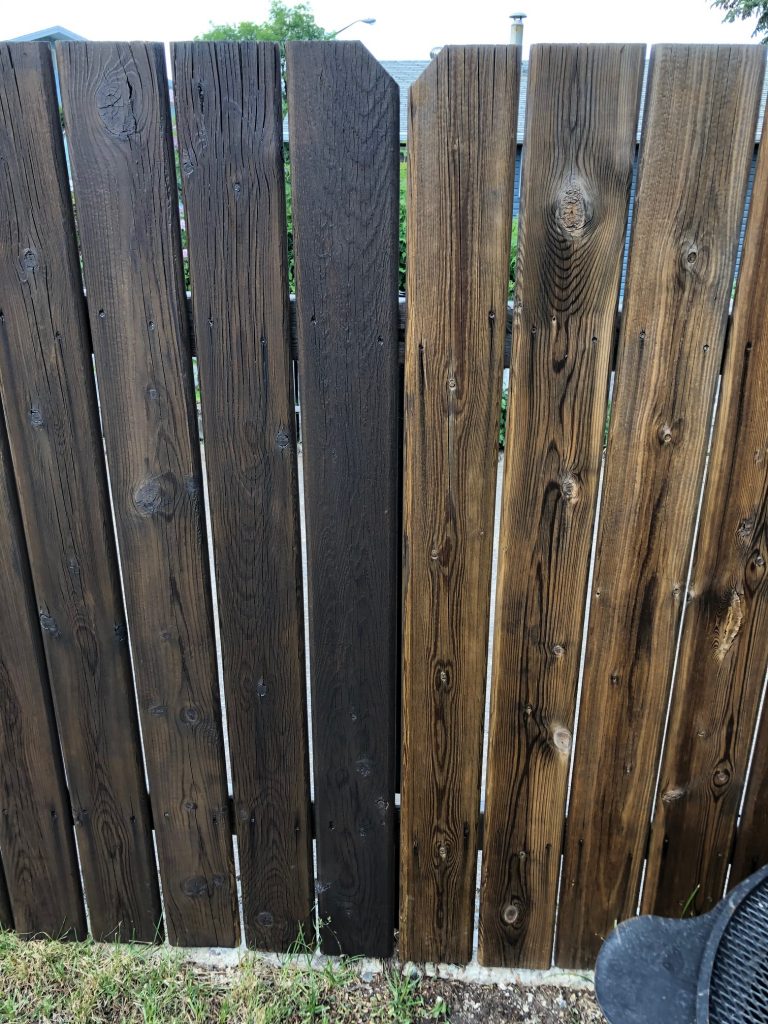
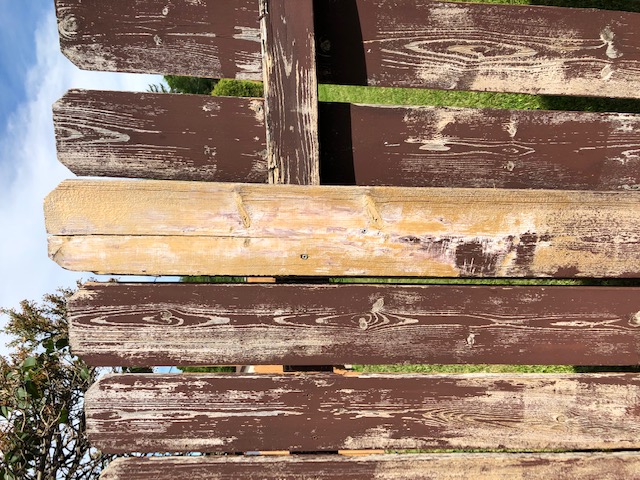
Week 4: During this week, I highlighted two new online tools that I used to help portray my learning project. The tools were a great addition, however this week was filled with fails! I stripped a portion of our run down fence, only to discover it was simply not worth fixing and will just have to straight up be replaced at some point soon. I also had a weird issue with the stain I briefly used in Week 2 that ultimately ended with using a different brand of stain.
Week 5: This week started out by breaking out the new stain I had purchased, which was still a lot darker than I was expecting but didn’t have the same paint-like look as the other stain, so I’ll consider it a win. I also fixed the back gate latch, which makes taking out the garbage a lot less painful now!
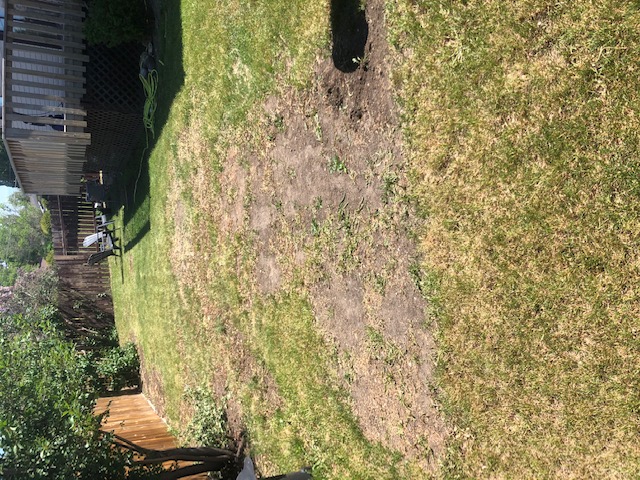
Week 6: By this week I could taste the finish line, but still had a lot of big jobs left to tackle. I found a great resource that really helped with seeding the patchy areas of our grass, and learnt a little bit about different grass types!
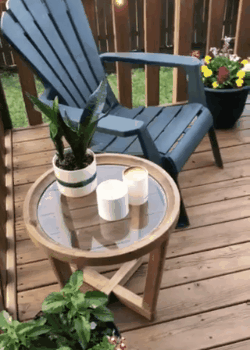
Week 7: That’s this week! I’d say this week involved the most amount of work but challenged me the least. Staining the rest of the fence and the deck was just a time consuming project without offering me very many new skills beyond what I’d learned in the weeks prior. Still, it was rewarding to see everything come together.
The Downfalls
Reflecting back on this project, it is easy to see what I would have changed (like wishing I’d snapped a pic of the lilac trees in full bloom). However, since this was my first journey into lawn care/yard care, I truly did not know what to expect. This project was pretty weather dependant, especially when it came to staining, which was frustrating at times. It was also hard work that wasn’t always very fun, and sometimes I wished I had decided to take on a project that maybe would have been a bit more enjoyable. Before selecting this project, I had considered doing something like learning more about cooking skills, as cooking and baking is something I really enjoy doing. I guess the grass is always greener, no pun intended. Visually, I think some of the changes come across as a little lack luster if someone didn’t understand the work that went on behind it. It wasn’t just simply staining the fence, it was taking several hours to pressure wash it, letting it dry, sanding it, and then finally staining, but that hard work isn’t always visible. Some of the projects I tackled didn’t turn out the way I expected, and it was frustrating and demoralizing when I thought a project that would only take me a few minutes ended up taking a lot longer (looking at you, week 3 and 4). Still, I think it would have been unrealistic to come into this project expecting zero fails or struggles, and it was a great lesson in self talk and perseverance.
The Triumphs
Moving away from the negativity, there were also a ton of positives about this experience! When I started this project, I had truly zero knowledge in anything to do with yard care or maintenance (seriously, I’d only used a lawnmower a handful of times before this. Embarrassing I know). So it is safe to say that throughout this project I have made a ton of very valuable skills that are necessary in being a homeowner. It was extremely rewarding to learn and accomplish a lot of tasks by myself especially ones that I will need moving forward, like staining the fence which is something that will need to be done every few years. Improving my home, not just aesthetically, but also in the longevity of the space that I can enjoy more was very gratifying, almost more so from the fact that it wasn’t always a fun time! I was also working with a pretty slim budget, and sometimes that required a bit of creativity to overcome. I feel very proud of my accomplishments
The Process of Learning Online
Most people in todays world are familiar with learning online. I didn’t find it too difficult to follow along with an article or video that was teaching me a new skill. However, I did find it challenging when I couldn’t find exactly what I was looking for. At one point my pressure washer quit working early on in the process. I knew if I googled ‘Pressure Washer stopped working’ I would likely get a ton of hits, but very few would probably address the specific issue I was having. I also was not knowledgeable enough about the topic to really narrow down my results with the specific problem I was having. In cases like that, online learning has its draw backs. However, it also made finding a great online resources all that much more rewarding. The garden boxes I made in Week 2 were an absolute breeze because of the awesome blog I followed along with. They were exactly what I was looking for, and the blog had pictures and tons of tips that really made the process a lot easier. Another example is the app I used when searching for the types of trees and shrubs in my backyard that I also did in Week 2. Because the leaves hadn’t really bloomed on one of the trees, I came up short when using the quiz portion of the app. However, there was another page where I was actually able to send an email to the creator of the app and ask for help. I sent a brief email with a picture and explaining a few characteristics of the tree, and also which hardiness zones I was located in. Check out the response I got a few weeks later below!

And they were right, it was a chokecherry tree! It was such a neat way to connect with an expert that wouldn’t have been available to me otherwise. Reflecting on my online learning experiences each week really helped me emphasize that it’s really more about the process than the outcome.
Final Thoughts
Even though a lot of days yard work was the last thing I wanted to do, I’m thankful that I was able to have this experience. While sometimes it was frustrating to not have something work out the way I wanted, those challenges are apart of learning. The skills I have made are definitely going to be ones I use again in the future. Even though the work is not finished (I’m coming to realize it may never be finished…) I feel more confident tackling a problem when I know I can find a way to do so. At the beginning of week 6, seeding grass seemed like a complicated and difficult project, because I knew nothing about it! However after watching the resource I found, I couldn’t believe how easy it actually was, and poking around online a bit more just confirmed that. I’m really looking forward to enjoying this space for the rest of summer, and it feels even better when I got there with my own two hands and a little help from the internet.