Post #3 – Wallpaper and Baseboards Gone!
This week I wanted to give another update on my bathroom renovation! I started this week off by going in the opposite direction I planned too. Instead of using the pressure washer to clean the shower, I did some other renovations within the bathroom, and the following week I will use the pressure washer to clean the shower! It’s funny how plans can change, but I was quite happy to get the renovations I did done!
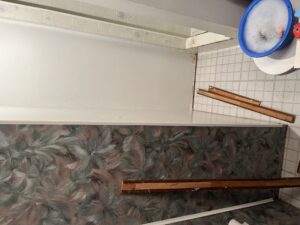
So, to begin, I started by cleaning all the walls of the bathroom with a concentrated mix of bleach and warm water. I also used a magic eraser on the tough parts. After cleaning the bathroom walls, I went ahead and ripped off the baseboards around the entire bathroom. I used the back of a hammer to remove the baseboards because most of them were already half off or loose. Overall, I was really happy getting the baseboards off using the information I learned from the website below:
How to remove baseboards without damaging them or the wall (twofeetfirst.net)

After I removed the baseboards, I decided to start removing the wallpaper. I began with removing the first layer of wallpaper with the spackle tool, at first I found this very difficult but once I got my groove it went faster than I expected!

After removing the first layer of wallpaper, I decided to do some more research on how to get the second layer off easily, I ended up using the vinegar and warm water method and let it sit for five to ten minutes then I scraped it off. Overall, my entire bathroom took me about two hours to do. Below are a few photos of my wallpaper removal process!


I ended up getting all the wallpaper off, the baseboards, and hardware like light plates, the towel holder, etc. I am very happy that I got this massive part of the project done. Next week, I will finish cleaning the shower with or without the pressure washer and I will finish off by rewashing all the walls again. I will also begin spackling the walls in the bathroom because as you can see from the photos there are a lot of holes! To finish off this post, I will also be going to co-op to purchase the paint and primer this week! As of right now, this project has costed me a total of $28.09, and next week I will give another price update!
Here are some more resources I will be looking into this upcoming week as well!
Great post once again. Wallpaper is a drag to remove. It is positive that you are taking the work to remove it and not painting over it, especially in a high-humidity place like a bathroom. The sweat equity you have gained by doing your own labor must already be in the couple hundred dollar range. Awesome.
-Cody
Ugh I have a love hate relationship with wallpaper! I love all the amazing designs but just the thought of removing it makes me cringe. Hats off to you for seeing it through and love that you went with a natural method for removing it.
This was an awesome read!! I love renovations and home projects. I was a framing carpenter for a few years, but I never got to work on reno’s or the interior stuff. This is a really great project idea!!!!